
Noticed lines running across your ceiling? You’re not alone. Ceiling cracks reveal a great deal about your home’s condition—from harmless signs of aging to warnings of potential structural issues.
Spotting the difference could save you thousands in repairs. Most homeowners panic when they see ceiling cracks, but knowing what you’re looking at changes everything.
Some cracks require immediate attention, while others are simply a result of your house settling into place.
We’ll walk you through each type of ceiling crack with clear pictures to help you identify what’s happening above your head.
Learn to read these telling signs and make smart decisions about when to grab a paintbrush and when to call a pro.
Understanding Ceiling Cracks
Looking up to see lines across your ceiling can be concerning. Ceiling cracks occur for various reasons, ranging from the simple drying of materials to the movement of a house over time. Most homes will show some ceiling cracks as they age, much like wrinkles on skin.
Knowing what kind of crack you’re looking at helps you decide if it’s a small fix or if you need expert help. Different cracks tell different stories about what’s happening in your home.
Most ceiling cracks are purely visual issues that don’t compromise the safety of your home. They can often be repaired with basic tools and materials available at any home store. Only a small number of crack types suggest bigger issues that need professional attention.
By learning to “read” these ceiling signs, you can save money, avoid unneeded worry, and know when to call for help. This guide will help you identify the most common ceiling cracks and explain their significance for your home.
Common Types of Ceiling Cracks
Most homeowners will eventually notice cracks in their ceilings. Understanding what you’re looking at can help you decide whether to grab a paintbrush or call a professional.
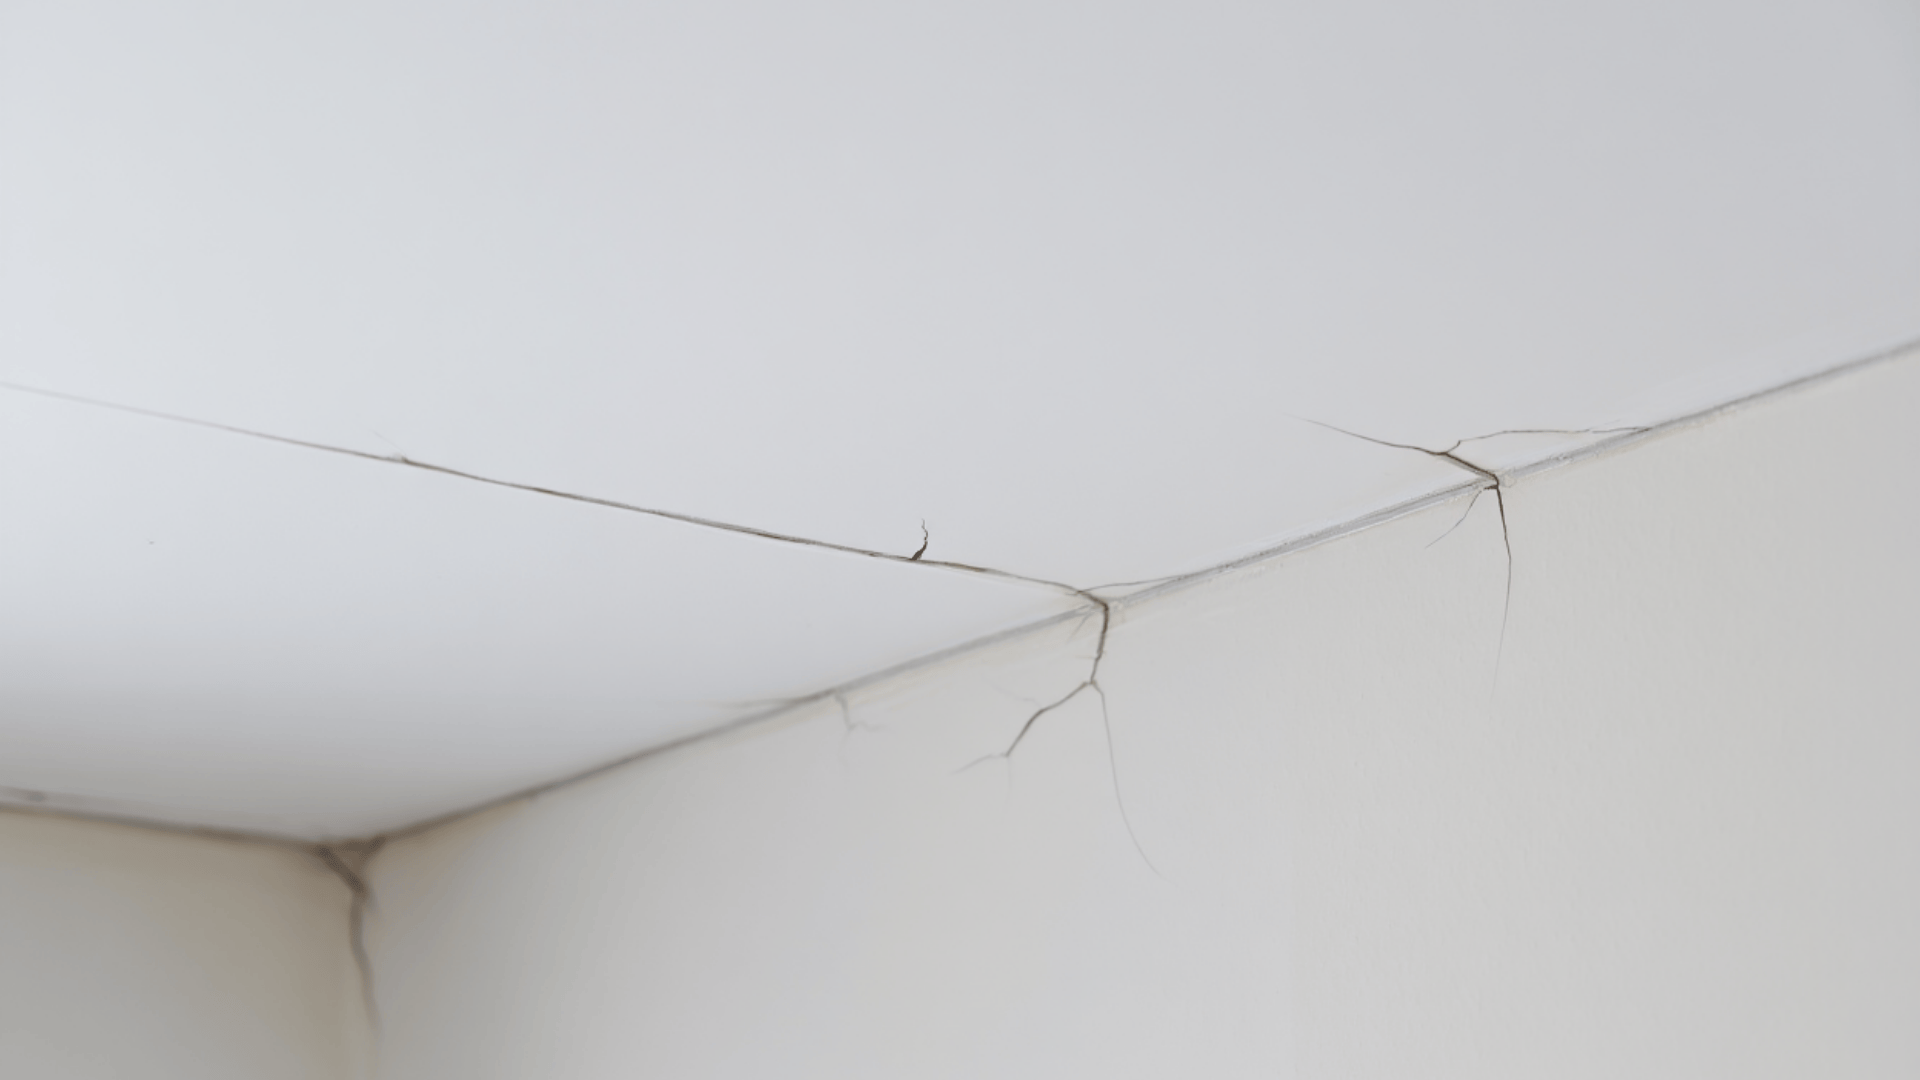
1. Straight Line Ceiling Cracks
These cracks run in straight lines across your ceiling, typically following the seams where drywall sheets meet. They’re among the most common ceiling issues homeowners spot.
Root Factors
- Poor taping during drywall installation
- Not enough joint compound at seams
- Natural house settling over time
- Slight shifts in framing materials
Priority Level: Low to moderate concern. These rarely signal structural issues, but should be repaired to prevent dust from accumulating and to maintain the appearance of your ceiling. Most can be fixed with new joint tape and compound.
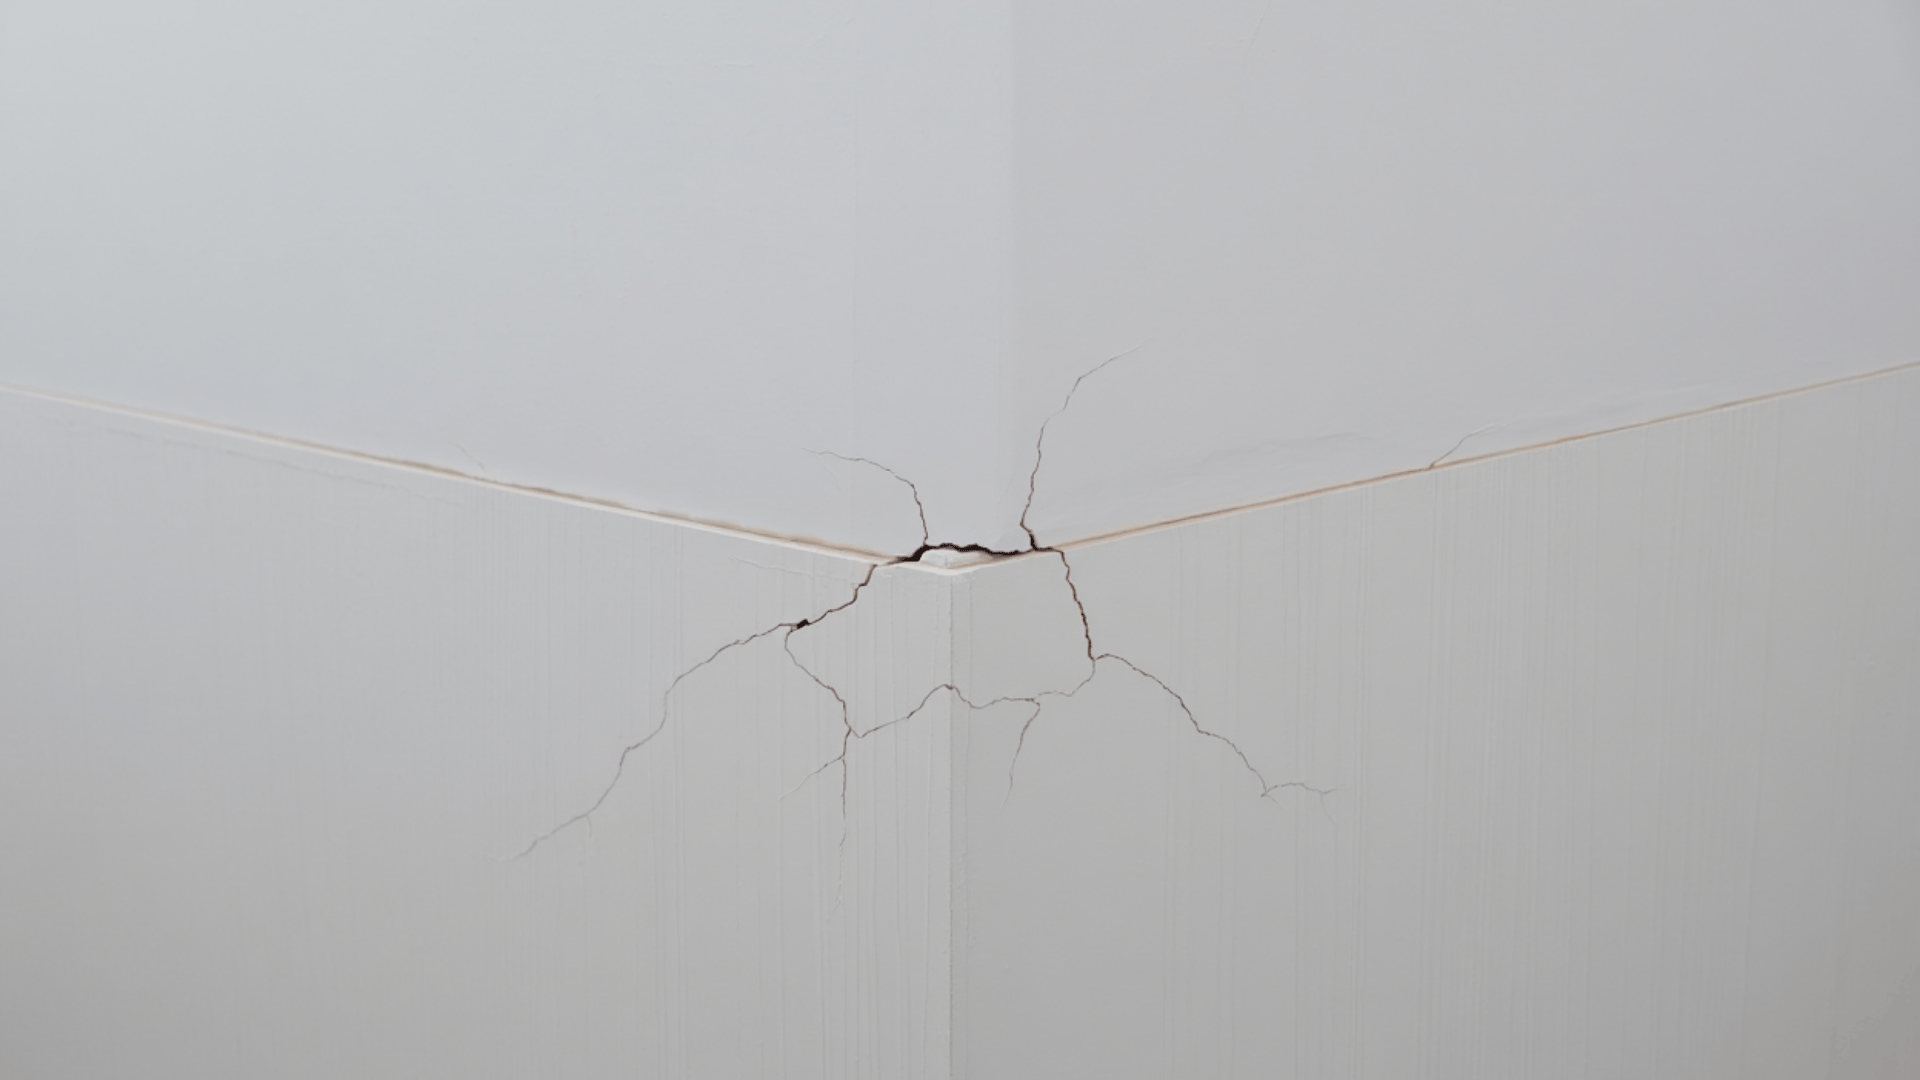
2. Spiderweb Ceiling Cracks
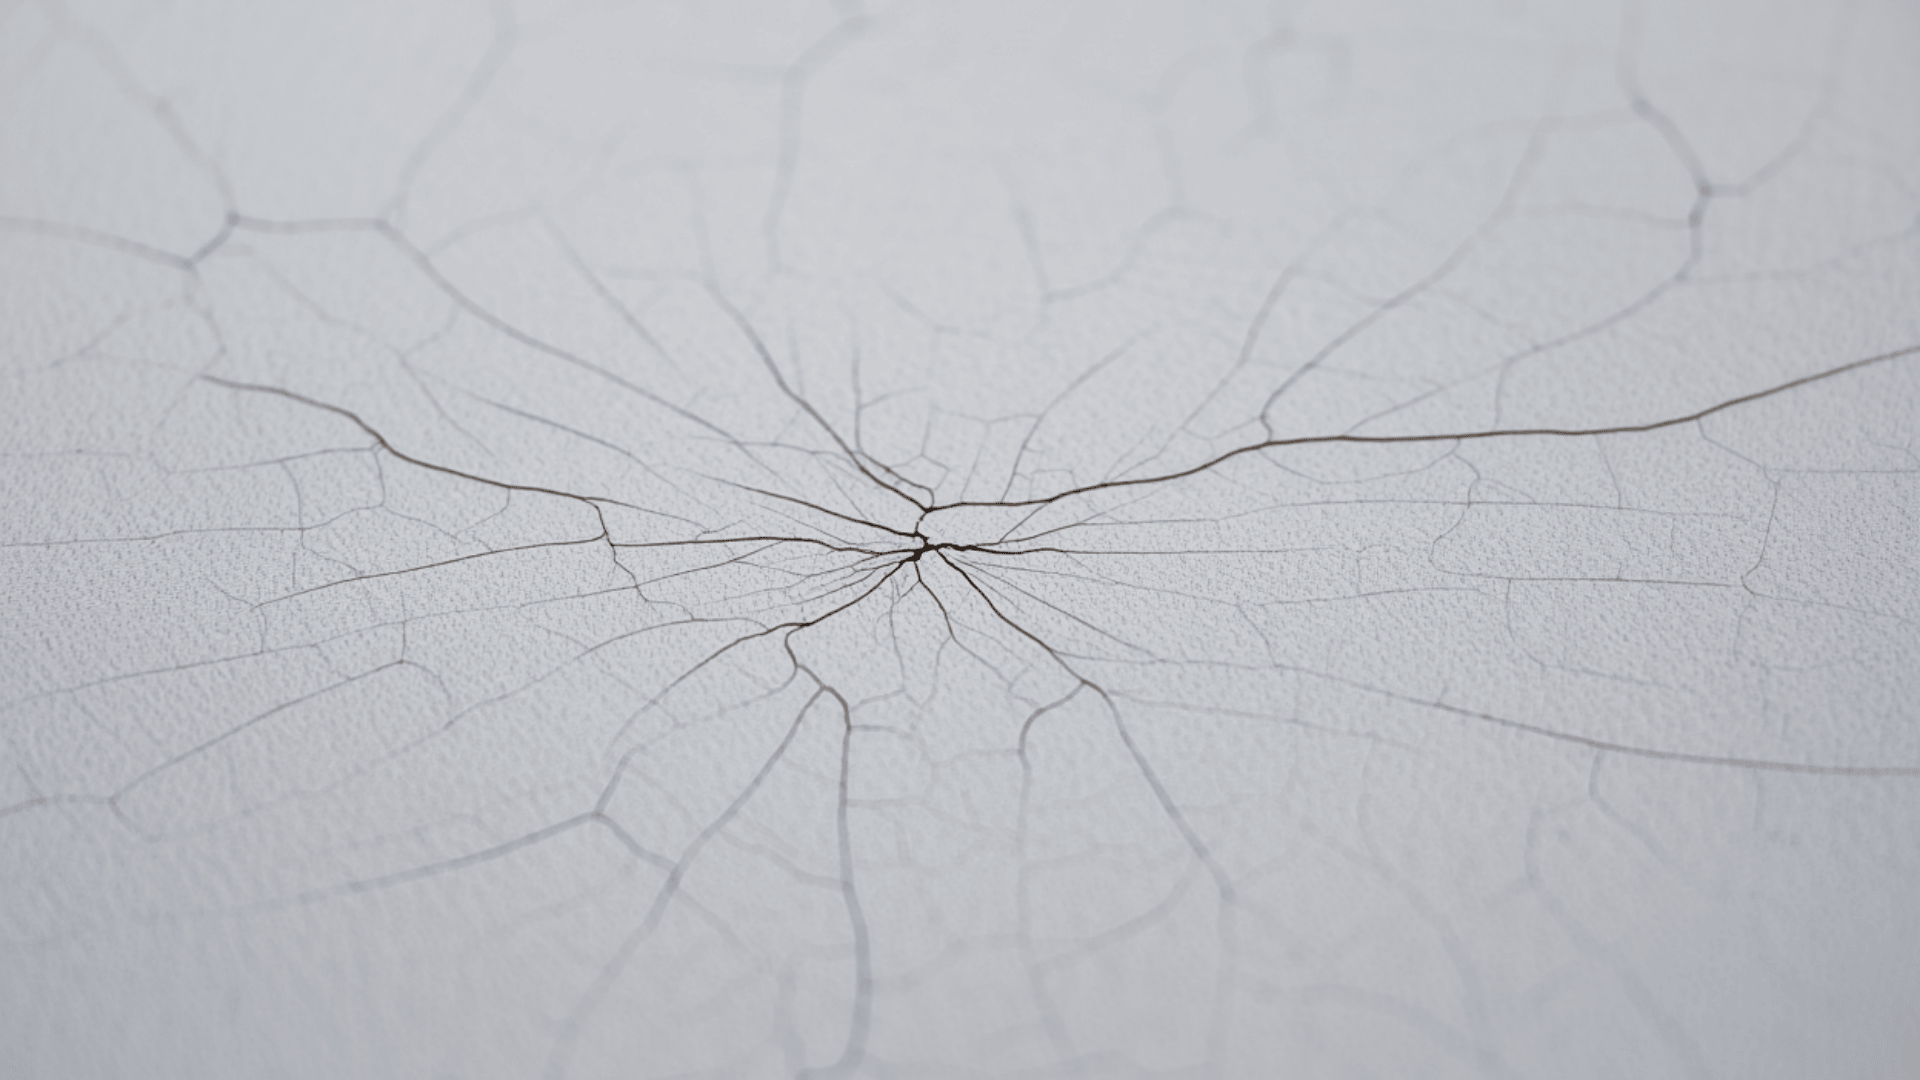
Unlike straight cracks, these spread out from a central point, forming a pattern with multiple branches that extend in different directions.
Root Factors
- Stress points from house settling
- Impact damage (often hidden or forgotten)
- Pressure from heavy items on the floor above
- Poor ceiling material attachment to joists
Priority Level: Monitor these cracks—if they remain small and don’t multiply, they’re typically not serious. However, rapid growth may mean that your house is still settling in ways that require inspection.
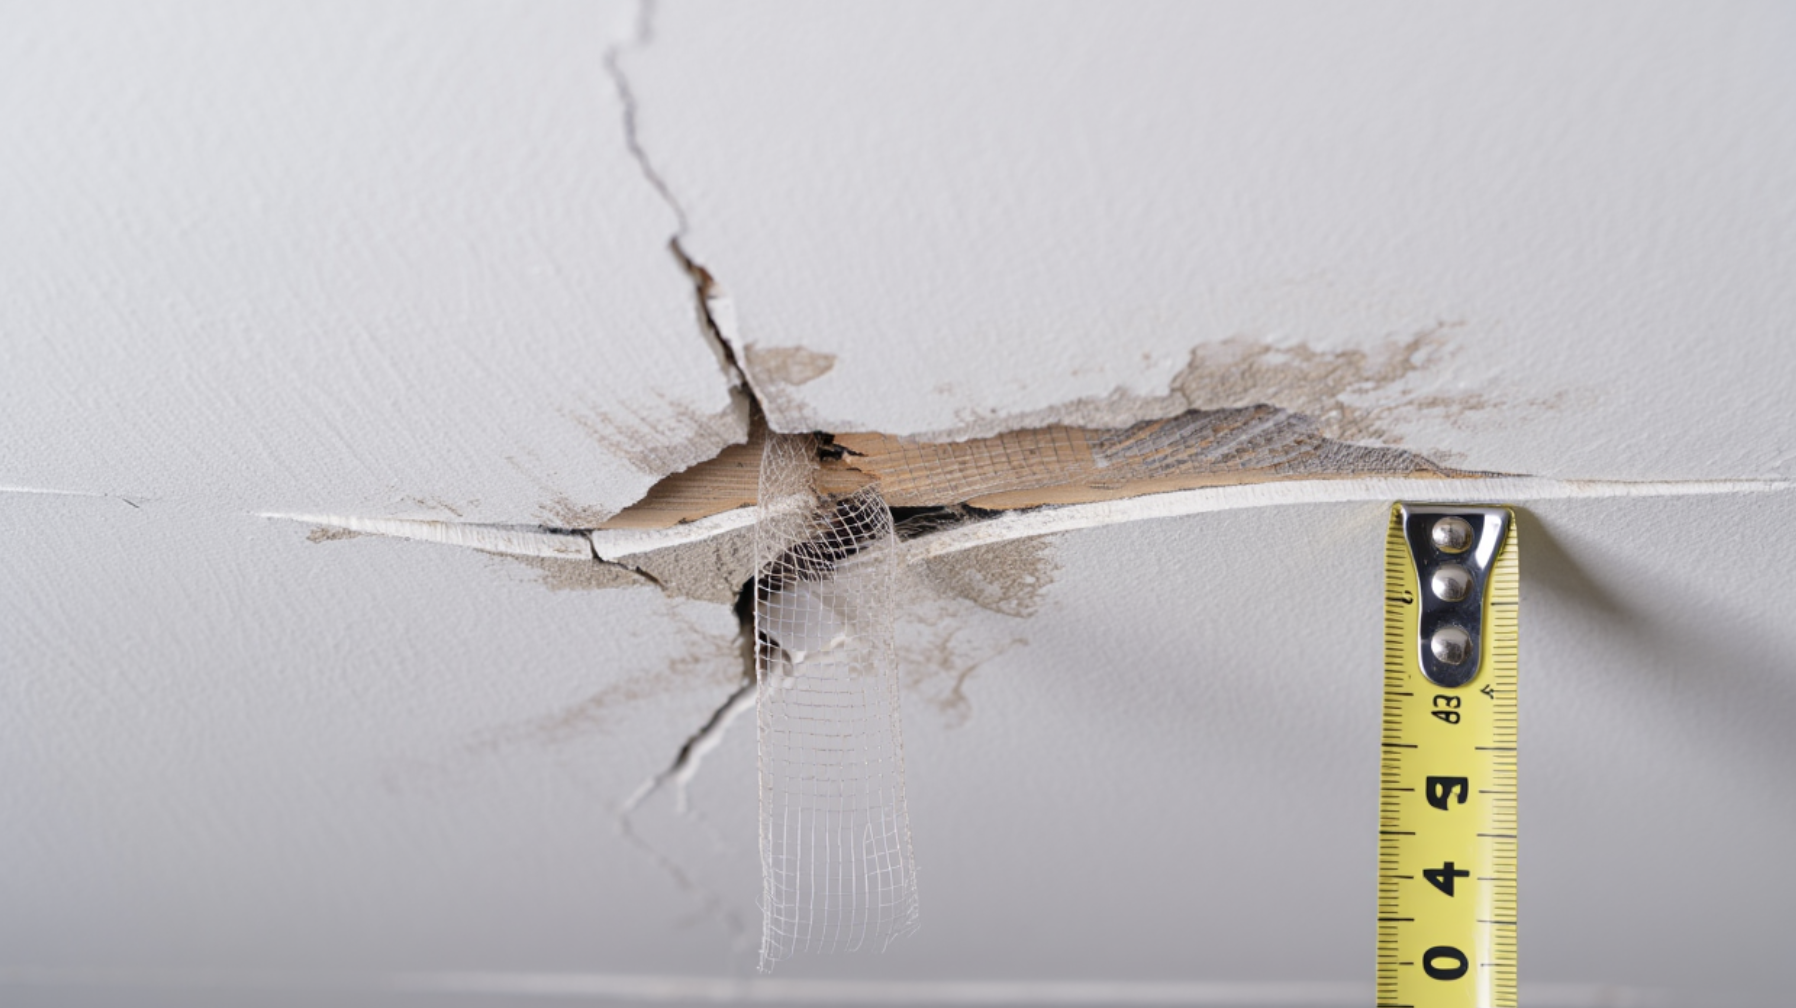
3. Discolored Ceiling Cracks
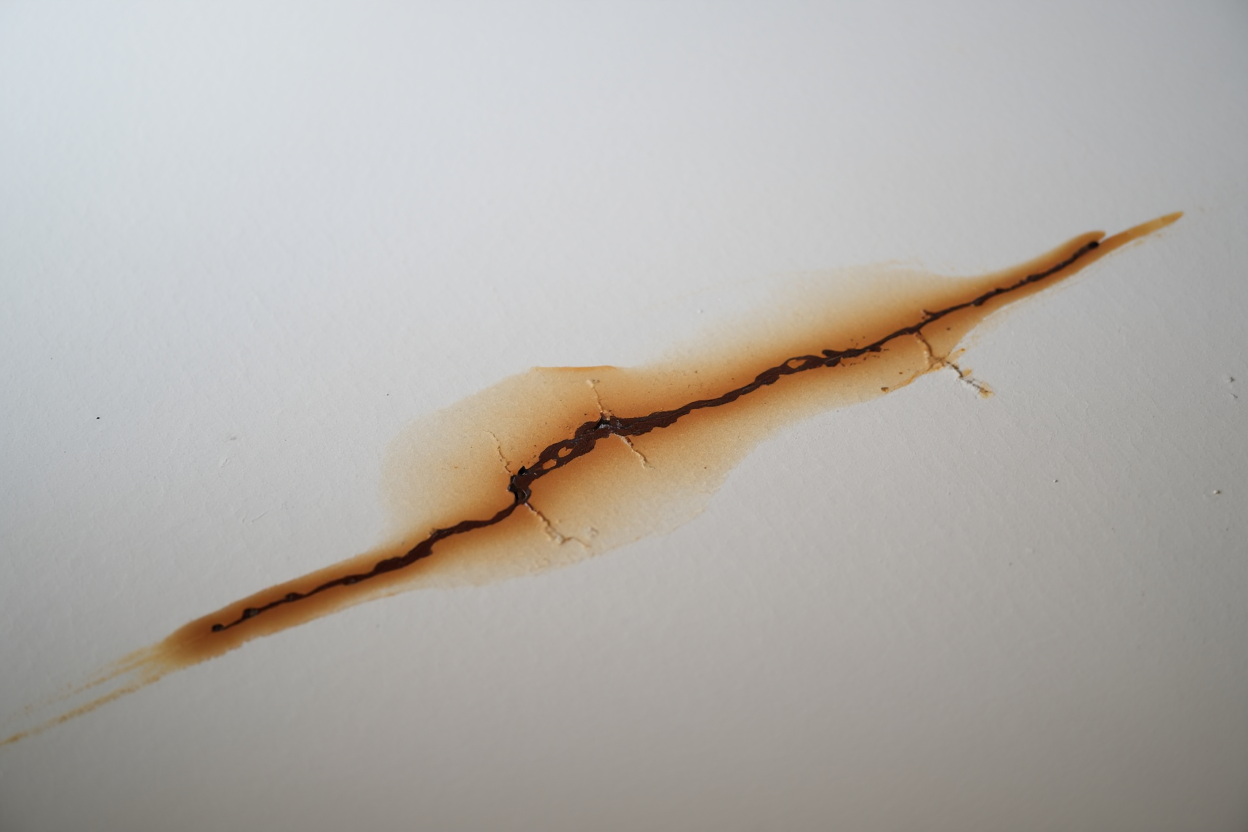
When cracks are accompanied by yellow or brown staining, water is almost always involved. This combination indicates that moisture has infiltrated your ceiling materials.
Root Factors
- Roof leaks during rain or snow
- Plumbing problems from rooms above
- Condensation issues in attics
- Bathroom steam seeping through over time
Priority Level: High—address these promptly. Water-damaged ceilings can develop mold and may collapse if the moisture issue is not addressed. Always fix the water source first, then repair the crack.
4. Sagging Ceiling Cracks
If your ceiling is both cracked and drooping downward, you’re facing a potentially serious situation that needs quick attention.
Root Factors
- Long-term water damage weakens materials
- Too much weight from items stored in attic spaces
- Structural failures in ceiling joists
- Older homes with plaster breaking down
Priority Level: Very high—these signal possible safety risks. A falling ceiling can cause injury, so have these checked by professionals as soon as possible. Don’t wait until more signs appear.
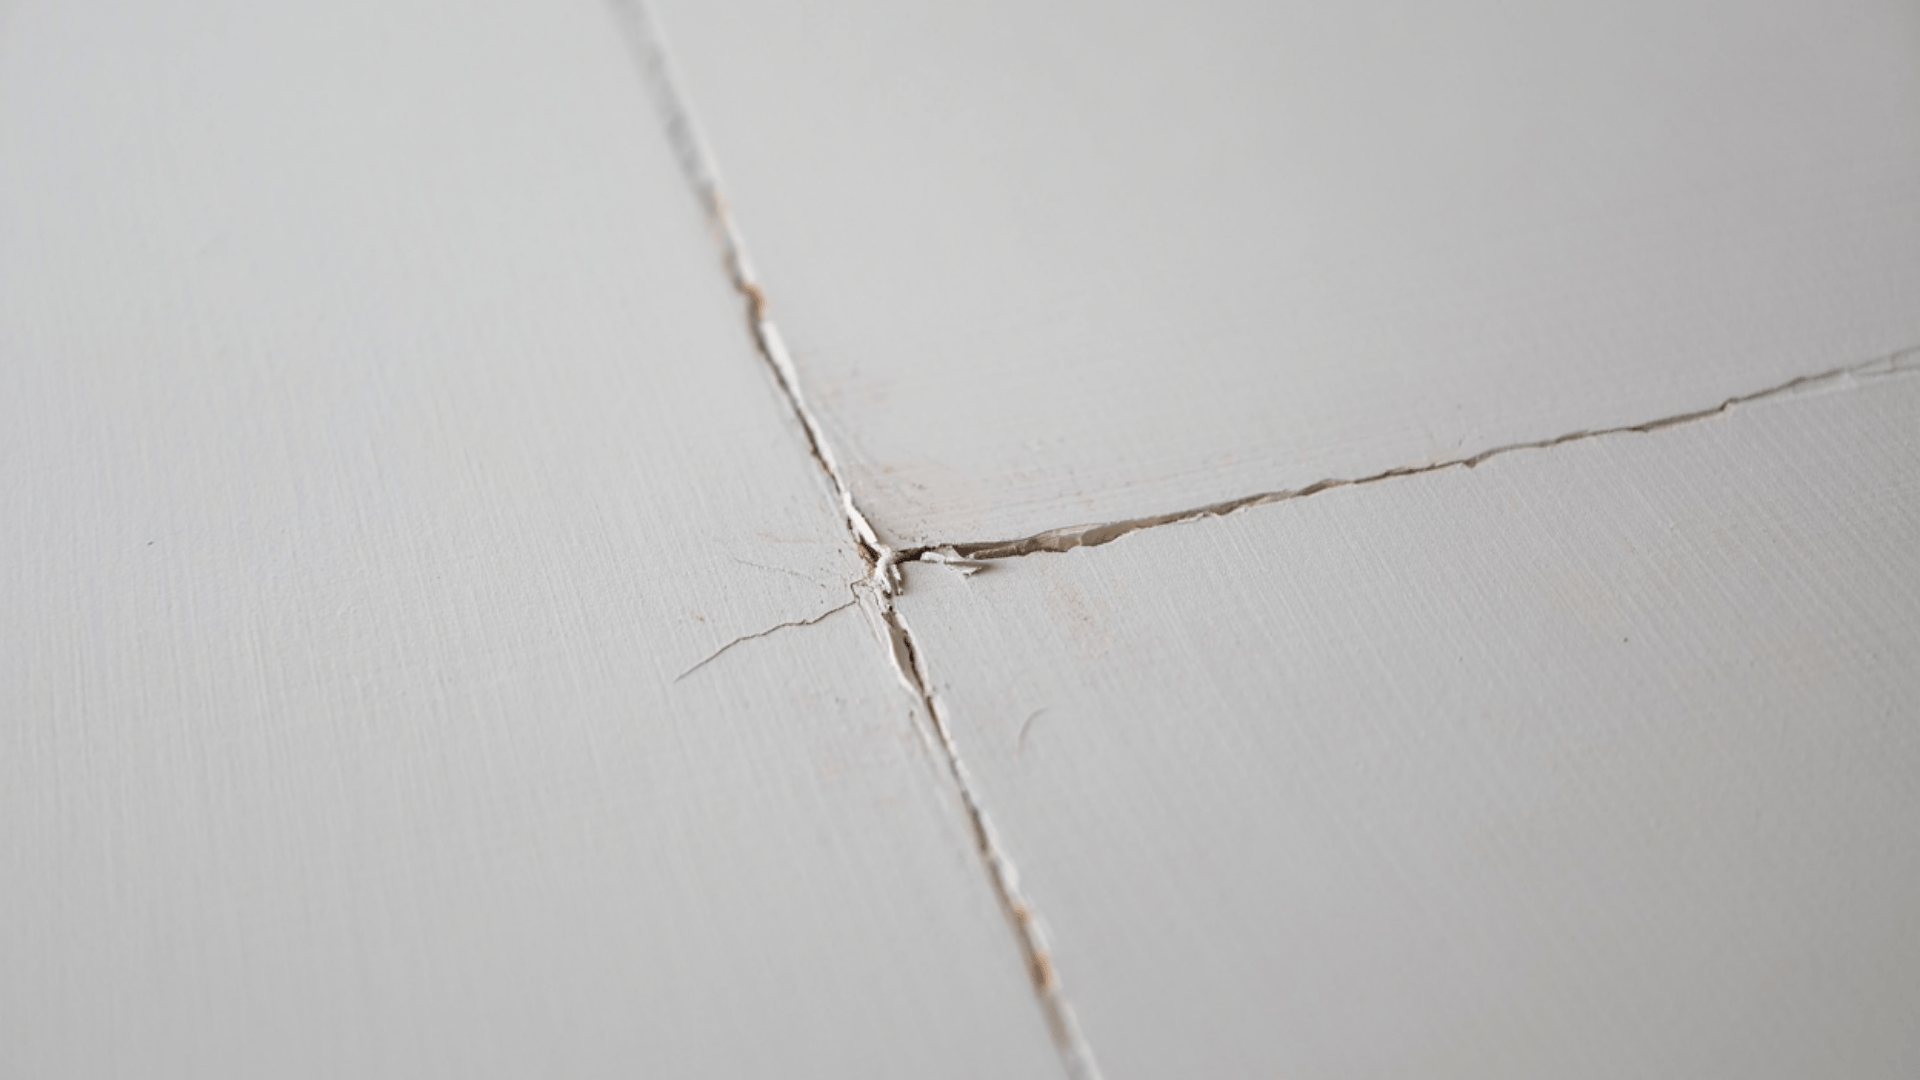
5. Cracks Between the Ceiling and The Wall
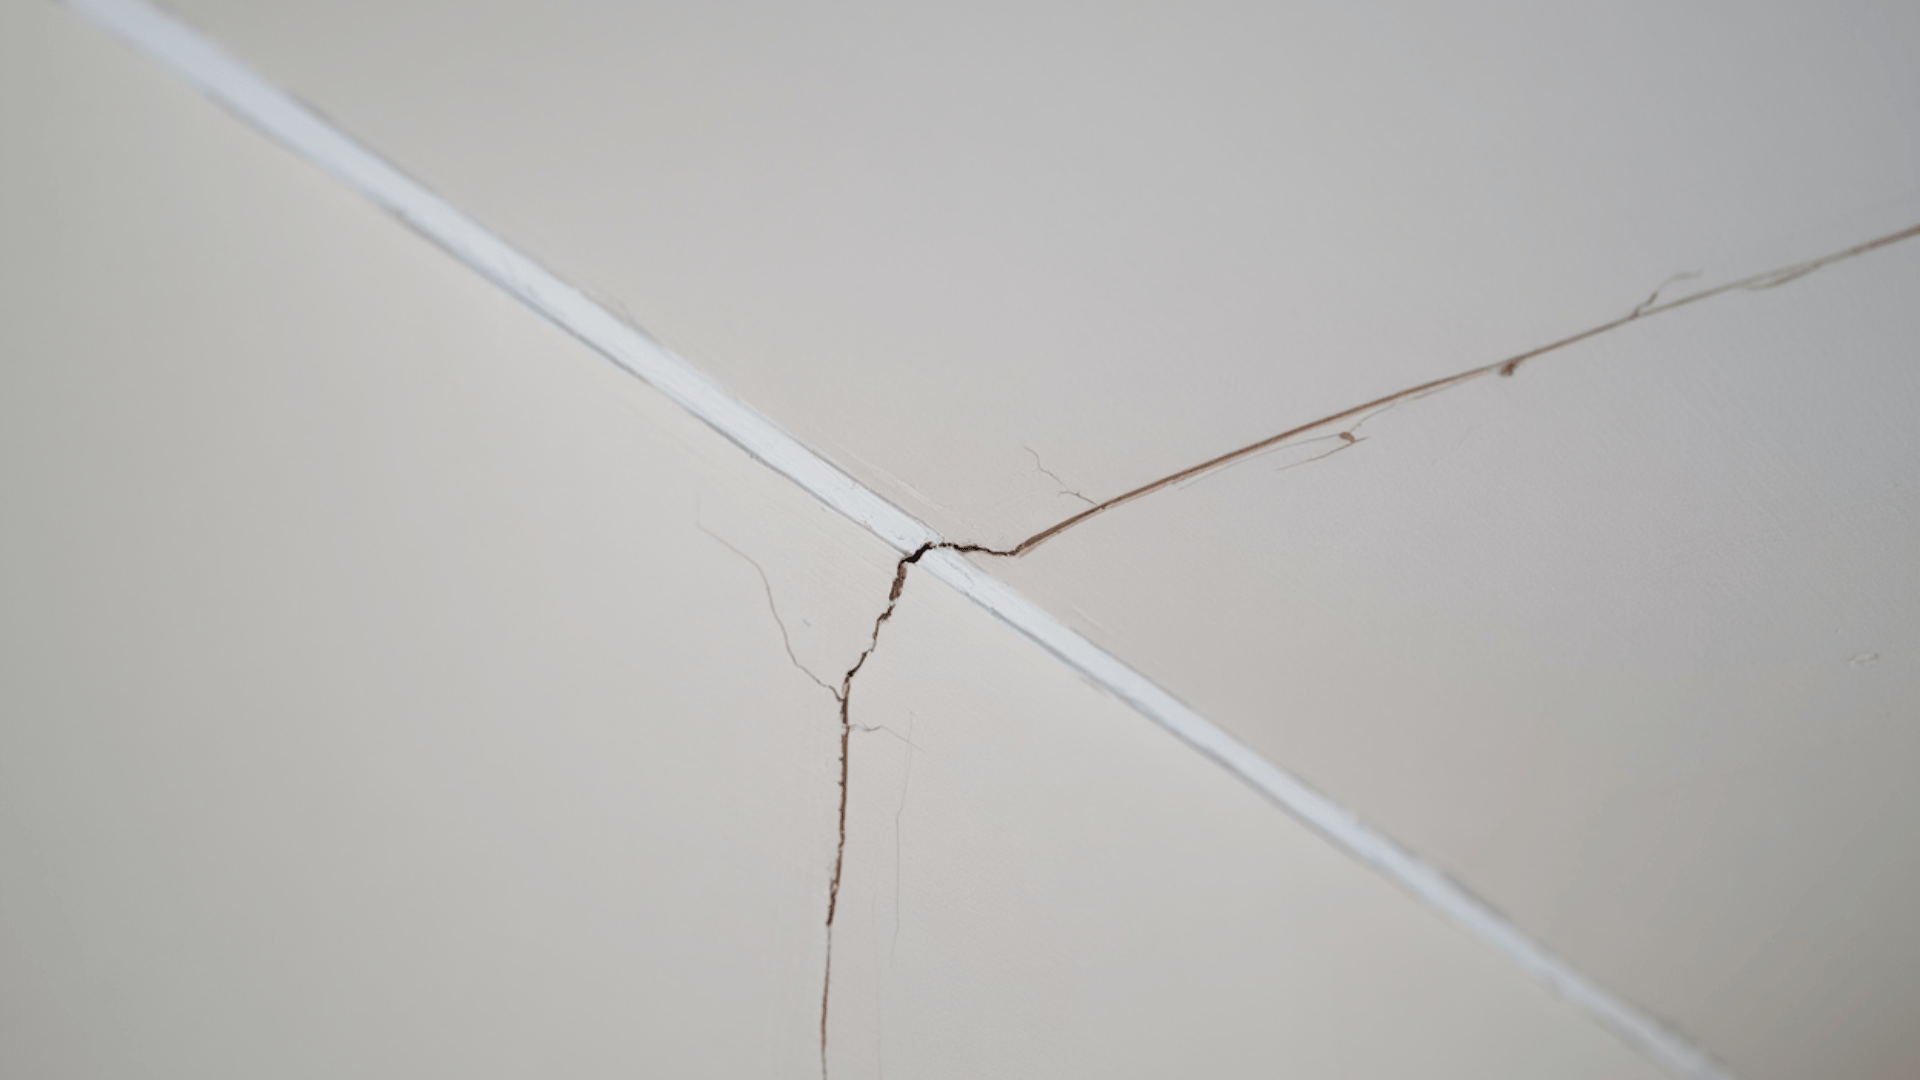
The spot where your wall meets the ceiling can sometimes pull apart, creating a visible gap. Many homeowners notice these cracks change with the seasons.
Root Factors
- Roof structure movement with temperature shifts
- Foundation slight movements
- Different materials expand at different rates
- Normal house settling patterns
Priority Level: Usually low if they’re small and only appear seasonally. However, if these gaps grow consistently larger or don’t close during certain seasons, they might signal foundation issues worth checking.
6. Diagonal Ceiling Cracks
When cracks run at an angle rather than straight across your ceiling, especially near corners, take note. These angled breaks might signal more than simple settling.
Root Factors
- Uneven foundation movement
- Structural stress from shifting
- Poor framing in the original construction
- Ground movement under one part of the house
Priority Level: Moderate to high concern, particularly if they’re wider than 1/8 inch or grow steadily. These cracks, especially when they extend to walls, may need professional assessment to rule out structural problems.
Causes of Ceiling Cracks
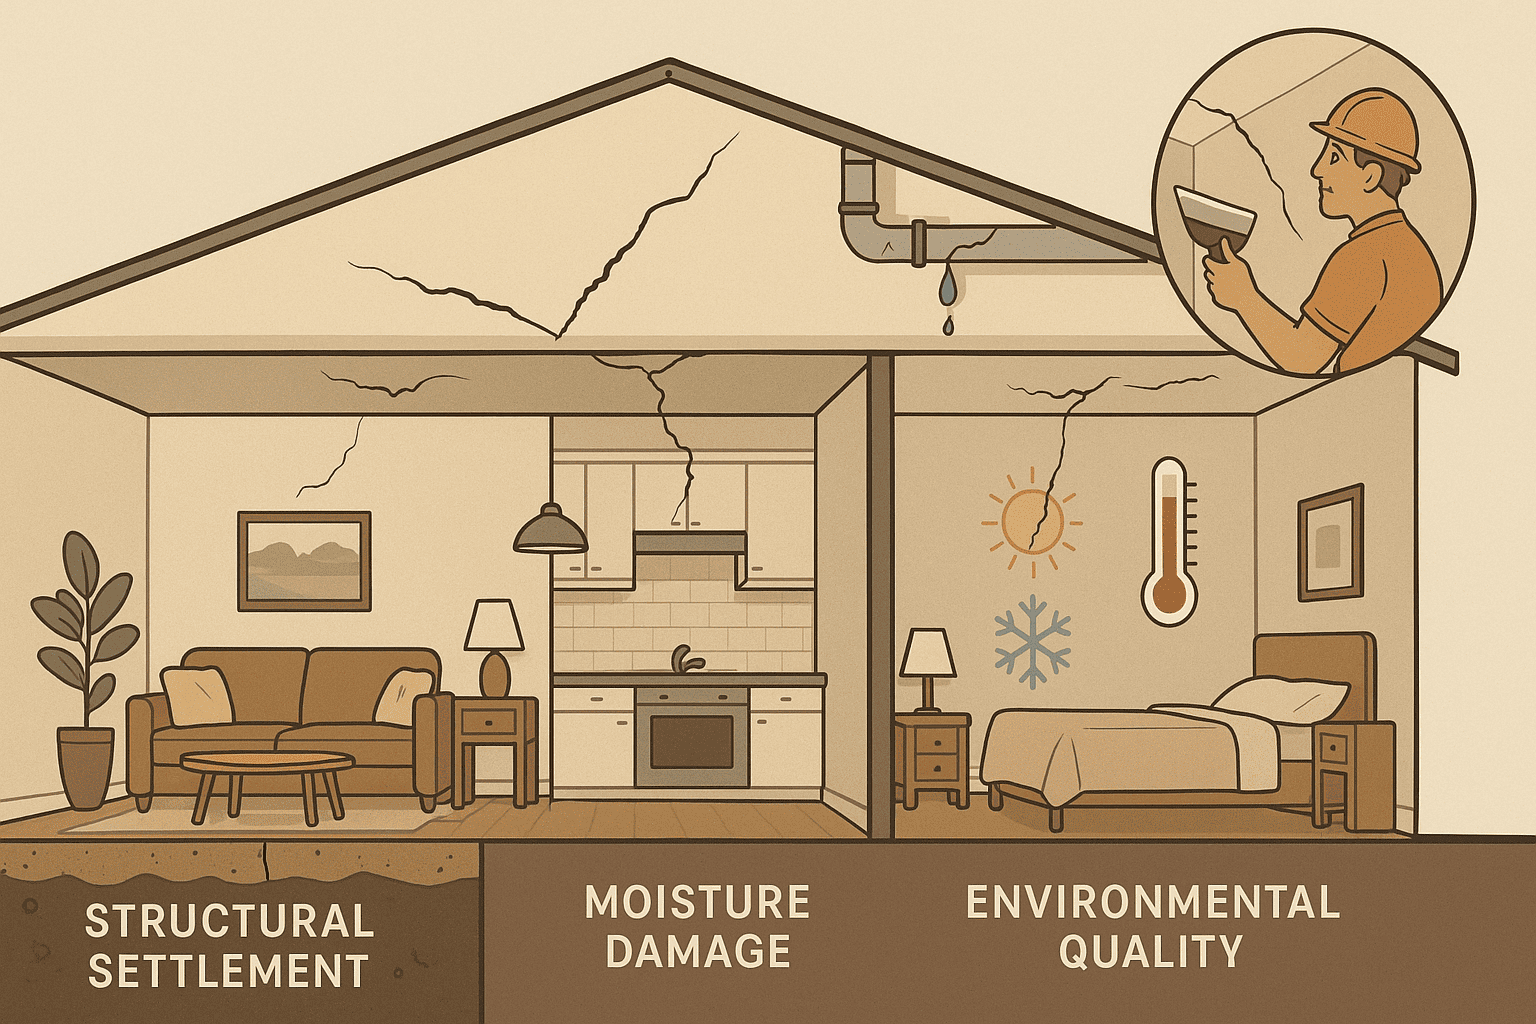
Ceiling cracks are a common concern for homeowners, often sparking anxiety about potential structural issues. Understanding the nature and origin of these cracks is crucial for determining if they represent a minor cosmetic problem or a more serious structural concern.
Different types of cracks can indicate various underlying causes, ranging from natural building settlement to more complex moisture or structural problems.
1. Structural Settlement
Building settlement is a natural and inevitable process that occurs as a home adjusts to its foundation and surrounding environment.
During the initial years after construction, typically the first two to three years, a house undergoes subtle movements as the structure finds its optimal resting position.
This process involves the gradual compression of soil beneath the foundation, causing minor shifts that can manifest as small cracks in the ceiling.
2. Environmental Stress
Temperature and humidity fluctuations create significant stress on building materials, leading to expansion and contraction cycles that can result in ceiling cracks.
These environmental changes cause building materials to move imperceptibly, creating tension at joints, seams, and connection points. In regions with extreme seasonal variations, the impact is more pronounced, with materials experiencing dramatic changes from hot summers to cold winters.
Over time, these constant micro-movements can weaken the integrity of ceiling surfaces, causing small fissures to develop.
3. Moisture Damage
Water intrusion represents one of the most serious and potentially destructive causes of ceiling cracks. Leaks from roofs, plumbing systems, or internal pipes can progressively weaken ceiling materials, compromising their structural integrity.
These moisture-related issues often present warning signs beyond simple cracking, including discoloration, soft or bulging areas, and potential mold growth.
Brown or yellow stains surrounding a crack are clear indicators of water damage that require immediate attention. Left unaddressed, moisture problems can escalate quickly, transforming minor cracks into significant structural issues that demand extensive and costly repairs.
4. Construction Quality
The initial quality of construction plays a crucial role in a ceiling’s long-term durability and resistance to cracking. Poor workmanship during the building process can create underlying weaknesses that only become apparent years after completion.
Improper drywall installation, insufficient securing of materials, inadequate joint compound application, and poorly executed seam taping can all contribute to premature ceiling deterioration.
These construction shortcuts might not be immediately visible but will ultimately manifest as cracks, sagging, or other structural imperfections.
DIY Solutions for Minor Ceiling Cracks
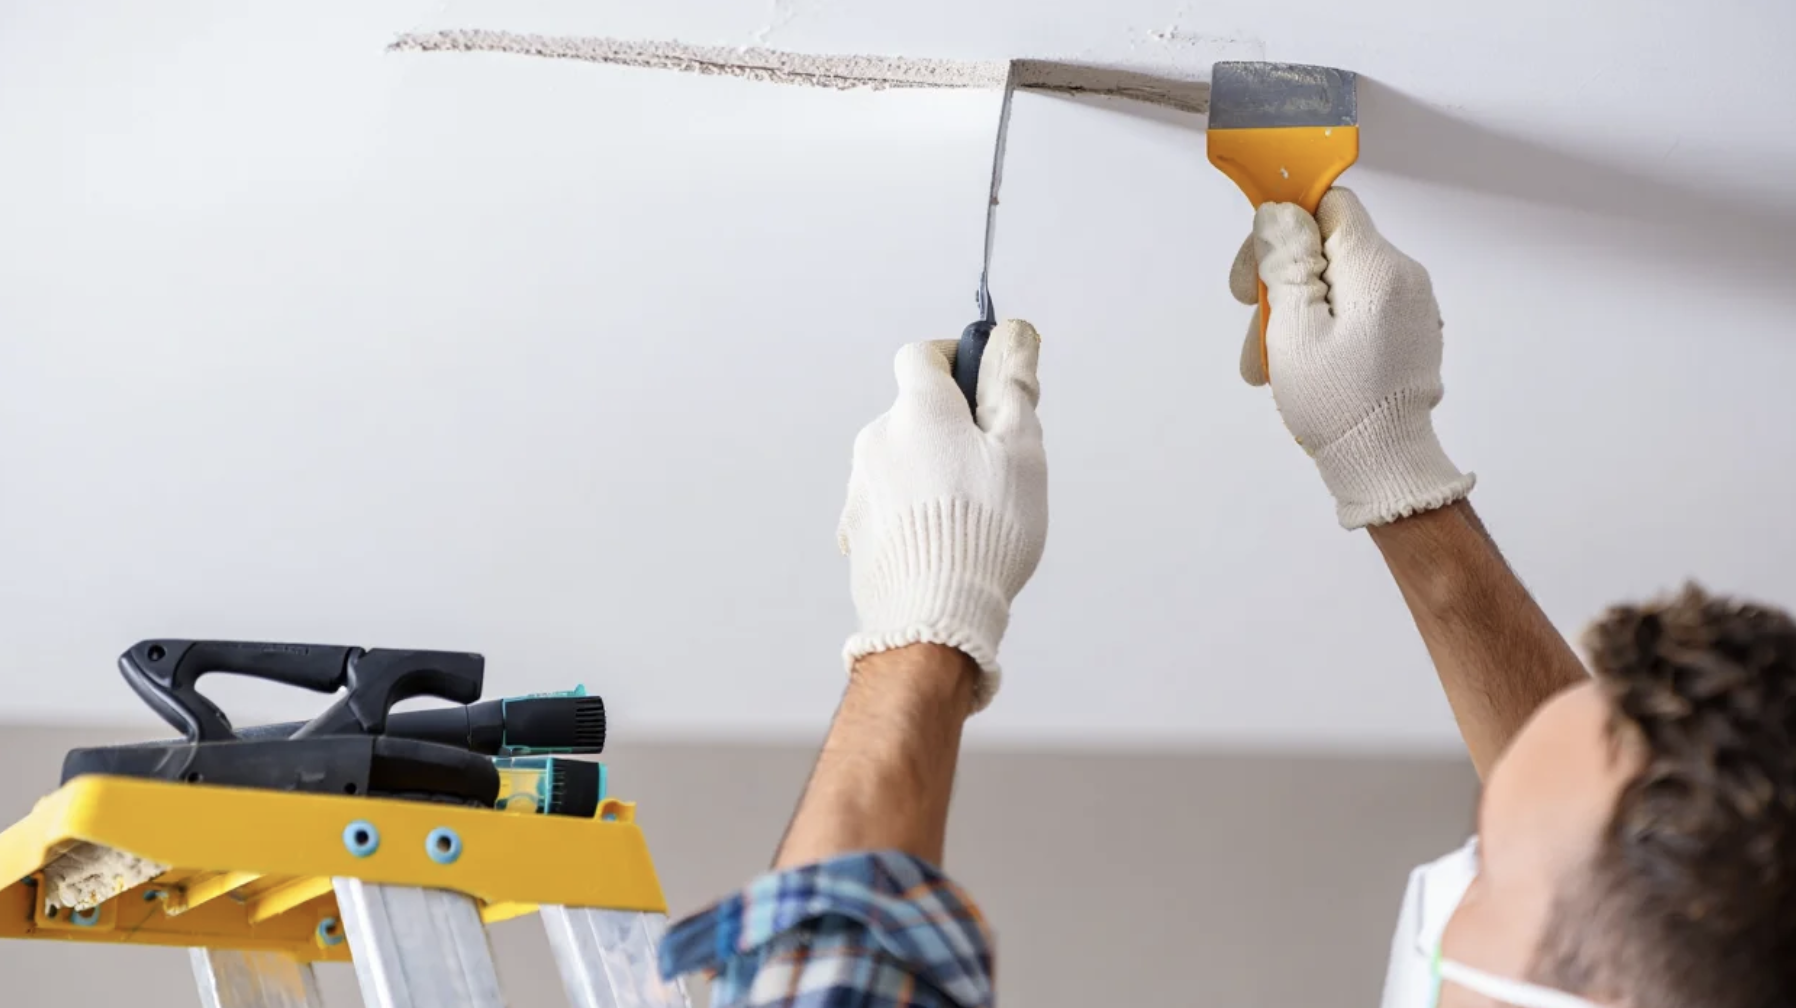
Many common ceiling cracks can be repaired without professional help. With the right tools and techniques, you can often handle these fixes yourself.
Basic Repair Kit
Before starting any ceiling repair, gather these essential supplies:
- Putty knife (4-inch for most jobs)
- Joint compound
- Fine-grit sandpaper (150-220 grit)
- Paint primer
- Ceiling-matching paint
- Stable ladder or step stool
- Drop cloths to protect the floors
- Safety glasses and a dust mask
Having everything ready before you begin makes the job go more smoothly and reduces cleanup time.
Standard Repair Process
The basic approach works for most hairline and straight cracks in drywall ceilings:
-
Preparation: Clear the area of furniture and lay down drop cloths. Clean the crack by removing loose material with a brush or vacuum attachment.
-
First Application: Using your putty knife, press joint compound directly into the crack, ensuring it fills completely. Smooth it out, feathering the edges to blend with the surrounding ceiling.
-
Building Up the Repair: After 24 hours of drying time, lightly sand the first layer. Apply a second, thinner coat extending 2-3 inches beyond the first to create a seamless transition.
-
Finishing Touches: Once the final layer is completely dry, sand until smooth. Apply primer over the repaired area, then paint to match your ceiling.
For more specialized situations like wall-ceiling junction cracks, use flexible caulk designed for this purpose. This allows for natural house movement without reopening the crack.
Professional Assessment and Repair
Sometimes, ceiling cracks indicate issues that require expert knowledge. Knowing when to call in professionals can save you from more extensive damage.
1. Signs You Need Professional Help
Some ceiling issues signal problems beyond what typical DIY repairs can address.
Consider calling professionals if you notice:
- Cracks wider than 1/4 inch
- Cracks with visible ceiling sagging
- Repairs that fail repeatedly
- Cracks accompanied by water damage
Taking on repairs beyond your skill level can sometimes hide symptoms of bigger problems that need addressing.
2. Finding the Right Expert
Different crack types require different specialists. For basic repairs, a skilled drywall contractor might be sufficient. For potentially structural issues, consider:
A home inspector can provide a general assessment of multiple systems. A structural engineer can formally evaluate building integrity. A foundation specialist might be needed for cracks related to foundation movement.
Getting the right expert first can save time and prevent unnecessary work.
3. Understanding Repair Costs
Here’s a breakdown of typical ceiling repair costs:
| TYPE OF CEILING REPAIR | TYPICAL COST RANGE | FACTORS AFFECTING COST |
|---|---|---|
| Minor crack patching | $150-$300 | Size of area, ceiling height |
| Water damage repair | $300-$800 | Extent of damage, cause remediation |
| Drywall replacement (section) | $400-$1,000 | Size of area, finishing requirements |
| Sagging ceiling repair | $500-$1,500 | Cause of sag, accessibility |
| Structural ceiling repair | $1,000-$4,000+ | Extent of damage, supporting work needed |
Simple cosmetic repairs might range from $300-$500, while structural ceiling issues could cost several thousand dollars to properly address.
Preventative Measures

Stop ceiling cracks before they start with these smart home maintenance practices. Regular attention to key areas can prevent many common problems.
Moisture Management
Keep indoor humidity between 30-50% year-round. This balance prevents materials from expanding too much in humid conditions or shrinking in overly dry environments.
In particularly damp areas of your home, consider using:
- Dehumidifiers in basements or other moist spaces
- Bathroom fans that vent completely outside
- Kitchen exhaust fans during cooking
- Air conditioners during humid summer months
Consistently managing moisture helps protect ceiling materials from stress.
Seasonal Home Care Calendar
Your home faces different challenges throughout the year. Follow this seasonal guide to protect your ceilings:
| SEASON | KEY TASKS | BENEFITS |
|---|---|---|
| Spring | Repair winter water damage, clear gutters | Prevents leaks during spring rains |
| Summer | Check attic ventilation, inspect bathroom ceiling areas | Stops heat damage and moisture buildup |
| Fall | Clean gutters, check attic insulation | Prepares for winter and improves efficiency |
| Winter | Monitor for ice dams, and control indoor humidity | Prevents water intrusion and condensation |
Regular maintenance prevents costly ceiling repairs in the future.
With consistent attention to these preventative measures, you can often avoid the conditions that lead to ceiling cracks and extend the life of your ceiling surfaces.
Wrapping It Up!
Ceiling cracks tell stories about your home—most aren’t disaster tales. Armed with knowledge about different crack types, you can now spot the difference between normal settling and serious structural warnings.
Hairline and straight cracks typically indicate cosmetic issues, while sagging or water-stained cracks require prompt attention.
Did you know that 90% of ceiling cracks are your house settling, like stretching after a long nap? Keep an eye on any cracks that change rapidly or appear alongside other home problems.
Regular maintenance prevents many ceiling issues before they start. Maintain humidity between 30% and 50%. Check your attic twice a year and follow the seasonal care calendar. Take photos of existing cracks and track changes over time.
Your ceiling’s health reflects your home’s overall well-being—stay informed and proactive. After all, your home takes care of you—it deserves the same in return.