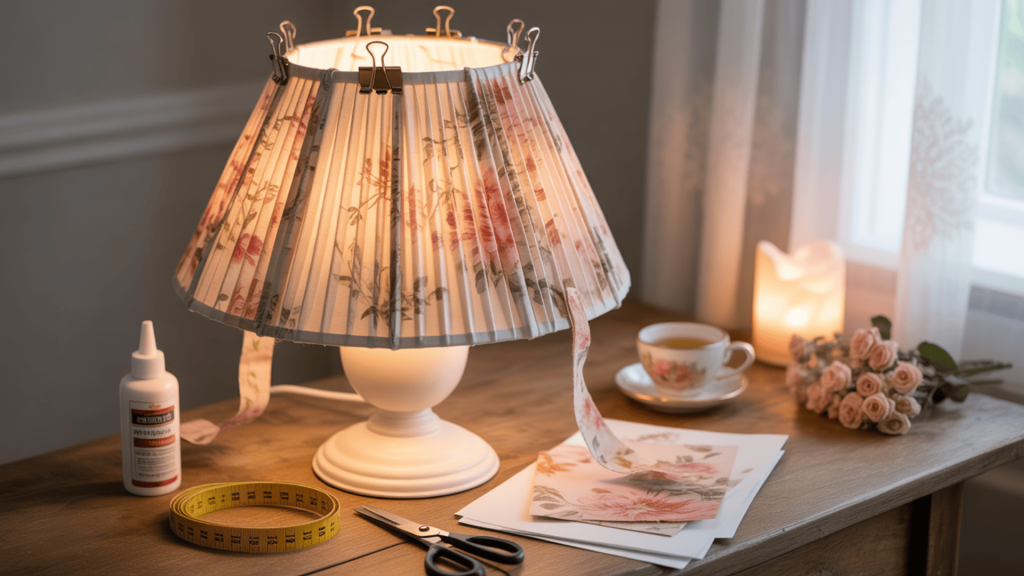
Have you ever noticed how pleated lampshades add a special touch to any room?
Those perfect folds casting soft patterns on your walls can cost a small fortune in stores.
But here’s a secret: you can make one yourself without sewing a single stitch!
I stumbled upon this trick last year when redecorating my living room on a tight budget.
Using just fabric, glue, and a bit of patience, I created a lampshade that friends thought came from an expensive boutique.
Hold onto your scissors!
It took less than an hour!
Ready to try it yourself?
I’ll show you a step-by-step method that anyone can follow, even if they aren’t usually into crafts.
Get ready to light up your space with a handmade touch!
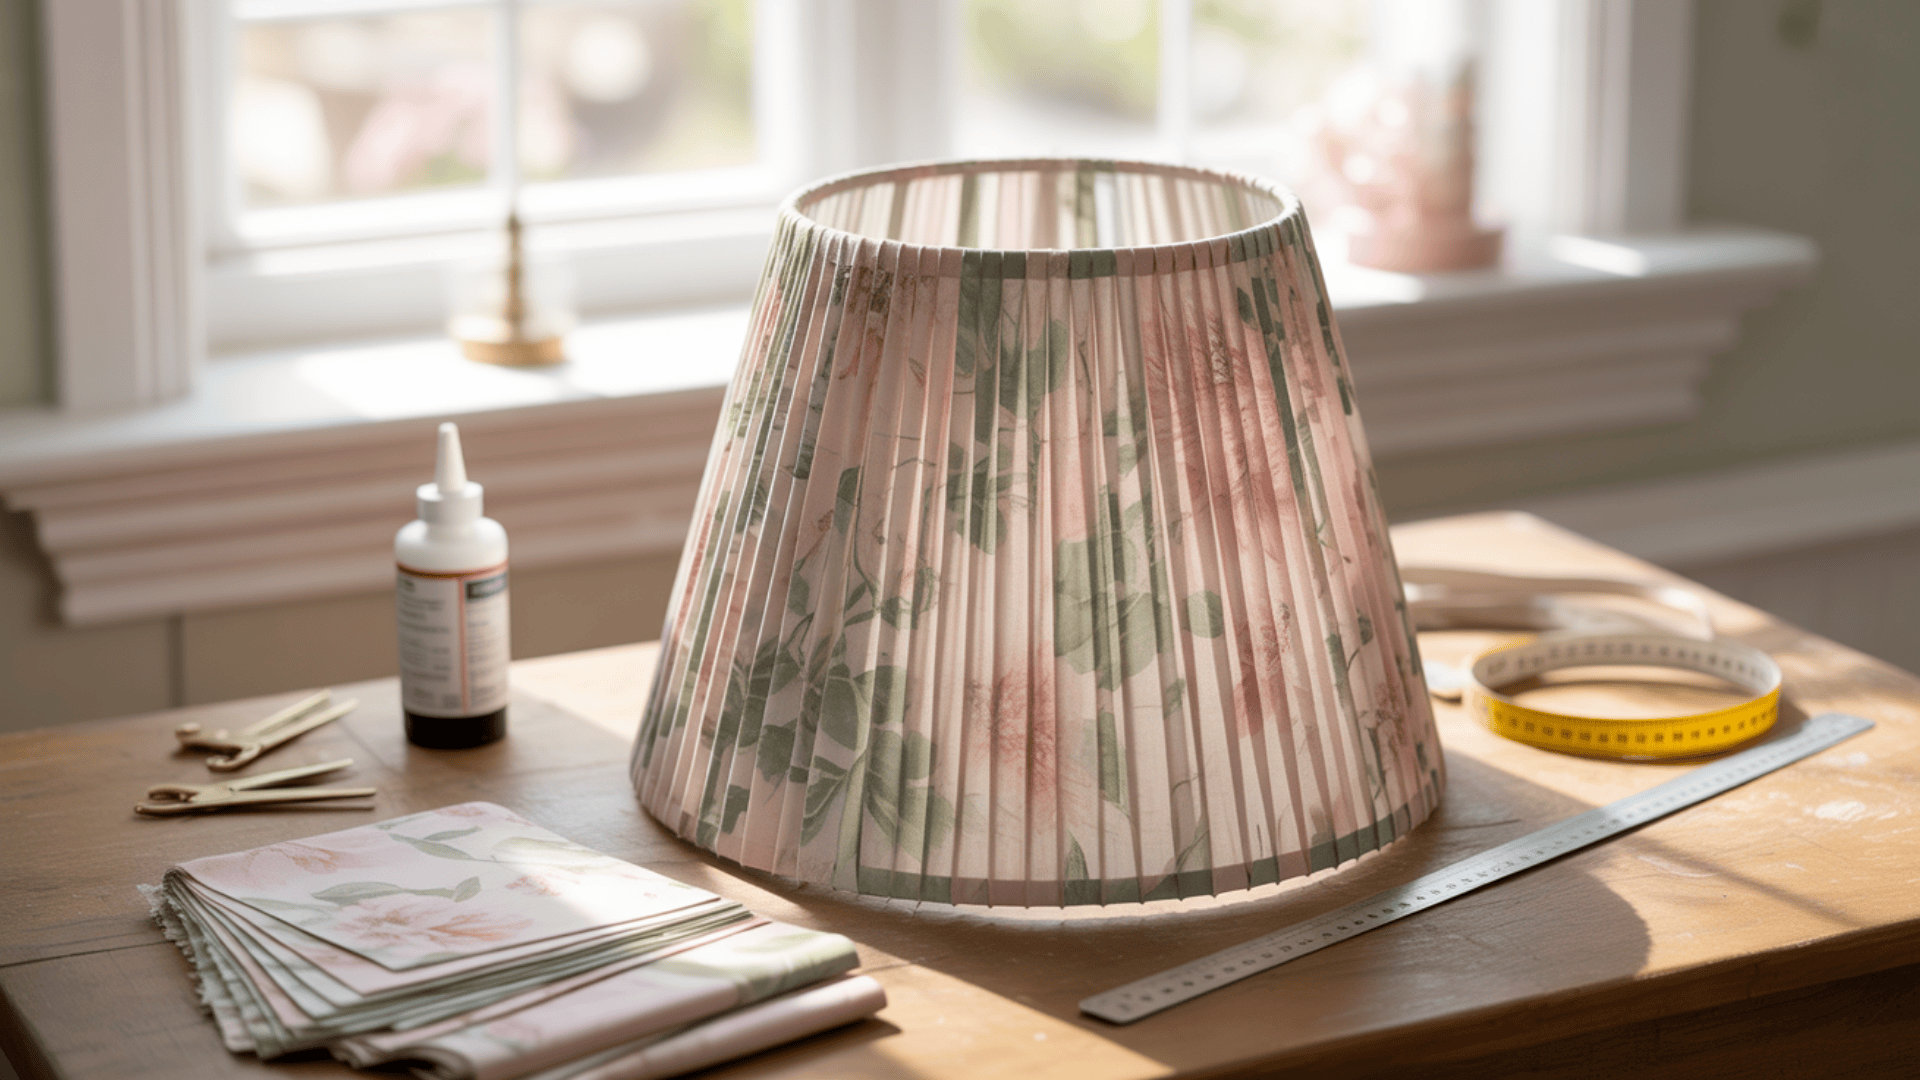
Why Choose a Pleated Lampshade?
Pleated lampshades bring charm and character to any room in your home.
With their soft glow and pretty folds, they cast the most wonderful patterns of light and shadow on your walls.
And here’s some good news – you can make one yourself without picking up a needle and thread!
When you create your pleated shade, you can pick the fabric or paper that best suits your style.
Maybe it’s a bold pattern for your reading nook or a soft color for your bedroom.
The choice is yours, and it will cost far less than what you’d pay in stores.
This project is perfect for anyone who wants to try their hand at home crafts without getting into complicated techniques.
With just 5 simple steps, you’ll change an ordinary lamp into a stunning focal point for any room.
All you need are a few common household items and a bit of time.
Once you learn these steps, you’ll be able to create beautiful lampshades that’ll wow your guests.
The method is so quick and easy, yet the final product appears to have come from a high-end shop.
Can’t wait to see how your new handmade shade will bring a cozy feel to your living space?
Let’s jump right in!
What You’ll Need for This No-Sew Lampshade
Before starting your project, gather all your supplies in one place.
This makes the whole process much smoother, and you won’t need to stop halfway through looking for items.
The good news is that you likely already have many of these things at home.
| ESSENTIAL ITEMS | WHY YOU NEED IT | SHOPPING TIPS |
|---|---|---|
| Lampshade base | Acts as the structure for your new shade | Can use an old one or buy inexpensive frames online |
| Fabric | Creates the pleated exterior | Choose medium-weight fabric; you need 3x the shade circumference |
| Hot glue gun | Holds everything together | Mini or full-size, both work; have extra glue sticks ready |
| Scissors | For cutting fabric | Sharp fabric scissors give the cleanest cuts |
| Measuring tape | Ensures correct fabric amounts | Flexible tape works better than a rigid ruler |
| Optional trim | Adds a finished look to edges | Ribbons, bias tape, or contrasting fabric work well |
For those feeling extra creative, consider adding buttons, beads, or even paint for the lamp base.
These finishing touches can make your lampshade truly one-of-a-kind.
Step-By-Step DIY Pleated Lampshade Tutorial
Making your own pleated lampshade may sound tricky, but it’s actually quite simple when broken down into steps.
Anyone can do this project, even if you’ve never made anything by hand before.
The best part?
No sewing machine or needle and thread required!
You’ll be surprised at how professional the results look.
Let’s walk through each step carefully.
Step 1: Measure and Cut Your Fabric
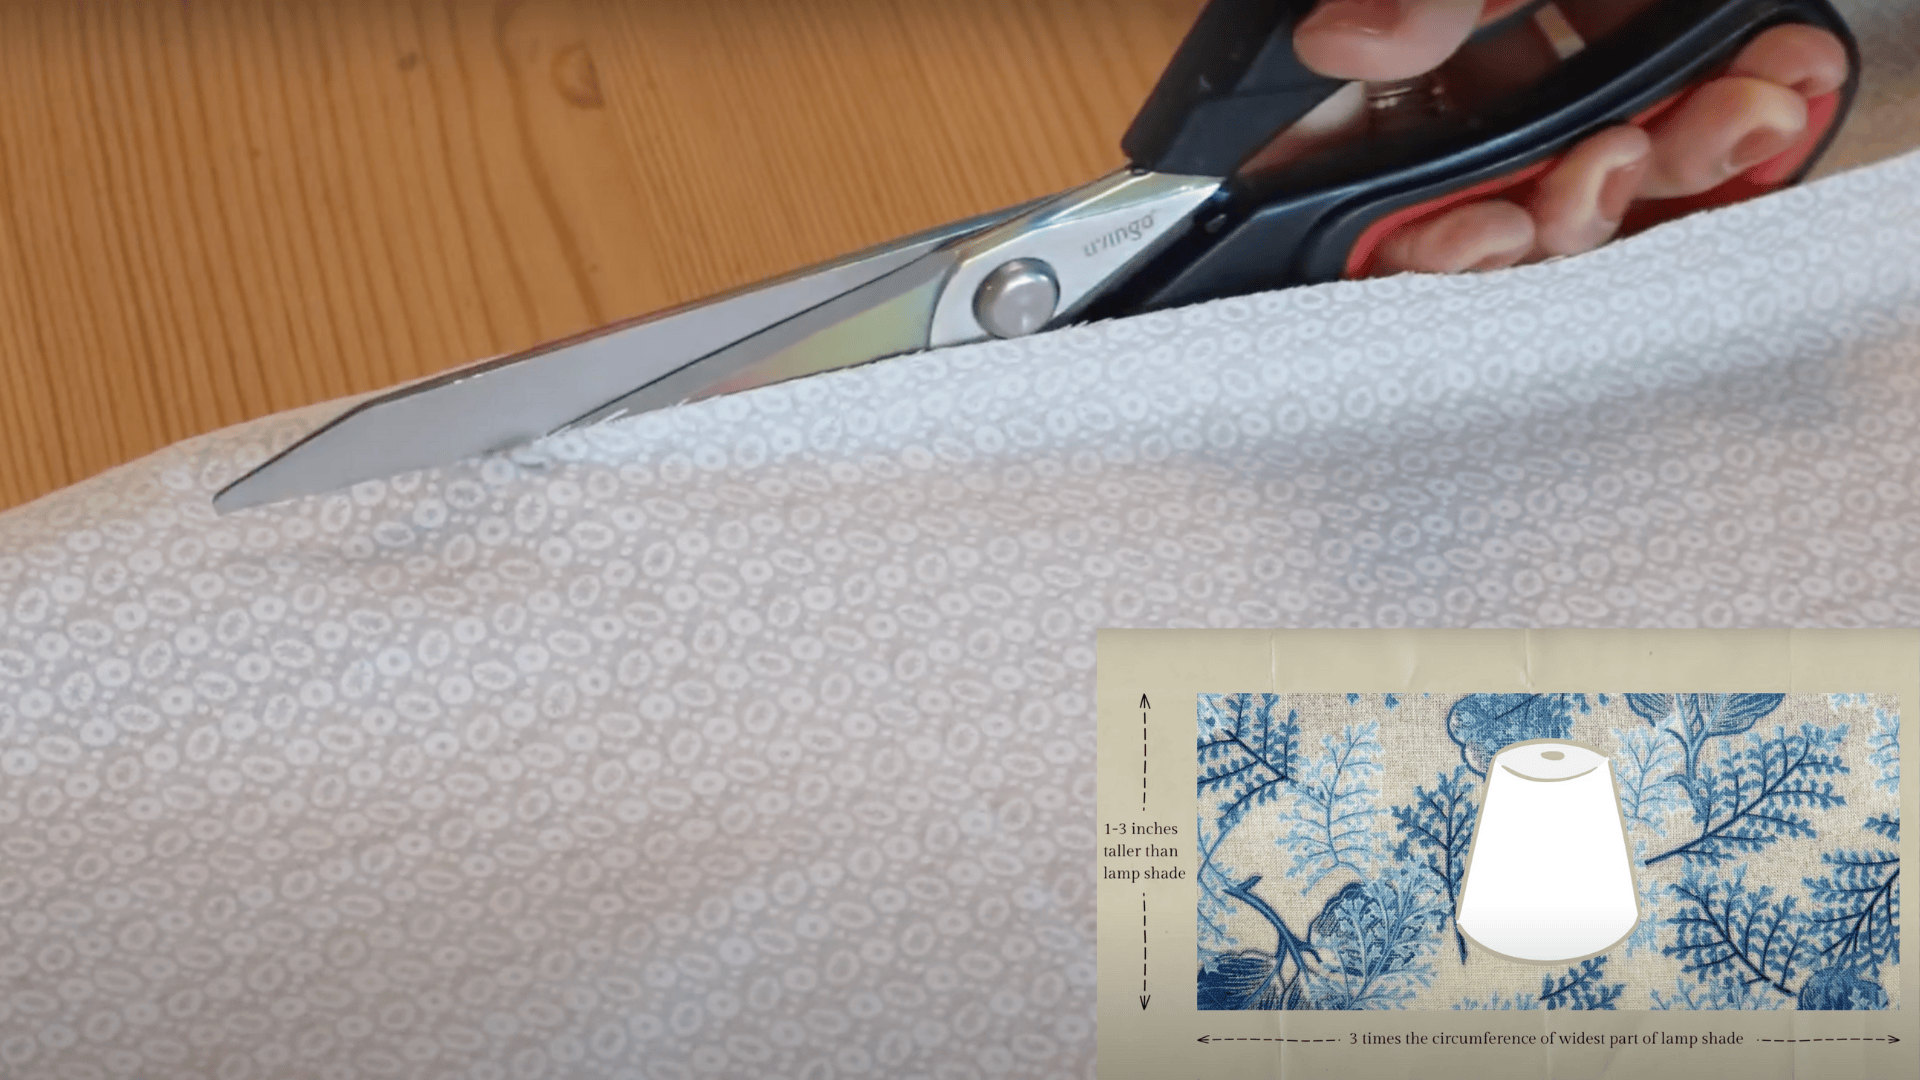
Getting the right measurements is key to a successful project.
Start by examining your lampshade to determine its height and width.
Use a measuring tape to get exact numbers.
For the fabric width, take the distance around your shade and multiply it by three.
This gives you enough material to create those pretty folds.
For height, add about 2-3 inches to your shade’s height to allow for folding over the edges.
Once you have your measurements, lay out your fabric on a flat surface and mark the dimensions with a pencil.
Cut carefully along your lines using sharp scissors.
If you plan to add decorative edges, cut those strips now, too.
They should be about 2 inches wide and long enough to go around the top and bottom of your shade.
Step 2: Start Gluing and Pleating the Fabric
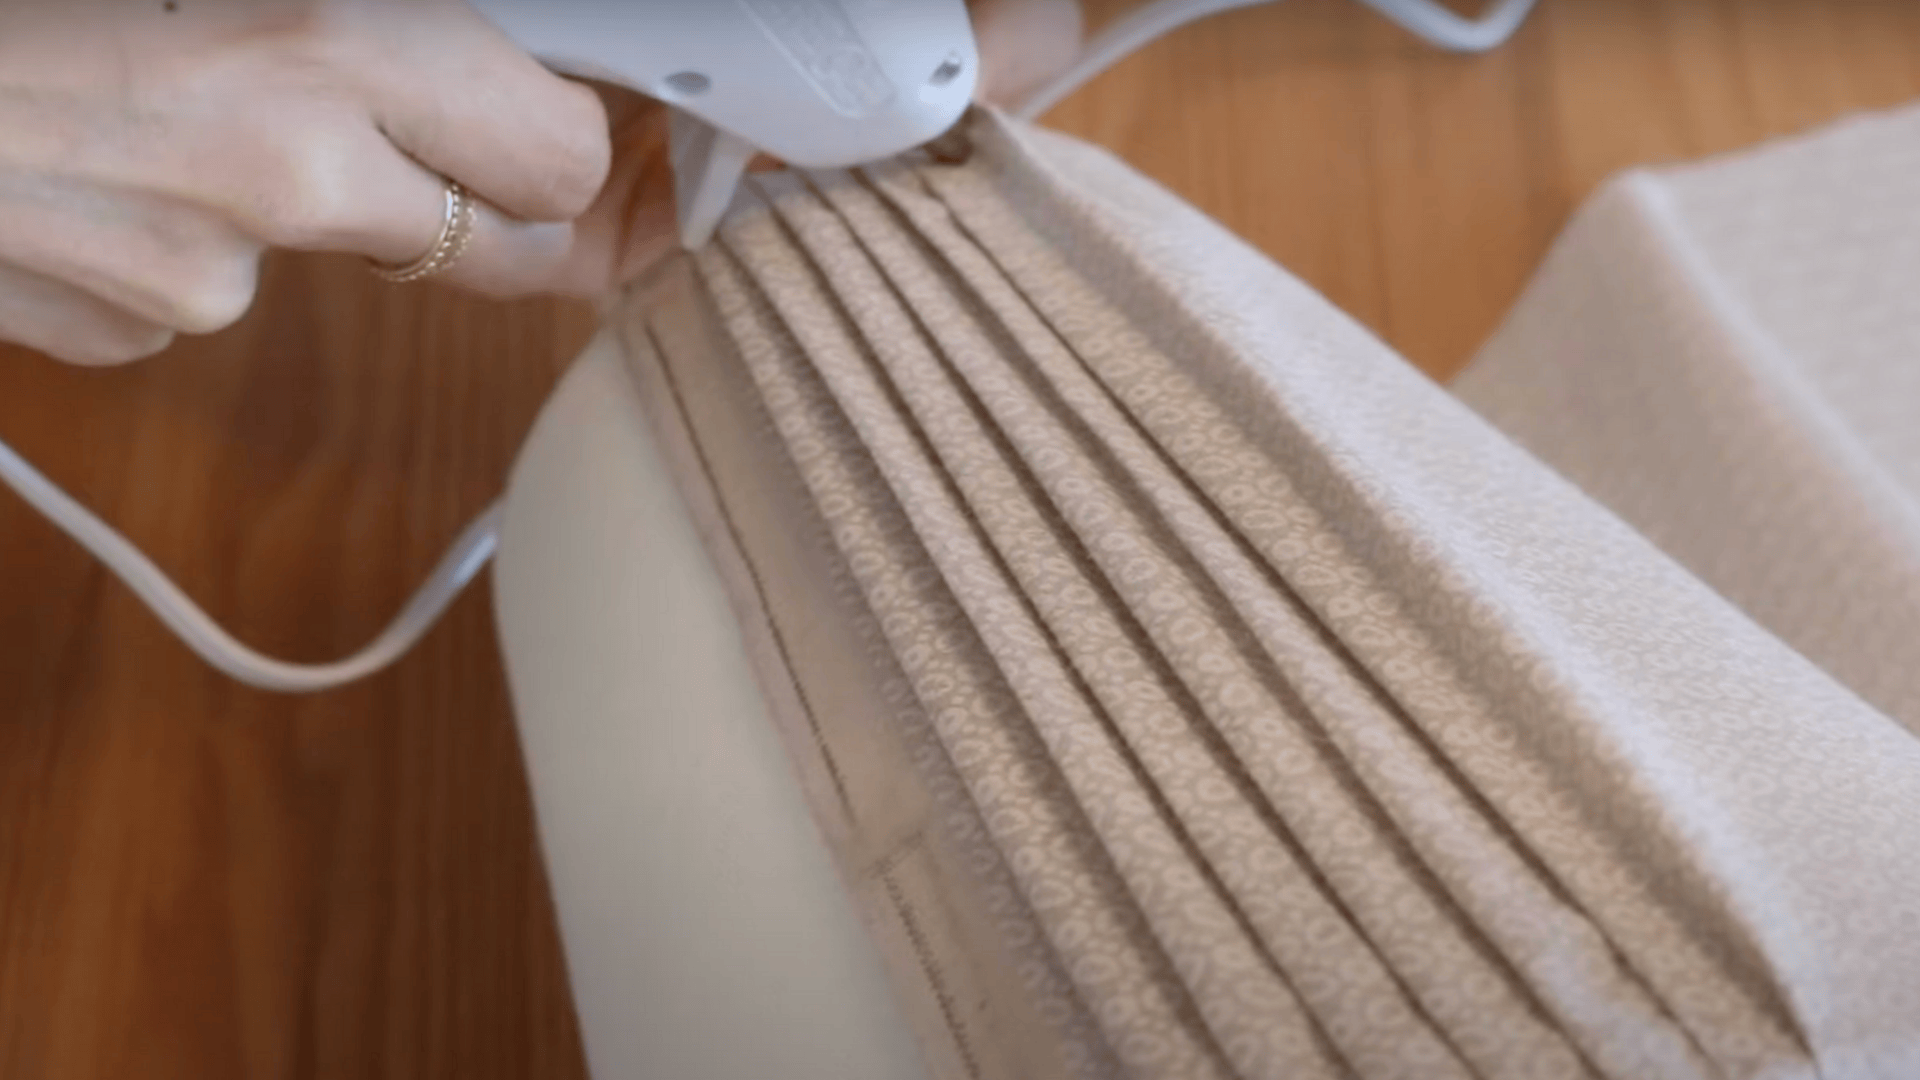
Now comes the fun part! Plug in your hot glue gun and let it warm up completely.
While waiting, you can plan how wide you want your pleats to be.
For most small to medium shades, pleats about 1-2 inches wide look nice.
Begin at one end of your lampshade.
Place a thin line of glue along the edge of the shade and press one end of your fabric onto it.
Hold it for a few seconds until the glue sets.
To make your first pleat, pinch the fabric about 1-2 inches away from the glued section.
Fold it back on itself to create a sharp crease.
Apply a small amount of glue to the shade where the fold will be placed, then press the fold into position.
Continue this pattern all the way around the shade.
You’ll need to adjust if your shade is tapered (wider at the bottom than the top).
Make the pleats slightly wider at the bottom than at the top to account for the difference in circumference.
Step 3: Finish Wrapping and Overlapping Fabric
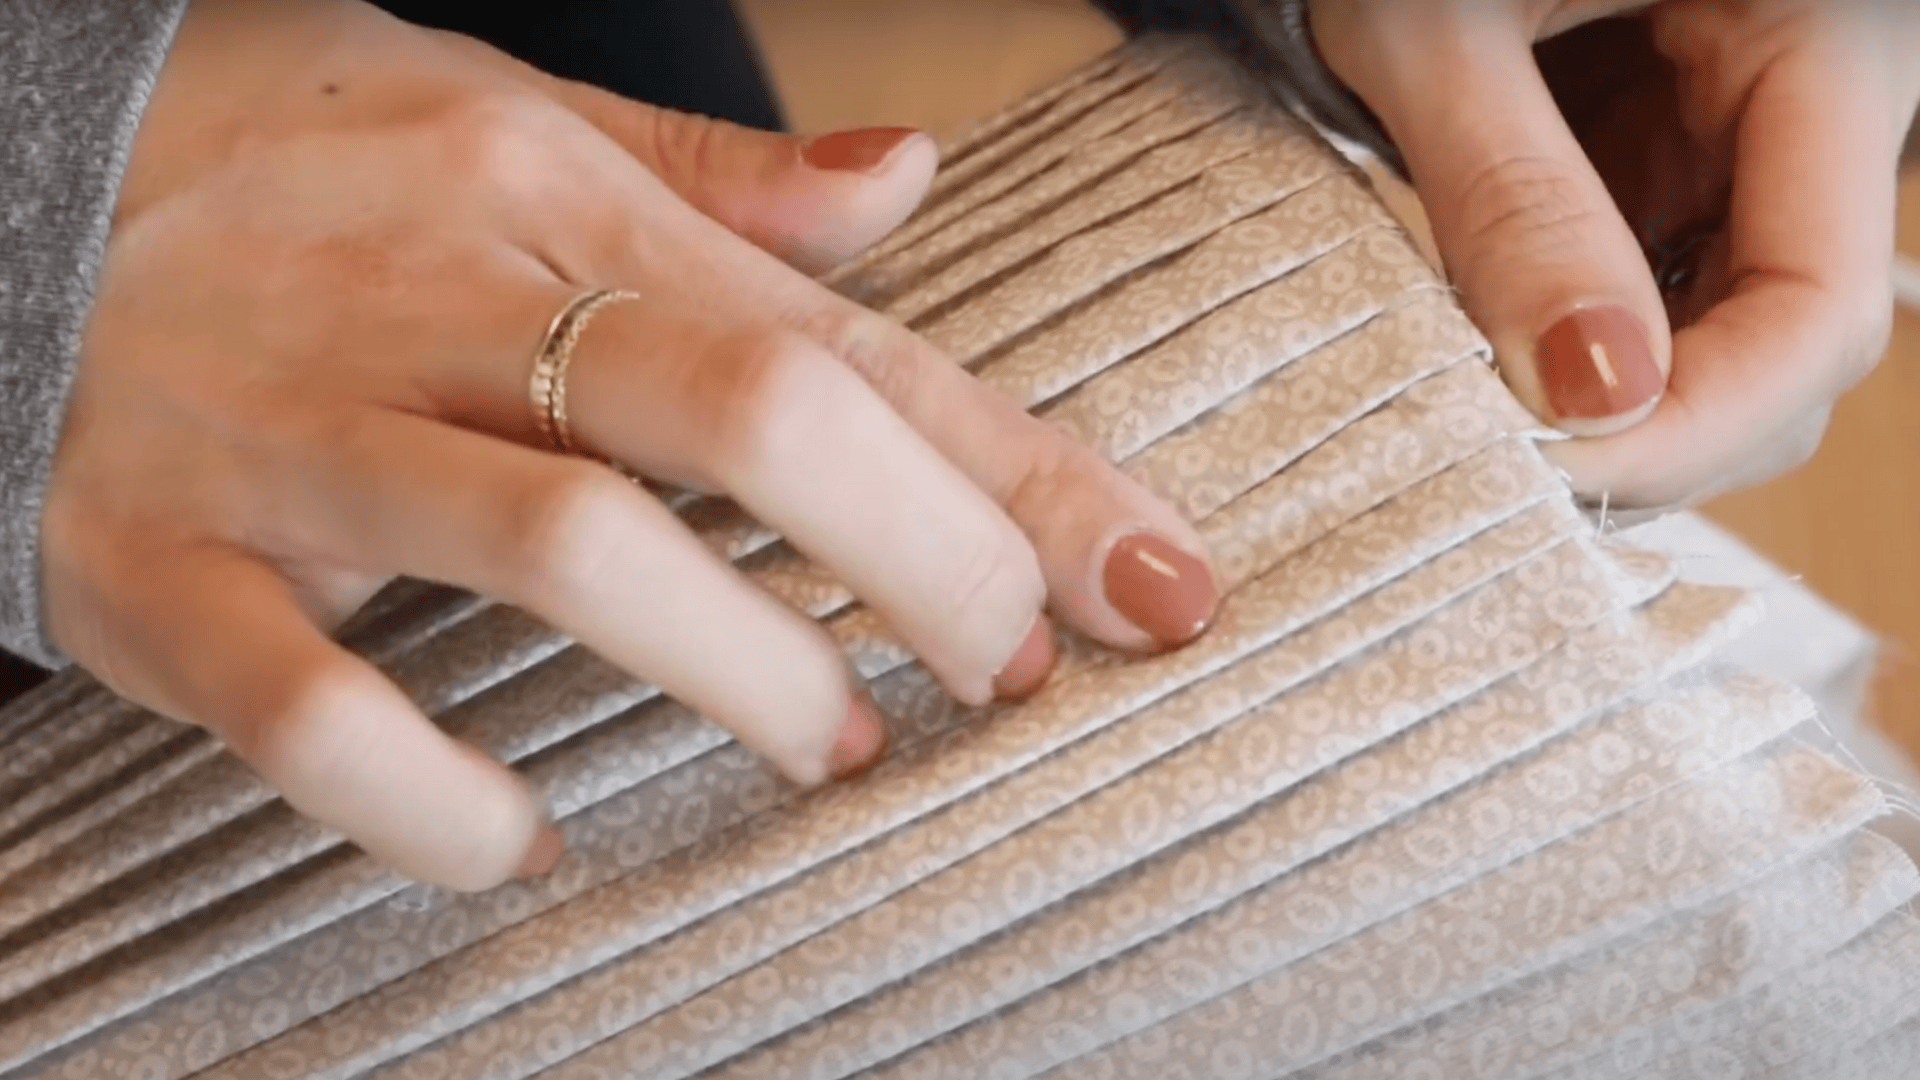
As you work your way around, you might find you need to join pieces of fabric if your shade is large.
This is totally fine!
When you reach the end of one piece, overlap the next piece by about half an inch and glue it in place.
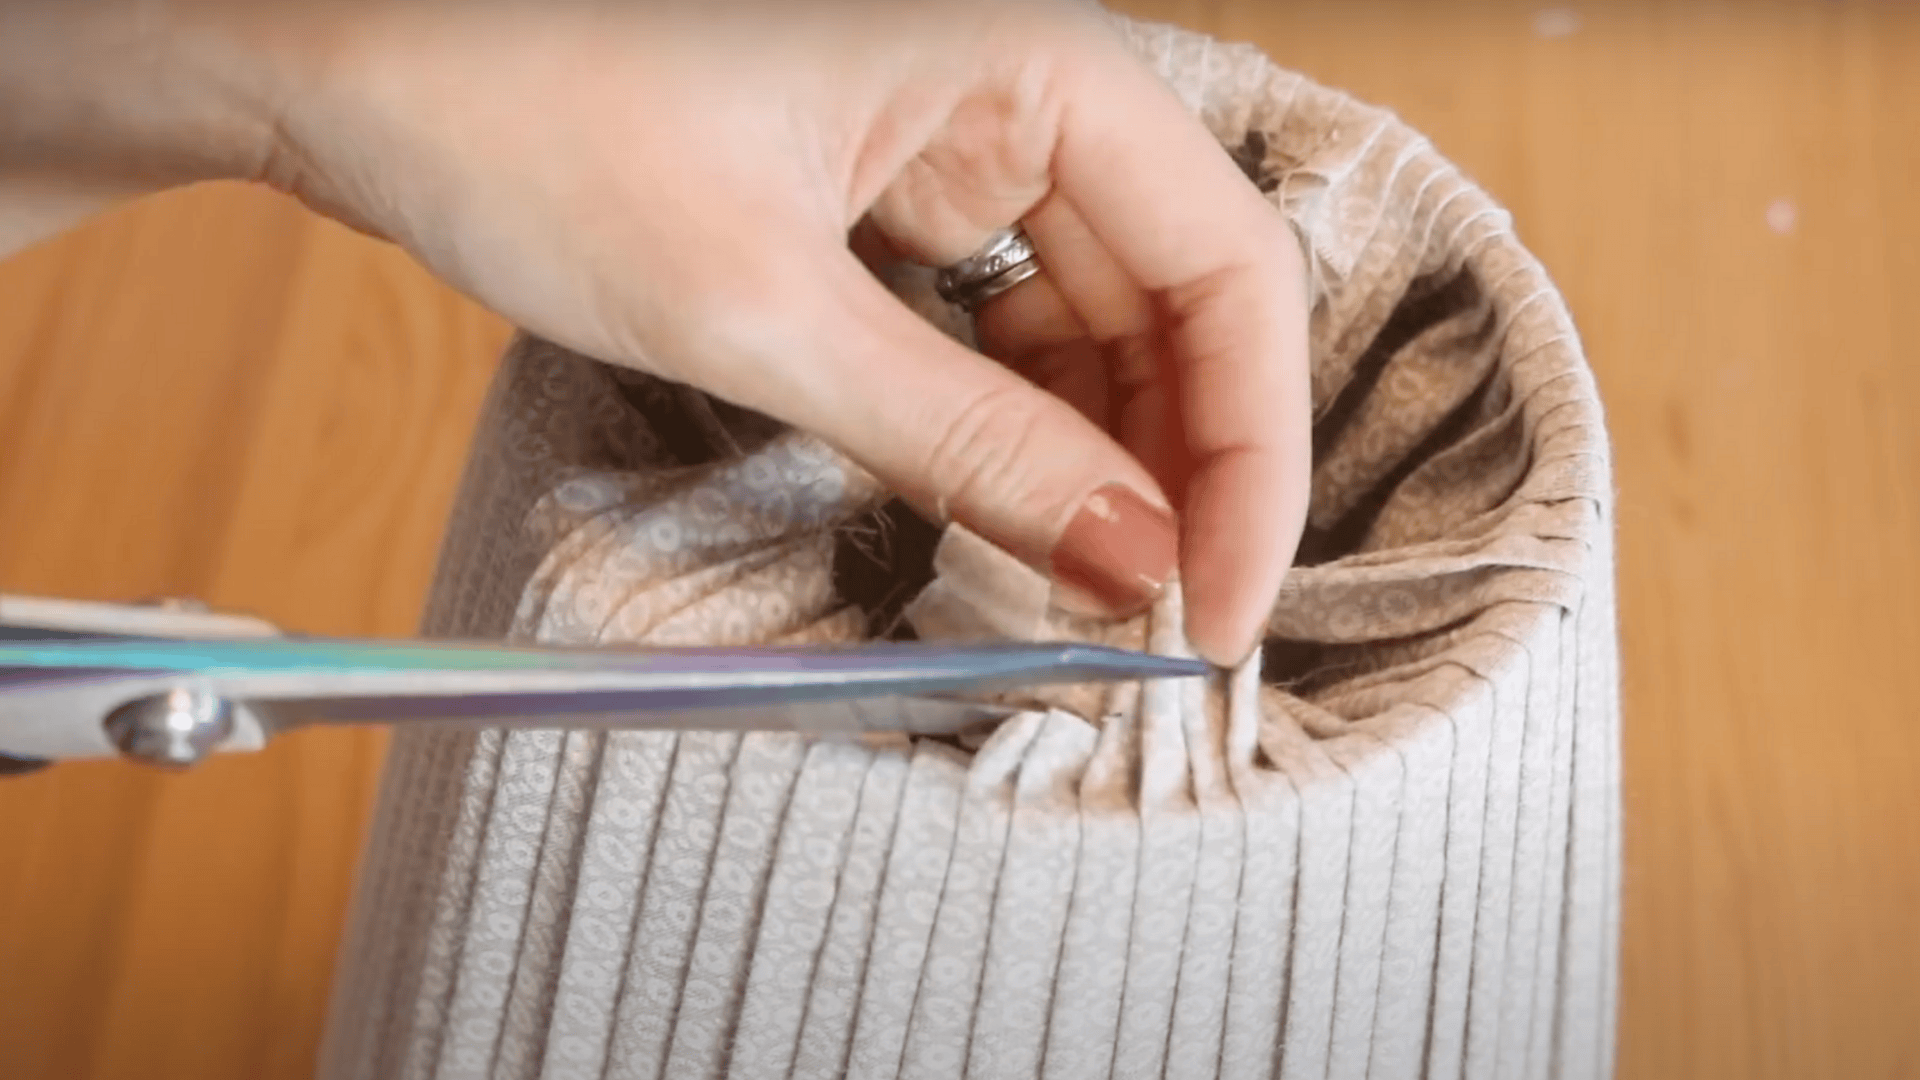
When you’ve gone all the way around and reached your starting point, you’ll need to create a clean finish.
Trim the fabric so it overlaps your starting edge by about half an inch.
Apply glue to this final section and press it down firmly over your starting edge.
Check that all your pleats look even and adjust any that seem out of place while the glue is still workable.
Take a step back and examine your work from different angles to identify any issues.
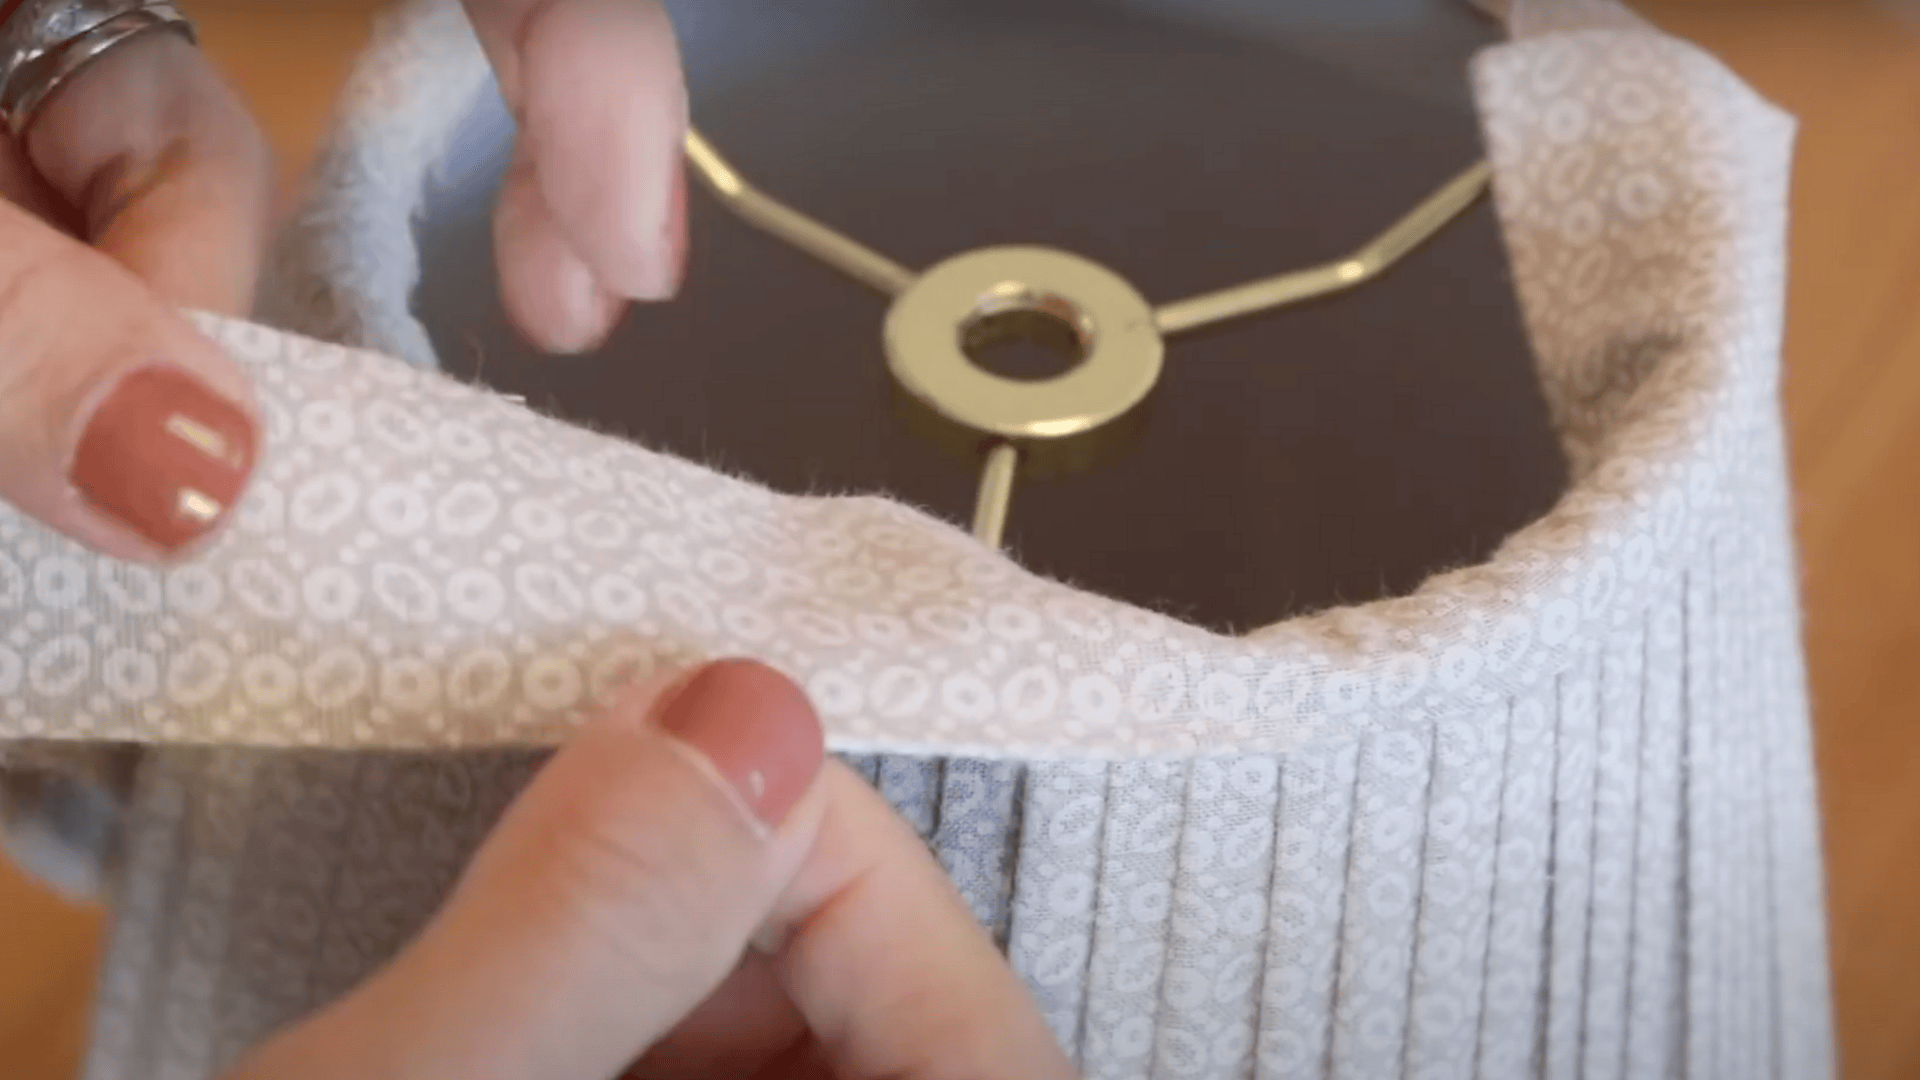
Step 4: Secure and Trim the Edges
Now it’s time to handle the top and bottom edges of your lampshade.
You have two options here.
The first is to fold the extra fabric over the edges of the shade and glue it to the inside.
This creates a clean, finished look but adds some bulk.
The second option is to trim the fabric right at the edge of the shade frame and then cover it with decorative trim.
This works well if you want less bulk or plan to add fancy edges anyway.
If you choose to fold the fabric, work in small sections.
Apply glue to the inside edge of the shade, then fold the fabric over and press it down.
Keep the fabric taut as you work to avoid wrinkles.
Step 5: Add a Decorative Hem
Adding a hem to the top and bottom edges gives your lampshade a polished, store-bought look.
Take your pre-cut fabric strips and fold them in half lengthwise.
Press them flat with your fingers or an iron.
Apply a thin line of glue along the top edge of your lampshade.
Press the folded strip onto this line, making sure the fold faces outward for a clean edge.
Work your way around the entire top edge.
Repeat this process for the bottom edge.
If you want, you can use a different fabric for these hems to add a pop of color or pattern.
When you reach the starting point, trim the hem strip so that the ends meet neatly, and then glue them together.
Video Walkthrough: See How Experts Do It
For more information, check out this video tutorial by Eunice at home
Common Mistakes and How to Avoid Them
Even the simplest projects can hit some bumps along the way.
Here are the most common issues people run into when making pleated lampshades and how to fix them:
- Not using enough fabric (always use 3x the shade’s width for proper pleating)
- Forgetting to adjust for tapered shades (make pleats wider at the bottom, narrower at the top)
- Using too much glue (small dabs work better than big globs)
- Rushing through the pleating process (take your time for even folds)
- Making uneven pleats (measure and mark your folds before gluing)
With these tips in mind, your no-sew pleated lampshade project should turn out beautifully!
This simple update can refresh a room without incurring significant costs or requiring a lot of time.
That’s a Wrap
Look at what you’ve made – a beautiful pleated lampshade that brightens your room in more ways than one!
Not only have you saved money, but you’ve also created something truly personal that perfectly fits your space.
Don’t you love how this no-sew lampshade looks so complex but was actually so simple to make?
It’s the kind of project that gives you major bragging rights without requiring a lot of effort.
Next time you spot an old lamp at a thrift store or have a plain shade that needs refreshing, you’ll know exactly what to do.
Share photos of your creation online – I bet you’ll inspire others to try it too!
Now, what room will you brighten next with your new lampshade-making skills?