That awkward corner in your bedroom, kitchen, or hallway is secretly the most valuable real estate in your home—if you know how to use it!
Most homeowners walk past these empty corners every day, never realizing they’re missing out on storage gold mines.
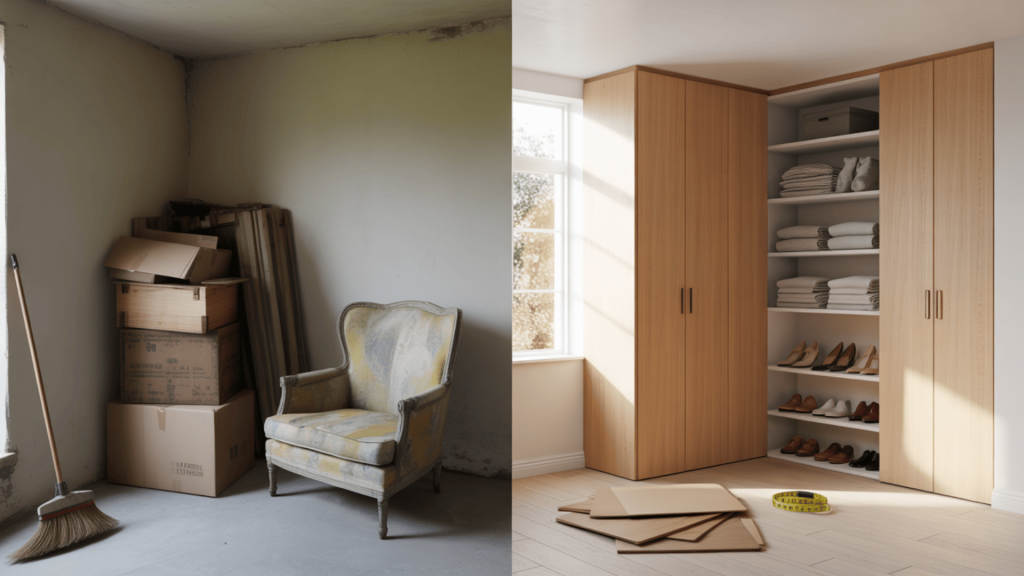
Imagine adding a beautiful, custom-built closet without losing any usable floor space.
With just basic tools and materials from your local hardware store, you can create stunning storage that fits your exact needs.
The secret?
Working with angles instead of fighting them.
Follow our simple steps and watch that forgotten corner become your favorite storage space in the entire house.
You’ll save hundreds of dollars while creating something perfectly suited to your needs, all without hiring a professional carpenter.
Why Build a Corner Closet?
Corner spaces in your home are wasted opportunities!
These often-overlooked areas usually collect dust or random items, but with smart planning, they can become valuable storage spaces.
Corner closets maximize unused space that regular furniture can’t fill.
They’re affordable alternatives to major renovations while adding real home value.
You can build one using basic tools and materials from a hardware store.
These versatile storage solutions work well in kitchen pantries for food and appliances, as well as in bedrooms for clothes and shoes.
Design them to match your home’s style for a seamless, built-in appearance that converts dead corners into functional, organized spaces.
Tools and Materials Needed for a DIY Corner Closet
Starting a corner closet project doesn’t need fancy equipment, but having the right tools makes the job much smoother.
Most of what you’ll need is likely at your local hardware store or maybe even in your garage already.
| CATEGORY | ITEMS |
|---|---|
| Cutting Tools | Miter saw or circular saw; Measuring tape; Speed square |
| Building Materials | 2×2 wood for wall supports; 1×2 trim boards; Edge-glued panels or 1×12 boards |
| Hardware | Screws (1.5″ and 3.5″); Wall anchors; Brad nails; Clamps |
| Measuring Tools | Stud finder; Level; Pencil |
| Finishing Supplies | Stain or paint; Primer; Polyurethane; Spackle; Sandpaper |
Take time to collect everything before you start.
This prevents frustrating stops mid-project when you realize something is missing.
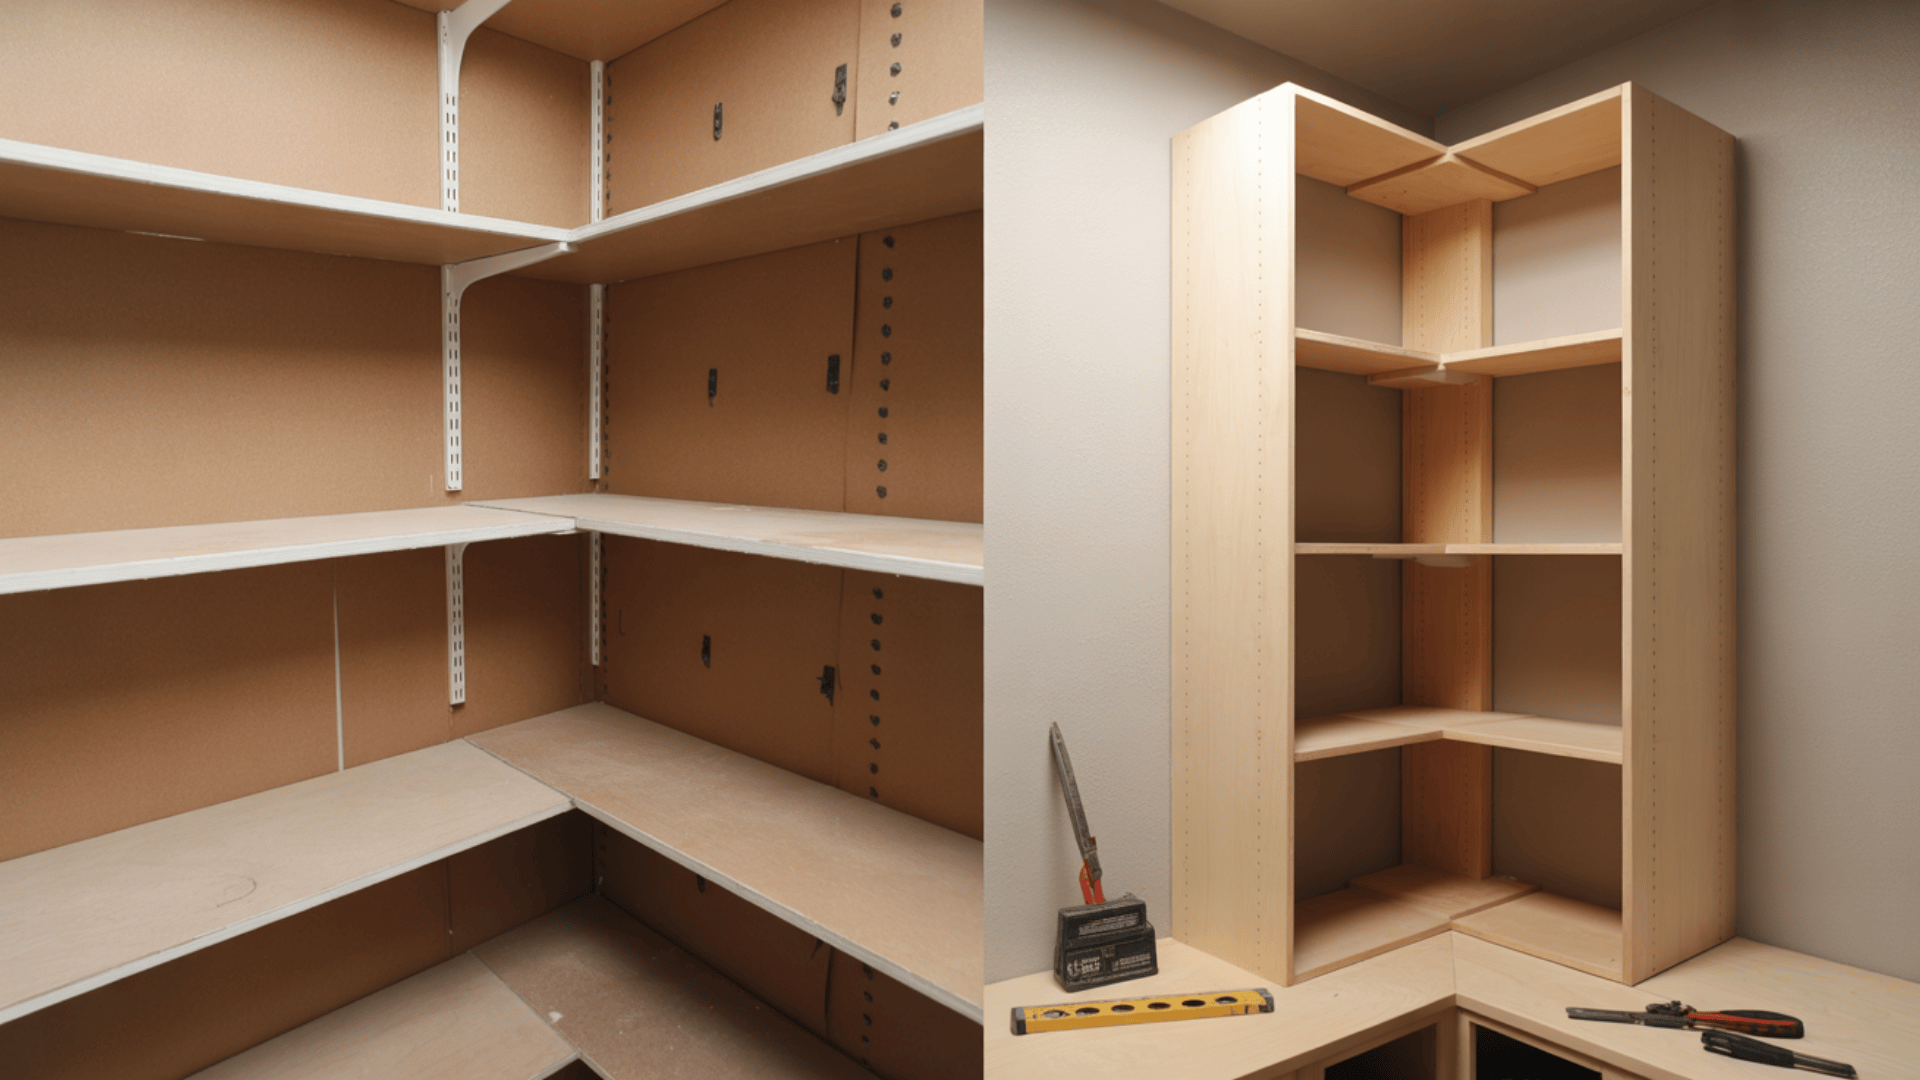
Step-by-Step DIY Corner Pantry Shelves Tutorial
The beauty of making your corner pantry is that you can customize every aspect to fit your exact needs and space.
With just a weekend of work, you’ll have a useful storage space that looks like it was always meant to be there.
Let’s begin the step-by-step process of turning an empty corner into a functional pantry.
Step 1 – Prep and Demo the Old Closet
Before building anything new, you need to clear the canvas.
Start by removing everything from the area where your new closet will be located.
If there’s old shelving there, now’s the time to remove it.
For wire shelving, a pry bar is the best tool for removing the anchors without damaging the walls.
Work slowly and carefully to avoid making the holes bigger than necessary.
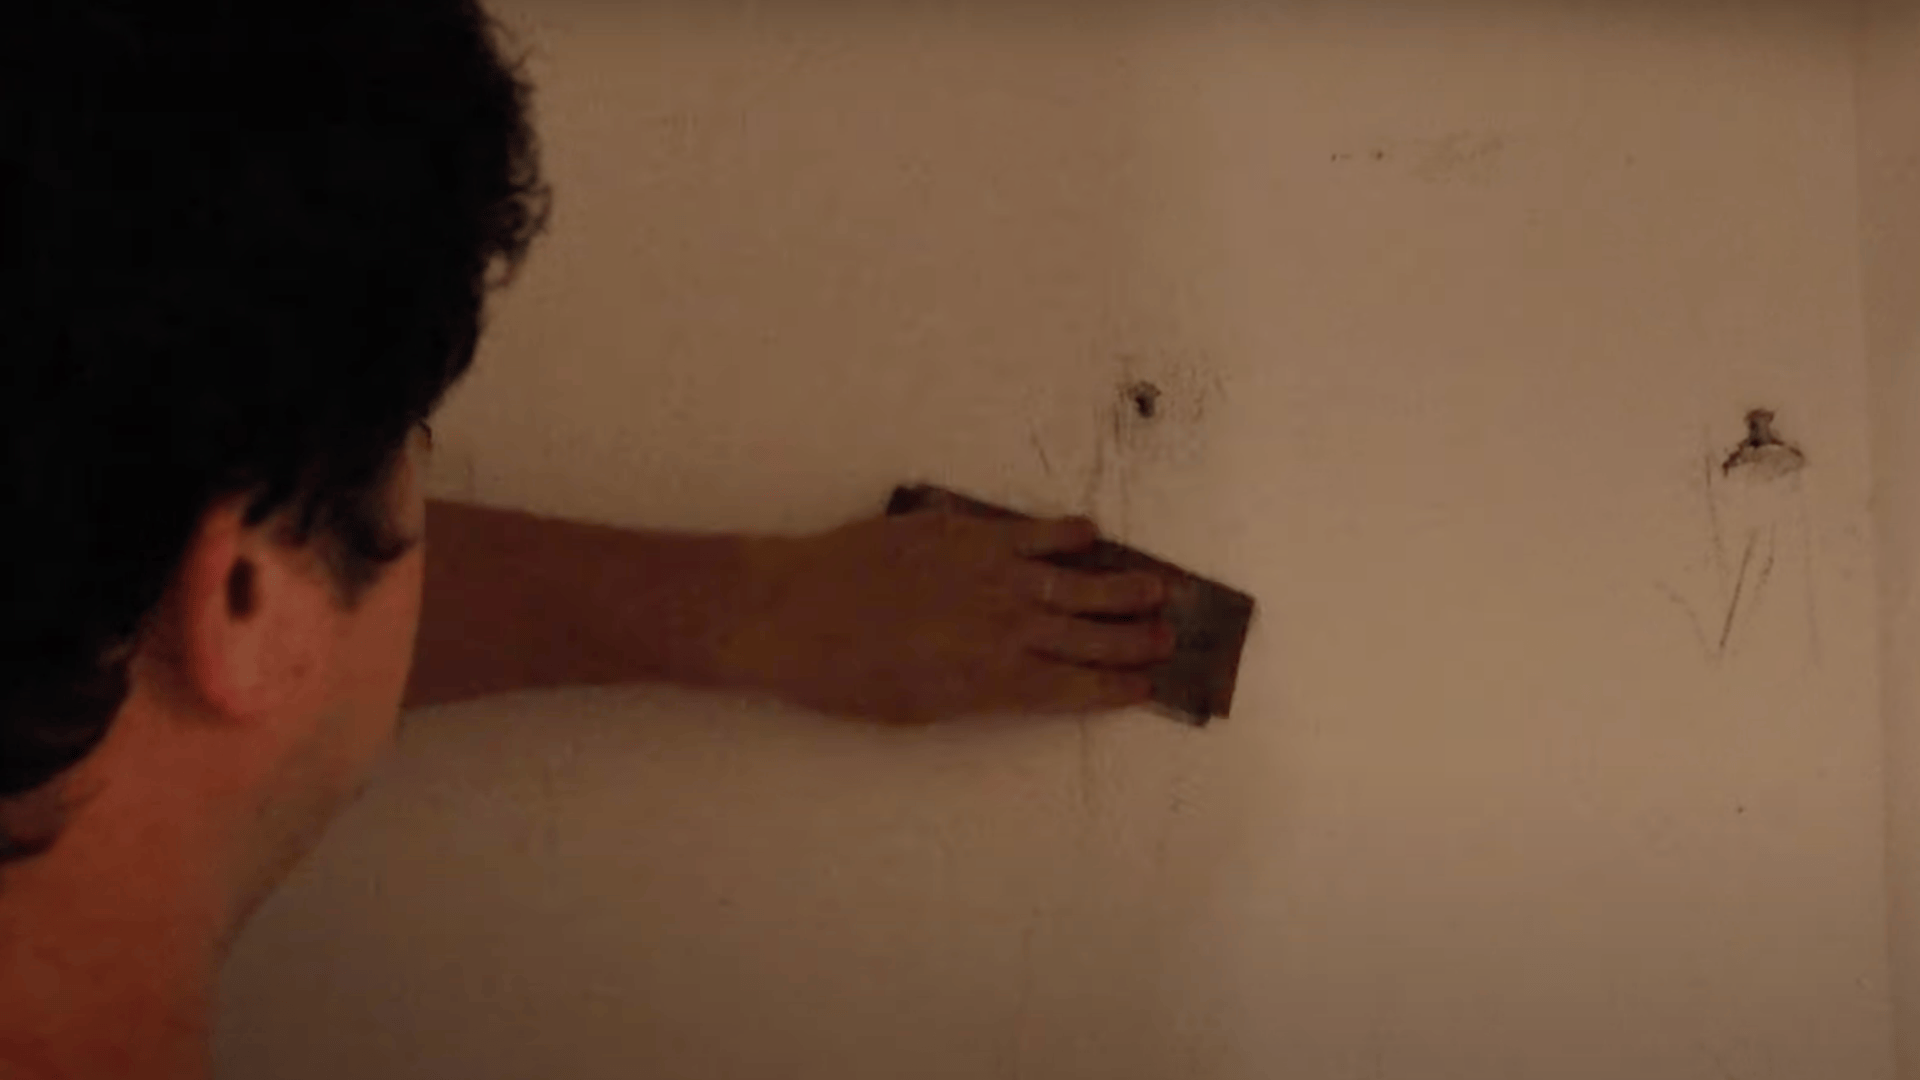
Once everything is removed, you’ll likely have some wall damage to repair.
For big holes, use joint compound and let it dry completely before sanding.
Smaller holes need just a dab of spackle.
After the patches dry, sand the walls until they feel smooth to the touch.
This prep work isn’t the most fun part, but it sets you up for success in the later steps.
Step 2 – Cut All Wood to Fit Your Corner Space
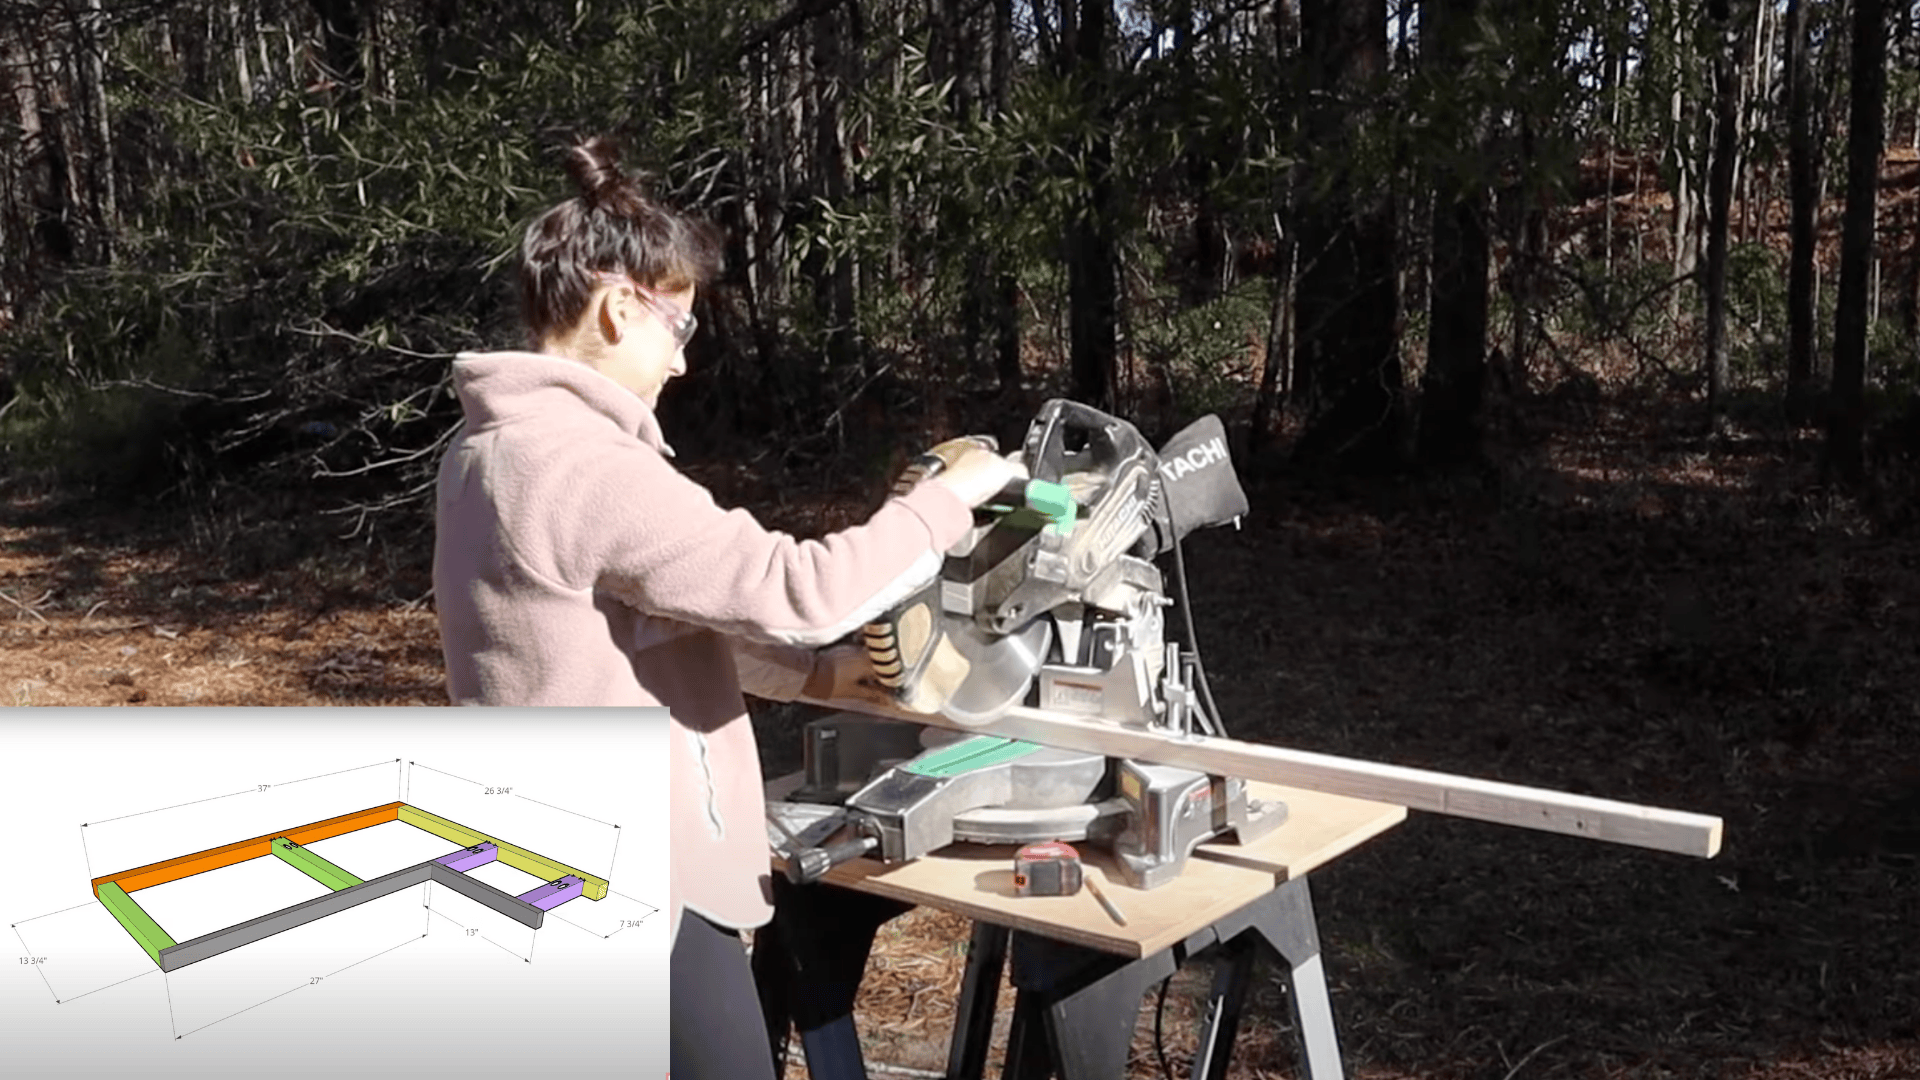
Now comes the part where your closet begins to take shape.
Grab your measuring tape and make a detailed plan of your space.
Remember that corners in most homes rarely form perfect 90-degree angles, so measure carefully.
Using your miter saw or circular saw, cut your shelves to the lengths in your plan.
Cut the 2×2 supports to match the depth of your shelves, and prepare trim pieces to conceal the shelf edges.
For a food pantry, consider staining your shelves instead of painting them.
Stain soaks into the wood, creating a surface that won’t chip like paint might.
Apply the stain evenly with a cloth, wiping off excess after a few minutes.
Once dry, seal the wood with polyurethane for a surface that’s easy to wipe clean in case of spills.
Take your time with this step – precise cuts now mean less trouble during assembly.
Step 3 – Install Wall Support Brackets
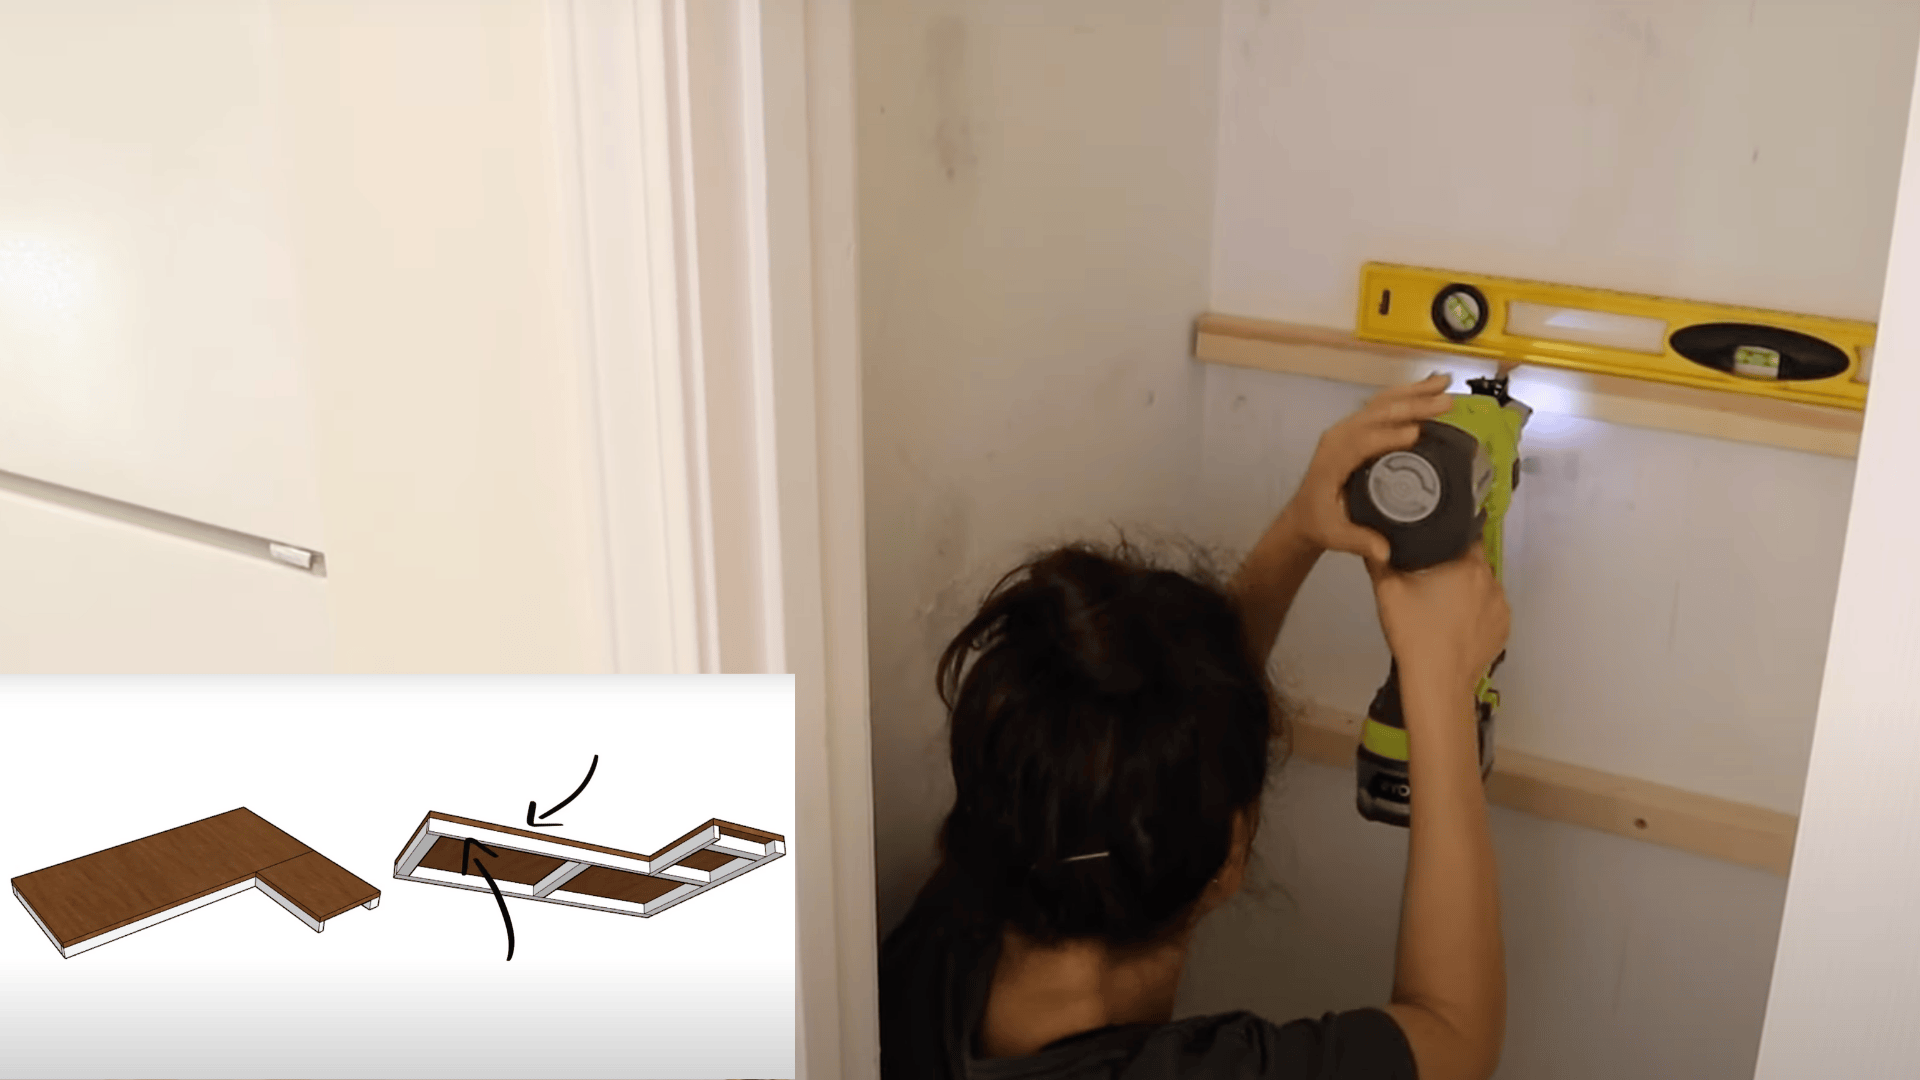
With your wood ready, it’s time to start building.
The support structure needs to be solid since it will hold the weight of your items.
First, mark the locations of each shelf on your walls.
Use a level to draw straight lines across both walls at each shelf height.
Next, find the studs in your walls using a stud finder.
Mark each stud location along your shelf lines.
Now attach your 2×2 supports to the walls, lining them up with your level lines.
Use 3.5″ screws to secure the brackets to studs.
For areas between studs, use wall anchors rated for the weight you plan to put on the shelves.
Double-check that each support is level before proceeding to the next one.
Step 4 – Add Middle Brackets and Paint

For wider shelves, you’ll need extra support in the middle to prevent sagging.
This is where pocket holes come in handy.
Drill pocket holes into your middle 2×2 supports.
These specially angled holes allow you to join pieces of wood securely.
Use a pocket hole jig if you have one; otherwise, carefully drill at an angle.
Attach these middle supports to your wall brackets using crank screws through the pocket holes.
Ensure everything remains level and square.
With all brackets in place, it’s time to prime and paint them.
White is a popular choice as it keeps the closet looking bright and clean, but choose any color that matches your home.
Apply primer first to help the paint stick better, especially if you’re using raw wood.
Step 5 – Install Shelves and Attach Trim
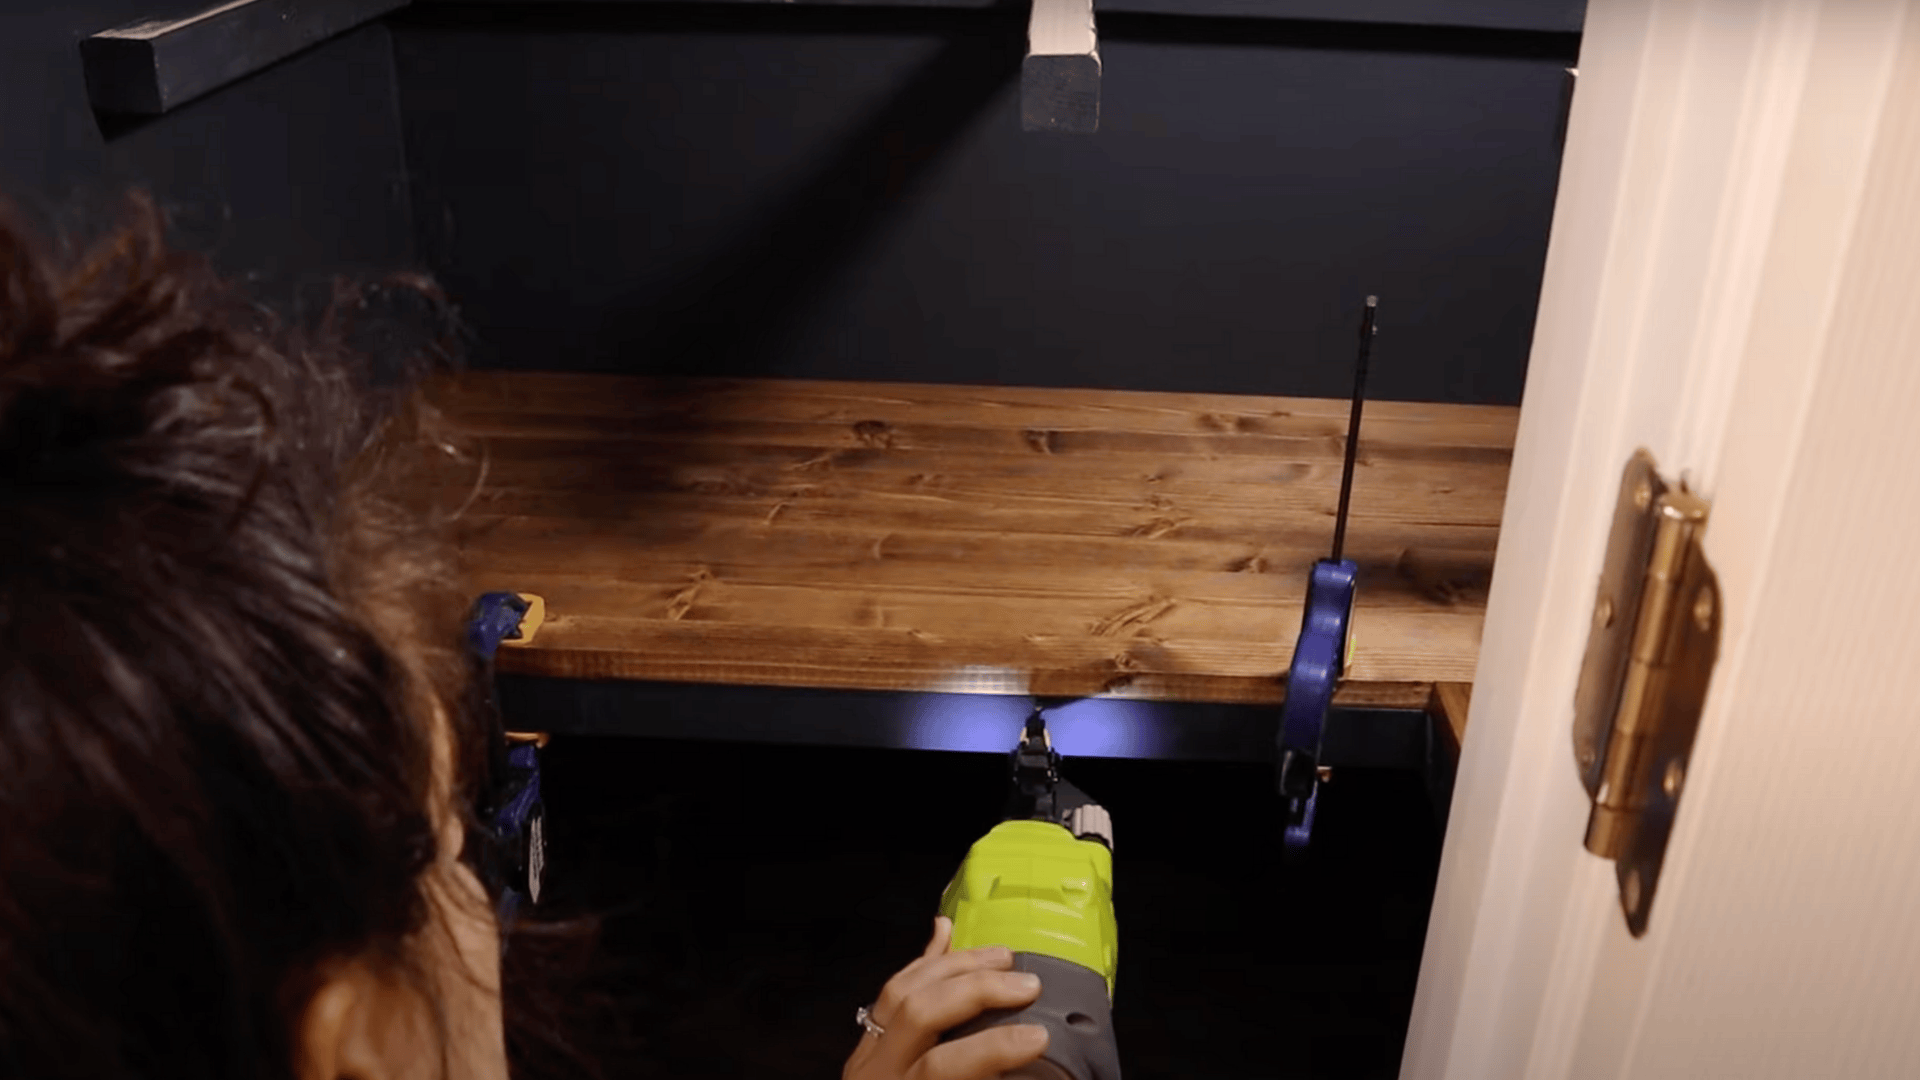
Now for the satisfying part – adding the shelves!
Place each shelf on top of its brackets, making sure it fits snugly in the corner.
Use Brad nails to secure the shelves to the brackets from above.
Once all shelves are in place, add the 1×2 trim to the front edges.
This trim conceals the raw edges of the shelves, giving your closet a finished, built-in appearance.
Cut the trim pieces with 45-degree angles at the corners so they meet neatly.
Attach them with brad nails.
To finish up, fill all nail holes with a small dab of spackle.
When dry, lightly sand these spots and touch up with paint to match.
Video Walkthrough: See How Experts Do It!
For more information, check out this video tutorial by Angela Marie Made
Common Mistakes to Avoid in a DIY Closet Build
Even careful planners can slip up when building their first closet.
Knowing these common pitfalls ahead of time saves you headaches and do-overs.
- Forgetting to account for trim thickness when measuring shelf depth.
- Skipping stud mounting and using wall anchors that can’t handle the weight.
- Rushing measurements – always check twice before cutting your wood.
- Not keeping shelves level throughout the building process.
- Skimping on finishing touches, such as filling nail holes and sanding edges.
Taking time to avoid these mistakes will result in a corner closet that looks professional, not homemade.
Your friends might even think you hired someone to build it, even if this is your first woodworking project.
Maintenance and Long-term Care
Your accessible home grows with you over time.
Schedule monthly inspections of critical features, such as ramps, grab bars, and lighting systems, and make it a family activity to ensure consistency.
Clean non-slip surfaces weekly and test emergency alert systems quarterly.
Maintain a log to track wear patterns and identify replacement needs.
As your mobility or vision changes, proactively adjust your environment.
Relocate frequently used items, add task lighting where needed, or modify counter heights.
Consider seasonal adjustments as well, such as extra lighting during shorter winter days or temporary cooling solutions for summer comfort.
What accessibility features in your current space do you think would benefit from more regular attention or updates?
Wrapping It Up
You’ve now got all the skills to turn any empty corner into valuable storage space.
Your new corner closet not only solves storage problems but adds real value to your home.
The best part?
You made it yourself, saving hundreds while creating something exactly how you wanted it.
Remember that careful measuring and taking your time with the small details separates amateur-looking projects from professional results.
Those extra few minutes spent double-checking measurements and properly finishing edges will make people wonder if you secretly hired a contractor.
Start small if you’re nervous, even a simple corner shelf unit builds your confidence for bigger projects later.
Now find that empty corner and make it count!