The moment you step through your front door should feel like a sigh of relief, not a stumble through scattered shoes and dropped bags.
Yet for most homes, that transition space becomes a daily battleground of clutter.
What if just one weekend of work could solve this problem for good?
A handmade mudroom creates order from chaos without breaking the bank.
Using simple materials like plywood and basic tools, you can build custom storage that perfectly fits your family’s needs.
No more morning hunts for keys or gloves.
No more piles of shoes to trip over.
Just a clean, organized entry that makes coming home a pleasure while adding real value to your property.
Get ready to claim control of your entryway and make everyday arrivals and departures smoother for everyone.
Why Build a DIY Mudroom?
Let’s discuss that transitional area where the outside meets the inside.
You know the one, where shoes pile up, coats get tossed, and bags end up on the floor.
What if you could fix this problem area once and for all?
A homemade mudroom turns chaos into order.
It’s your home’s first line of defense against daily clutter.
Instead of jackets on chairs and boots making puddles on your good floors, everything gets its own spot.
The best part?
Sitting on your own built-in bench while you put on your shoes, instead of hopping around on one foot.
It’s a small joy that makes mornings run smoother.
Building your own mudroom lets you customize it exactly for your family’s needs.
Tall hooks for dad’s coat.
Lower ones for the kids.
It’s all up to you!
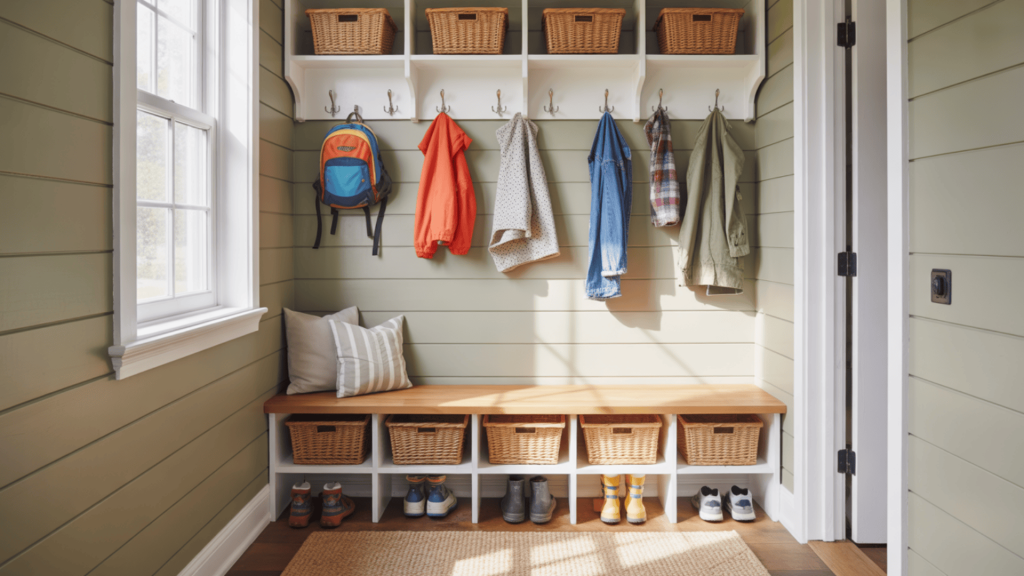
Essential Features to Include
Creating the perfect DIY mudroom means including six key features that work together to keep your family organized. These aren’t just nice-to-have additions – they’re the backbone of a functional space that actually gets used every day.
- Seating or bench – Provides a comfortable spot to put on shoes and boots while offering hidden storage underneath for seasonal items.
- Hooks and racks – Keep coats, bags, and backpacks off the floor with sturdy wall-mounted hooks placed at different heights for kids and adults.
- Shoe storage – Prevents muddy footwear from tracking through your house with cubbies, boot trays, or simple wooden shelves.
- Cubbies or cabinets – Create personal storage zones for each family member to stash gloves, hats, sports equipment, and school supplies.
- Message board or chalkboard – Stay connected with family schedules, reminders, and important notes in one central location that everyone can see.
- Durable flooring – Choose waterproof materials like tile or vinyl that can handle wet boots, muddy paws, and daily wear without damage.
Pro tip: Start with these six essentials, then add decorative touches like baskets or plants to make your mudroom feel welcoming rather than purely functional.
Tools & Materials You’ll Need
Before starting your mudroom project, gather all the necessary materials.
Having the right tools and materials ready will make the building process much smoother.
Tools You’ll Need
| TOOL TYPE | WHAT YOU’LL NEED |
|---|---|
| Cutting tools | Circular saw, table saw, router |
| Assembly tools | Drill, pocket hole jig, clamps, nail gun |
| Finishing tools | Sanding supplies, caulk gun |
Materials You’ll Need
| MATERIAL TYPE | WHAT YOU’LL NEED |
|---|---|
| Wood products | Plywood (¾” & ¼”), trim boards, butcher block |
| Hardware | Drawer slides, hinges, brackets, screws |
| Finishing supplies | Wood glue, filler, primer, paint |
Buy materials with a bit extra to allow for mistakes.
It’s better to have some left over than to stop work for another trip to the store.
NOTE: Don’t forget to bring safety equipment (e.g., goggles, gloves, dust mask) if it hasn’t already been planned.
A Step-by-Step DIY Mudroom Building Guide
This project may seem large, but when broken down into manageable steps, it becomes much more manageable.
You’ll be making five main components: two tall cabinets, overhead storage, a bench, and finishing touches.
Let’s begin with the project’s backbone.
Step 1: Build the Tall Storage Cabinets
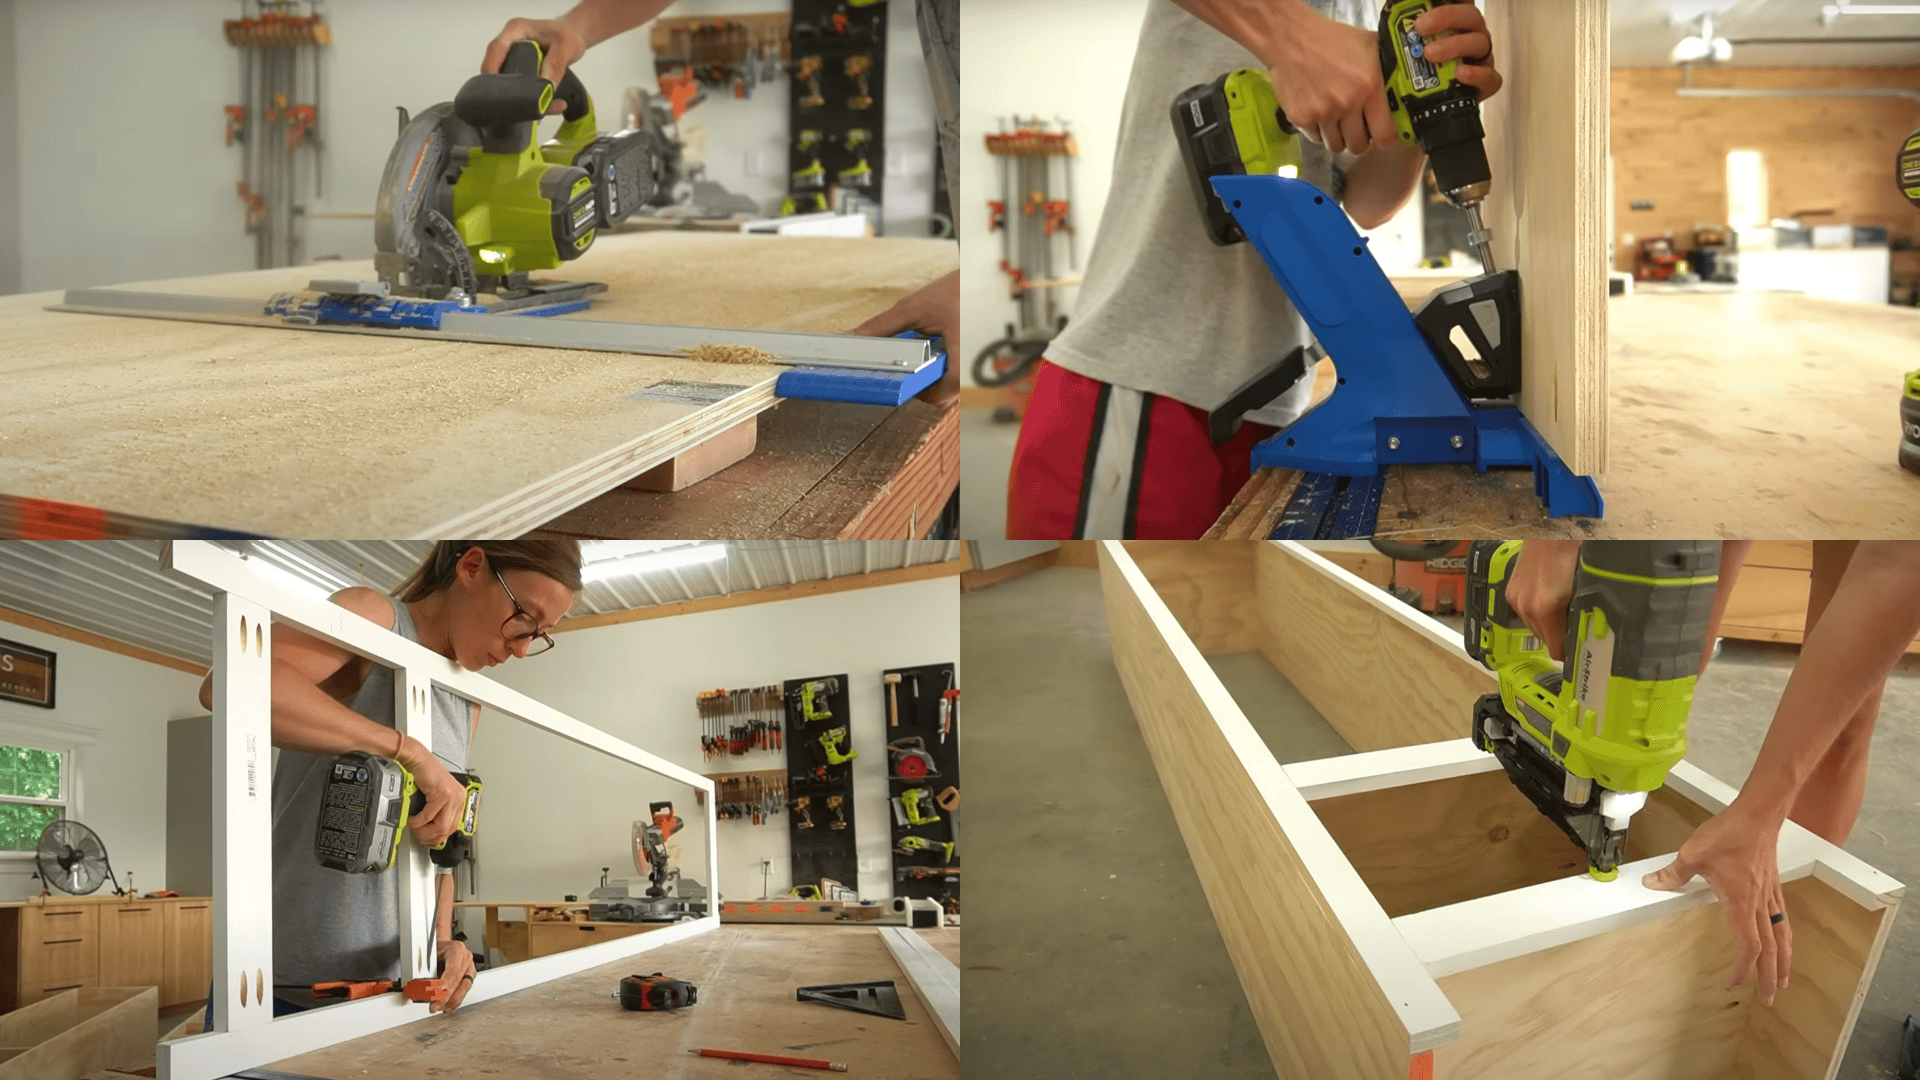
The tall cabinets store coats, cleaning supplies, and other items you want out of sight.
Cut plywood for two 94″ tall cabinets.
This height works well with standard 8′ ceilings, leaving space for crown molding while creating a built-in look.
Join the cabinet boxes with pocket holes and screws for strong, hidden connections.
Add toe kicks at the bottom so you can stand comfortably closer to the cabinets.
Install back support strips at the top and bottom.
Create face frames from 1×2, 1×3, and 1×4 boards.
These provide a finished look and serve as a surface for door attachment.
Glue and nail them to the cabinet fronts.
Build drawers with even spacing using blocks as guides.
For doors, make frames from 1x3s joined with dowels, then add plywood panels in the center.
Step 2: Create the Overhead Cubbies
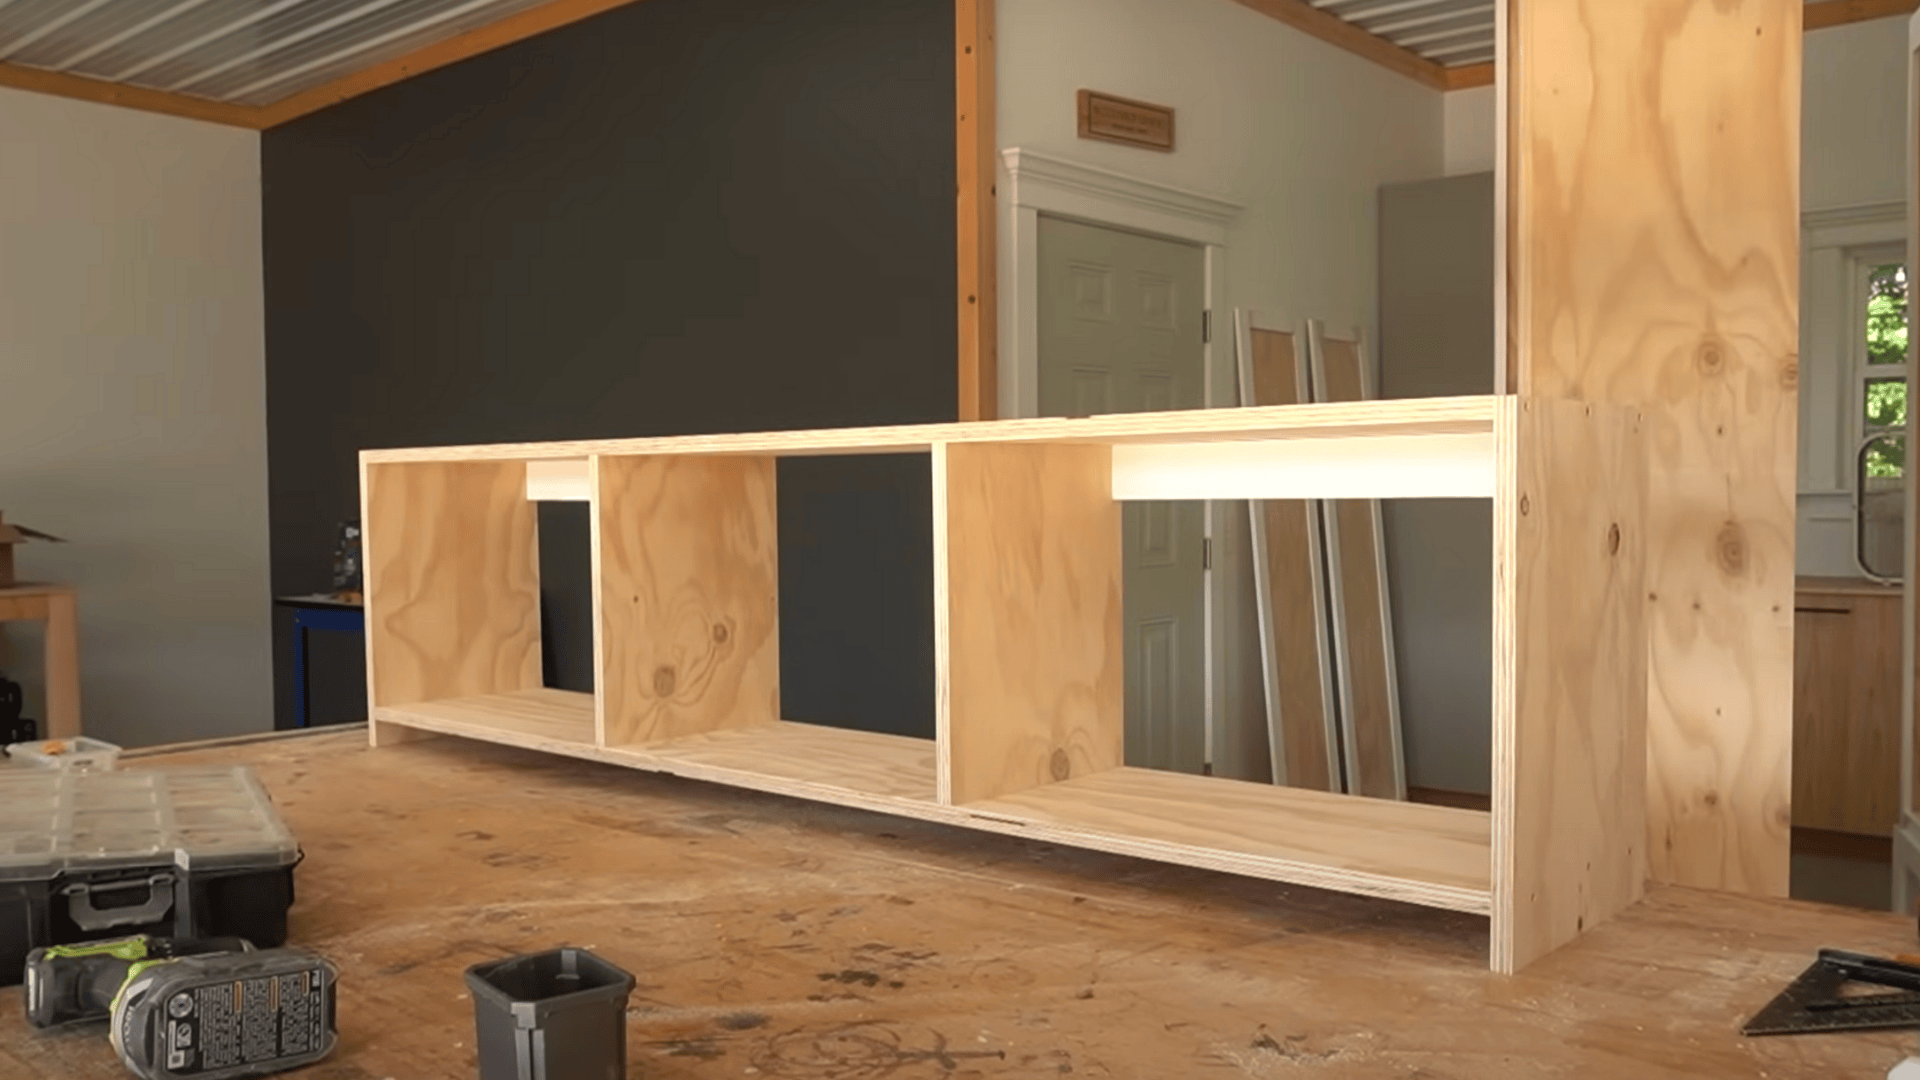
The upper cubby unit offers open storage for frequently used items.
Cut and assemble a 6-foot-wide unit with two dividers to create three equal sections.
Use face screws instead of pocket holes for a cleaner interior finish, as these areas will be visible.
Install back support strips to secure the unit to the wall.
This prevents any chance of tipping forward when loaded with items.
Attach a 1×3 face frame to the front for a more finished, professional look.
Sand all edges so they’re smooth and splinter-free when you reach for items.
This simple structure provides valuable storage without occupying floor space, making it ideal for hats, gloves, and other small items that often get misplaced.
Step 3: Assemble and Install the Bench Seat
The bench might be the most useful feature in your mudroom.
It provides a place to sit while putting on shoes and adds extra storage below.
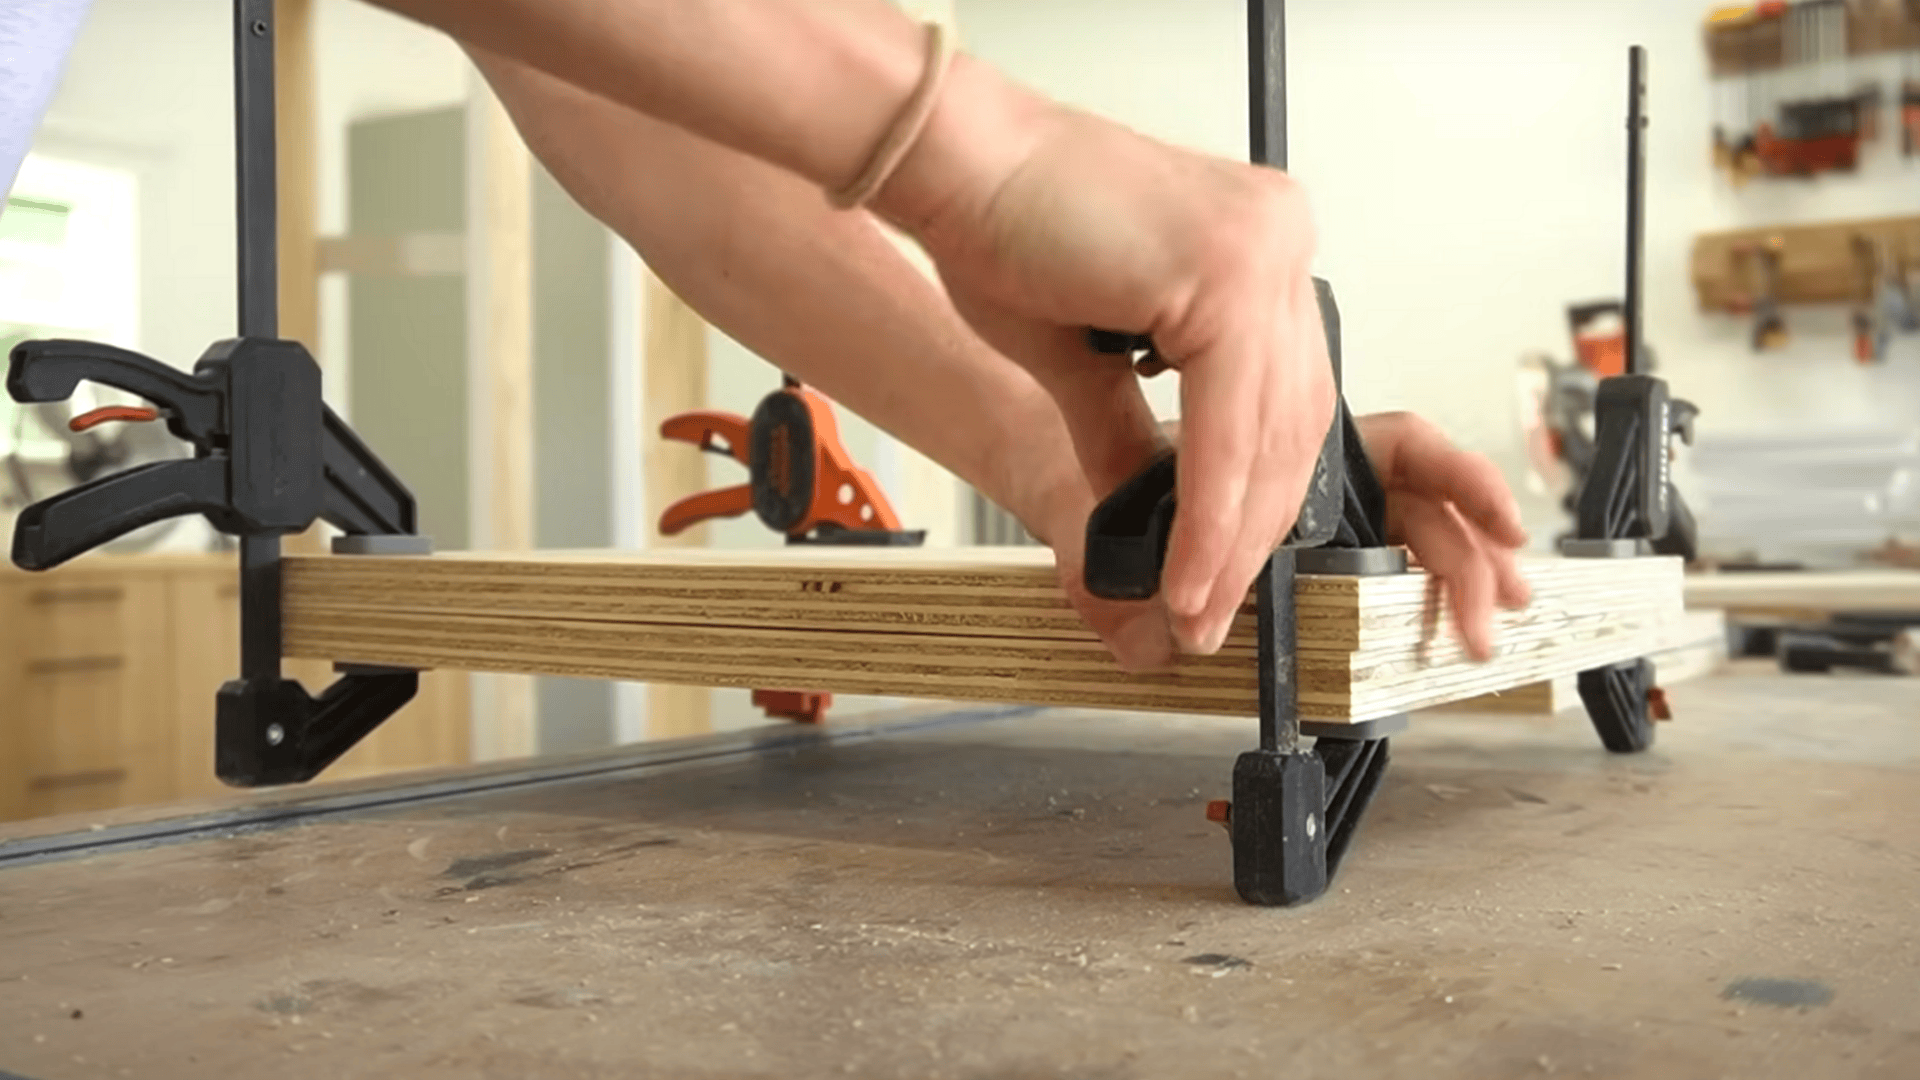
Build four support blocks from layers of glued plywood.
These create strong bases that won’t bend under weight even after years of use.
Add 1×3 trim to the front of each support for a finished look that hides the raw plywood edges.
Cut a 74-inch butcher block to fit your space.
This natural wood top adds warmth and is designed to withstand daily use.
Secure it with figure-eight brackets that allow for natural wood movement with seasonal changes.
Keep the space under the bench open for shoes or baskets.
This design makes floor cleaning easier and provides flexible storage options that adapt to your changing needs.
Step 4: Paint, Prime, and Prep for Assembly

This step requires patience but makes the difference between a professional and amateur-looking result.
Sand all surfaces smooth and fill nail holes with wood filler.
Slightly round, sharp edges for safety and comfort.
Prime raw plywood surfaces – most trim boards come pre-primed.
Apply two coats of paint for complete coverage and better durability.
Allow everything to dry fully before final assembly.
Rushing can cause smudges or sticking.
Give it at least 24 hours, especially in humid conditions.
Taking the time with this step ensures your mudroom will look good for years to come, with a smooth, durable finish that withstands daily use.
Step 5: Final Installation and Finishing Touches
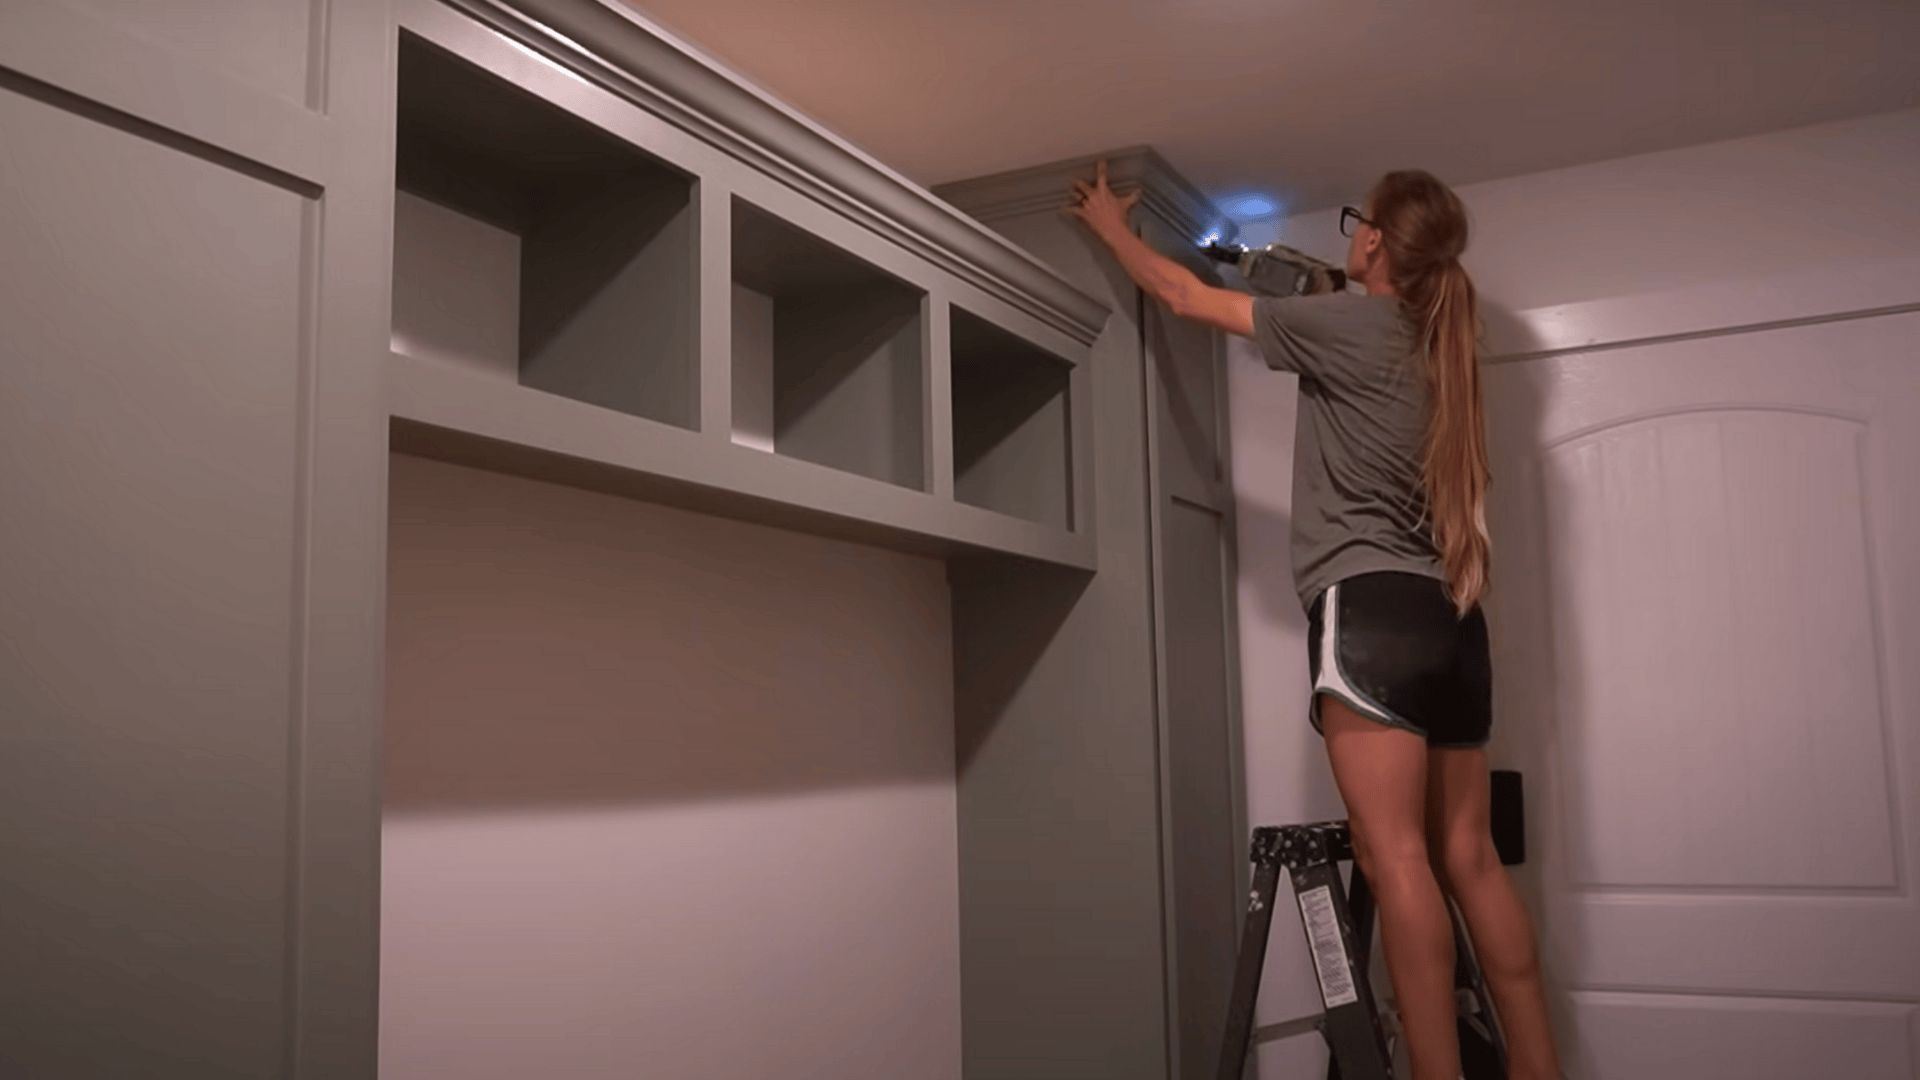
On installation day, start by securing one tall cabinet to the wall.
Check that it’s perfectly level and plumb before attaching.
Install one bench support next to the cabinet, then place the bench top, checking again to ensure it is level.
Position the upper cubbies using a scrap wood guide to maintain consistent spacing above the bench.
Secure them to the wall studs through the back supports.
Attach the second tall cabinet to complete the frame.
Add adjustable shelves to customize the interior storage based on your needs.
Mount doors and drawers, taking time to adjust hinges and slides for smooth operation.
Finish with crown molding and baseboards for a built-in appearance.
Smart Tip: Add hooks, a small shelf for keys, or other accessories that make the space work for your family’s specific habits and needs.
Video Walkthrough – See How Experts Do It!
For more information, check out this video tutorial by Shara Woodshop Diaries
Mudroom Decor Inspiration
Transform your mudroom from purely functional to fabulous with thoughtful design choices that reflect your family’s personality. The right decor makes everyone excited to use this hardworking space while keeping it organized and welcoming.
Color schemes and finishes – Choose cheerful colors like navy blue, sage green, or warm gray that hide dirt while creating an inviting atmosphere with matching hardware
Personalized signs or labels – Add custom family name signs, fun chalkboard labels for each cubby, or motivational quotes that make kids smile every morning
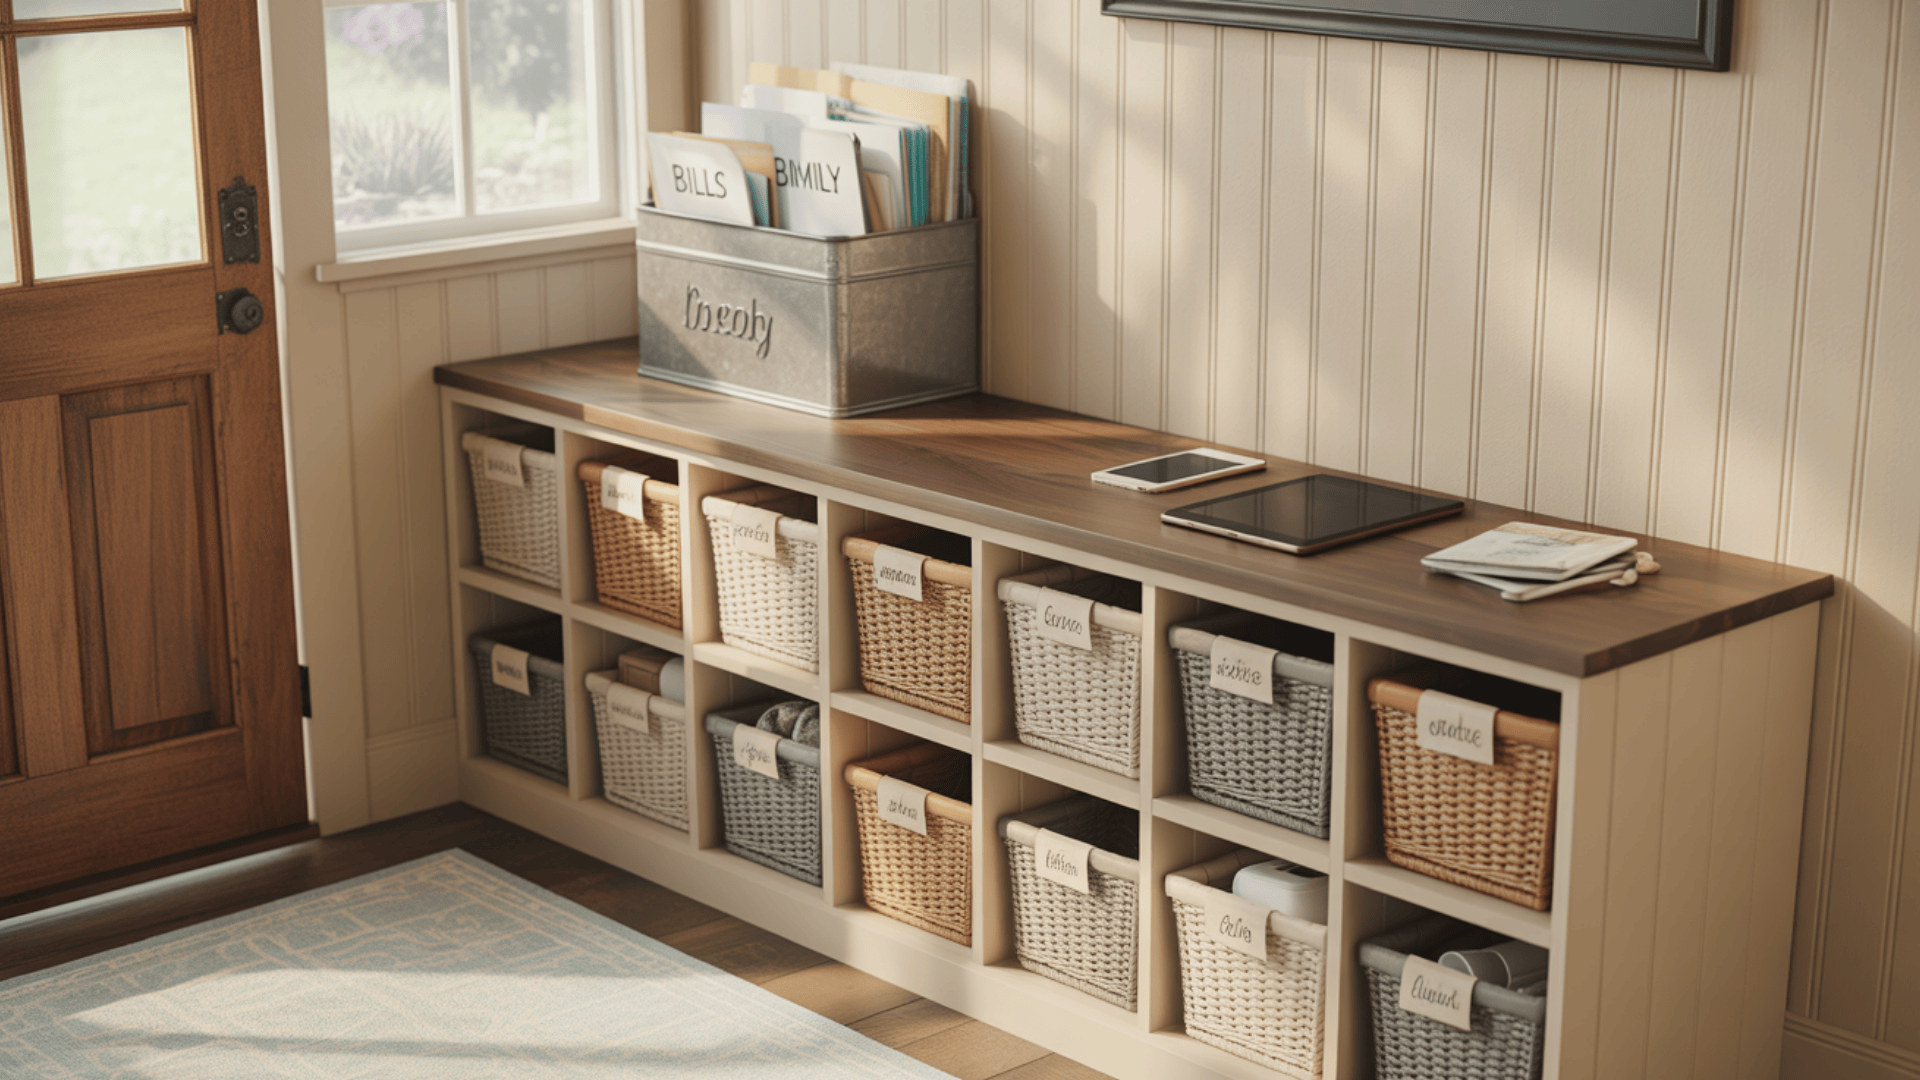
Functional decor (mirrors, rugs, baskets) – Include a mirror for last-minute appearance checks, washable rugs for comfort, and stylish baskets that corral loose items beautifully
STYLE TIP: Mix practical pieces with personal touches to create a mudroom that works hard but looks amazing!
Tips for Customizing Your Mudroom
Your mudroom should cater to your specific family’s needs.
Here are some ways to make it truly yours:
- Place baskets in cubbies to organize small items and seasonal gear, and add labels so everyone knows where to put their belongings.
- Select hardware that complements your home’s style, such as brass for traditional rooms or black for more modern spaces.
- Install beadboard or shiplap on the back wall to add texture and make your mudroom feel more custom-built.
- Create a small charging area on a shelf to keep phones and tablets off the floor and in one place.
- Set up a mail sorter near the entrance to stop paper clutter from spreading through your house.
These small touches make your mudroom more functional and uniquely yours.
The best part is that you can easily update these elements over time as your needs change.
Maintenance Tips for Your Mudroom
A well-maintained mudroom remains functional and welcoming throughout the year.
The key is to establish simple routines that prevent clutter from accumulating and keep everything fresh and clean.
Easy-clean materials – Choose wipeable surfaces like laminate shelves and washable storage bins that you can quickly spray down and dry
Weekly decluttering habits – Spend 10 minutes every Sunday removing items that don’t belong and putting everything back in its designated spot
Seasonal organization updates – Swap out heavy winter coats for light jackets in spring, and rotate boots for sandals to keep storage relevant
Odor control (especially for shoes) – Place dryer sheets in shoe cubbies, use cedar blocks, or sprinkle baking soda in boots overnight
NOTE: Remember, A few minutes of maintenance each week saves you from spending hours deep-cleaning a chaotic mudroom later!
Wrapping It Up
Your new mudroom will quickly become the hardest-working spot in your house.
Beyond keeping clutter at bay, it creates a smooth transition between outdoor chaos and indoor calm.
The beauty of making it yourself means it perfectly fits your space and meets your family’s unique needs.
As seasons change, you’ll appreciate having a dedicated spot for winter boots or summer sports gear.
Friends will notice the polished look, and you’ll enjoy the daily ease of everything having its place.
So grab those tools, set aside a weekend, and build something that makes every homecoming better.
Your organized, custom-built mudroom awaits!
Which custom feature would make your perfect mudroom?
A charging station, extra hooks, or something else?
Share your must-have element below!