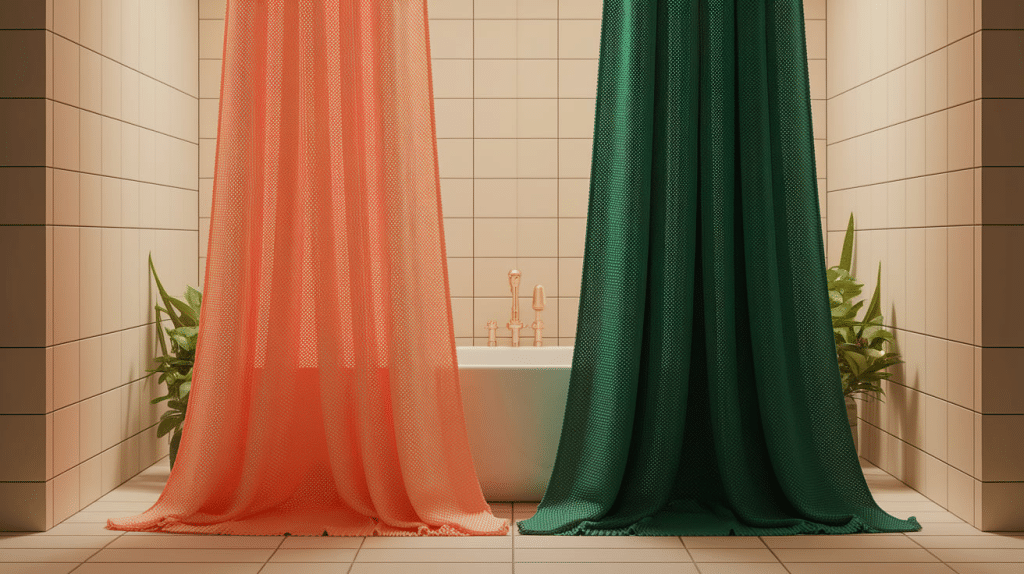
Creating a custom shower curtain blends functionality and personal style to enhance your bathroom’s design.
DIY curtains let you choose fabrics that perfectly complement your space’s color scheme and aesthetic.
This simple project requires little sewing skill but delivers stunning, professional results.
Using water-resistant fabrics ensures durability in the humid bathroom environment.
Basic supplies like fabric, scissors, and thread are all you need, with optional grommets for added flair.
The project can be completed in a few hours, making it a quick yet rewarding task.
Adding your personal touch to the bathroom is both satisfying and unique, unlike mass-produced options.
Shower Curtains
Shower curtains are essential bathroom accessories that prevent water from splashing onto your floor.
They come in various materials, including vinyl, polyester, cotton, and eco-friendly options like PEVA.
Choose waterproof fabrics for better longevity and mildew resistance.
Decorative shower curtains can transform your bathroom’s appearance with minimal investment.
Regular cleaning helps prevent mold growth and extends the life of your curtain.
Most shower curtains include reinforced holes for easy hanging with standard shower hooks.
Consider adding a liner behind fabric curtains for extra protection against moisture.
Modern designs feature weighted hems to prevent billowing during hot showers.
Measurement is crucial before purchasing to ensure proper coverage of your shower area.
Many retailers offer matching accessories to create a coordinated bathroom look.
Essential Materials & Tools for DIY Shower Curtain
Here’s a quick summary of the essential tools and materials you’ll need to make your own shower curtain:
| Item | Purpose/Use |
|---|---|
| Outdoor Fabric (5 yards) | Main material, mold and mildew resistant |
| Scissors | For cutting fabric to size |
| Ruler | To measure fabric dimensions accurately |
| Thread | For stitching panels and hems |
| Fabric Marker | To mark cutting lines and grommet placements |
| Pins | To hold fabric in place while sewing |
| Iron | For pressing hems and folds |
| Sewing Machine | To sew hems, seams, and possibly buttonholes |
| Grommets or Eyelets (12) | For curtain hanging; optional if using buttonholes |
| Hammer & Grommet Setter | For setting grommets securely into place |
PRO TIP: Use outdoor polyester fabric for a professional finish—it resists moisture and lasts longer in humid bathroom conditions.
DIY Shower Curtains: Step-by-Step Guide
A custom shower curtain transforms your bathroom with personal style while being surprisingly simple to create.
With basic sewing skills and a few supplies, you can design a shower curtain that perfectly complements your decor.
The following steps will guide you through the process from selecting fabric to adding the finishing touches.
1. Measure and Cut Your Fabric
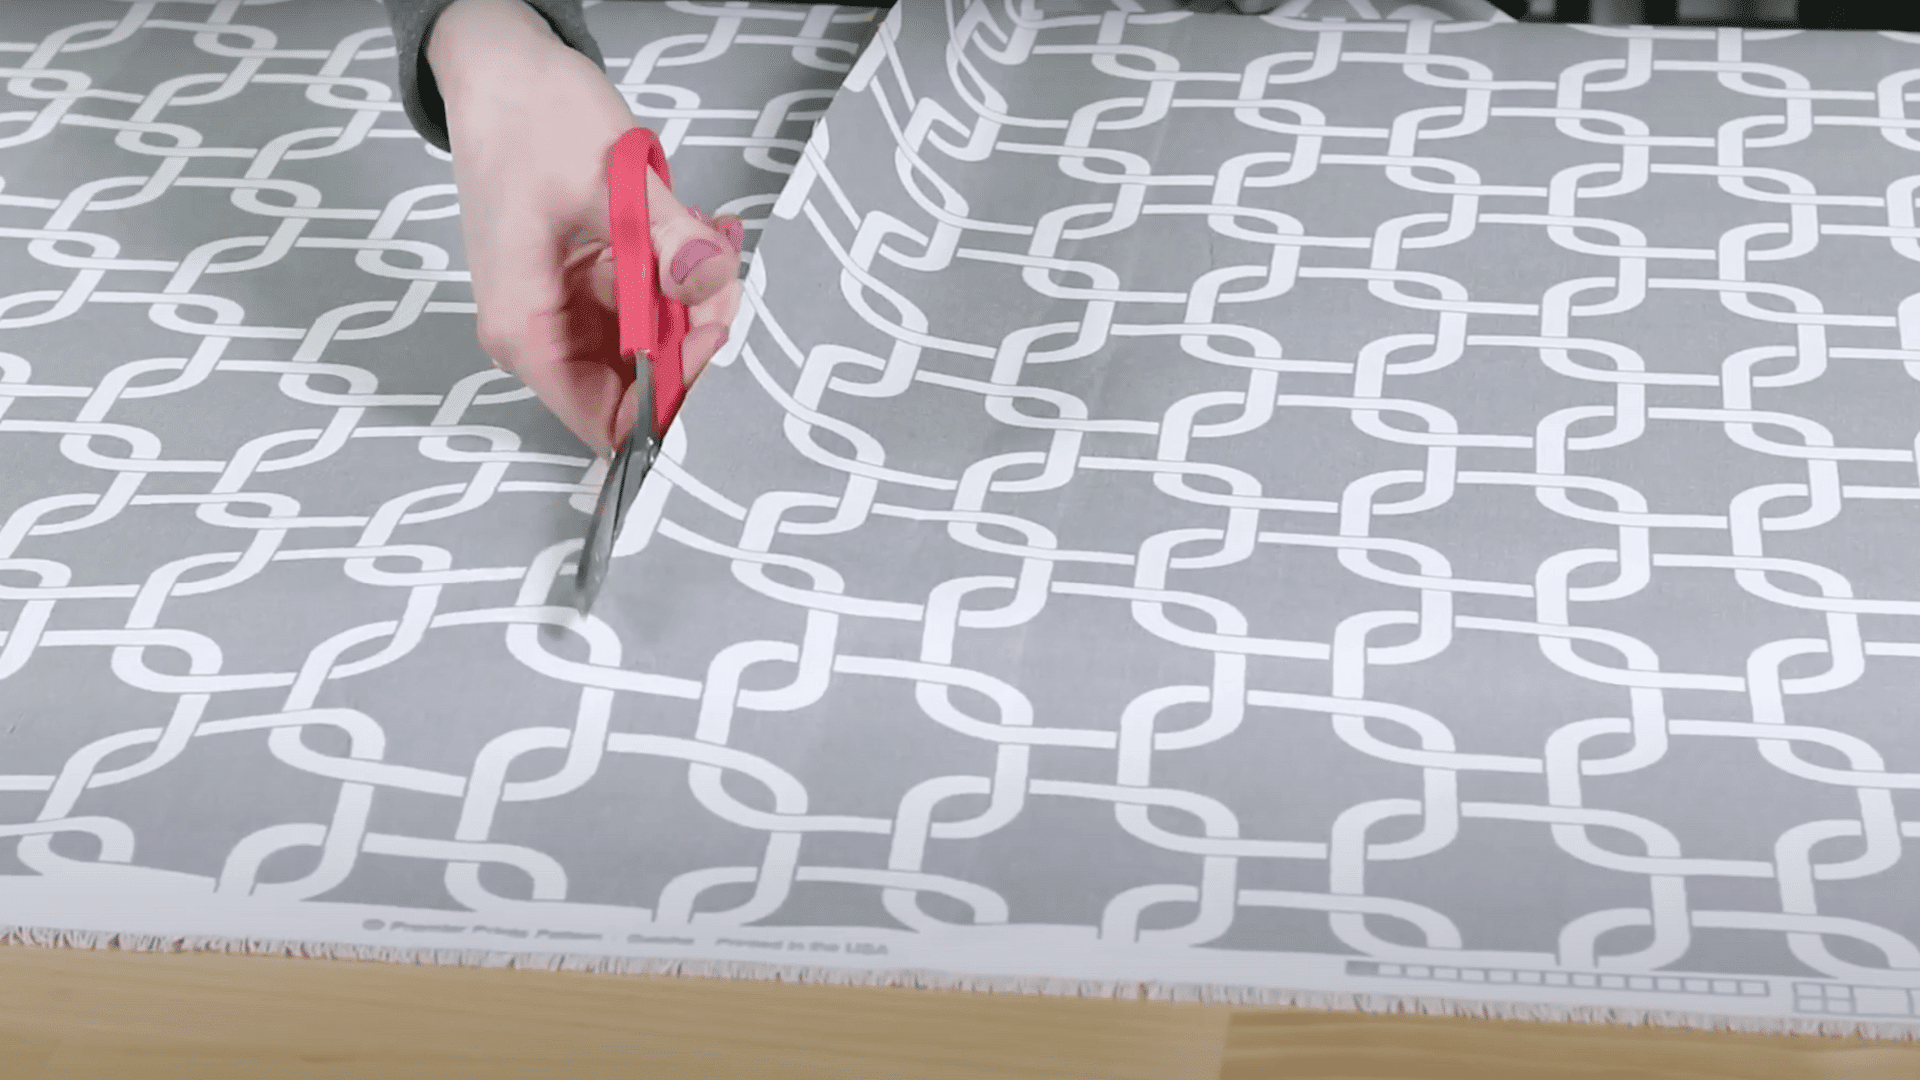
Start by measuring your desired curtain length and add 12 extra inches for hems.
A standard shower curtain is 72 inches square. Cut fabric to 84 inches long or adjust for your preference.
If the fabric is narrow, you’ll need to piece multiple panels. Use two equal pieces or a center panel with side panels.
Always include seam allowances and hem margins when calculating cut size.
2. Sew the Side Hems
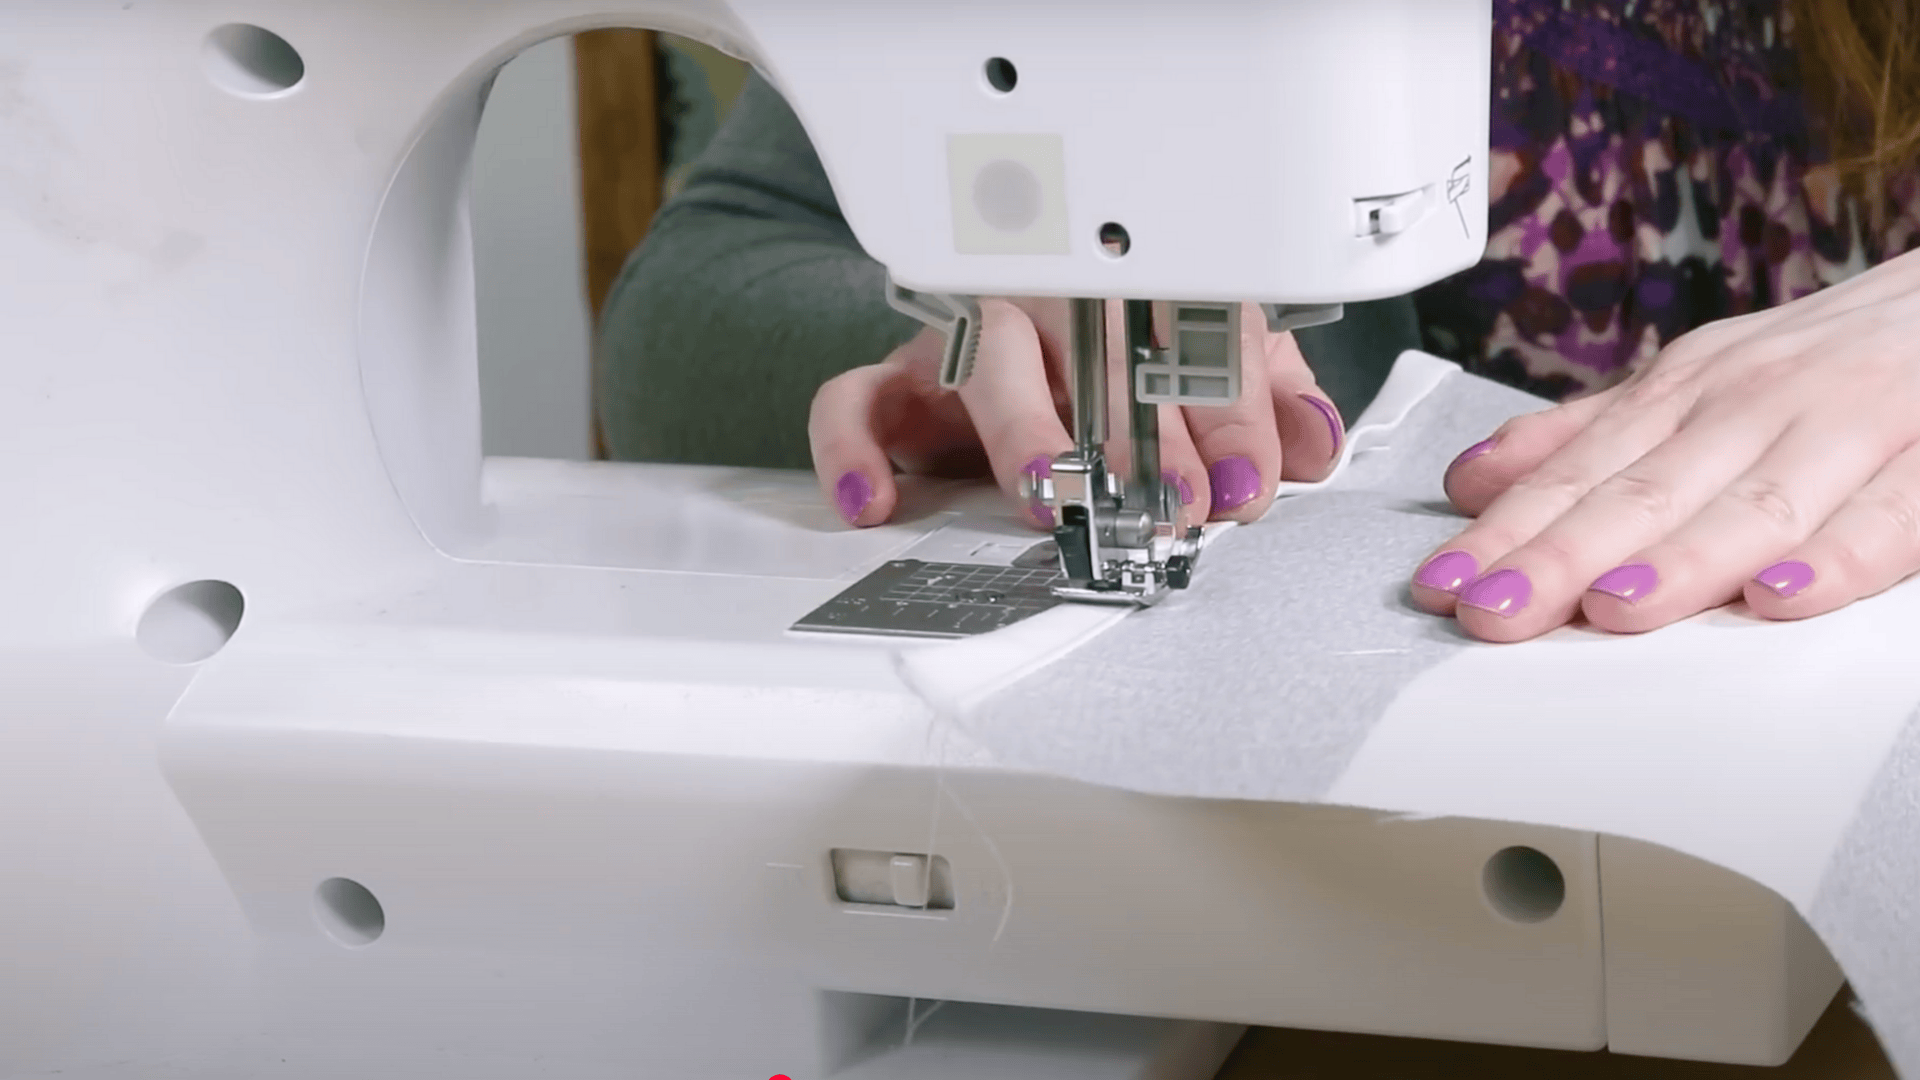
Iron the side edges by folding them over ½ inch twice. This helps prevent fraying and gives a clean finish.
Sew close to the inner fold for a professional look.
Repeat for both side panels before attaching them to the center panel. If working with outdoor polyester fabric, use the polyester setting on your iron.
Press folds well before sewing to keep hems neat.
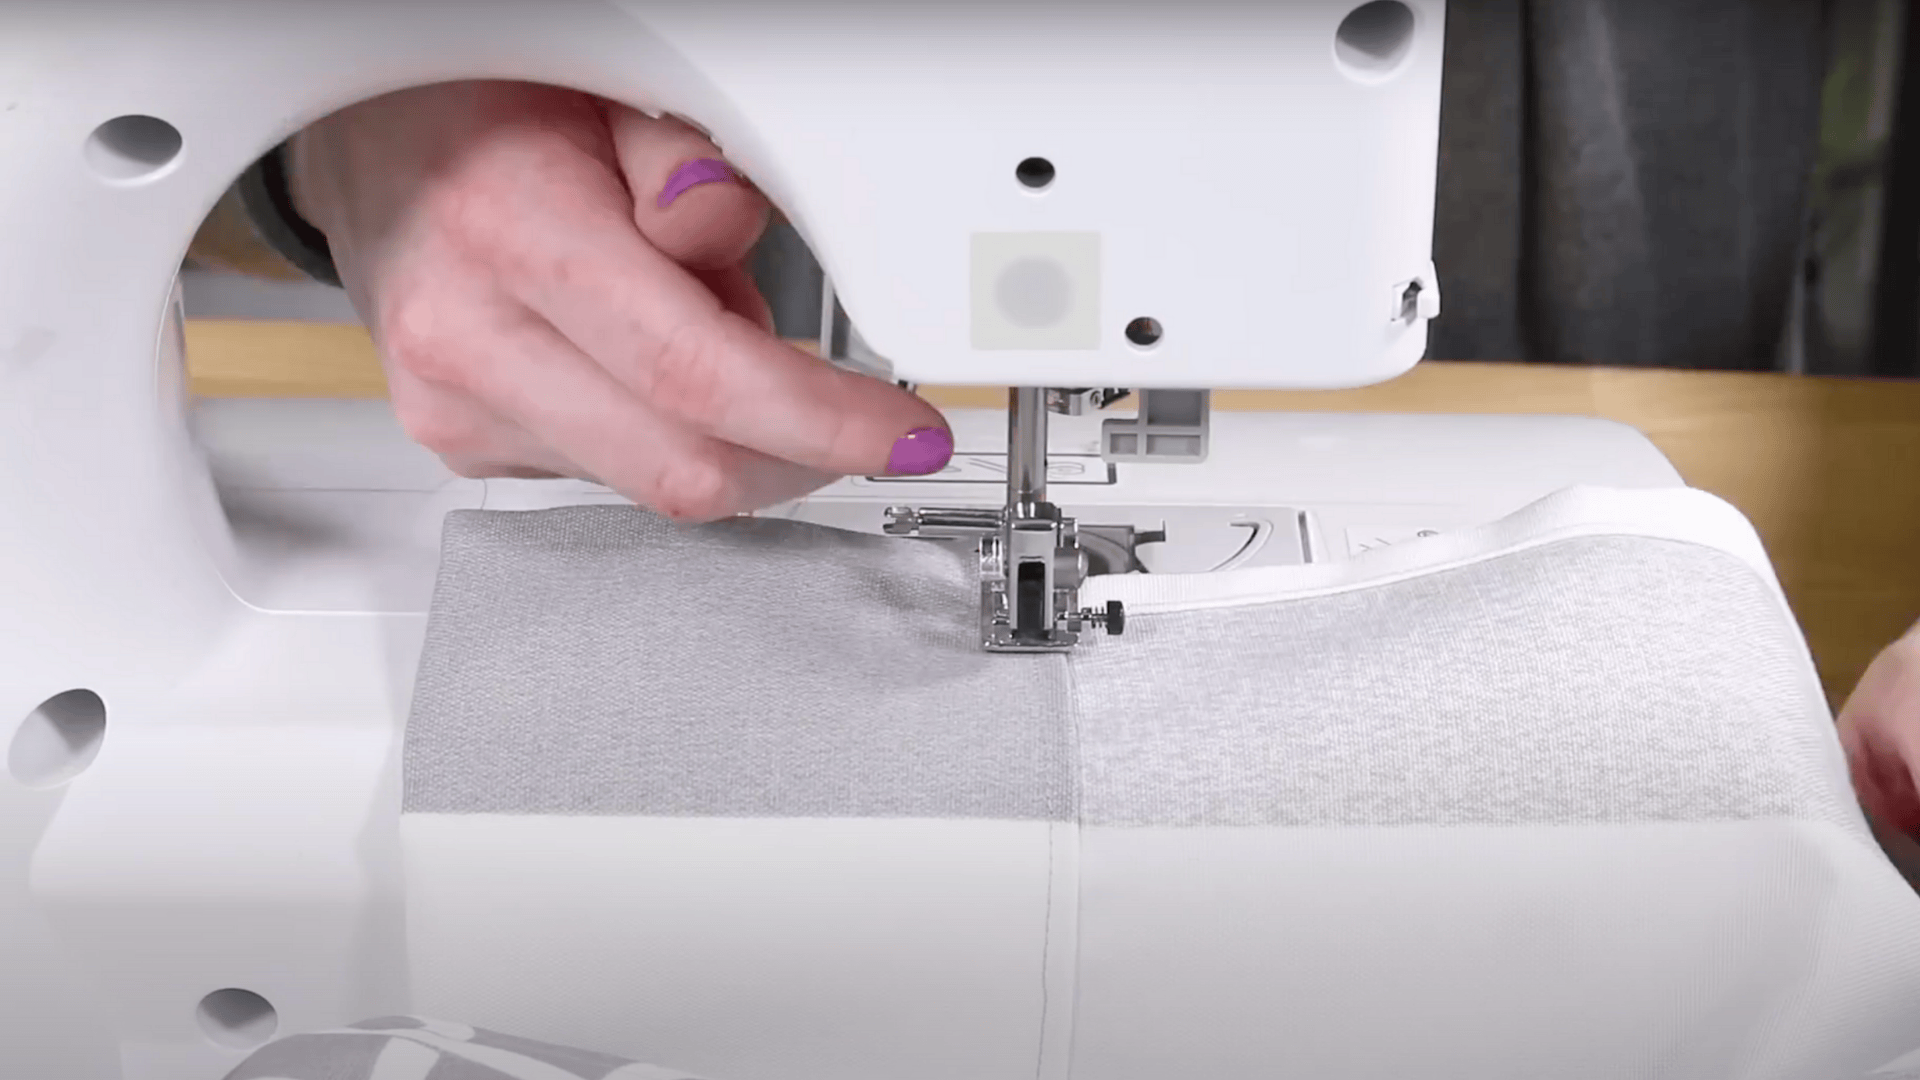
3. Join Panels Together
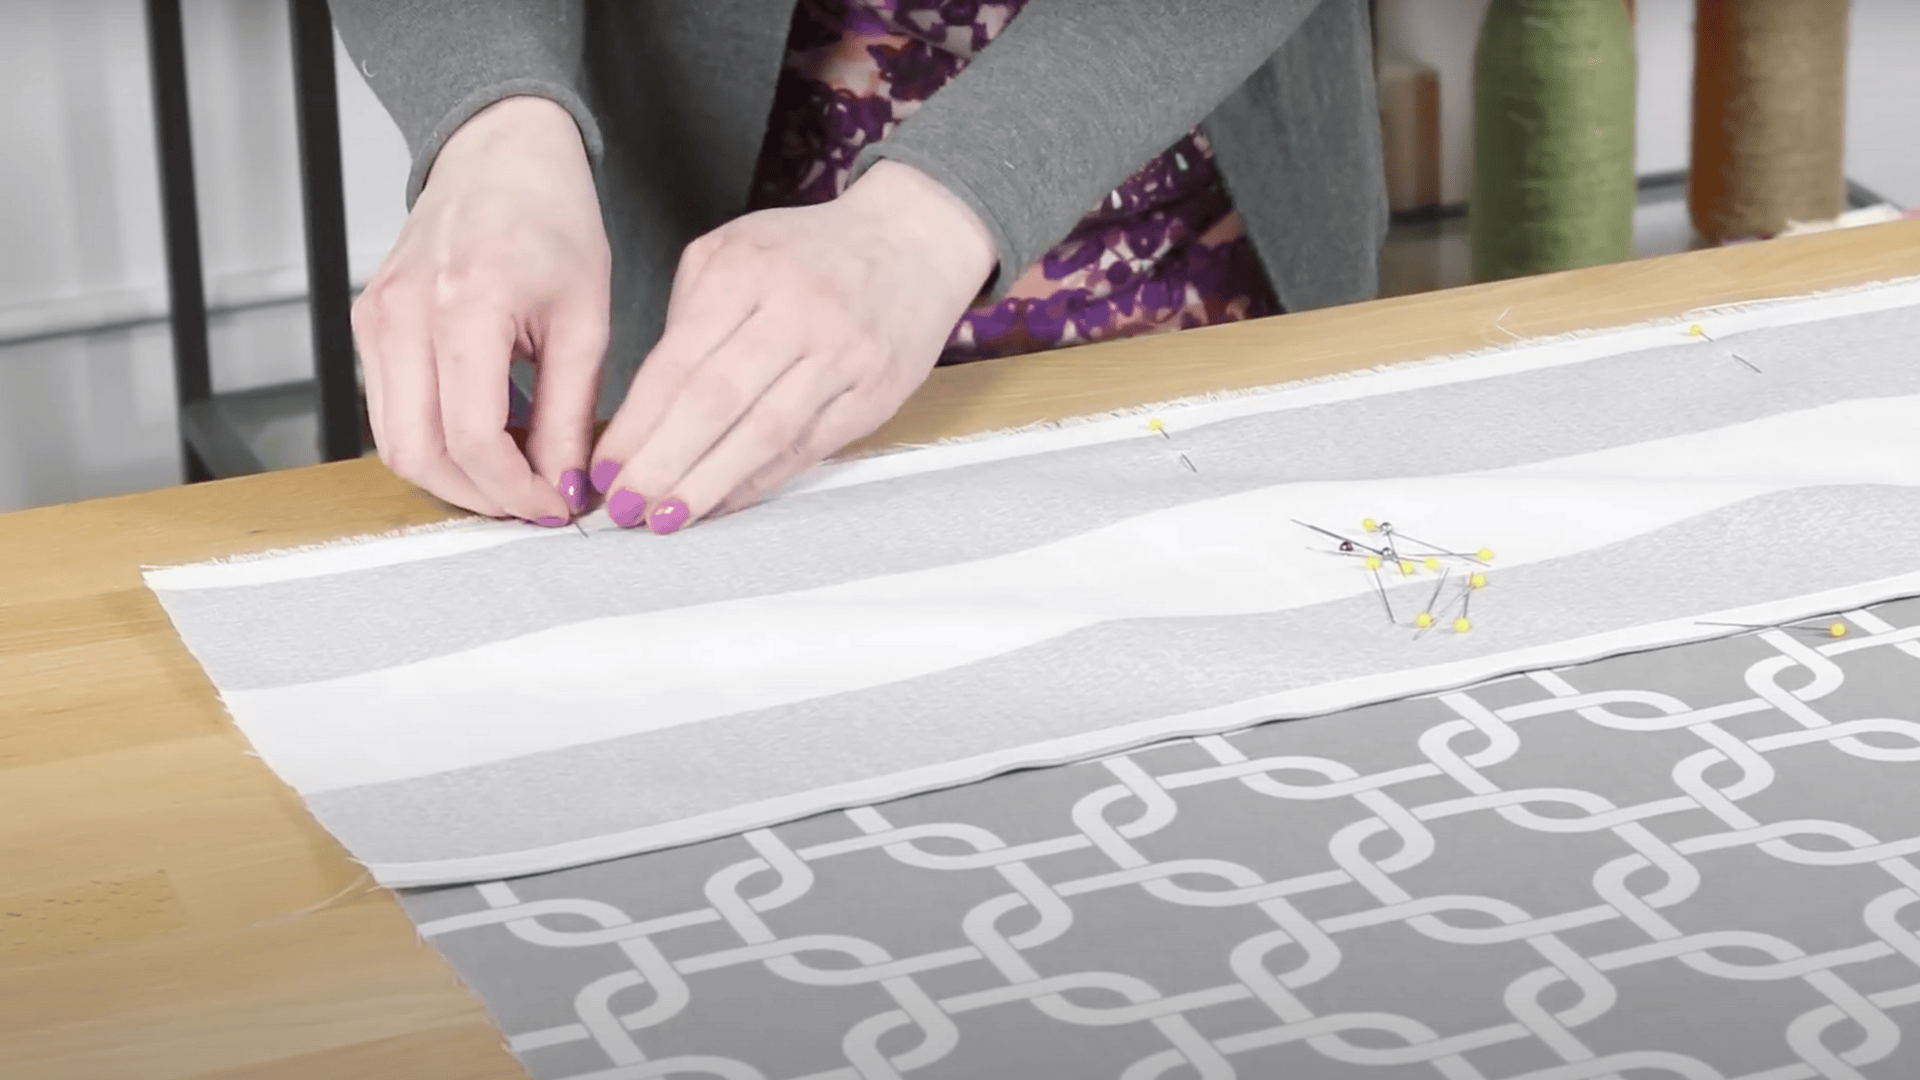
With right sides facing, pin the side panels to the center piece. Sew using a ½ inch seam allowance throughout.
To prevent fraying, use a flat-felled seam: trim one edge, fold the other over, and stitch to encase both.
If using printed fabric, make sure patterns align. Finish both side seams carefully, as they will be visible through clear liners.
4. Hem the Top and Bottom
Create a double-fold hem at the bottom, folding up 4 inches twice.
Press each fold before pinning and stitching. For the top hem, use a 2-inch double fold using the same process.
This gives structure and helps it hang better. Fold corners inward for a clean edge.
Sew down each side of the hem and across the top and bottom folds.
5. Add Grommets or Buttonholes
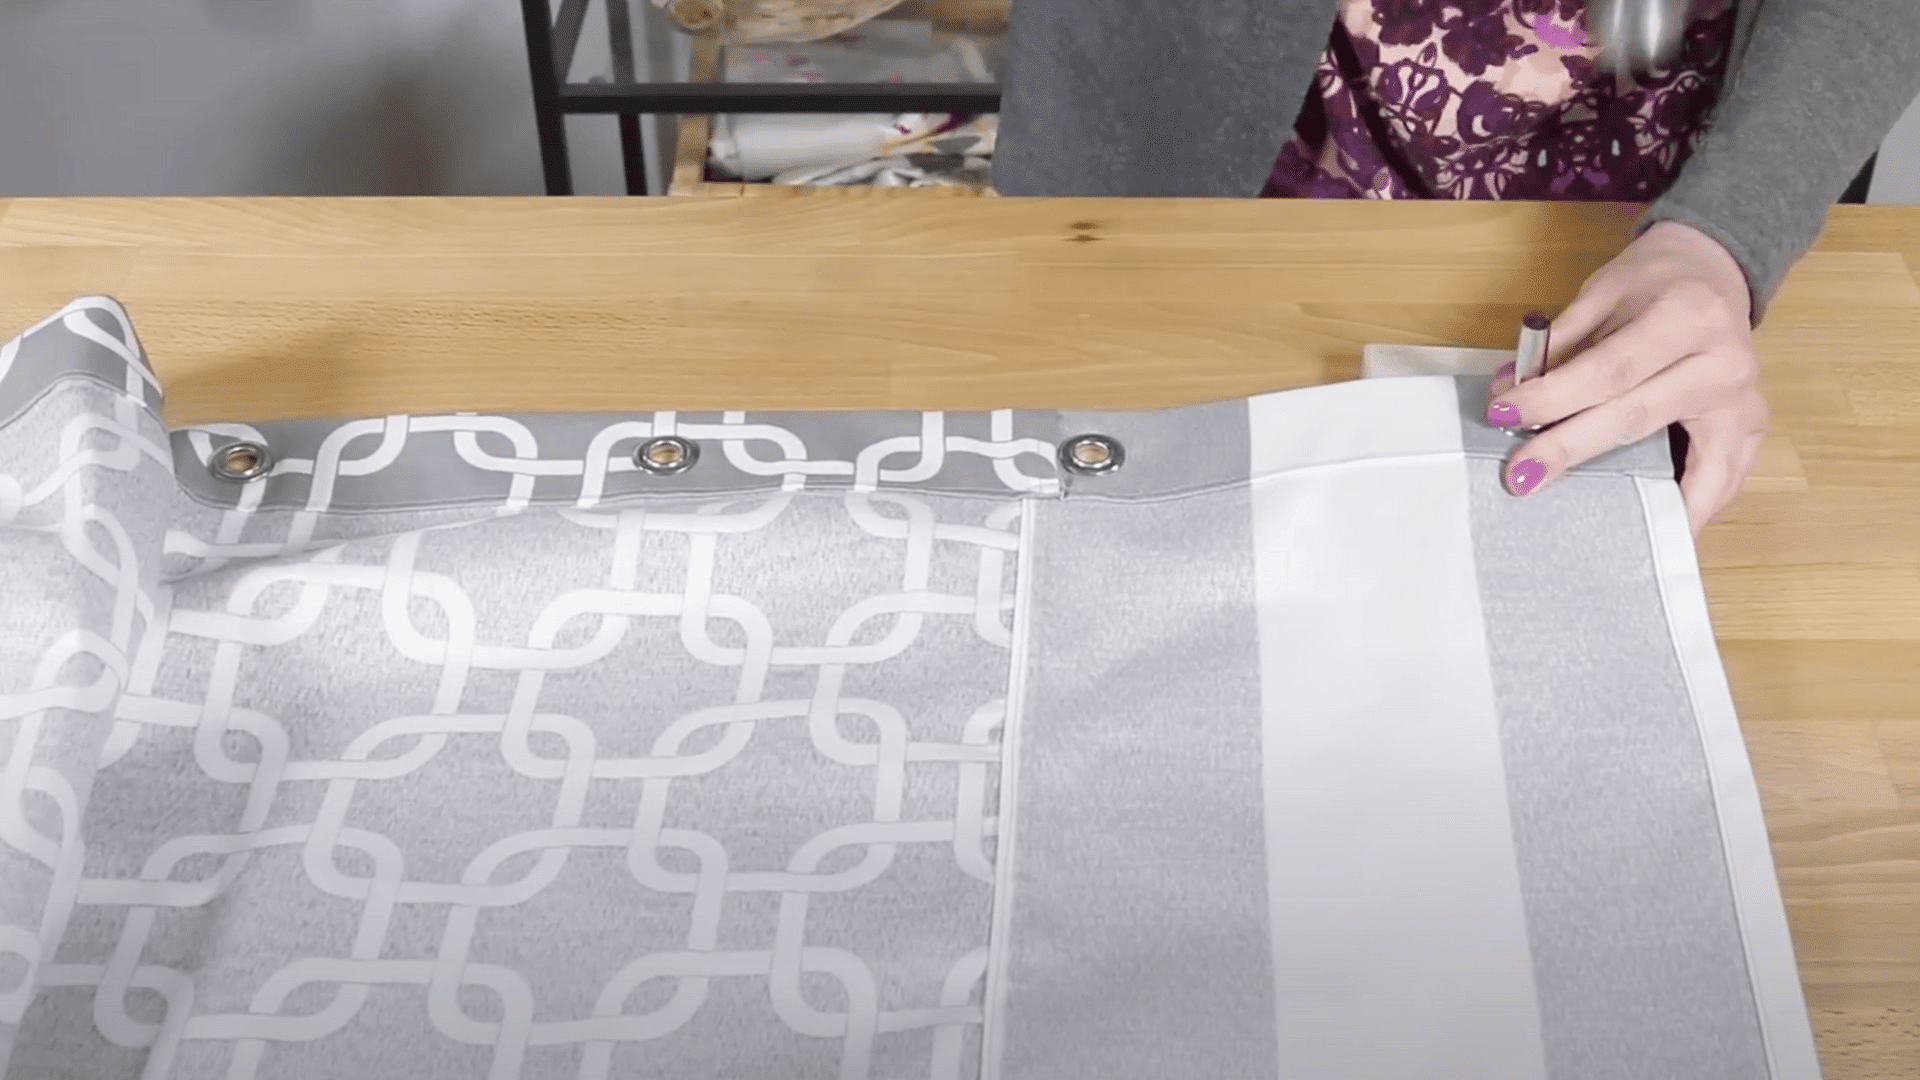
Mark 12 evenly spaced points across the top, starting 2 inches from each side and 1 inch from the top.
Use grommets for durability or buttonholes for ease, especially with automatic sewing machine functions.
Trace, cut, and insert each grommet.
Place fabric over a hard surface to hammer grommets using a washer and setter.
Ensure spacing is even for hanging.
Video Walkthrough – See How Experts Do It!
For more information, check out this video tutorial by OnlineFabricStore
Common Mistakes to Avoid
When making your own shower curtains, being aware of these common pitfalls will help ensure your DIY project turns out beautifully:
- Choosing a non-waterproof fabric that will quickly develop mold or mildew when exposed to bathroom moisture.
- Forgetting to pre-wash your fabric, which can lead to shrinkage after your curtain is already hung.
- Making the curtain too short, leaving gaps where water can escape during showers.
- Using a weak thread that deteriorates with moisture and regular bathroom cleaning products.
- Placing grommets too close to fabric edges, causing them to tear under the curtain’s weight.
- Skipping proper hemming leads to frayed edges and a shorter lifespan.
Remember that investing time in proper preparation and execution will save you from having to remake your curtain.
With careful attention to these details, your DIY shower curtain will be both beautiful and functional for years to come.
Wrapping It Up
Your DIY shower curtain is a testament to your creativity and craftsmanship, offering both style and functionality.
The custom dimensions ensure a flawless fit, eliminating the common sizing issues of store-bought curtains.
Regular care will keep your curtain in great condition, providing long-lasting use and enjoyment.
By choosing to create it yourself, you save money while achieving a high-end look.
Guests will appreciate the unique, personal touch in your bathroom decor.
This project often sparks a desire to tackle more DIY home improvements.
Mistakes will enhance your sewing skills, preparing you for future projects.
To read more Home-Improvement and DIY Projects Blogs. Explore here
Frequently Asked Questions (FAQs)
1. Can I Make a Diy Shower Curtain without a Sewing Machine?
Yes, you can create a DIY shower curtain using fabric glue, iron-on hem tape, or snap-on grommets.
These no-sew options are ideal for beginners or those without sewing equipment.
2. What Type of Lining Should I Use with a Diy Fabric Shower Curtain?
Use a waterproof vinyl or PEVA liner behind your DIY curtain.
It protects the fabric from direct water contact, reduces mildew, and extends the curtain’s lifespan.
3. How Do I Clean a Diy Shower Curtain Made from Outdoor Fabric?
Most outdoor fabrics are machine washable on a gentle cycle using cold water.
Avoid bleach, and hang dry to maintain shape and waterproof qualities.
4. Can I Customize the Size for Odd-Shaped Showers or Tubs?
Absolutely.
One of the main benefits of DIY is that you can tailor the curtain’s width and height to fit clawfoot tubs, stall showers, or other unique dimensions.