Sweet Parrish Place

I'm the girl with champagne taste and a tight budget

  • Home
  • About
    • About Nicki
    • Shop My Amazon
    • Contact Us
    • Blog Love
    • Link Parties
    • Advertise | Disclosure | Privacy Policy
  • Home Tour
    • Yellow Prairie House Tour
    • West Virginia Home Tour
    • Seasonal
  • Projects
    • Trashtastic Treasures
    • Holiday
    • Decorating
    • DIY
    • Crafting
    • Paint Projects
    • Cleaning/Organization
  • Style
    • Fall/Winter
    • Spring/Summer
    • Sweet Parrish Place Style
    • Tips/Tricks
    • Shop My Looks
    • Shop My Amazon
  • Travel
  • Lifestyle
    • Family
    • Decor
    • My Favorites
    • I’m Loving It
    • Personal
    • Shop My Amazon
  • Yellow Prairie House Tour

Bathroom sink Makeover with Giani Granite Kit

April 3, 2014 By Nicki 2 Comments


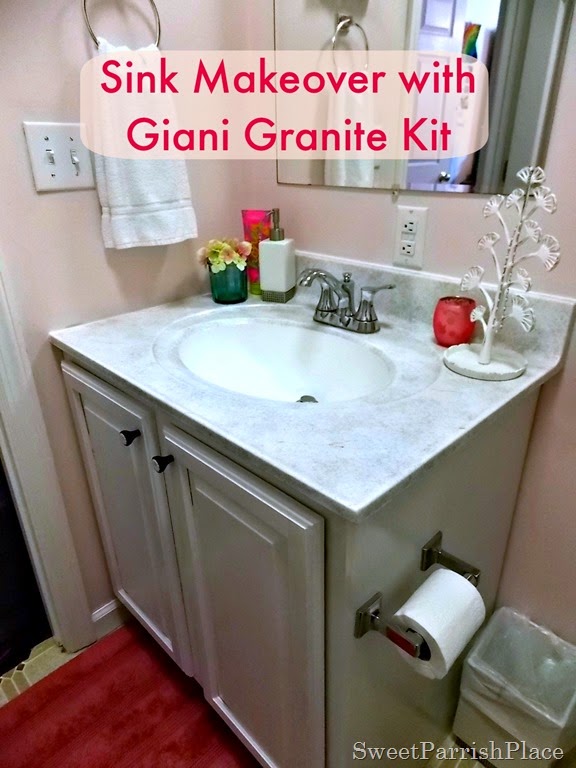
picmonkeysinkimage

This project has been in the works for quite some time.  I am finally getting around to updating Miss 17 Year Old’s bathroom, starting with the sink and vanity.  I have been working on them for several weeks, little by little, and I am so happy to finally get to share them with you!  If you follow me on Facebook or Instagram, you might have seen some sneak peeks of my progress along the way.  Here are a couple of before pictures of the sink.

before sink1

It is difficult to make out in these pictures, but the sink was a cultured marble with pink swirls.  And the vanity was the oak that was so popular in the 90’s.  Both parts were is desperate need of an update.

Before Sink2
I started researching ways that I could paint this sink.  It wasn’t in the budget to replace the sink or vanity, but I was determined to find a way to update this sink.  I came across a product called Giani Granite Countertop Paint.  I searched for everything I could find on people who had used this kit before, and after reading lots of reviews, other blog posts, and looking at tons of pictures, I decided this was going to be my solution.
Before sink3
Update: See the DIY Shelves that I installed in this room, and the new Grouted Vinyl tiles.
I went out on a limb and decided to contact Giani Granite and offer to partner with them.  I was so amazed to hear back from them, and they offered to send me a free kit to try!  That was the first time I had ever contacted a company for something like this, and I never even expected a response, but I heard back from them the following day, and my kit was on the way!  I chose the White Diamond kit.  This kit cannot be used in the actual sink, it is for the counter top surrounding the sink.
I used a product called Homax Tuff as Tile to paint the sink.  It took three coats to cover completely.   I also taped off the area around the sink using Frog Tape, so that I would get a nice clean line.  It took 48 hours or so to dry.  I ran a space heater in the bathroom while it was drying, and that helped it to cure.  It was extremely cold when I was working on this.  Next up!  The Giani Granite Kit to paint the area surrounding the sink.  This is the finished product.   I removed the tape very carefully after it had dried.  It worked like a charm!
Giani Granite white diamond paint kit
The kit was very easy to use.  I read the directions thoroughly, and I watched some You Tube videos about applying it as well.  I am absolutely amazed at the transformation!  The next thing on the list was to paint the vanity.  My daughter decided she wanted it to be white, so we went with that.  I used some satin white paint that was left over from the old home owners.  I was trying to keep the budget to an absolute minimum.  It took three coats of paint, and then I applied two coats of poly to protect it. Before I began painting, I sanded the cabinets down with a sanding block, but I did not completely sand them down to the bare wood.  After sainding them, I cleaned them with a deglosser.
Painted Oak bathroom cabinet
The cabinet feels as smooth as butter!  The sink has a textured feel.  But the feel of it is quality.
Painted Oak bathroom cabinet 2
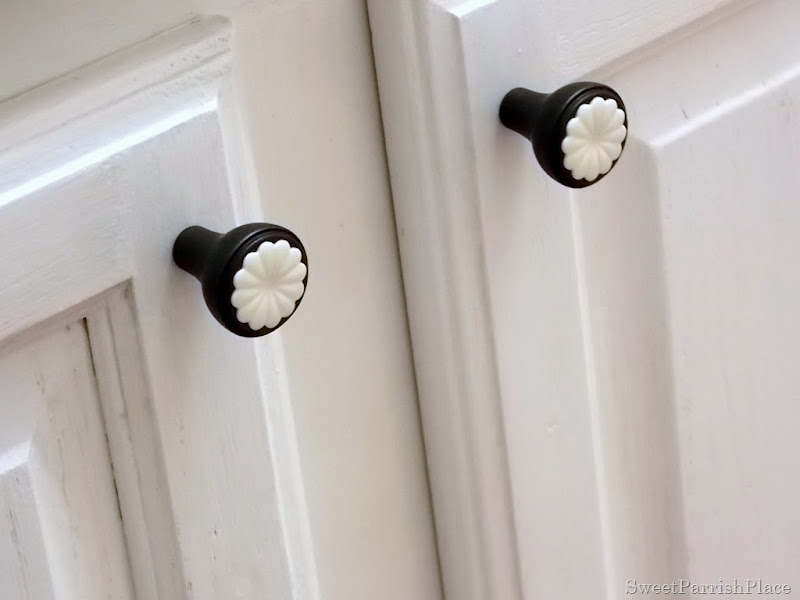
I also added new knobs, which I found on clearance at Target for $7.28.  They are oil rubbed bronze with little white flowers.
New cabinet knobs
I had LC remove the faucet when I painted the sink.  The hardest part of this whole project was removing the old grout from around the counters.  These walls are not completely square, so there is a fairly thick grout line to the left, and it took strength to get it out.
Giani Granite painting kit
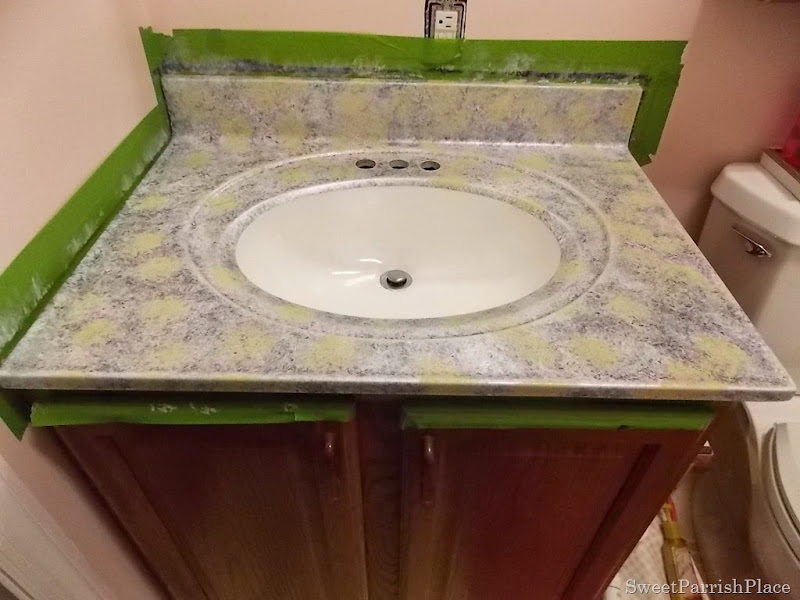
Here are some process pictures for you when I started the Giani Granite process.  You start by cleaning it really well, and then painting the counter black.  Next you have different colors that you sponge on one at a time.  I was brave and did not tape off the sink area when I used this.  I do have a very steady hand, so if you do not, by all means tape it off!  the nice thing about this product is that you can make it look however you prefer it to look.  I am planning on using it in my boy’s bathroom as well, but I think I might make it look different than this one.
DSCN4518
DSCN4520
DSCN4521
DSCN4525
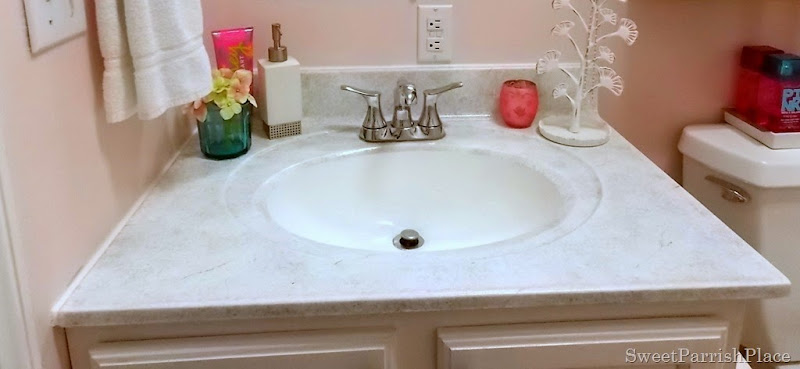
And voila!  The end result!  So much better, don’t you agree!
DSCN4619
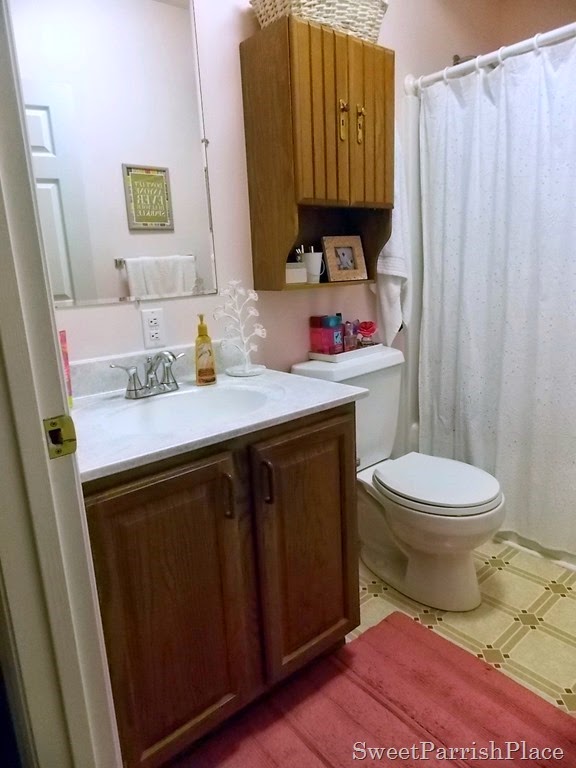
This room has no window, so painting the vanity white makes it seem so much brighter in here!
Bathroom sink and cabinet makeover
I found this little blue glass at a thrift store last weekend.
Thrifted blue glass
This was purchased at the Mission a year or so ago.  It is the perfect place for the girls to lay their jewelry and hair things when they are getting in the shower.
DSCN4624
I was able to keep a clean line even without taping off.  I was lucky!
Painted sink
Here is a close up of some veining that Miss 17 Year old added for me.  We did this at the end, and then I sponged a little more white over it to blend it in.
DSCN4626
I want to add some trim down the side and bottom of the sink.  But I plan on replacing the flooring, so I am going to wait on that.
DSCN4627
See the lovely cabinet hanging over the toilet?  It’s days are numbered.  It will be removed in a couple of weeks.  I found something to replace it at Habitat For Humanity Restore, for only $6!  I cannot wait to show it to you!  I also replaced the shower curtain rod with a bronze one that we brought from our old house.  I need new shower curtain rings.
girl's bathroom
This picture was taken to show you that there is no lighting over this sink.  That will be added too.  I am currently on the market for something.  This has been on my to do list since we moved in.  I am also going to be replacing the builder grade mirror with a nice framed one.  I actually already have it, we just need to hang it.
DSCN4630
You can clearly see that the floor is completely outdated.  I plan to add peel and stick tiles that look like marble.  You can see a great example of these tiles on DIY Showoff, she used them in a recent bathroom update.
DSCN4635
Still a lot to do in the small bathroom, but I feel like I got the biggest part out of the way!
DSCN4636
This is the opposite wall from the sink.  The wall art was made from a free printable and some scrap paper.  I will probably replace this eventually, when I find what I want.  You may have seen posts I wrote about this little white bamboo shelf or this pink tissue box before.
DSCN4643
I am on the hunt for some new wall art and maybe a cute towel hook for this wall next to the sink.
DSCN4646
But for now, the newly painted sink and cabinet are making me very happy.  And in case you were wondering, I have been using a squirt of dawn in a small bucket of water and wiping everything down with a sponge to clean it, then I dry it off with a clean towel.  You are not supposed to use harsh chemicals on the sink or the counter, so I am going to make up a bottle of dishwashing liquid and water to use to clean it.
DSCN4647
And the girls seem very happy with the change as well!
DSCN4648
I hope you will stick around to see the continued progress in this bathroom!  I am hoping to have it completely finished sometime over the summer.  The next things on the list are the shelves over the toilet and the mirror.  And of course, I will be showing you my progress every step of the way!  This sink has been finished for a couple of weeks now, so I will write a post down the road to let you know how it is holing up over time.
If you would like to read more about the Giani Granite Countertop kit, I invite you to follow them on Facebook, Pinterest, and take a look at their online photo gallery.Link Parties:

Friday:
Inspire Me Please
Freedom Fridays
Remodelaholic
Creativity Unleashed
Domestic Superhero
Remodelaholic
Saturday:
Super Saturday
Sunday:
DIY Showoff
DIY Sunday Showcase
Like it or Lump it
Monday:
Between Naps on the Porch
Monday Funday
The Dedicated House
The DIYers
Thrifty Decor Chick
Project Inspired
Home Stories A to Z
My Uncommon Slice of Suburbia
Tuesday:
A Stroll Through Life
Coastal Charm
Cozy Little House
Ma Made
Not Just a Housewife
Wednesday:
Savvy Southern Style
DIY By Design
Green Willow Pond
Work it Wednesday
Thistlewood Farm
Thursday:
All Things Pretty
Spring Sale - 970x90

Filed Under: DIY, Giani countertop paint, Giani Granit Kit, Giani White Diamond, My Home, My Projects, paint laminate, Paint Projects, Painted Sink, painting bathroom cabinets, painting oak cabinets, pictures of painted cabinets, Uncategorized

Comments

  1. @GwynethJones says

    August 14, 2018 at 9:20 am

    Thank you so much for this! You’ve made that dated vanity into a show stopper! I’ll have to search your blog to see if you added the framed mirror. I’m a little nervous about taking off such big mirrors by myself. You’ve inspired me!

    I’ve got several dated bathrooms and I want to spend about as close to zero dollars before I sell my house and move to my #CoastalCottageDE full time when I retire. My problem are my sinks, which are in the scalloped shell motif. Once a fancy upgrade, now a dated womp womp! Any suggestions?

    Reply
    • Nicki says

      August 14, 2018 at 11:08 am

      Hi Gwyneth! Unfortunately, that solution was short lived! Here is a link to the post where I show our new bathroom sink and talk a little about the painting of the sink and how it turned out. https://sweetparrishplace.com/orc-week-2-downstairs-bathroom-makeover/ It was good while it lasted, but was definitely not a long term solution. We painted all of our cabinets in our bathrooms instead of replacing them, and just got new sinks to attach to the painted vanities.

      Reply

Leave a Reply Cancel reply

Your email address will not be published. Required fields are marked *

CommentLuv badgeShow more posts

This site uses Akismet to reduce spam. Learn how your comment data is processed.

Hi, I'm Nicki I'M THE GIRL WITH CHAMPAGNE TASTE AND A TIGHT BUDGET. I'M SO GLAD YOU'RE HERE!
  • Bloglovin
  • Facebook
  • Google+
  • Instagram
  • Pinterest
  • Twitter

VIP Real Estate

NO PLACE LIKE HOME

No Place Like Home

ORC Bathroom Makeover

Kids/Guest Bathroom Makeover

One Room Challenge Week 6 Kids-Guest Bathroom Reveal

It's week 6 of the One Room Challenge and this is … [Read More...]

ARCHIVE

ORC

Shop My Faves!

Spring Trends
PicMonkey Photo editing made of win
Get Sponsored by Big Brands

SheKnows

Linquia Influencer

FYI

Find Your Influence

INSTAGRAM

Recent Posts

  • Cozy and Casual Christmas Tour | Part 2
  • Casual and Cozy Christmas Tour | Part I
  • Farmhouse Bathroom Makeover Progress | $100 Room Challenge

Archives

Find It Here

Copyright © 2022 · Sweet Parrish Place