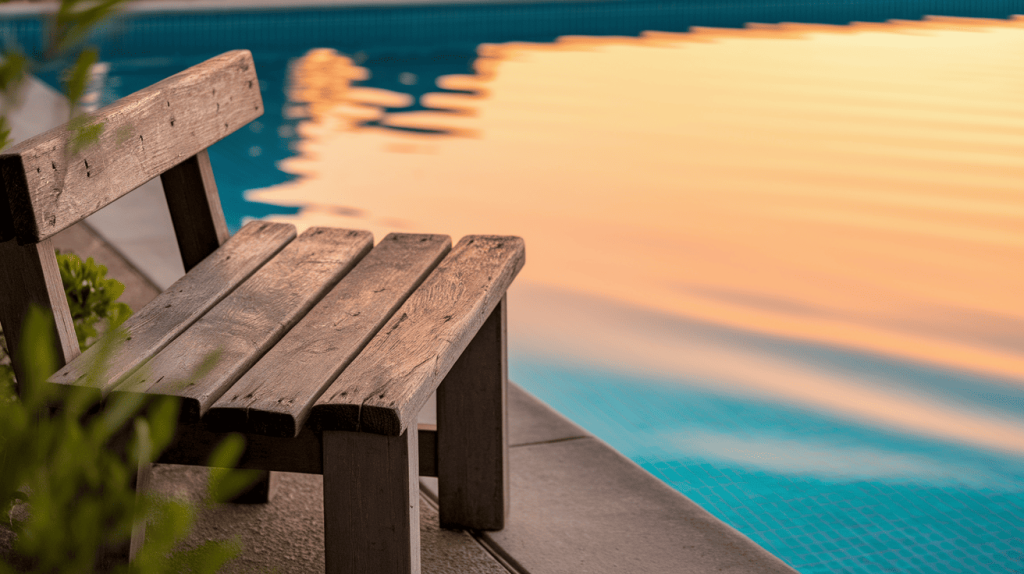
Ready to create the perfect spot to relax by your pool?
Building your poolside bench is easier than you might think!
With basic tools and materials, you can craft a custom bench that fits your space perfectly and costs far less than store-bought options.
A DIY bench gives you full control over size, style, and features, unlike mass-produced furniture.
Plus, there’s something deeply satisfying about sitting on a bench you built with your own hands.
The simple instructions in this blog will show you the entire process, from initial planning to final placement, ensuring your handcrafted bench becomes your favorite poolside feature for years to come.
Why Build a Pool Bench?
Adding a bench to your pool area creates the perfect spot to relax, dry off after swimming, or enjoy watching others in the pool.
Store-bought options can be expensive and might not fit your space perfectly, but building your bench solves these problems.
When you build a custom bench, you can make it exactly the right size for your pool area and design it to match your outdoor style.
It’s also much cheaper than buying one, often costing just a fraction of retail prices when you use basic materials.
Plus, there’s something truly satisfying about creating something useful with your own hands.
Your homemade bench will bring pride with guests’ compliments, and you’ll value it more knowing you built it yourself.
A DIY pool bench is practical, affordable, and rewarding.
Planning Your Poolside Bench Design
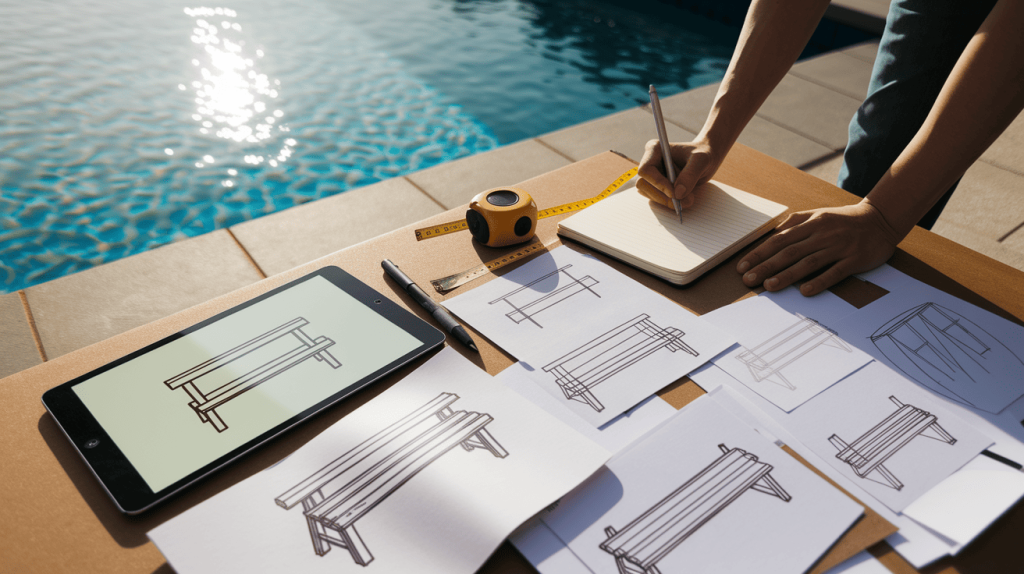
Before grabbing your tools, take time to plan your poolside bench properly.
Start by measuring the available space around your pool using a tape measure, noting any curves or obstacles.
Consider which style suits your outdoor area best: rustic benches bring natural charm, modern designs offer clean lines, and simple options are timeless and easy to build.
Custom-designed benches let you adjust dimensions to your specific needs, no matter if you need extra seating for guests or a compact option for a small deck.
Quick sketches on paper help visualize your bench, or try free design apps on your phone if you prefer digital planning.
This planning stage might seem tempting to skip, but a well-thought-out design prevents costly mistakes and ensures your finished bench fits perfectly in your poolside setting.
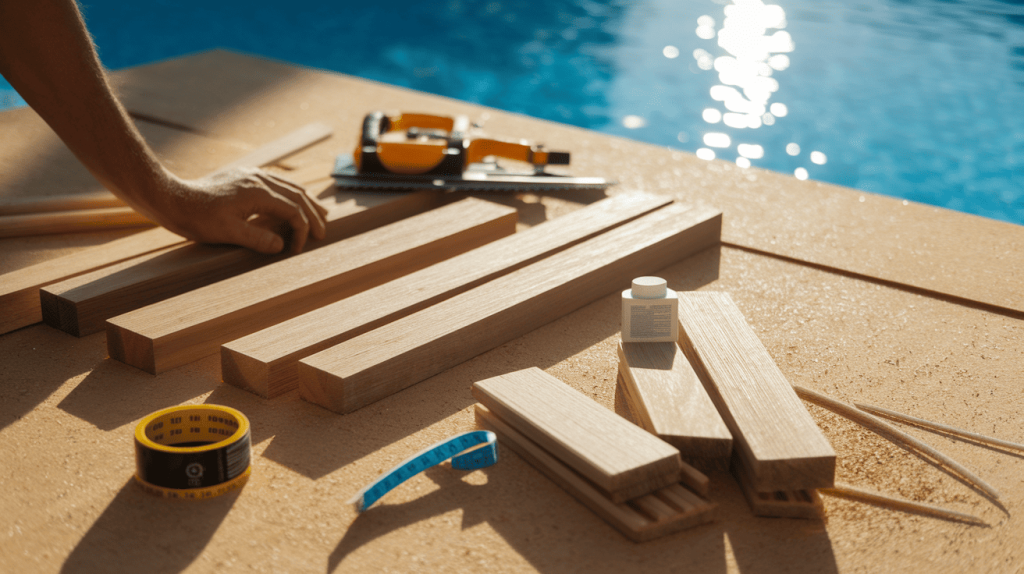
Materials and Tools You’ll Need
Before starting your bench project, gather all the necessary supplies.
Having everything ready will make the building process smoother and more enjoyable.
You can find these items at any home improvement store.
- Wood – Pressure-treated lumber, composite wood, cedar, or redwood.
- Screws – Exterior wood screws, deck screws
- Wood Glue – High-quality outdoor wood glue ensures a strong bond for pieces
- Wood Finish or Stain
- Optional Cushioning – If you want to add comfort to your bench
- Miter Saw
- Drill/Impact Driver
- Screwdriver
- Measuring Tape and Carpenter’s Square
- Sander (or Sandpaper)
- Nail Gun (Optional)
- Clamps
Once you have all the materials and tools ready, set up your work area in a well-ventilated space with plenty of room to move around.
Consider laying down a tarp to catch sawdust and make cleanup easier.
Now you’re all set to begin building your perfect poolside bench!
Step-by-Step Guide to Building Your Pool Bench
Building your poolside bench is a rewarding project that adds both function and style to your outdoor space.
Follow these simple steps to create a beautiful, durable bench that will last for years.
Step 1 – Preparing the Wood
Start by selecting pressure-treated lumber or cedar, which naturally resists rot and insects.
Cut your boards to the desired lengths using a saw, measuring twice to avoid mistakes.
Treat the wood with a waterproof sealant designed for outdoor use, even if using pre-treated lumber.
Then sand all surfaces with medium-grit sandpaper, followed by fine-grit for extra smoothness.
Round off any sharp edges to prevent splinters and create a more finished look.
This preparation step is crucial for ensuring your bench’s durability under poolside conditions.
Step 2 – Building the Bench Frame
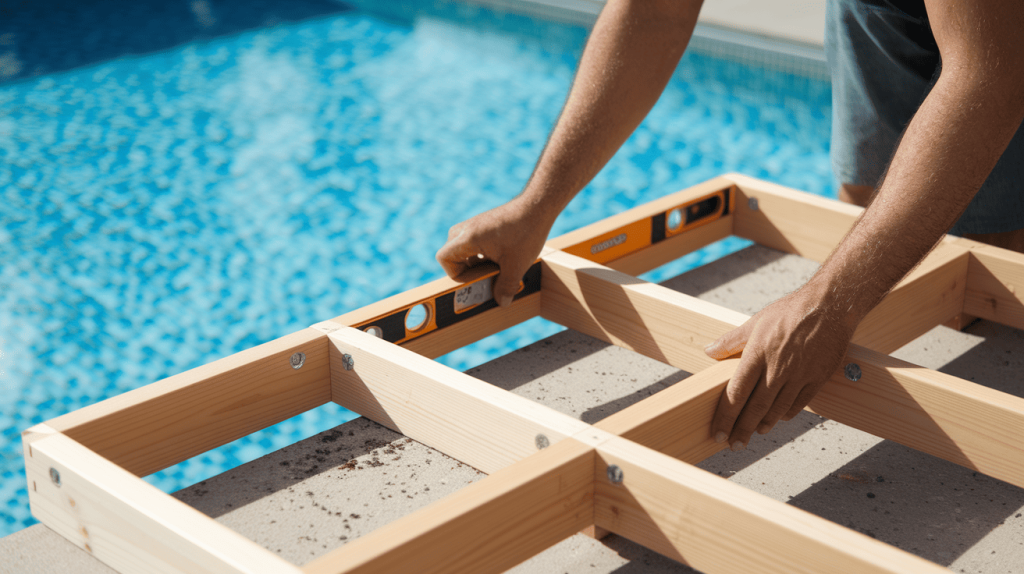
Lay out your frame pieces on a flat surface and connect them using weather-resistant screws or bolts.
For legs, attach them at each corner of the frame, using angle brackets for added strength.
Check that everything is square using a carpenter’s level and measuring diagonally from corner to corner – equal measurements mean your frame is square.
Add cross-support beams under the seat area to prevent sagging over time.
If needed, make small adjustments by shimming legs until the entire frame sits perfectly level on your pool deck.
Step 3 – Attaching the Seat Boards
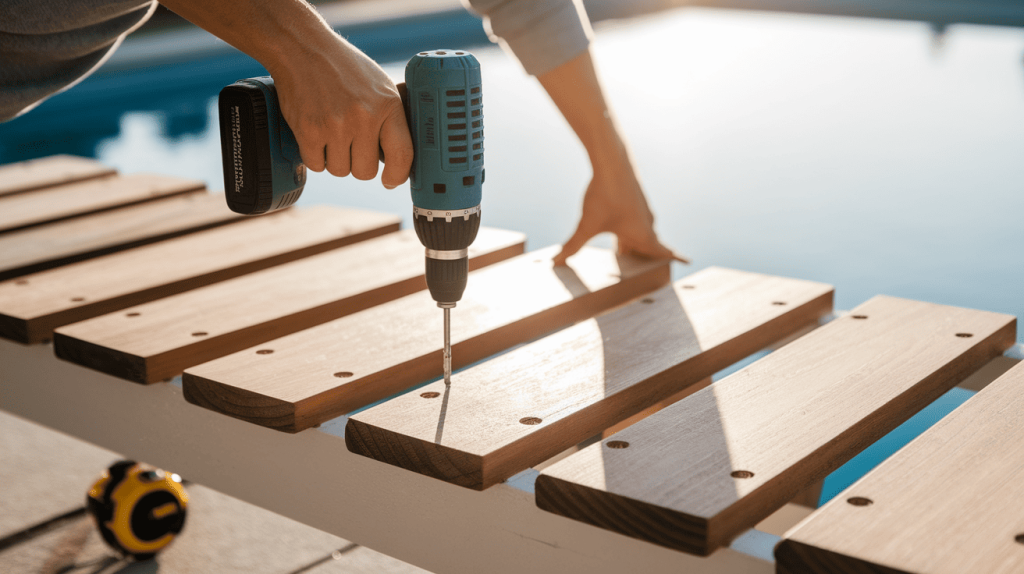
Arrange your seat boards across the frame with a small gap (about 1/4 inch) between each board to allow for water drainage and wood expansion.
Start from one end, ensuring each board extends equally on both sides.
Secure each board with two screws at every frame contact point to prevent warping.
For added comfort, slightly round the front edge of each seat board.
If desired, design your bench to accommodate cushions by creating a slight recess or adding cleats to keep cushions from sliding.
This will make your pool area more inviting.
Step 4 – Finishing Touches
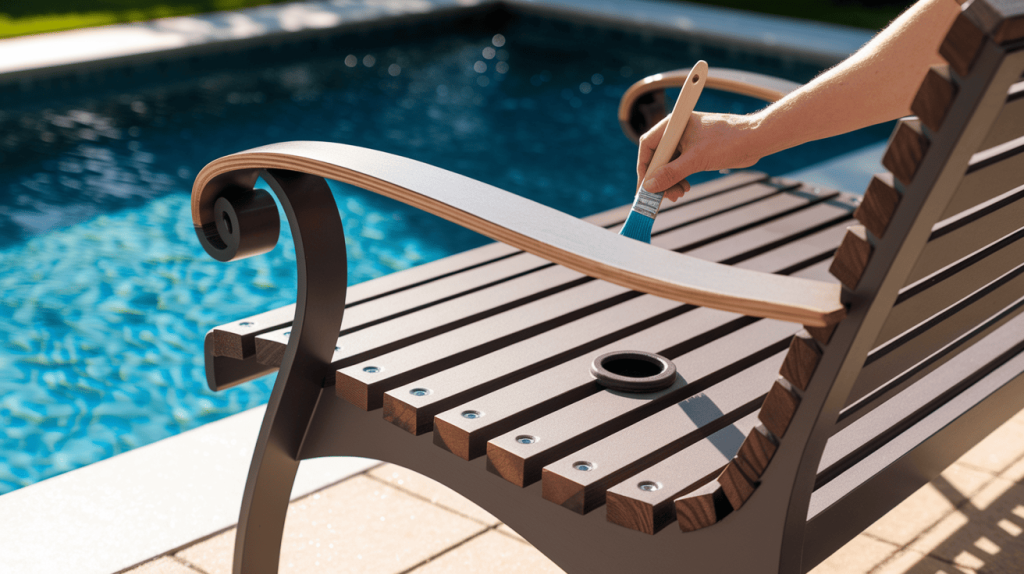
Apply a quality outdoor stain or paint that contains UV protection to shield your bench from sun damage.
Use a brush or roller to apply at least two coats, allowing proper drying time between applications.
Consider adding armrests using curved pieces attached to the frame sides.
For extra character, route decorative edges on visible parts or add wooden plugs to cover screw holes.
Weather-resistant metal hardware, like cup holders or towel hooks, can add functionality.
Proper finishing is crucial for extending your bench’s life in harsh pool environments.
Step 5 – Positioning and Installing the Bench
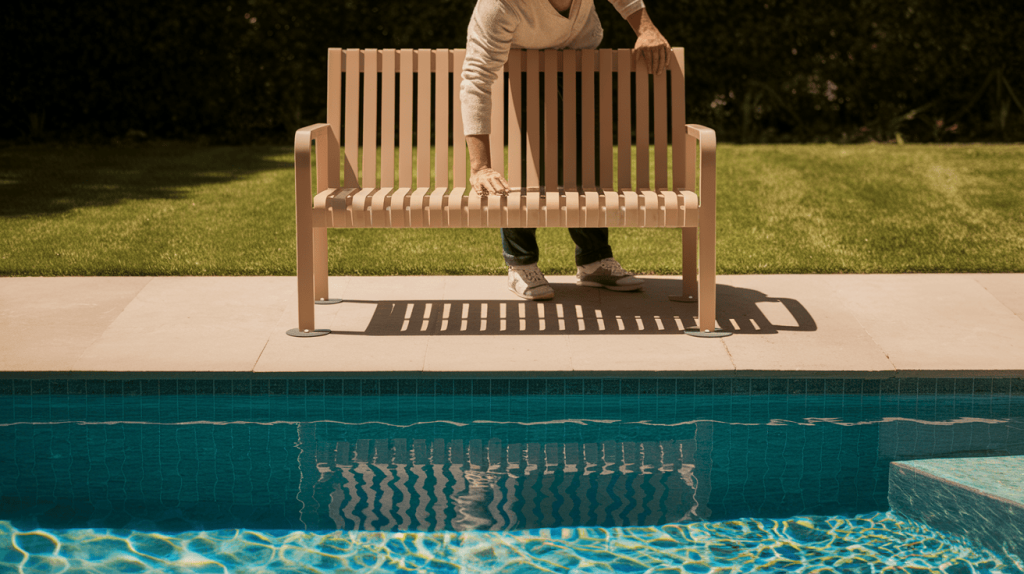
Place your bench where it provides the best view of the pool while staying far enough back to avoid constant splashing.
Consider the sun’s path throughout the day to balance sun and shade exposure.
For safety, ensure the bench sits on stable, level ground.
On concrete surfaces, add rubber pads under legs to prevent scratching and slipping.
For permanent installation, use concrete anchors to secure the legs, especially in windy areas.
Position your bench strategically around your pool area to create conversation areas or quiet reading spots.
More Bench Ideas for Your Pool Area
Your poolside bench can be more than just a place to sit.
Check out these creative ideas to make your bench more useful, comfortable, and stylish.
These simple upgrades can change a basic bench into a standout feature of your pool area.
| IDEA | DESCRIPTION | BENEFIT |
|---|---|---|
| Built-In Storage | Hidden compartments beneath the seat | Keeps pool accessories organized and out of sight |
| Backrest Addition | Slatted or cushioned back support | Enhances comfort for extended lounging |
| Side Tables | Small platforms attached to the bench ends | Convenient spots for drinks, snacks, and personal items |
| Metal Frames | Aluminum or powder-coated steel structure | Modern aesthetic with excellent durability |
| Composite Wood | Recycled plastic/wood fiber material | Weather-resistant with minimal maintenance needs |
Consider which of these upgrades would work best for your pool area and budget.
You can add one feature or combine several for a truly custom bench that perfectly suits your needs.
Total Estimated Cost Range
- For Builders with Tools Already Available: $90 – $250 (materials only, including wood, screws, glue, finish, and optional cushioning).
- For Builders in Need of Tools: $250 – $600 (for those who also need to purchase tools).
Maintaining Your Poolside Bench
Regular maintenance will keep your poolside bench looking great and extend its life for many years.
Here are simple ways to care for your bench:
- Brush off leaves and debris weekly to prevent staining.
- Wash with mild soap and water every month to remove dirt buildup.
- Check and tighten any loose screws or bolts twice a year.
- Apply new waterproof sealant once a year to protect the wood.
- Reapply stain or paint when the finish looks dull or worn.
- Cover your bench during severe weather or winter months.
- Repair any damage promptly to prevent bigger problems later.
With these simple maintenance steps, your poolside bench will remain beautiful and functional for many summers to come.
The small amount of time spent on upkeep will save you from having to build a new bench sooner than necessary.
The Bottom Line
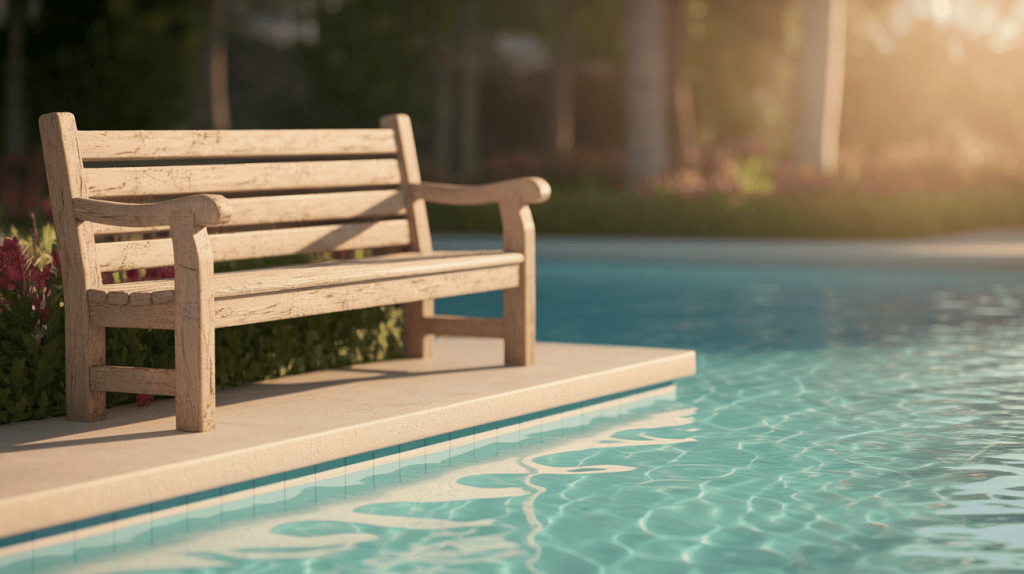
You’ve now got all the knowledge needed to build a beautiful, durable poolside bench.
Your new DIY creation will provide the perfect spot to towel off, watch swimmers, or enjoy your outdoor space.
Remember that proper maintenance keeps your bench looking great season after season with minimal effort.
The money you’ve saved compared to buying pre-made furniture makes this project especially rewarding.
Best of all, you’ve added a personal touch to your pool area that reflects your style and craftsmanship.
So gather your materials, set aside a weekend, and enjoy the satisfaction of building something functional and beautiful with your own two hands!