Sweet Parrish Place

I'm the girl with champagne taste and a tight budget

  • Home
  • About
    • About Nicki
    • Shop My Amazon
    • Contact Us
    • Blog Love
    • Link Parties
    • Advertise | Disclosure | Privacy Policy
  • Home Tour
    • Yellow Prairie House Tour
    • West Virginia Home Tour
    • Seasonal
  • Projects
    • Trashtastic Treasures
    • Holiday
    • Decorating
    • DIY
    • Crafting
    • Paint Projects
    • Cleaning/Organization
  • Style
    • Fall/Winter
    • Spring/Summer
    • Sweet Parrish Place Style
    • Tips/Tricks
    • Shop My Looks
    • Shop My Amazon
  • Travel
  • Lifestyle
    • Family
    • Decor
    • My Favorites
    • I’m Loving It
    • Personal
    • Shop My Amazon
  • Yellow Prairie House Tour

Builder Grade Vanity Makeover- Master Bath Progress

November 21, 2014 By Nicki 1 Comment


buildergradevanitymakeoverpin
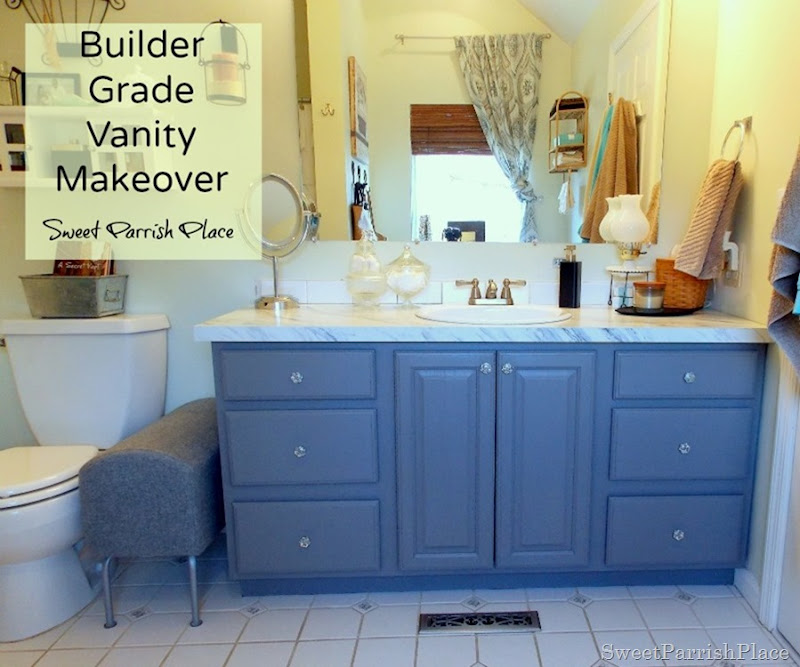
I am so excited to share the recent progress we have made in our Master Bathroom!  We have been planning this builder grade vanity makeover for several months, and I am so excited to finally mark it off of the list.  Painting this vanity was a big step towards updating our master bathroom.  I took lots of pictures, over the course of a couple of hours, and the light was changing in the room, so in some pictures it looks a little darker than others.
builder grade vanity makeover 
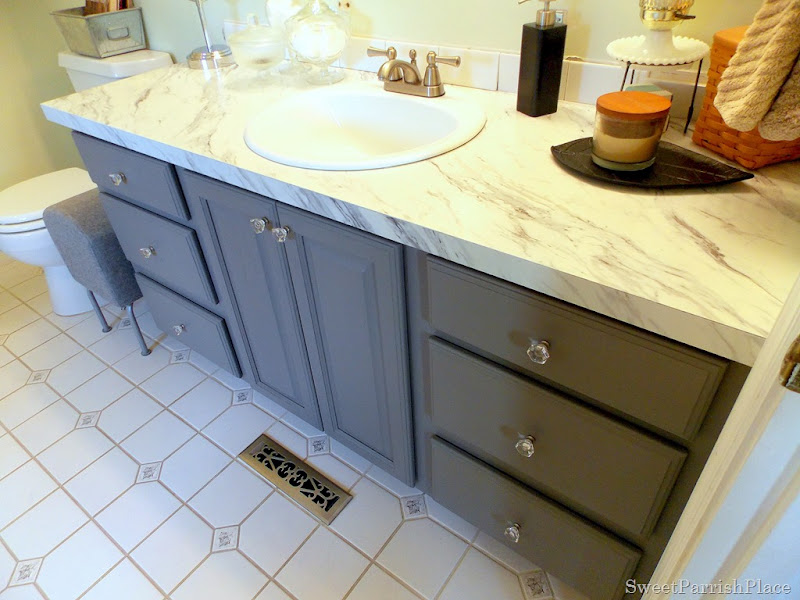
You may remember me posting about our plans for our master bathroom.  You can see the mood board I made for our master bathroom, plus before pictures of the vanity here.  I showed you the new shower curtain and the new counter and sink in this post.  I had paint chips taped to this vanity for months trying to choose a color (and mostly because we were too busy to start on it).  The paint we ended up choosing was Behr Premium Plus flat paint in the color Suede Gray.


Builder grade vanity makeover 2


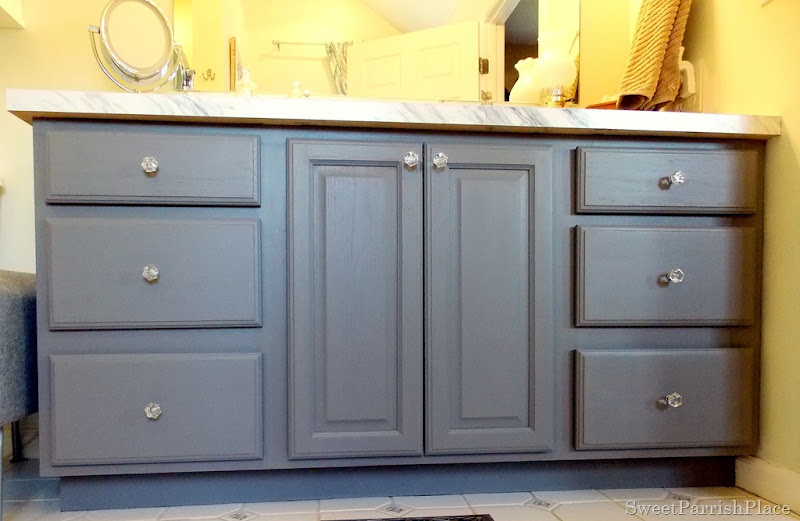
We started by removing the drawers and the cabinet doors,and removing all of the existing hardware, because we were to replace it.  I then sanded down the surfaces with an abrasive sanding sponge to try to take off the finish.  I then sanded it with a fine grade sanding sponge.  I did not completely remove all of the finish, but I felt that it was enough to make the paint adhere to the surface.  After sanding everything down, I then cleaned all of the surfaces with a deglosser, and let everything dry.
Builder grade vanity makeover 3


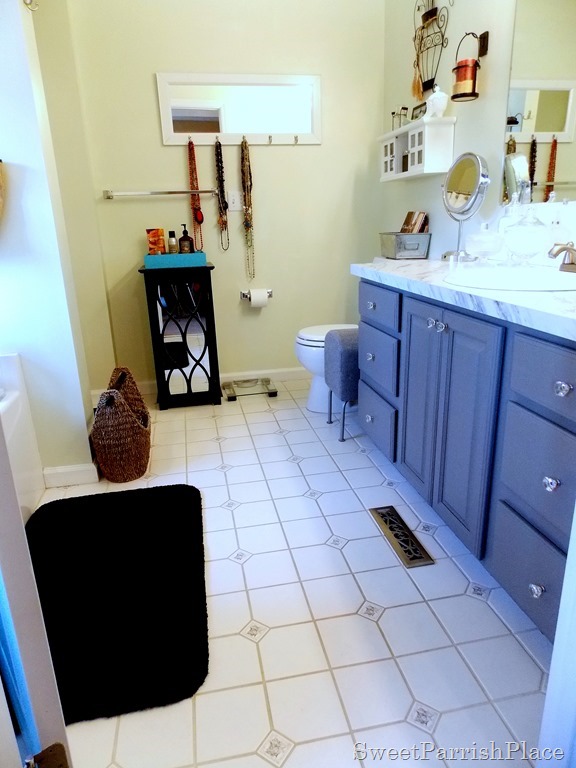
This is a shot of the bathroom from standing in the master bedroom.  This paint color was on the walls when we moved in.  It is a cucumber green color.  We will be painting the walls too, Although, I really don’t mind the color.  See that towel bar?  It will eventually be removed.
Master Bathroom with painted vanity
The stool to the left of the vanity is where I sit and do my makeup.  I just pull it out, and pull the mirror up to the edge of the counter.  It works for me.  I bought the stool years ago at Ikea.
Builder grade vanity makeover 4
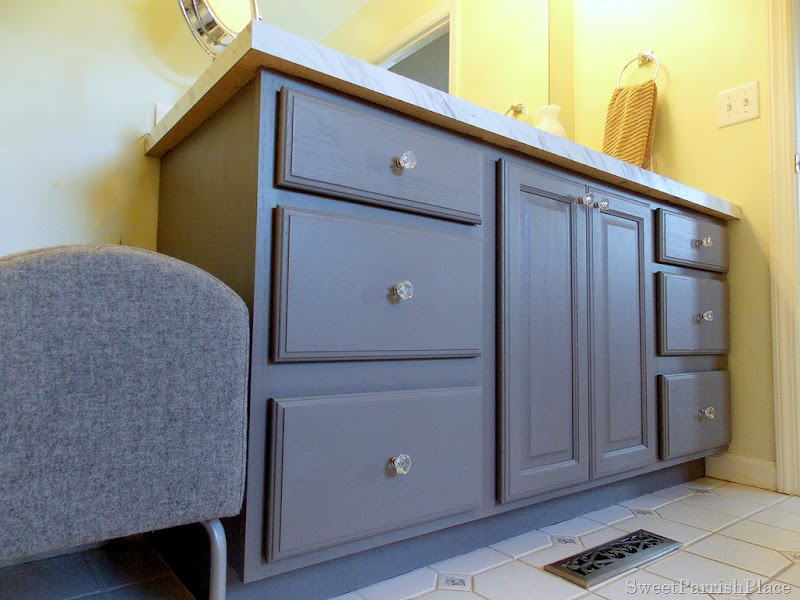
I painted two coats of paint on this cabinet.  After the paint was dry overnight, I applied one coat of clear wax, and buffed it when dry.  It turned out to have the exact finish I wanted.  Not shiny, but it feels smooth to the touch, and should be easy to wipe down.
Builder grade vanity makeover 5
Builder grade vanity makeover 6


The light over the mirror will be changed as well.  I have actually already bought the replacement light.  I would also love to frame out the builder grade mirror.
Builder grade vanity makeover 7


Now that this vanity is painted, and we have a new counter and sink, it looks like brand new!  It is exactly what I envisioned it to be.  I love when that happens!
Builder grade vanity makeover 8

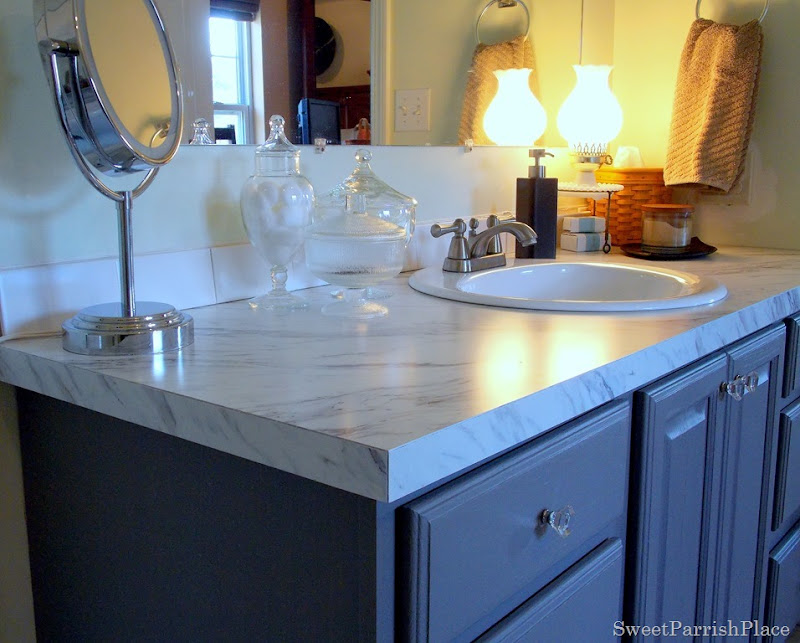
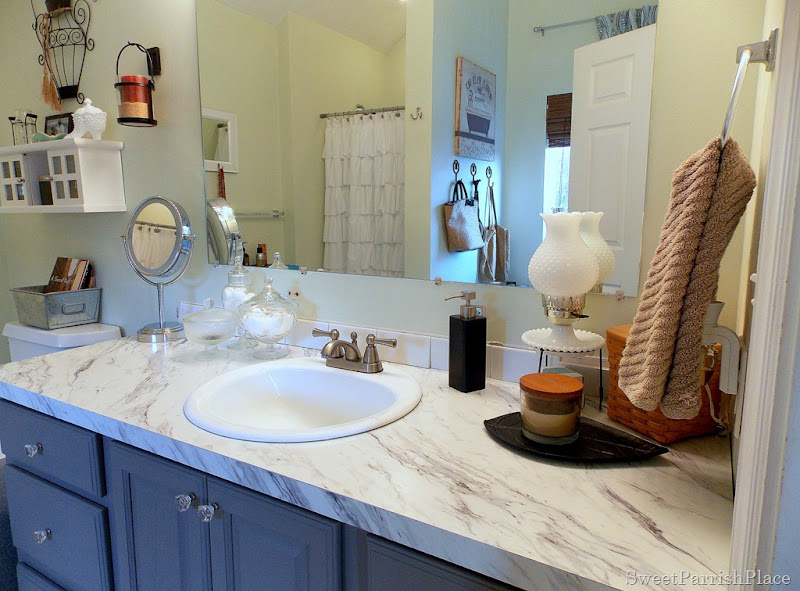
We purchased the counter and sink from Home Depot back in the Spring.  We chose a WilsonArt Premium Laminate in Calcutta Marble, again from Home Depot.  I decided to go with a simple square cut on the counter top, because that is what I preferred.  the sales woman tried to talk me out of it, and thought I should choose a fancy edge, but this is the look I wanted. I also chose not to have a backsplash.

Builder grade vanity makeover 9
Because  the counter top was square, there was a dark seem going across the edge.  I fixed that really easily by using a white Sharpie paint marker, and painting the seam.  You can see a close up of what I am referring to in the picture below.  I just kept going over it until I thought I had good coverage. And if it ever starts to wear, it will take all of 5 minutes to give it a touch up.
Sharpie painted edge

I love the look of this counter, and you wouldn’t be able to tell it was not real unless you touch it.  We plan to do a small backsplash using white subway tiles, but we have not done that yet.  I already have bought the tiles though (for 10 cents each at the Habitat for Humanity Restore), so I propped some up against the wall just to get an idea of whether we like them.

Builder grade vanity makeover 10


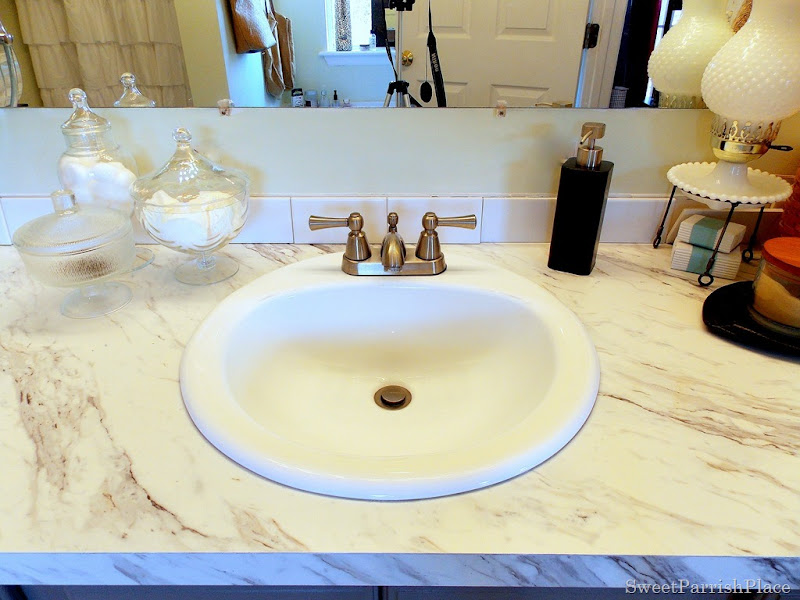
We purchased this round sink at Home Depot.  It is just a plain, round sink.  No bells and whistles, but it was only $39, and I like the way it looks.  We kept the existing faucet.
round drop in sink 
This is a good shot of the counter top.  I love it!


Builder grade vanity makeover 11
Builder grade vanity makeover 12
We also bought these knobs from Home Depot.  Although I have to say, I do love the way they look, but the clear part (which are lucite, I think) on one of them has already fallen off and needs glued back.  If that happens with all of them, they may need returned.  And of course, I don’t think I kept the receipt.
Builder grade vanity makeover 13

I bought the front apothecary jar at a yard sale, and the others we received from LC’s grandmother’s home.  They hold cotton rounds, cotton balls, and bobby pins.

apothecary jars
I bought this Milk Glass lamp off of Craig’s List a while back for $15.   The stand it is sitting on was from a bowl that I no longer have out.  I needed something to elevate the lamp a little and this fit.  I am thinking of wrapping it with jute.  What do you think of that idea?  I am also considering using some gold Rub and Buff on the shiny brass part.
milk glass lamp

Here is a shot of what the wall really looks like behind the counter.  And we had a little mishap when we tried to make this outlet a four socket outlet instead of two.  We put a hole in the wall, and it still needs more patching.  Plus, it needs a white outlet cover.  Would you believe Home Depot did not have white outlet covers?  so we just bought this to use temporarily.

DSCN6298

A friend gave me this blue wooden tray last weekend, and I was just trying it out here for size.  I am going to paint it eventually, when I decide what color.  Maybe even a pattern?  Also, I would love your opinion on this little black cabinet.  It will stay in the room, but I am thinking of painting it with white chalky paint.  What do you think will look better in this room?

white ruffled shower curtain

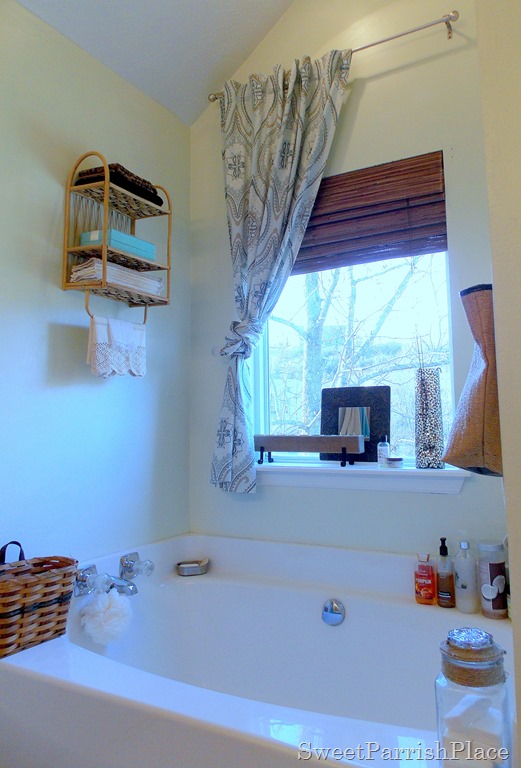
You can read more about this Goodwill shelf here.  This drapery panel is also new.  I found it at a thrift store over the summer.  I decided to try it out on this window.  I love the colors and pattern.  But it is way too long, so I just tied it in a knot to shorten it.  I like the way it looks!  I would love to trim out all of the windows in this house.  It drives me crazy that they have no trim around them.

bathtub nook
bathroom window

So what is left to be done, you ask?  Well, here is a little list:

Paint Walls
Replace light over sink
Frame out Mirror
Paint grout in floor tiles
Possibly some new art work and other accessories
Remove towel bar
Replace hand towel hook
Replace toilet seat
Add new rugs
Try out a Paint treatment to look like window trim (we’ll see how that goes!)
Possibly add some shelving for storage
Add hanging light over tub

I think the next thing we will tackle is to replace the light fixture, then paint the walls.  If I had a much larger budget, I would love to replace the shower stall in this bathroom.  It is the smallest shower stall known to mankind.  Note to self:  Next time you are in the market for a house, step into the shower!   I would love to rip out the shower stall, and just make the walls and floor tiled, and also deepen it.  If you look, there is room to bring it our a little and enlarge it a few inches.

PicMonkey Collage
What do you think of the transformation of our builder grade vanity?  I would love to here from you in the comments!
I am so happy to say that after today, I will have a 9 day break from work, and a fireplace surround to tackle!  Enjoy your weekend!This is where I party:

Friday:
Weekend Retreat Link Party// Remodelaholic// Inspire Me Please// Creativity Unleashed
Freedom Fridays// Craft Frenzy Friday// Frugal Friday// Pretty Pintastic Party// Best of the Nest
Before and After Party
Saturday:
Found and Foraged// DIY Sunday Showcase//
Sunday:
That DIY Party
Monday:  Metamorphosis Monday// Motivation Monday// Masterpiece Monday// Blogger’s Brags
Motivational Monday// Your Designs This Time// Inspire Me Mondays// Clever Chicks
Much Ado About Monday// Amaze Me Monday// Inspiration Monday
Tuesday:  Show and Share// Tutorials and Tips// Inspire Me Tuesday// The Scoop
Totally Terrific Tuesday// Tuesdays at Our Home// Tweak it Tuesday// Twirl and Take a Bow
Turn it up Tuesdays// Project Inspired
Wednesday:
Work it Wednesday// Wow us Wednesdays
Thursday:
Project Pin It// Think and Make Thursday
Filed Under: builder grade vanity makeover, how to paint bathroom cabinets, how to paint oak cabinets, Master bathroom, Paint Projects, painting builder grade cabinets, Uncategorized

Leave a Reply Cancel reply

Your email address will not be published. Required fields are marked *

CommentLuv badgeShow more posts

This site uses Akismet to reduce spam. Learn how your comment data is processed.

Hi, I'm Nicki I'M THE GIRL WITH CHAMPAGNE TASTE AND A TIGHT BUDGET. I'M SO GLAD YOU'RE HERE!
  • Bloglovin
  • Facebook
  • Google+
  • Instagram
  • Pinterest
  • Twitter

VIP Real Estate

NO PLACE LIKE HOME

No Place Like Home

ORC Bathroom Makeover

Kids/Guest Bathroom Makeover

One Room Challenge Week 6 Kids-Guest Bathroom Reveal

It's week 6 of the One Room Challenge and this is … [Read More...]

ARCHIVE

ORC

Shop My Faves!

Spring Trends
PicMonkey Photo editing made of win
Get Sponsored by Big Brands

SheKnows

Linquia Influencer

FYI

Find Your Influence

INSTAGRAM

Recent Posts

  • Cozy and Casual Christmas Tour | Part 2
  • Casual and Cozy Christmas Tour | Part I
  • Farmhouse Bathroom Makeover Progress | $100 Room Challenge

Archives

Find It Here

Copyright © 2022 · Sweet Parrish Place