Ready to update your kitchen without draining your wallet?
Making your own cabinet doors might be easier than you think.
DIY cabinet doors let you save money while getting exactly the style you want.
From basic flat panels to fancy framed designs, homemade doors can match any home style and cost much less than store-bought options.
Even as a beginner with basic tools, you can create doors that look like they came from a pro shop.
The good news?
You don’t need tons of fancy equipment to get started.
With some wood, a few tools, and a weekend of work, your kitchen can look brand new.
Let’s jump into the world of custom cabinet making!
Why Build Your Own Cabinet Doors?
Making your own cabinet doors can be one of the most rewarding home projects you’ll tackle.
Not only do you get to see your vision come to life, but you also gain valuable skills along the way.
When you make cabinet doors yourself, you save a lot of money.
Store-bought doors can cost three to four times more than the materials you’d need to make them.
You get to call all the shots with DIY cabinet doors.
Want a special size that doesn’t exist in stores?
No problem.
Need a certain wood type to match your home’s look?
You pick it.
This freedom lets you create exactly what you want instead of settling for what’s available.
The best part?
The pride you feel when guests ask where you bought such nice cabinets, and you get to say, “I made them myself.”
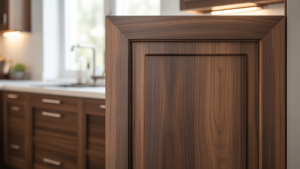
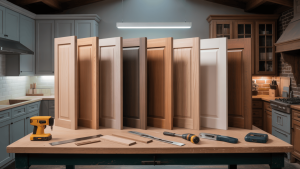
Understanding Cabinet Door Styles
When planning your cabinet project, picking the right door style makes all the difference.
Each type has its own look and building method, making some perfect for beginners and others better for those with more woodworking practice.
Let’s look at the seven main door styles you can build at home:
1. Slab Doors
Slab doors are the most basic style – just a flat piece of wood cut to size.
You can use ¾” plywood for a budget option or solid wood for a higher-end look.
These doors are quick to make, taking just minutes to cut and finish.
Difficulty: Very easy
Look: Sleek, modern, minimal
2. Faux Frame Doors
These doors start with a ½” plywood base.
You then add thin strips of lattice trim to the front in a frame pattern.
This creates the look of a more complex door without needing special tools.
Difficulty: Easy
Look: Traditional with less work
3. Frame-and-Panel with Pocket Holes
This method uses strong hidden screws (pocket holes) to join the frame pieces together.
You’ll make a frame from 1×2 or 1×3 boards, then attach a thin panel to the back.
This style offers a classic look without needing complex joinery skills.
Difficulty: Moderate
Look: Traditional with depth
4. Doweled Frame with Routed Back Panel
Dowel pins create strong, hidden connections between frame parts.
The back panel fits into a groove cut with a router tool.
This method creates a very sturdy door with clean lines and no visible hardware.
Difficulty: Moderate to hard
Look: Polished, professional
5. Mitered Frame with Dado Joinery
Frame corners meet at perfect 45° angles in this style, with grooves (dados) cut to hold the center panel.
This method creates modish corners and a truly custom look, but requires precise cutting and good tools.
Difficulty: Hard
Look: High-end, refined
6. Tongue & Groove Lumber Frame
This traditional method uses interlocking edges on solid wood pieces.
One piece has a “tongue” that fits into a “groove” on the matching piece.
The result is extremely strong and has been used by woodworkers for centuries.
Difficulty: Hard
Look: Craftsman, timeless
7. Routed Tongue & Groove Joinery
Similar to the above but created entirely with a router tool, this method allows for decorative edge profiles while maintaining strong connections.
The result looks highly crafted and professional.
Difficulty: Very hard
Look: Custom, high-quality
How to Choose the Right Style for You
Your available tools greatly impact which styles you can build.
If you only have basic cutting tools and a drill, stick with slab doors or faux frame styles.
Without a router, avoid any style that needs grooves or fancy edge work.
Your woodworking experience matters, too.
New woodworkers should start with slab or faux frame doors.
As your skills grow, try pocket hole frames, then move to doweled frames.
The look you want for your kitchen or bathroom plays a big role, too.
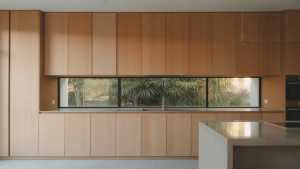
For modern spaces, smooth slab doors work best.
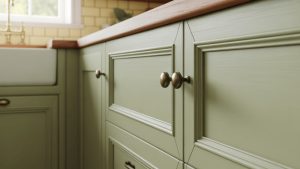
Traditional kitchens call for frame-and-panel styles.
Farmhouse looks pair well with tongue-and-groove doors, while high-end kitchens benefit from mitered frames with decorative edge details.
Tools and Materials You’ll Need
Before starting your cabinet door project, gathering the right supplies will make your work much smoother.
Here’s what you’ll need based on your chosen door style:
| TOOL TYPE | BASIC | INTERMEDIATE | ADVANCED |
|---|---|---|---|
| Cutting Tools | Circular saw | Miter saw | Table saw |
| Assembly Tools | Drill, screwdriver | Pocket hole jig | Doweling jig |
| Finishing Tools | Sandpaper, hand sander | Random orbit sander | Belt sander |
| Joinery Tools | None needed | Chisel set | Router with bits |
| Measuring Tools | Tape measure, square | Combination square | Digital calipers |
For materials, your needs will vary by door style:
| DOOR STYLE | WOOD NEEDED | HARDWARE | ADHESIVES |
|---|---|---|---|
| Slab | ¾” plywood or solid wood | None | Edge banding glue |
| Faux Frame | ½” plywood, lattice strips | Small nails | Wood glue |
| Pocket Hole | 1×2/1×3 boards, ¼” plywood | Pocket screws | Wood glue |
| Doweled | 1×2/1×3 boards, ¼” plywood | Dowel pins | Wood glue |
| Mitered | 1×2/1×3 boards, ¼” plywood | None | Wood glue |
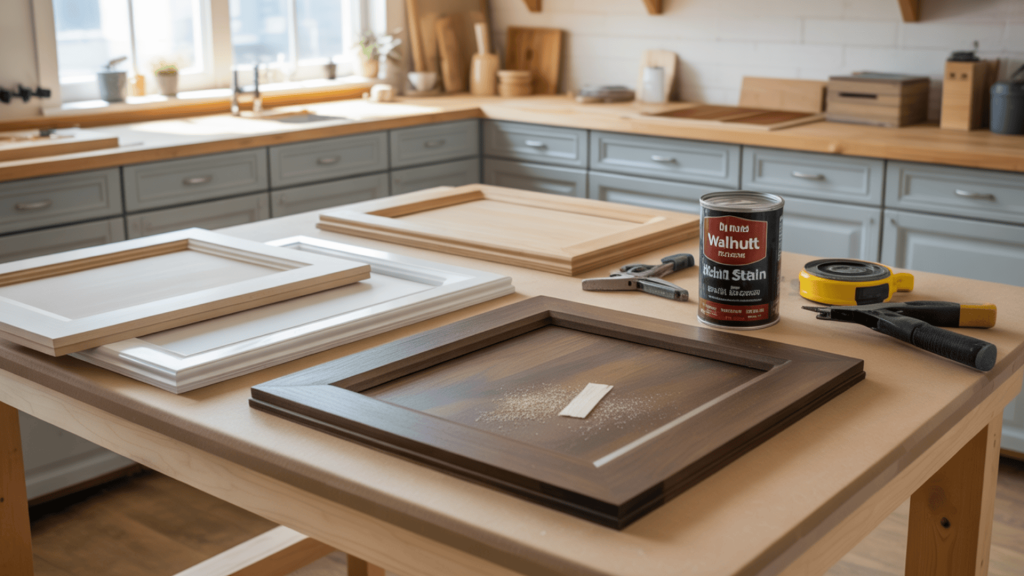
Most styles will also need finishing supplies like wood filler for holes, caulk for gaps, primer, paint or stain, and clear topcoat for protection.
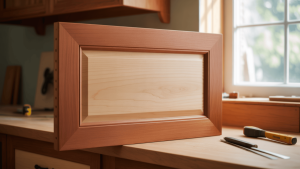
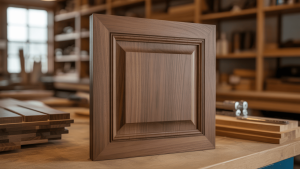
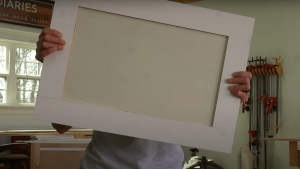
Step-by-Step Tutorial: Building a Frame and Panel Cabinet Door
Let’s walk through making a simple but good-looking frame-and-panel door using pocket holes.
This method needs minimal tools but creates a door that looks much more complex than it really is.
Step 1: Cut Your Frame and Panel
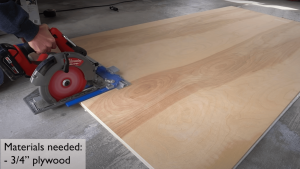
Start by measuring the opening where your door will go.
For overlay doors (that sit on top of the cabinet face), add ¾” to both height and width.
For inset doors (that sit inside the opening), subtract ⅛” from both measurements.
Now, cut your wood:
- Two vertical pieces (stiles) from 1×3 boards, cut to the full door height
- Two horizontal pieces (rails) from 1×3 boards, cut to the door width minus the width of both stiles
- One panel from ¼” plywood, cut to fit inside the frame with a ⅛” gap all around
Check all cuts with a square to ensure they’re straight.
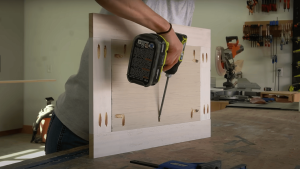
Step 2: Drill Pocket Holes
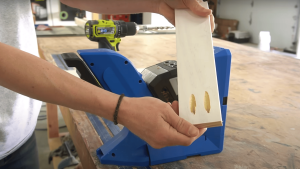
Set up your pocket hole jig for ¾” thick material.
On the ends of both rail pieces, drill two pocket holes.
These will connect to the tiles.
Flip your plywood panel face down.
Using the same jig set for ½” material, drill pocket holes around the back edge, spacing them about 6-8 inches apart.
Step 3: Assemble the Frame
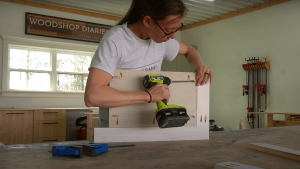
Apply wood glue to the ends of one rail.
Position it between the stiles, making sure the pocket holes face the back of the door.
Drive 1¼” pocket hole screws through the holes into the stiles.
Repeat with the second rail.
Check that the frame is square by measuring diagonally from corner to corner.
Both measurements should match.
Step 4: Install the Panel
Place the plywood panel into the frame from the back.
The panel should sit flush with the back of the frame.
Secure it by driving 1″ pocket hole screws through the holes you drilled earlier.
Make sure the panel sits flat and doesn’t bow or warp.
Tighten screws just enough to secure the panel without splitting the wood.
Step 5: Finish Smooth
Fill all pocket holes and screw heads with wood filler.
Let dry completely, then sand smooth with 120-grit sandpaper, followed by 220-grit for a fine finish.
Wipe away all dust and apply your chosen finish.
For painted doors, use a good primer first, then two coats of cabinet paint.
For stained doors, apply pre-stain conditioner, then your stain and protective clear coat.
Watch And Build Along
For more information, check out this video tutorial by Shara Woodshop Diaries
Tips for a Clean, Professional Finish
The difference between an amateur-looking door and one that seems store-bought often comes down to the finishing touches.
Here are some ways to make your DIY doors look truly professional:
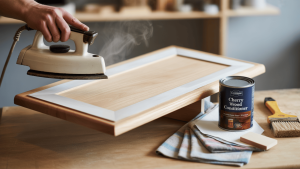
1. Hiding Raw Edges
When using plywood for slab doors, the exposed edges show layers that look unfinished.
Apply iron-on edge banding to cover these edges.
Heat it with a household iron, press it firmly onto the edge, and trim the excess with a sharp knife.
Once applied, sand lightly for a smooth transition.
For solid wood doors, round over the edges slightly with sandpaper or a router.
This small detail makes the door feel more finished and prevents sharp corners that can chip.
2. Filling Gaps and Holes
Even well-cut wood can have small gaps at joints.
Fill these with paintable caulk for painted doors or matching wood filler for stained doors.
For painted doors, caulk creates seamless joints that won’t crack over time.
Pocket holes and nail holes need filling, too.
Use wood filler that matches your wood type, overfill slightly, then sand flush when dry.
For stained doors, test your filler on scrap wood first to make sure it takes stain similarly to your door wood.
3. Sanding Secrets
Proper sanding makes or breaks your finish quality.
Start with 100-120 grit to smooth rough spots and remove machine marks.
Move to 150-180 grit for general smoothing, then finish with 220 grit for a polish.
Use a sanding block for flat surfaces to keep them even.
For inside corners, fold sandpaper around a paint stirrer to reach tight spots.
4. Painting and Staining Tips
For the smoothest painted finish, use a high-quality primer made for cabinets.
Apply thin coats with a foam roller for flat areas and a good brush for details.
Sand lightly between coats with 320-grit paper.
When staining, always use pre-stain wood conditioner on pine, maple, or birch to prevent botching.
Apply stain with a rag, wiping with the grain, and remove excess promptly for even color.
Finish with at least two coats of polyurethane for protection.
That’s a Wrap
Taking on DIY cabinet doors puts the power of home improvement directly in your hands.
You now know the styles, tools, and steps needed to create doors that fit your space perfectly.
The money saved can fund other projects, and the skills gained will serve you in future woodworking tasks.
Most importantly, you’ll feel satisfaction every time you open doors you built yourself.
Craftsmanship that opens and closes—because the projects made with your own hands always mean more.
Comment below with your DIY cabinet door experience!
What style did you choose, and what was your biggest challenge?
Share the results of your handcrafted doors and tell us what tools made the biggest difference in your results!