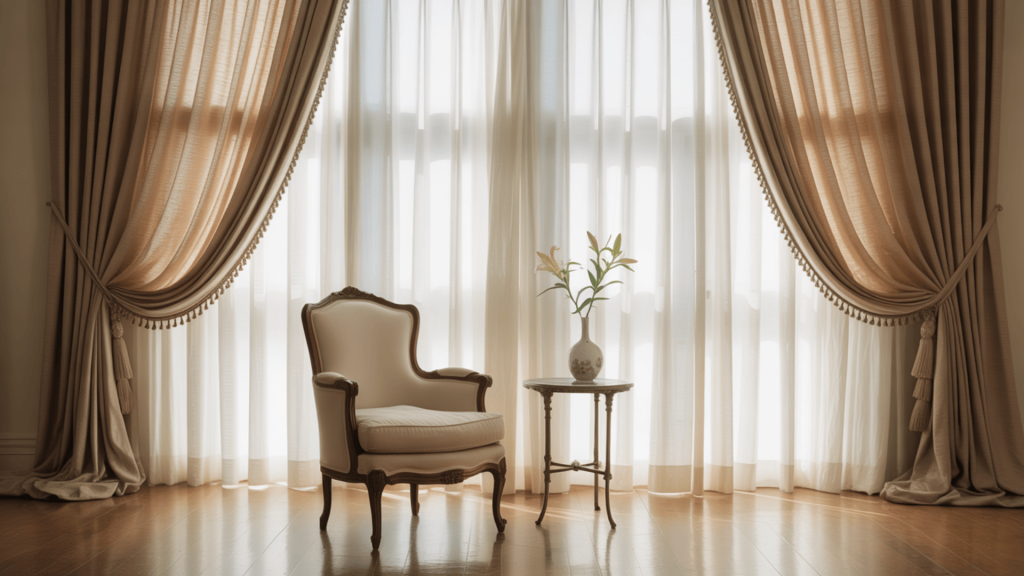
Imagine walking into your living room to find windows dressed in curtains that flow with perfect rhythm and charm.
That’s the magic of pleated curtains!
I still remember my first attempt – what started as a pile of fabric became the most complimented feature in my home.
Pleating isn’t some mysterious art reserved for decorators with years of training.
It’s a skill waiting on your fingertips, ready to emerge with just a few simple tools and techniques.
The beauty of making your pleated curtains?
You’ll save hundreds of dollars while creating something uniquely yours. The fabric you love, the exact spacing you need, the perfect match for your room – all within reach.
Why Pleat Your Curtains?
Have you ever walked into a room and felt instantly impressed by graceful, flowing curtains that hang just right?
That special touch likely comes from pleating, a simple technique that transforms ordinary fabric into beautiful window treatments.
When curtains hang flat, they often look incomplete.
But add some pleats, and suddenly your windows have depth, fullness, and a touch of luxury that elevates your entire room.
The best part?
You don’t need to spend a fortune or hire a pro to achieve these results.
I’m excited to share with you the wonderful world of curtain pleating.
From the popular pinch pleat (sometimes called French pleats) to the simple magic of pleater tape and hooks, you’ll discover just how doable this project really is.
The change you’ll create is worth every minute spent.
Your friends might even think you hired a professional!
Gather your supplies, set aside a few hours, and prepare to give your windows the lovely treatment they deserve.\
Types of Curtain Pleats
When selecting pleats for your drapery or curtains, it’s important to consider both style and function.
Each pleat type offers a different aesthetic and suits specific room settings.
| PLEAT TYPE | DESCRIPTION | COMMON USES |
|---|---|---|
| Pinch Pleats | Classic pleat with pinched folds at intervals | Common in living rooms and bedrooms |
| Box Pleats | Deep, symmetrical folds for a structured appearance | Ideal for formal dining or office spaces |
| Goblet Pleats | Graceful pleats shaped like a wine glass | Best suited for luxurious or formal settings |
| Cartridge Pleats | Rounded, tube-like pleats for volume | Great for tall windows and grand rooms |
| Pencil Pleats | Narrow, tightly gathered folds | Easy choice for casual or beginner projects |
NOTE: The right pleat not only enhances your curtain’s look but also affects how it hangs and moves, match the pleat style to your room’s vibe and function.
Materials You’ll Need
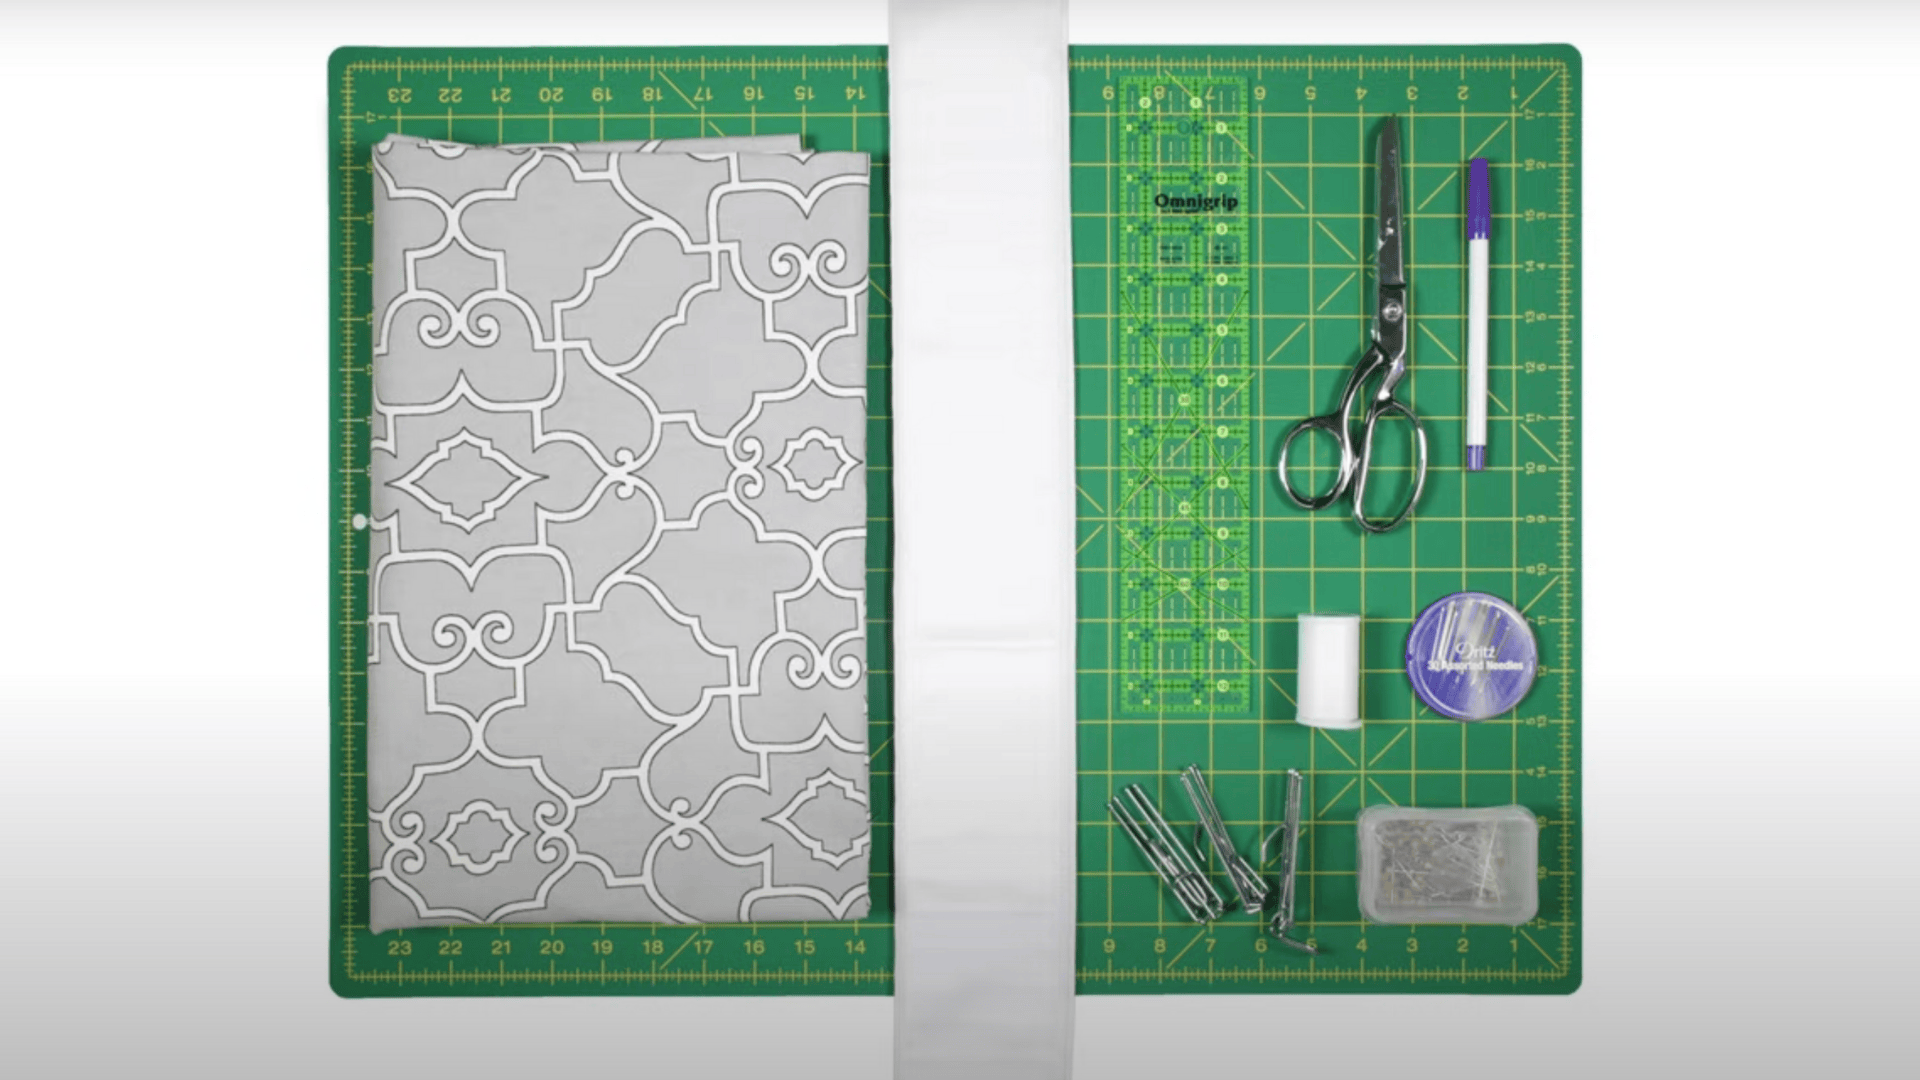
Before starting your curtain project, let’s gather all the necessary materials.
Having all materials ready makes the process smooth and enjoyable.
Quality materials make a big difference in how your finished curtains will look and last.
- Drapery fabric (e.g., Covington Windsor Sterling)
- Pleater tape (choose spacing: ¾” for more control or 2″ for best pleats)
- Pleater hooks
- Ruler or measuring tape
- Scissors
- Fabric marker or pencil
- Thread
- Hand sewing needle (optional)
- Pins
- Iron
Pro Tip: Lay out the pleater tape and hooks first to test pleat spacing before cutting your fabric.
A Step-by-Step DIY Pinch Pleat Curtains Guide!
Creating your pinch pleat curtains may seem daunting at first, but breaking the process down into simple steps makes it manageable.
The joy of seeing your finished curtains hanging perfectly makes all the effort worthwhile.
Let’s walk through each stage of the process together.
Step 1: Measure & Cut Fabric to Size
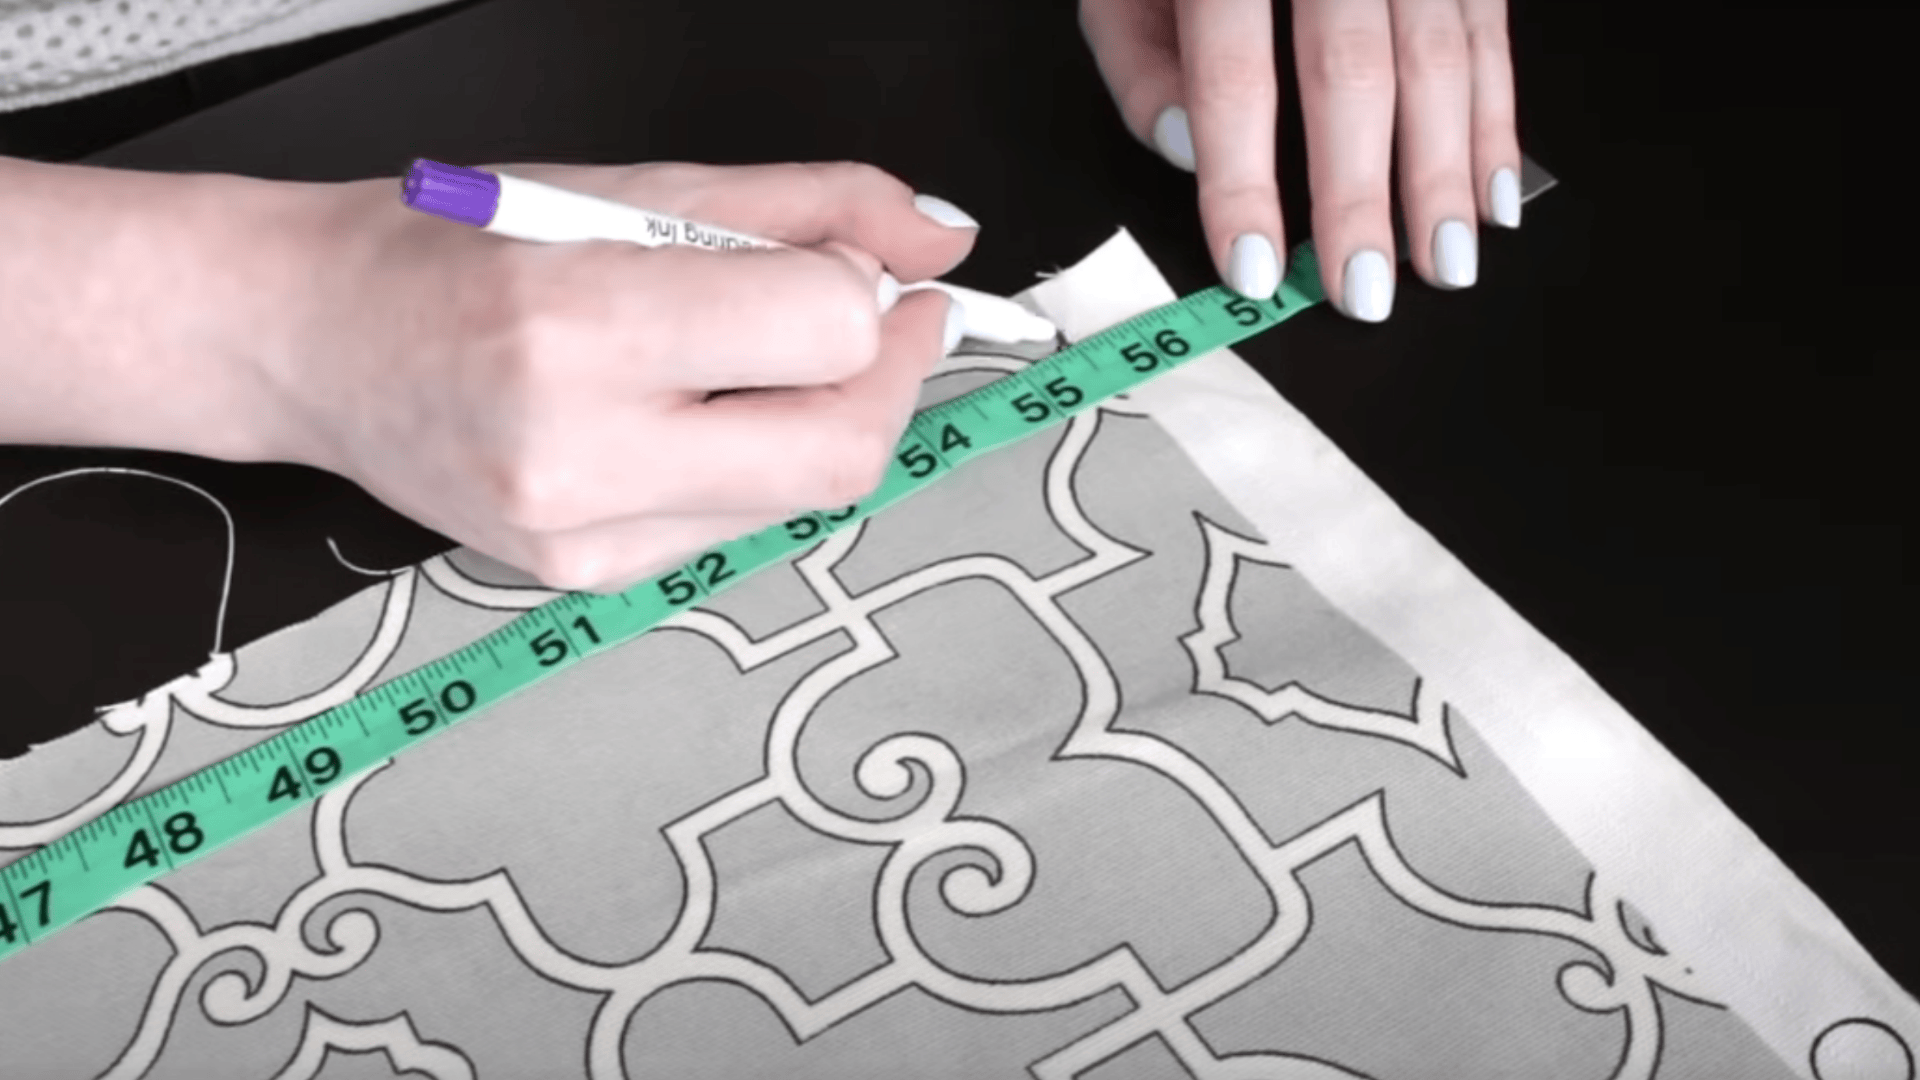
Getting your measurements right is the foundation of lovely pleated curtains.
When working with pleats, your finished curtain will be much narrower than your starting fabric.
For instance, if you want curtains that are 28 inches wide with 5 pleats spaced 5½ inches apart, plan accordingly.
Add 3 extra inches for side seams that give your curtains a clean, finished edge.
For length, add 9 1/2 inches to allow for proper hemming at the top and bottom.
If you want lined curtains (which look more high-end and block light better), cut your lining to match the same width and finished height as your main curtain fabric.
Step 2: Sew the Sides and Hem
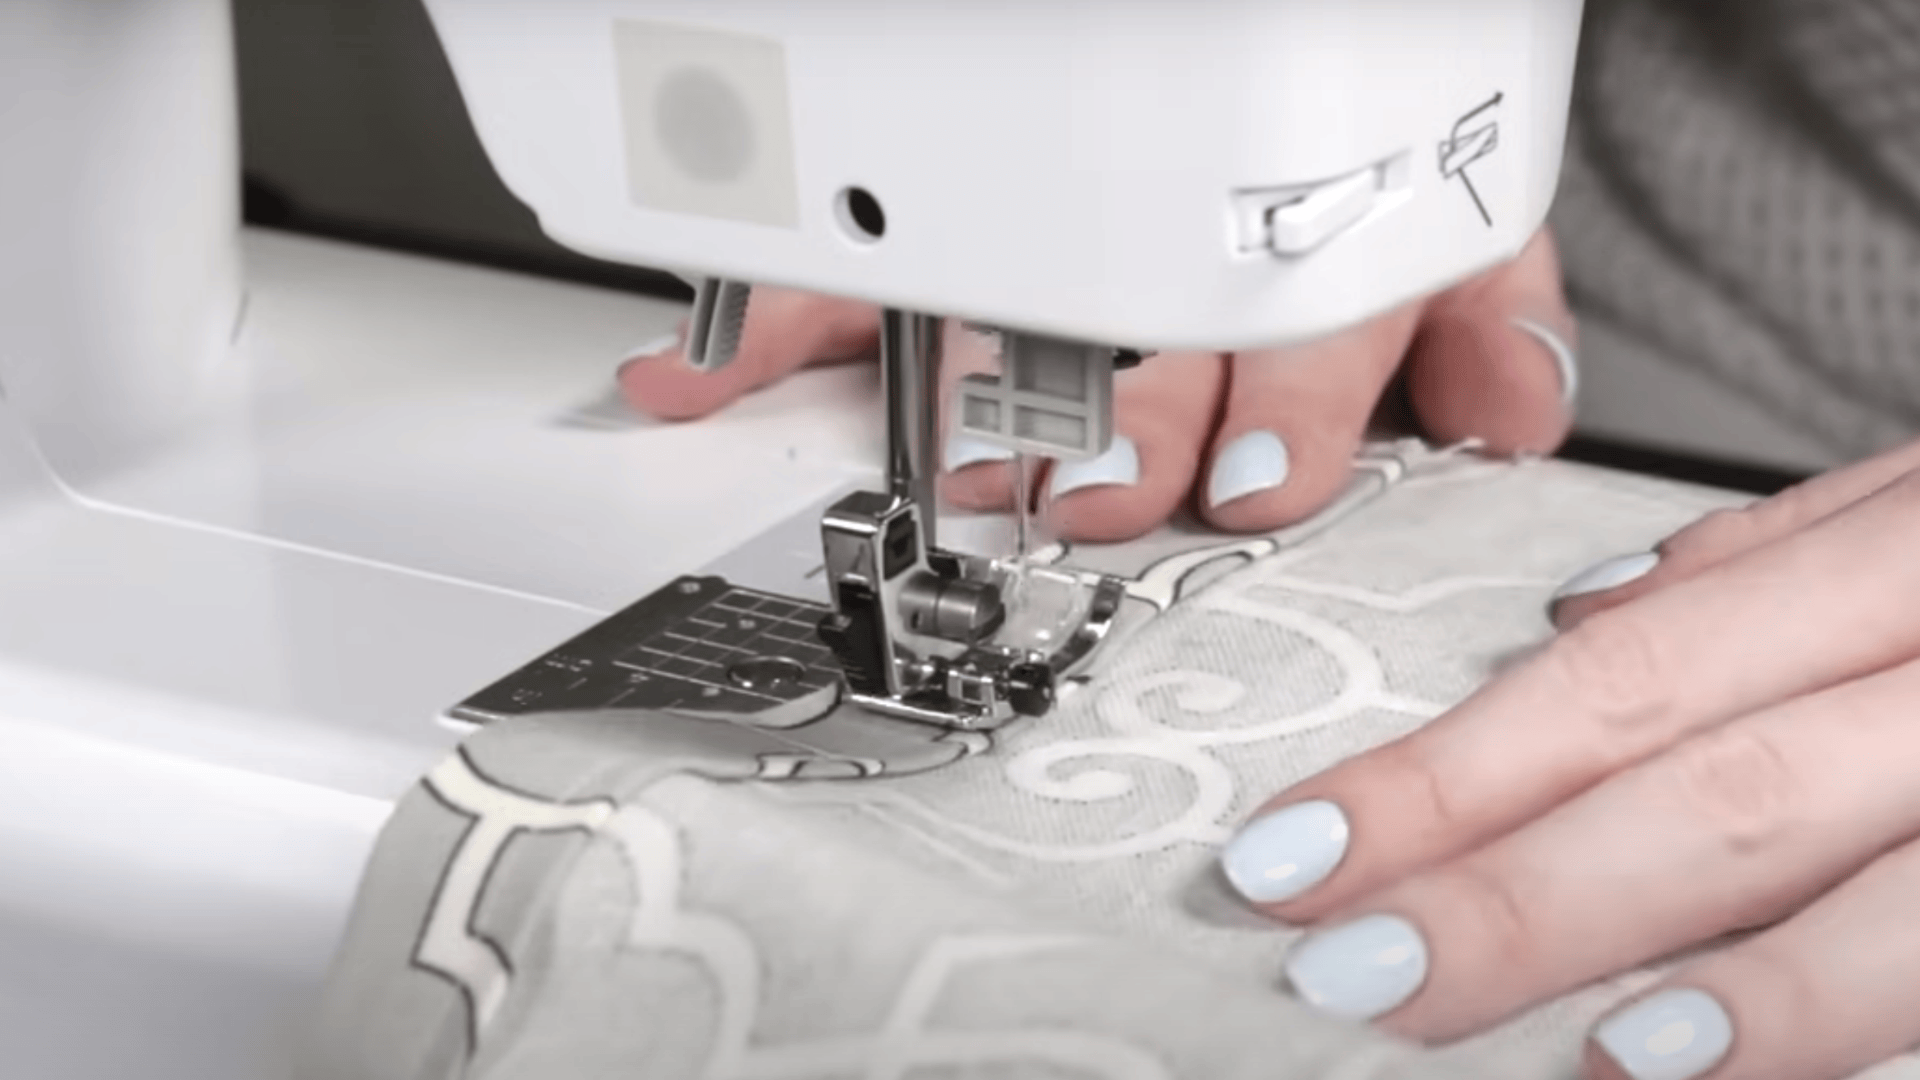
Take each side of your fabric and fold it twice, making each fold about ¾ inch deep.
Press these folds with your iron to create sharp creases.
Then, sew along the edge with a 5/8-inch seam allowance.
Remember to backstitch at both ends – this keeps your seams from coming apart when your curtains are hung.
If you’re adding lining, place it inside before pinning and sewing your sides.
For the bottom hem, use the same folding and stitching method.
Here’s a little secret for truly professional-looking curtains: tuck the corners under before finishing your hem.
Step 3: Finish the Top Hem
The top of your curtain requires special attention, as it will support the weight of the entire panel.
A strong, wide hem creates the base for your pleats.
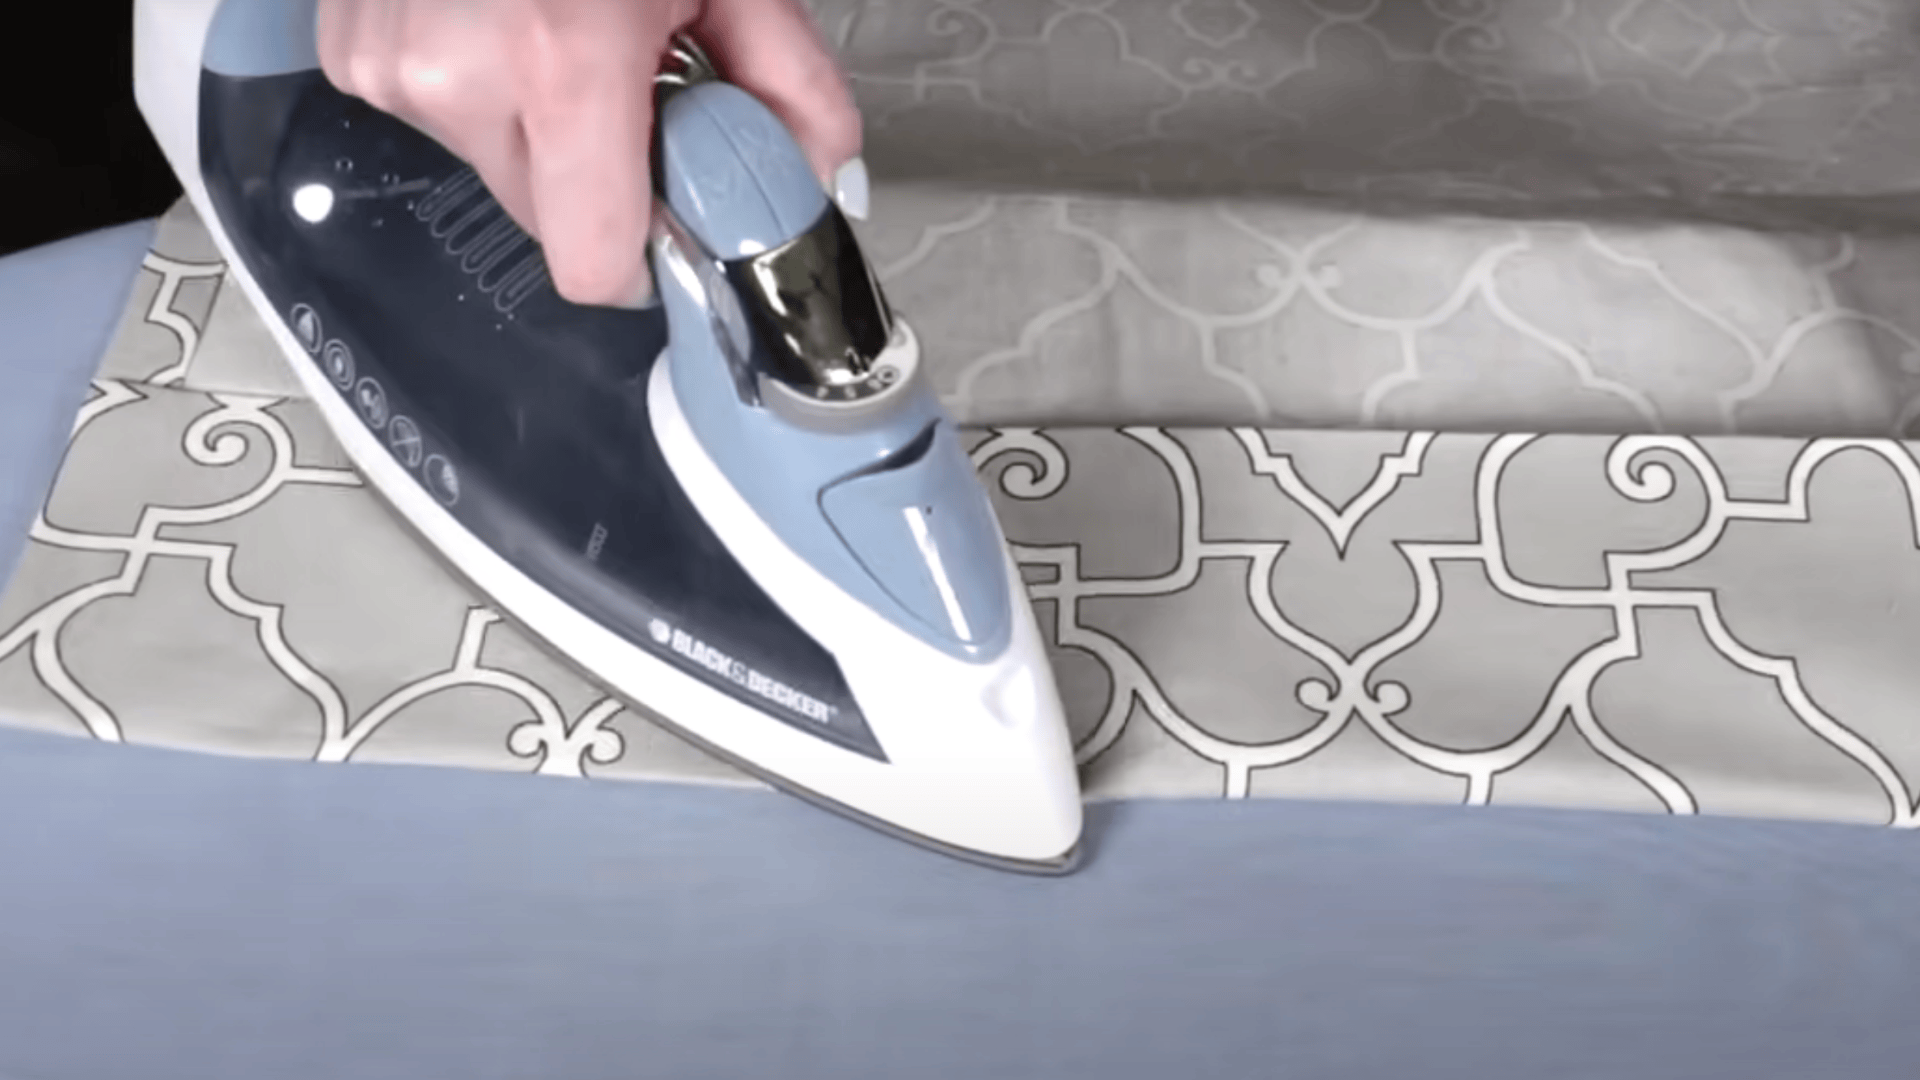
Fold the top edge of your fabric down 4 inches and press it with an iron.
Then fold it down another 4 inches and press again.
This double fold hides raw edges and creates a sturdy band for attaching your pleater tape.
Sew along the edge with a ¼-inch seam allowance, making sure to backstitch at both ends for added strength.
This reinforced hem will support your pleater tape and hooks without sagging over time, ensuring your curtains look great for years.
Step 4: Attach Pleater Tape & Insert Hooks
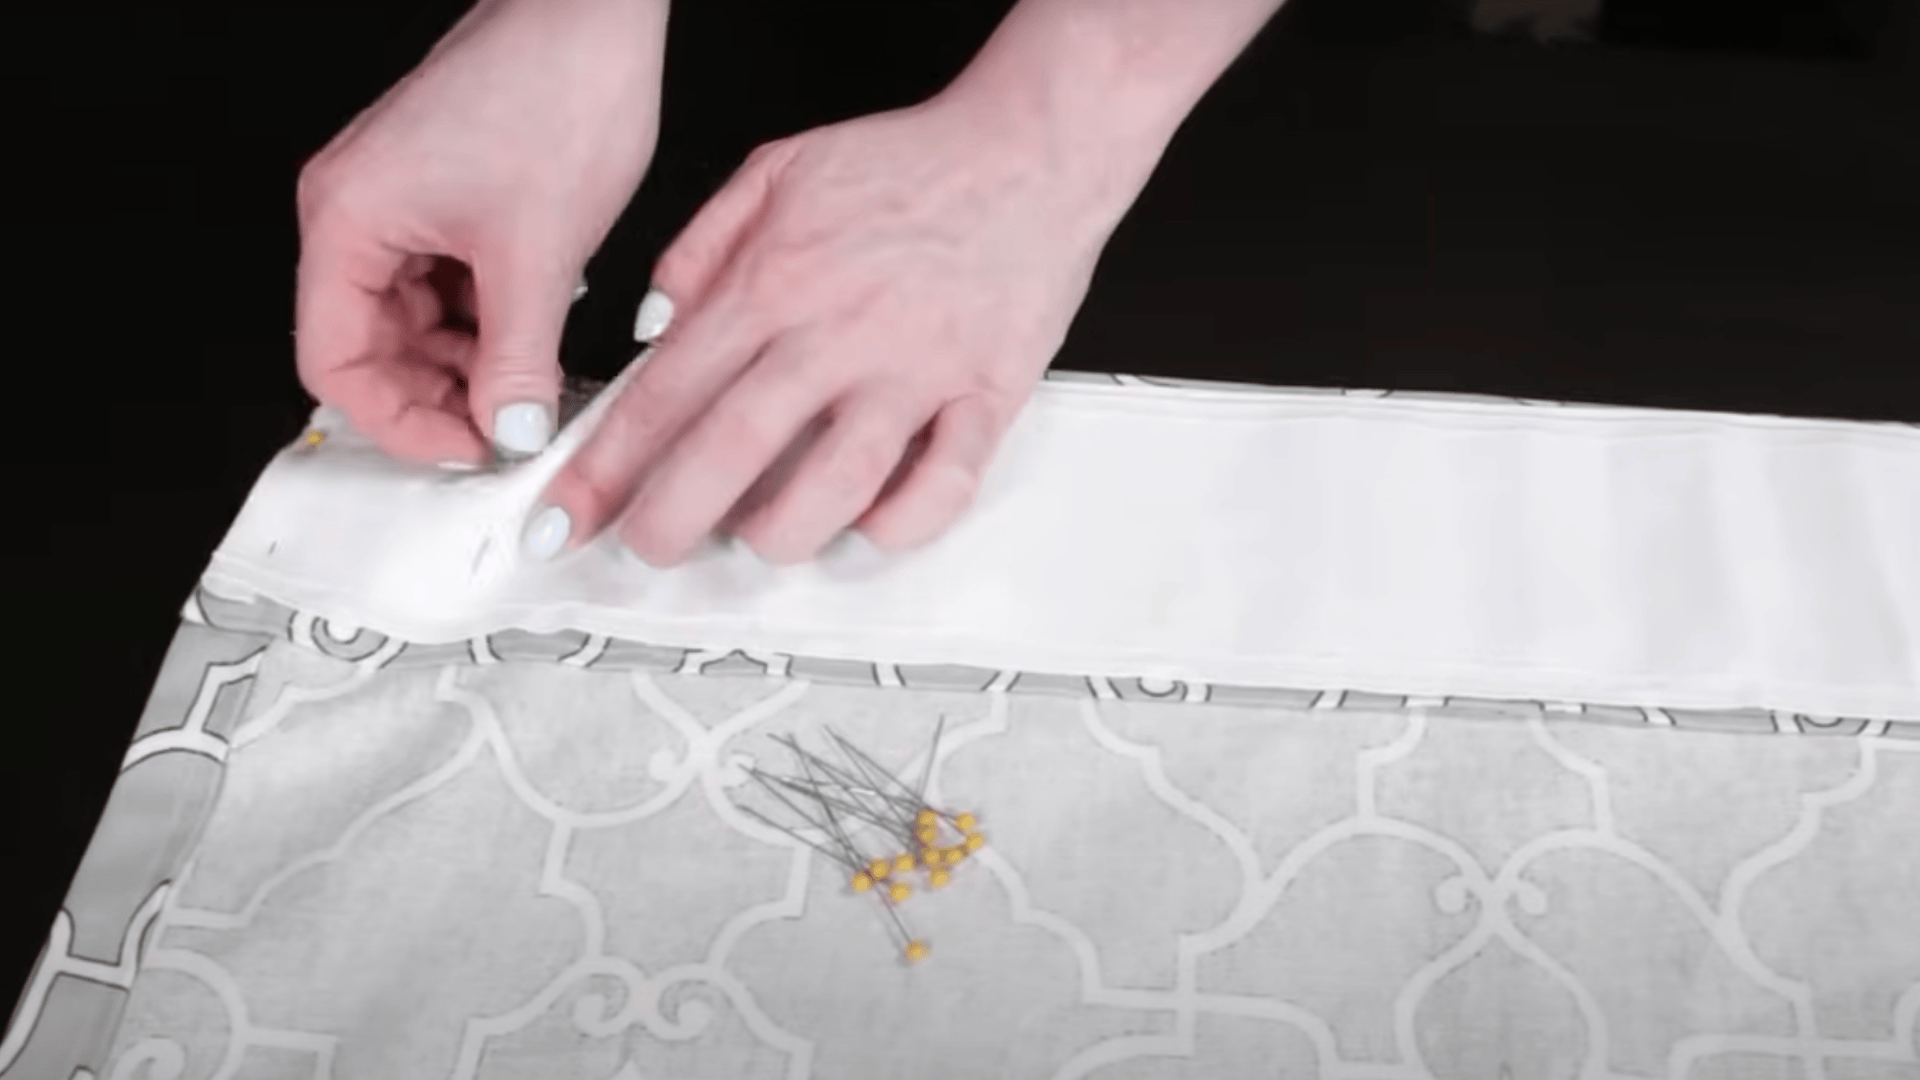
Place your pleater tape along the top back edge of your curtain, with the pockets facing downward and outward.
These pockets will hold your hooks and create the pleats.
Fold under the ends of the tape and pin everything in place.
This keeps the tape from fraying and gives you a clean finish.
Now stitch around the tape on the pre-marked color lines.
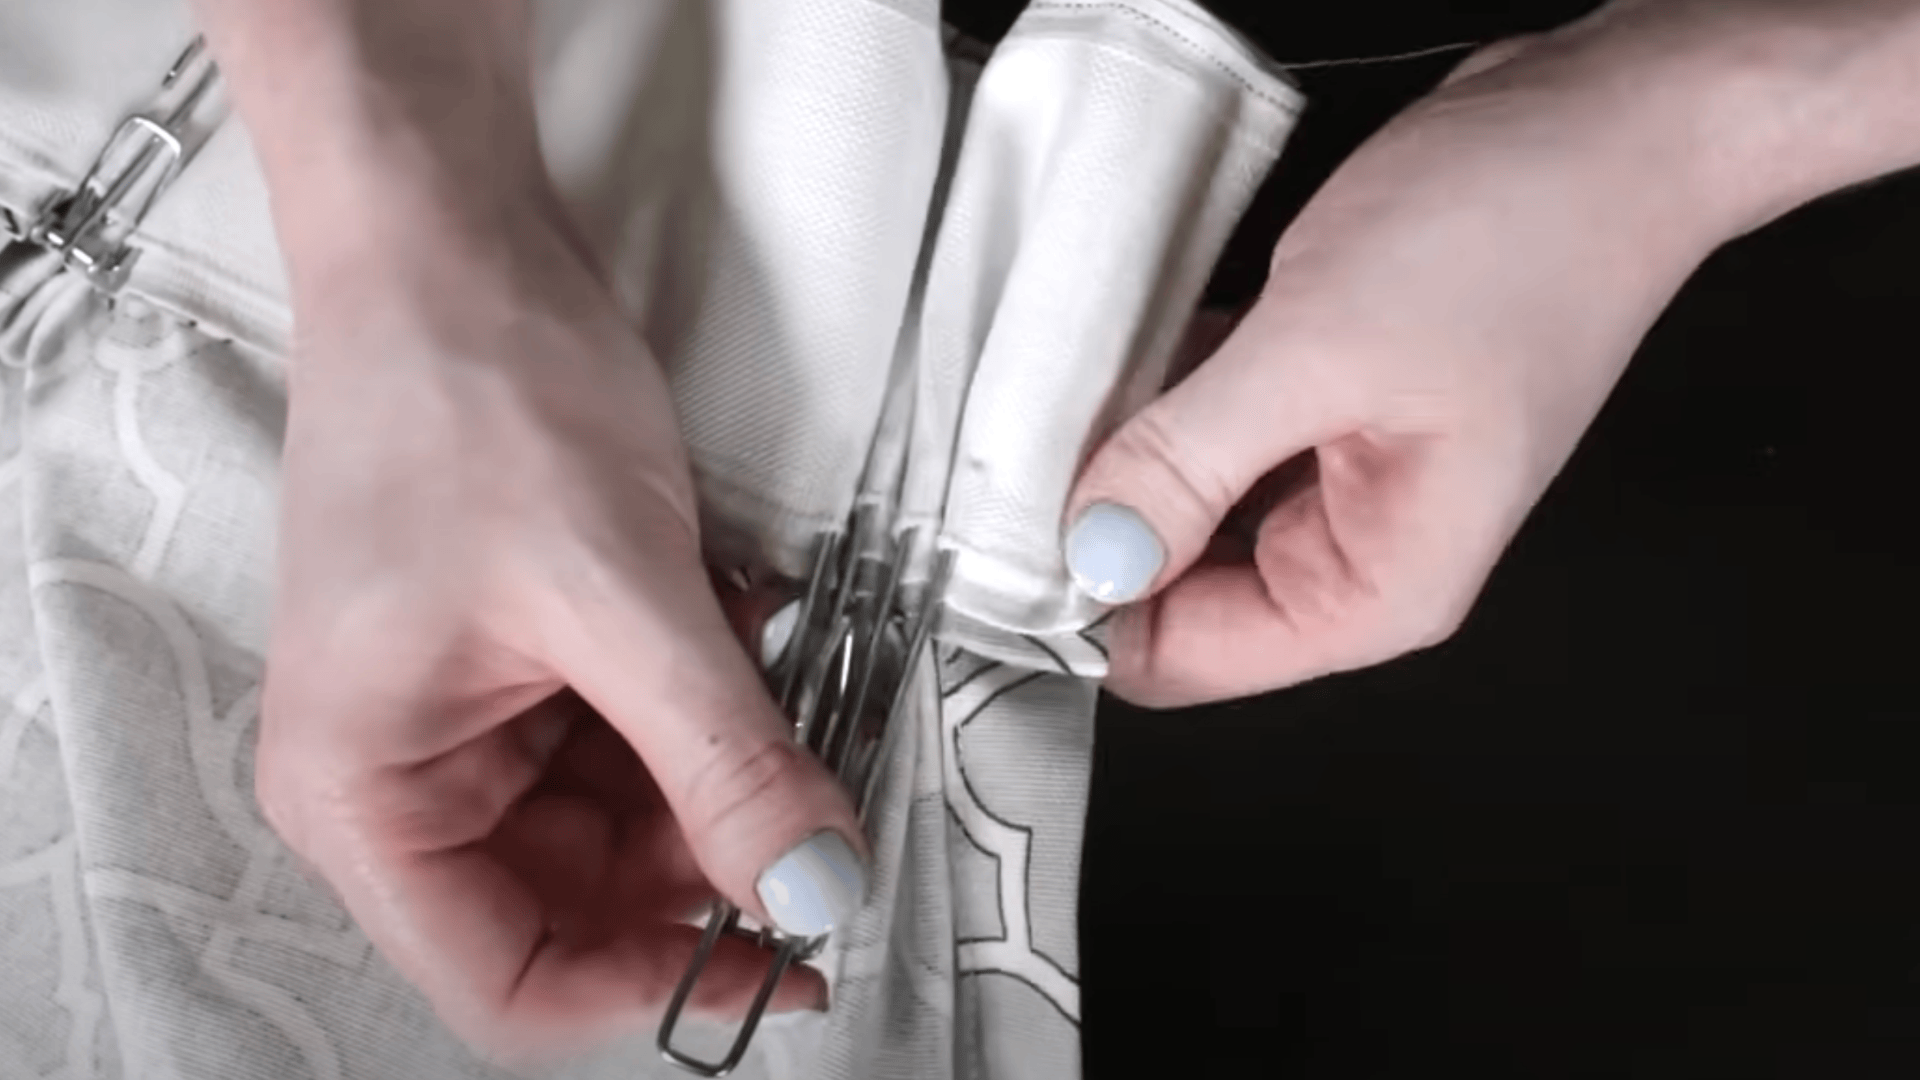
Once your tape is secure, insert the hooks by pushing the prongs into separate pockets in the tape.
If you want deeper, more dramatic pleats, you can skip some pockets.
Ensure the hooks are pushed all the way in and secured with the bottom bar for even, consistent pleats.
Step 5: Pinch the Pleats & Hang Your Curtain
For a truly polished look, hand-sew the base of each pleat from the inside.
This hides any knots and keeps your pleats looking neat.
Stitch a few times to tack the pleats together, then knot your thread, hide it within the fabric, and cut.
Now it’s time for the big reveal!
Hang your hooks on your curtain rod or traverse rod and step back to admire your work.
Adjust the pleats as needed until they fall just right.
Take a moment to appreciate what you’ve created – custom pleated curtains that add character and style to your room.
The personal touch you’ve added will be noticed and admired by everyone who enters the space.
Video Walkthrough – See How Experts Do It
For more information, check out this video tutorial by OnlineFabricStore
Common Mistakes to Avoid!
When making your first set of pleated curtains, being aware of these common pitfalls will save you time and frustration.
Many of these issues can be easily prevented with a bit of planning.
- Not measuring enough fabric width for pleating – remember pleats use up to three times more fabric than flat panels.
- Skipping the ironing steps – pressed folds create cleaner, more professional-looking pleats.
- Rushing through the pleater tape attachment – uneven tape leads to crooked pleats.
- Forgetting to backstitch seams – this simple step prevents seams from unraveling when curtains hang.
- Using fabric that’s too light or too heavy for the intended pleat style.
- Inconsistent hook placement – measure carefully for even, balanced pleats across your curtain panel.
With these steps and tips, you’ll have beautiful, custom pleated curtains that make your windows the star of the room.
The effort is worth it when you see how much character and style they add to your space!
Wrapping It Up
There’s something deeply satisfying about stepping back and seeing your newly pleated curtains catch the light just right.
The first time I completed mine, I couldn’t stop smiling at how they changed the entire feel of my room.
Now it’s your turn to experience that joy!
You’ve learned the tricks, avoided the common mistakes, and created something truly special for your home.
The best part?
Only you know how simple it really was.
Guests will assume you spent a fortune, while you enjoy the secret satisfaction of your DIY success.
Your windows aren’t just covered anymore – they’re showcased.
So grab that fabric you’ve been eyeing, and let your creativity flow from your hands to your windows!
Frequently Asked Questions (FAQs)
1. What’s the Difference Between French Pleats and Pencil Pleats?
French pleats are pinched in groups and sewn at the base for a formal, fuller look.
Pencil pleats form narrow, evenly spaced folds for a more casual appearance.
2. Can I Reuse Pleater Tape and Hooks?
Yes, both pleater tape and hooks are fully reusable when changing curtains.
Simply remove them carefully from old curtains and attach them to your new fabric.
3. How Do I Wash Pleated Curtains?
Remove the hooks before washing and follow the fabric care instructions, using a gentle cycle for most curtains.
Iron while slightly damp to easily reshape the pleats after cleaning.