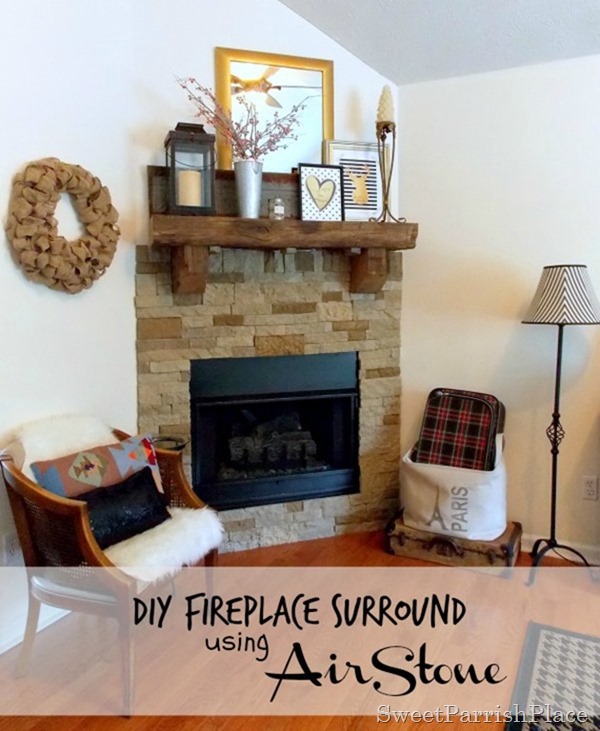
If you are a regular around here, you have already seen my new AirStone Fireplace surround (you can see the reveal here). Somebody stop me, I can’t keep from posting about this project! Today, I am here with a full tutorial for how I installed my fireplace surround. I will try my best to explain this step by step, but if you are planning on installing one, and have any questions for me, please don’t hesitate to ask me in the comments. I will answer back!
To start these are the materials you will need to complete this project. It is really not a big list. You will of course need the AirStone, AirStone adhesive, a putty knife, and a hacksaw. That is it! Also, before you start this project, you need to bring the products into the room where you will be installing them and let them acclimate to the room for 24 hours. I tell you this now because I did not realize I needed to do this until I was getting ready to start this project, which delayed me by one day. So frustrating! Ours was in our cold garage, so It was nowhere near the temperature it should be.
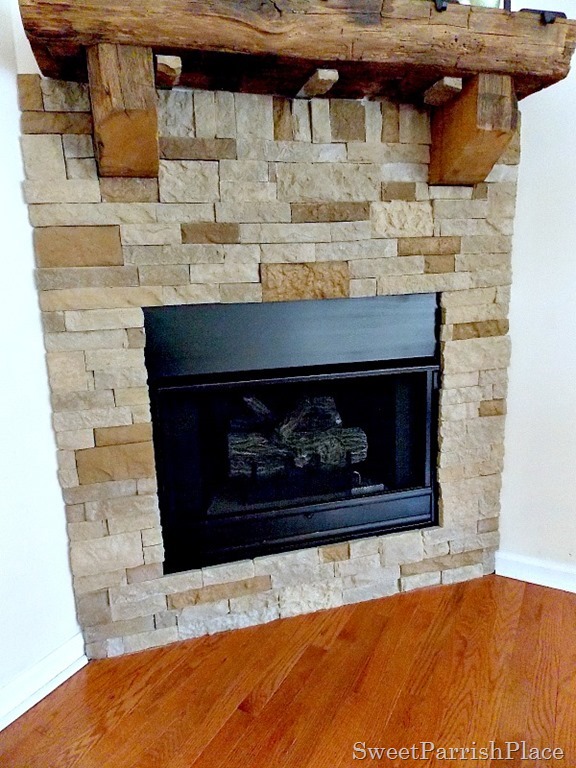
The first thing I did was to remove the baseboards from the wall where I was going to be installing the AirStone. I debated back and forth on weather to remove them or not, but after doing some research and looking at pictures of other similar projects, I decided to remove them. And I am so glad I did because I love the way it looks going all the way to the floor, and don’t think I would have liked it any other way. After the baseboards were gone, I started by just laying the product out for the first two rows to give myself any idea of where to start. The picture below is of the stone laid in place just as a test. Also, this stone comes in various shades. The color stone we ordered is called Autumn Mountain. And it had three-four different shades. So you just piece them together the way you want to. After this whole project was finished, I thought to myself that the whole process was kind of like putting a puzzle together.
Next, I started the process of applying the stone to the wall. I started in the center of the bottom row and worked my way out on both sides. This stone comes in flat edge stones, natural edge stones, and corner edge stones. We did not need to use corner edged ones, but we did use the other two. I used the natural edge around the fire box opening and on the right and left sides. To attach the stone to the wall, you start by scraping off any bumps on the back and edges of the stone using a putty knife.
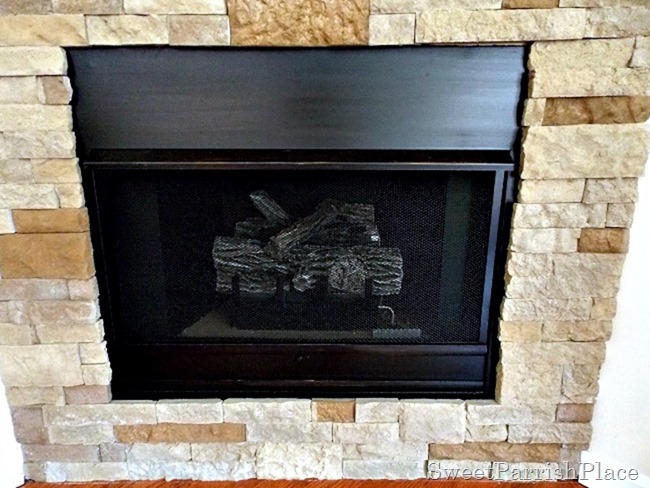
Next, you use a putty knife and get some adhesive on the putty knife and smear it on the back of the piece of stone, kind of like icing a cupcake. I found through trial and error that you do not need to put too much adhesive. As a matter of fact, if you use too much, some of the heavier stones will take forever to dry. And they might start slipping as mine did right at the top of the fire box, but I will tell you more about that later. So, you apply the adhesive to the back of the stone, and then you just press it firmly to the wall. If you start at the floor, and just work your way up, you should not have a problem getting them to stay in place (until you get to the top of the firebox). If you happen to get any adhesive on the front of the stone, you just need a warm wet rag to wipe it off. The below picture shows the finished stone all of the way to the top of the box. Up until now, all went perfectly. I did read where some people used a level when applying the stone, but I chose not to. I just eyeballed it.
Some of these pictures were taken at night, so I apologize for the poor quality of some of the photos. When we came to the top of the firebox, things got more challenging, because there was nothing to hold the stones up in place on the wall. Where until now, each stone was stacked on top of another stone from the floor up. And I wanted a very large stone right in the top center of the fire box. so we kind of had to get creative with how we were going to stabilize the stone. This was a huge dilemma. I had LC and Mr. 14 Year Old helping me with this project. LC helped for two mornings before going to work, but after he went to work it was just me and my son. And I have to say, I could not have done it without him. And I don’t know if he would admit it, but I think he really enjoyed being my assistant for this!
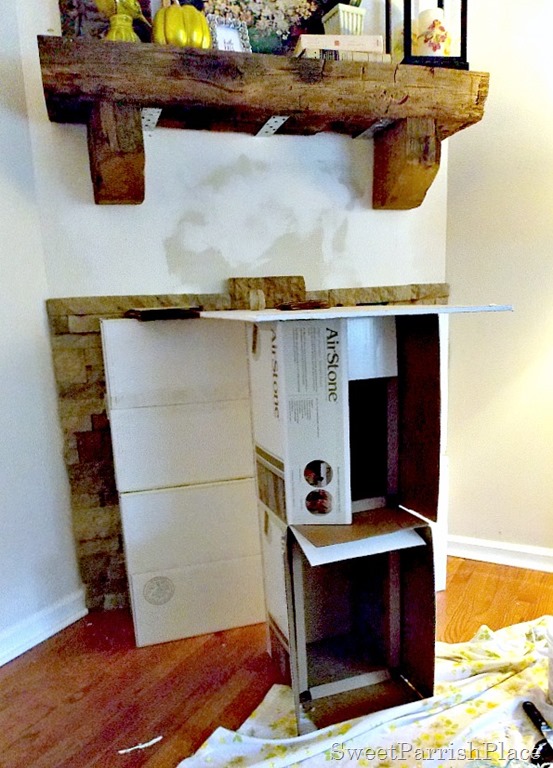
The boys made most of the cuts for me. I will talk more about cutting the stone a little later. But back to how we rigged things to stabilize this stone. My son got the bright idea to stack some of the boxes the product came in, and then on top of those boxes I laid a left over sheet of drywall to get it to the exact height we needed. We laid that first row right on top of the firebox, and then we waited for it to dry, and we waited, and waited. And it seemed like the smaller stones were dry, but that large stone in the middle just didn’t seem to be drying, and we determined that maybe it was because I put too much adhesive on the back of it.
In the below picture you can see a close up of how we rigged things. We needed some wedges to stick in places to make things look level, so we cut up some pieces of cardboard (that happen to be stacked between each layer of stone in the packaging), and we used the cardboard to wedge in there wherever needed, all the way to the top, we used those wedges to keep things level.
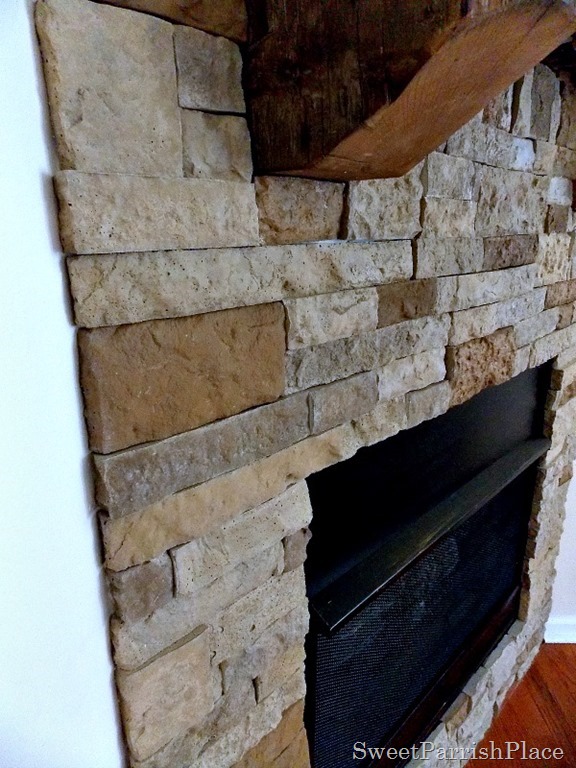
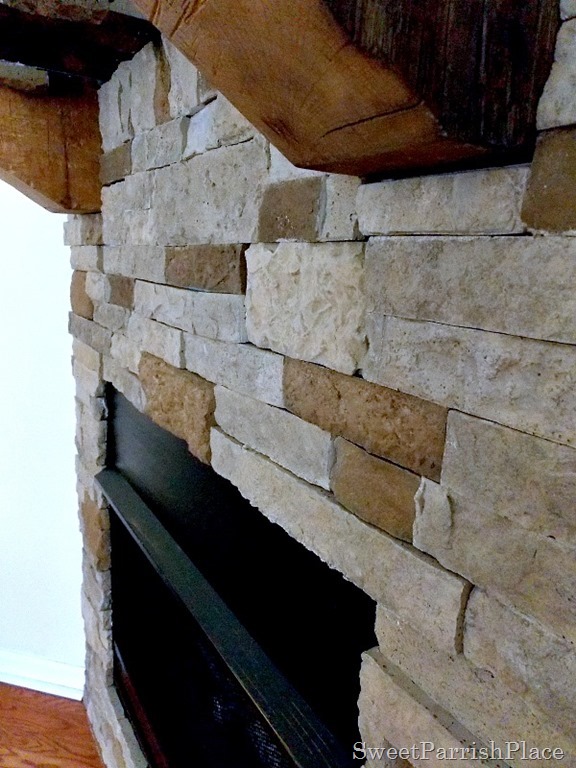
It was also tricky trying to fit the stones perfectly around the corbels and up under the mantle. This part took both my son and I brainstorming a lot to decide on how to place things. Like I said above, this part especially was like working a puzzle. The problem we ran into under the mantle was that we had a piece of old barn wood as a mantle. That was not a perfectly straight line underneath. The top is because it was cut and sanded down, but the bottom of it is it’s natural state. When we got up to right underneath of the mantle, we were at a standstill. It was going to fit perfectly up to the top, and it was way too difficult to cut the stones horizontally and straight using a hacksaw. We finally came up with the idea to place the stones vertically right under the mantle. And it turned out to be the perfect solution. So if you look at the picture below, you can see that the very top row underneath the mantle, the stone go vertical. And even then, there were still a few tiny gaps from where the mantle is not level underneath. What I did to disguise these was to use tiny pieces of scrap stone from where we had made cuts, and wedged them up under and into those openings. It worked perfectly! And no one would ever even notice them! When we were finished, we left the boxes propping things up there overnight so things would stay stable.
As far as cutting the stone, it is super simple. I think we bought 4 brand new hack saw blades for cutting the stone, and we went through three of them. It cuts much easier with a sharp blade. We made all of the cuts outside. Some tips for doing the cuts – start your cut from the front of the stone, not the back. When a stone needed cut, we would measure it out, and then I would make a pencil mark on the stone so the boys would know where to cut it. And I think that basically sums up the installation process. The below pictures are just some photos showing you the details of the finished product.
If you remember, we installed this mantle in a way that it can be removed (you can read about the installation here), because when we go to sell this house, we plan to take this mantle with us, and put up a different mantle (yes we saved some product so that we will be able to fill in any gaps if the new mantle is not the same exact same measurements. Anyhoo, because it is installed temporarily (but very stable) there are metal brackets underneath. I decided to adhere a few stones to those metal brackets to hide them. And I love the way it turned out! You can still see the metal brackets at the back close to the wall, but so one would ever really see them unless they bent down and looked up close and personal underneath there.
We all love a good before and after photo, am I right? So here is a picture to show just how far we have come with this project. Such a huge improvement!
I love the way this whole project turned out, and it completely changed the whole look and feel of our living room! I am so happy that we did this, and so happy that we chose AirStone products. And in case you don’t know this, AirStone was kind enough to supply all of the product that we needed to complete this project, which was such a dream come true for us!
You can see my mantle decorated for winter here.
I would be glad to answer any and all questions you might have if you are thinking about using Airstone for a project of your own. Just as away in the comments!
Happy Monday! I am enjoying a day off courtesy of Dr. Martin Luther King today. I hope you are too!

This is where I party:
Monday:
Frugal Crafty Home// Your Designs This Time// Metamorphosis Monday// Bloggers Brags
Mom to Mom Style// Much Ado About Monday// Masterpiece Monday// Motivation Monday
Motivational Monday// Clever Chicks// Amaze me Monday// Inspiration Monday
Frugal Crafty Home// Mom to Mom Encouragement// What’d You do This Weekend
Get Your DIY On// Before and After Party
Tuesday:
Show and Share/ Tutorials and Tips// Inspire me Tuesdays// The Scoop// Totally Terrific Tuesday
Tweak it Tuesday// Project Inspired
Wednesday:
Wow us Wednesdays// Work it Wednesday
Thursday:
Think and Make Thursday// My Two Favorite Things on Thursday
Friday:
Weekend Retreat// Remodelaholic// Frugal Friday// Craft Frenzy Friday// Creativity Unleashed
Saturday:
Found and Foraged// Show me Saturdays
Sunday:
DIY Sunday Showcase// That DIY Party








Does Airstone hold up to heat? I would like to surround a wood stove. Also, I would be adhering it over tile. Possible?
Thanks!
Yes, It will hold up to heat, it is around my fireplace and has held up wonderfully! Thsi product was given to me from Airstone to use as my fireplace surround, and I am sure if it were not meant to be used in this way they would not have given me the materials. I highly reccommend the specific adhesive sold by Airstone though, I would not use any other product.
Also, I think it would hold up just fine over ceramic tile as long as it is on the wall nice and tight and not falling off or coming loose.
I just check the product you mentioned in the post.
Its great to know that airstone comes with less weight but the same look and feel of real stone.
Thanks Roxanne and Nicki for the QA about heat hold up.
Alex Turner recently posted…38 Awesome Stylish Lamps For Your Home
Awesome! Glad you found it helpful!
So it looks like the stones are touching each other instead of leaving some room inbetween the stones and putting in some kind of grout, is this right? Also, how did you figure out how much Air stone you would need to put the on the fireplace? Besides color does Air Stone come in other styles?
Yes, Kim, this is right. It is supposed to touch each other like stacked stone. There are no grout lines. The AirStone website has a product calculator that you can use to figure out how much product you need. It does not come in other styles, only other colors.