Sweet Parrish Place

I'm the girl with champagne taste and a tight budget

  • Home
  • About
    • About Nicki
    • Shop My Amazon
    • Contact Us
    • Blog Love
    • Link Parties
    • Advertise | Disclosure | Privacy Policy
  • Home Tour
    • Yellow Prairie House Tour
    • West Virginia Home Tour
    • Seasonal
  • Projects
    • Trashtastic Treasures
    • Holiday
    • Decorating
    • DIY
    • Crafting
    • Paint Projects
    • Cleaning/Organization
  • Style
    • Fall/Winter
    • Spring/Summer
    • Sweet Parrish Place Style
    • Tips/Tricks
    • Shop My Looks
    • Shop My Amazon
  • Travel
  • Lifestyle
    • Family
    • Decor
    • My Favorites
    • I’m Loving It
    • Personal
    • Shop My Amazon
  • Yellow Prairie House Tour

DIY Grouted Vinyl Floor Reveal and Tutorial

July 28, 2014 By Nicki Leave a Comment

You may recall that I have been slowly updating Miss 18 Year Old’s bathroom.  Most recently, I made some DIY shelves to hang over the toilet.  I also painted the sink and cabinet.  And during this summer break, I finally got around to laying tile in this bathroom!  It is the biggest change so far, and something I have been wanting to do for 2 years.  I am so happy that it is finally done!


The tile that I purchased is :

Armstrong 12-in x 12-in Crescendo Marble Gray Marble Finish Luxury Vinyl Tile from Lowe’s.  I also used this grout:  Blue Hawk Saddle Gray Vinyl Tile Grout.

Other supplies I used were:
Utility knife
Bucket of water
sponge
rags
float
putty knife
3/16 in. spacers

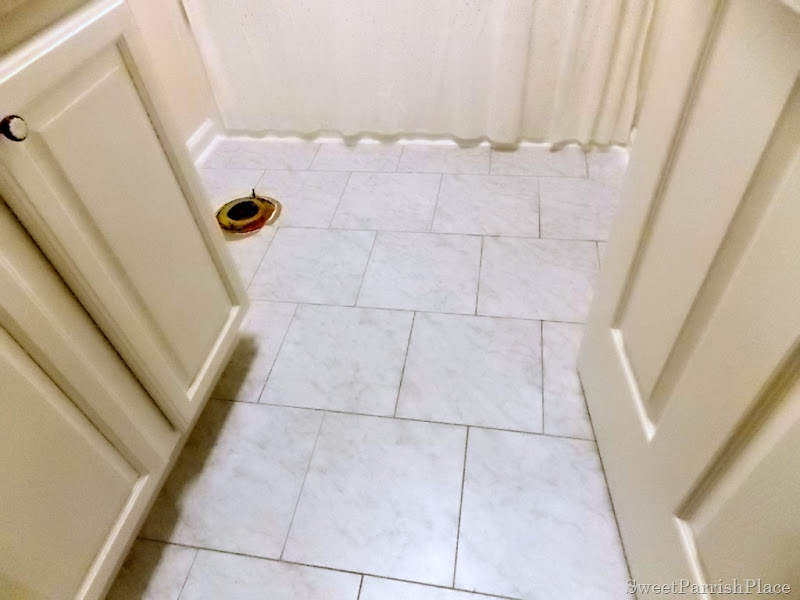
This is the floor after it was completely finished.

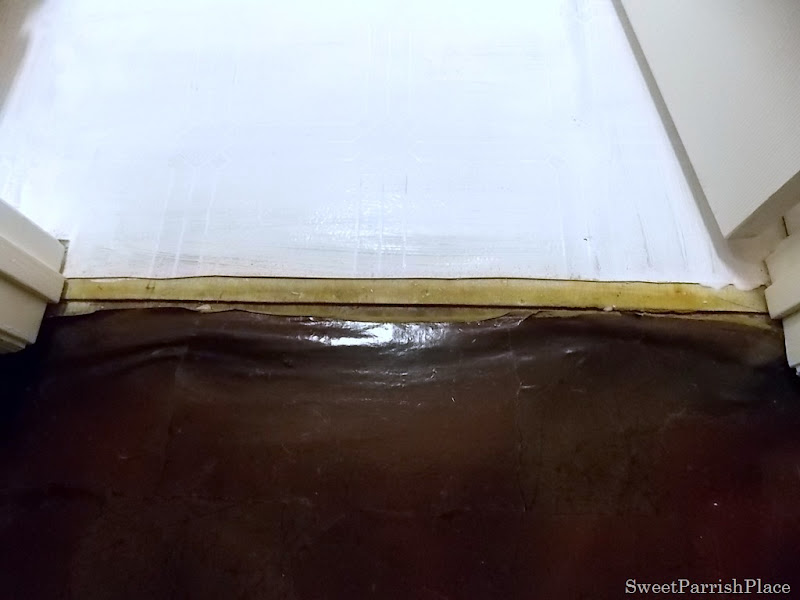
This is the ugly linoleum that was on the floor.  You can see in the doorway where my brown paper floors end and this linoleum begins.  The brown paper floor is loose right near the doorway because we had a water leak that got the flooring wet.  I wasn’t too worried about it because I knew we would be installing a threshold when the floor was finished.  But I did want to show you what it looked like.

DSCN5421
I decided to leave the linoleum on the floor because it was very tight, and the directions said you could leave it down if it was in good condition.
DSCN5424
I did trim the edge of the linoleum at the threshold, where it was loose.  I used a utility knife to do this.  Next, I cleaned the old flooring, and I painted the floor with primer, one coat.  The directions on the tile said to do this.
DSCN5426
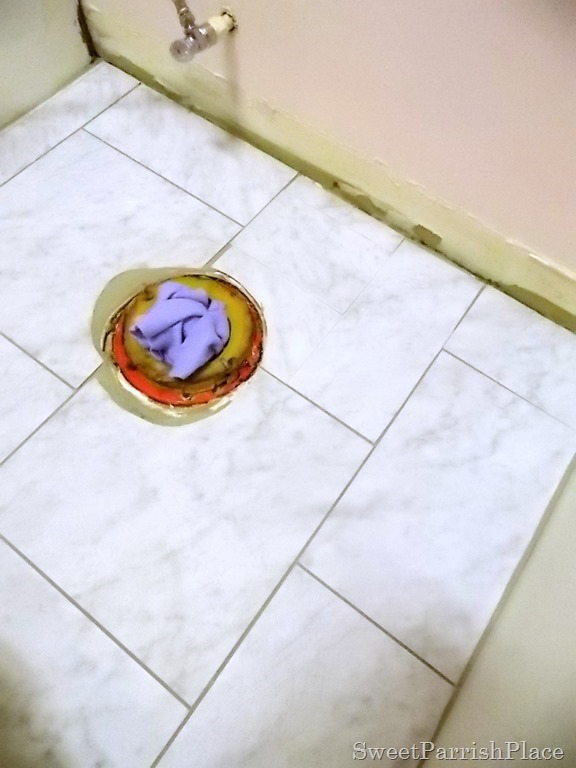
This is the floor after I painted it.  I carefully removed the quarter round going along the bathtub and the baseboard from behind the toilet.  I left the rest of the baseboards, but the ones behind the toilet were in really bad shape, and I knew I had some matching leftover baseboard in the garage that was left here from the previous home owners.  Obviously, you can also see that I had LC remove the toilet.  I stuffed some old rags into the opening in the floor in case of an odor.  I do recommend that the toilet be removed so that you can tile underneath it.  It gives it a more professional look in my opinion.
DSCN5425
I used a staggered pattern.  I started by placing my first tile in the center of the doorway,and laying all of the tiles that were not going to need cut at all.  I made sure to pay attention that the marble veining on the tiles was all running in the same direction.  You simply peel the paper backing from the tile and stick it down to the floor pressing firmly to make sure they are down good.  I also used a pencil to make a mark in the center of each tile to make sure I was laying them correctly.
DSCN5428
I used the 3/16 in. spacers to place the tiles evenly apart from each other.  Sorry, I forgot to get a pictures of the spacers in action.
DSCN5429
After I had all of the full tiles stuck down, I got to work on the tiles that needed cut.  It is not difficult to cut these tiles.  You just score it really good with your utility knife, and they will snap right apart.  I am not going to lie.  I had never done this before and measuring and cutting the tiles was a bit tricky for me.  I measure using a ruler.  For some of the more tricky spots I used a piece of paper to draw how the tile needed cut, and used it as a guide.
DSCN5430
You can clearly see right here behind where the toilet belongs is a spot where I messed up with my cuts.  I decided to leave it because the baseboard, quarter round molding,and the toilet would be hiding most of this completely.
DSCN5432
Here is another spot right next to the sink where I made a mistake.  but I was also planning to put baseboard and quarter round around the sink, so I knew it would also be hidden.
DSCN5433
Once the tiles are all laid, you can move straight to grouting.  there is no need to wait for anything to dry.  this part was fairly simple.  I just scooped out the grout with a putty knife, put a gob of it on my float, and worked in diagonal motion to smoosh it into the spaces.  I worked in small sections, using a wet rag or sponge to wipe off the excess grout as I went.  These are some pictures of the tile after the grout was finished.
DSCN5438
The imperfections around the edges will all be covered by trim.
DSCN5441
You can see in this picture that around the bottom of the sink is warped from the water leak we had.  That will all also be covered by trim.
DSCN5443
DSCN5446
Not bad, right?  Next it was time to install the trim and quarter round.  I had never done this before in my life.  But I went out and bought a miter box and a hand saw and decided to give it a whirl.  I am not going to include a tutorial for that because this post would be way too long.  Maybe I will do another post on that.  But I am going to show you some before and after pictures of the installation, caulking, and painting phases of the trim work.
DSCN5450
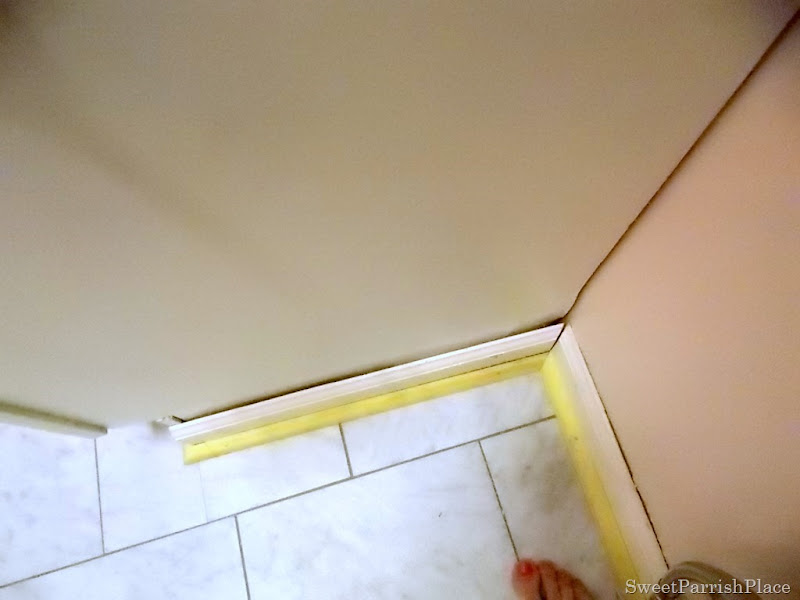
Here the baseboards and quarter round are ready for caulk.
DSCN5455
You can see the water damage here.  The trim does not hide it completely, but I am also planning to put a little piece of quarter round going up the sink between the wall and the back corner of the sink.
DSCN5456
Also ready for caulk and paint.
DSCN5457
Here, you can see some of my handy work, ha!  This got quite a few laughs and gasps of horror when I posted it on my Facebook page!  This is a dark corner underneath of the sink.  I was running out of quarter round, I had mis-measured my cut, and I pieced together enough to make this corner.  You will see in later pictures that once it was caulked and painted you can’t even see this.  I swear!
DSCN5459

Here the caulk is finished and ready for paint.  The sink is looking better already.

DSCN5461
This is that same messed up corner under my sink after caulking.  It already looks so much better, right?  BTW, I would have never done this if it were not underneath of the sink and barely noticeable.  Unless you bend over and look at it, you don’t see it.
DSCN5462
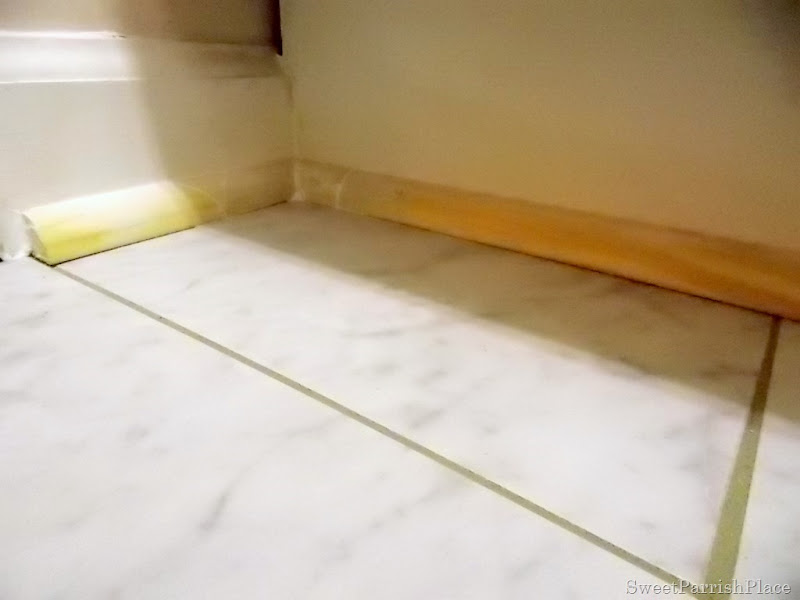
The quarter round that goes along the bathtub was glued in place.  It had been nailed previously, but I just didn’t see any way of doing that, so I glued it.
DSCN5464
This is the same area next to the sink, all finished!  It looks so much better!  That trim and quarter round make such a huge improvement.
DSCN5466
Not a bad job at matching those corners up, for a first timer.
DSCN5471

After letting the grout dry for 48 hours, we installed the toilet.  You can see here that it was not until LC had it reinstalled that I could see that I had made a mistake when I cut that tile under the toilet.  Well, I knew better than to even ask him to take it back out, so right now, I am living with it.  I just placed a toilet paper holder over it to hide it.

DSCN5475
See?  You can’t see it now!  Ha!  BTW, that toilet paper holder is actually a paper towel holder.  You can fit three rolls on this baby.
DSCN5477
Here is the spot under the sink where I pieced together the quarter round.  Virtually unnoticeable.
DSCN5478
This floor looks so fresh and clean compared to the old linoleum.  It is now a delight to enter this bathroom.  I used to cringe.


The freshly painted white trim is also a huge improvement.
DSCN5480
the only part I got some help with was installing the threshold.  My dad came over and did that for me.
DSCN5609
Here, you can see the thresholds to the bathroom and Miss 18 Year Old’s bedroom.  These will eventually be stained to match the brown paper floors.  Sorry some of these pictures are so grainy.  This is a dark area, and I just wasn’t getting good light down here when I took some of these.
DSCN5610
this little bathroom has come a very long way since we moved in.


This is a quick picture of the bathroom when we first moved in.  At this point, I had painted and hung the shower curtain.
delaney bathroom
I am so happy to almost call this room finished.  The only thing left to do is have the light installed over the mirror.  I also think I am going to repaint the mirror frame, I am not quite happy with the color of it.  I wanted it to have more of a shiny look.
And that, my friends, is it!  What do you think?  Have you ever tried your hand at peel and stick tiles?  Honestly, I would love to have real tile down here, but for the next 3-4 years, this will work just fine.  It looks very real, especially since I used the kind of peel and stick tile that I can grout.  I would highly recommend grouting your peel and stick tile if you can.
Have a great week!  It is my last week of summer break.  I am having anxiety just thinking about it!I am linking up here:

Monday:
Between Naps on the Porch
The Dedicated House
Home Stories A to Z
Inspire me Monday
Project Inspired
Monday Funday
Thrifty Décor Chick
Tuesday:
A Stroll Through Life
Coastal Charm
Wednesday:
Savvy Southern Style
Work it Wednesday
Friday:
The Shabby Nest
Craft Dictator
Inspire Me Please
Remodelaholic
Sunday:
DIY Sunday Showcase
DIY Showoff
Get Your DIY On

Filed Under: Armstrong luxury vinyl tiles, DIY, how to install vinyl tile, how to install vinyl tile flooring, how to lay vinyl tile, laying vinyl tile, Uncategorized

Leave a Reply Cancel reply

Your email address will not be published. Required fields are marked *

CommentLuv badgeShow more posts

This site uses Akismet to reduce spam. Learn how your comment data is processed.

Hi, I'm Nicki I'M THE GIRL WITH CHAMPAGNE TASTE AND A TIGHT BUDGET. I'M SO GLAD YOU'RE HERE!
  • Bloglovin
  • Facebook
  • Google+
  • Instagram
  • Pinterest
  • Twitter

VIP Real Estate

NO PLACE LIKE HOME

No Place Like Home

ORC Bathroom Makeover

Kids/Guest Bathroom Makeover

One Room Challenge Week 6 Kids-Guest Bathroom Reveal

It's week 6 of the One Room Challenge and this is … [Read More...]

ARCHIVE

ORC

Shop My Faves!

Spring Trends
PicMonkey Photo editing made of win
Get Sponsored by Big Brands

SheKnows

Linquia Influencer

FYI

Find Your Influence

INSTAGRAM

Recent Posts

  • Cozy and Casual Christmas Tour | Part 2
  • Casual and Cozy Christmas Tour | Part I
  • Farmhouse Bathroom Makeover Progress | $100 Room Challenge

Archives

Find It Here

Copyright © 2022 · Sweet Parrish Place