Building an effective paint can storage system is essential for any workshop or garage where organization and accessibility matter.
A well-designed paint can rack not only keeps your workspace tidy but also extends the life of your paint by storing cans in the optimal position.
Using a CNC machine for custom storage allows precise cuts and perfect joints, creating a professional organizer for different paint container sizes and weights.
This DIY approach combines woodworking skills with modern fabrication techniques to create a durable, functional storage system.
Essential Components of Paint Can Storage
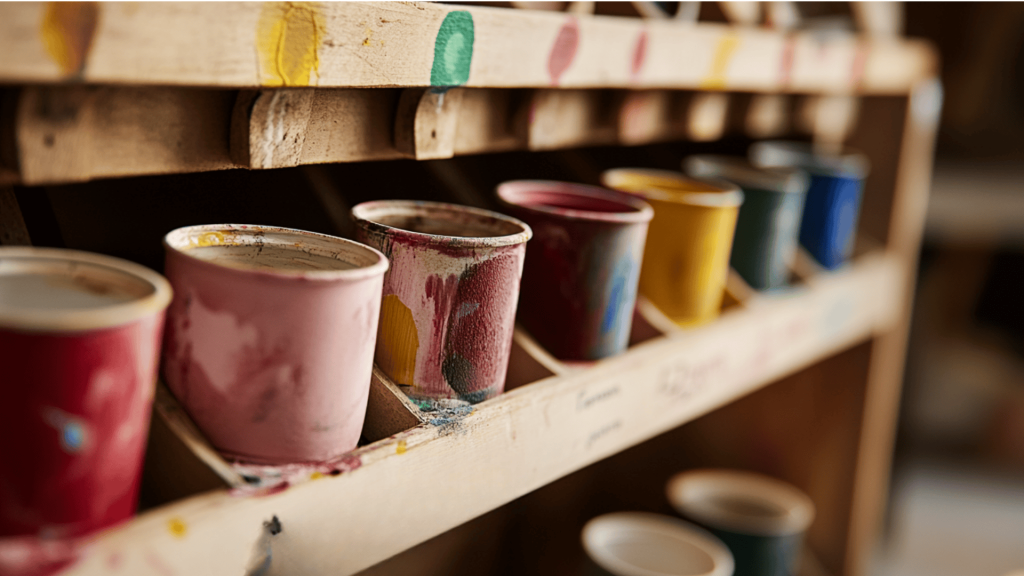
Store paint cans upside down in your rack to prevent the dip tube from drying out, which significantly extends shelf life.
Since inverted cans hide their labels, write color names on the bottom using a permanent marker for easy identification.
This technique is beneficial for those with color vision limitations or when organizing diverse paint collections.
This ensures better performance when you’re ready to use the paint for your next project.
Securing Your Paint Can Storage System
A robust mounting system ensures your paint storage remains safe and accessible.
Implement a French cleat system on the back of your rack for secure wall mounting, allowing easy removal when needed.
This bracket setup evenly distributes weight and prevents the rack from pulling away from the wall.
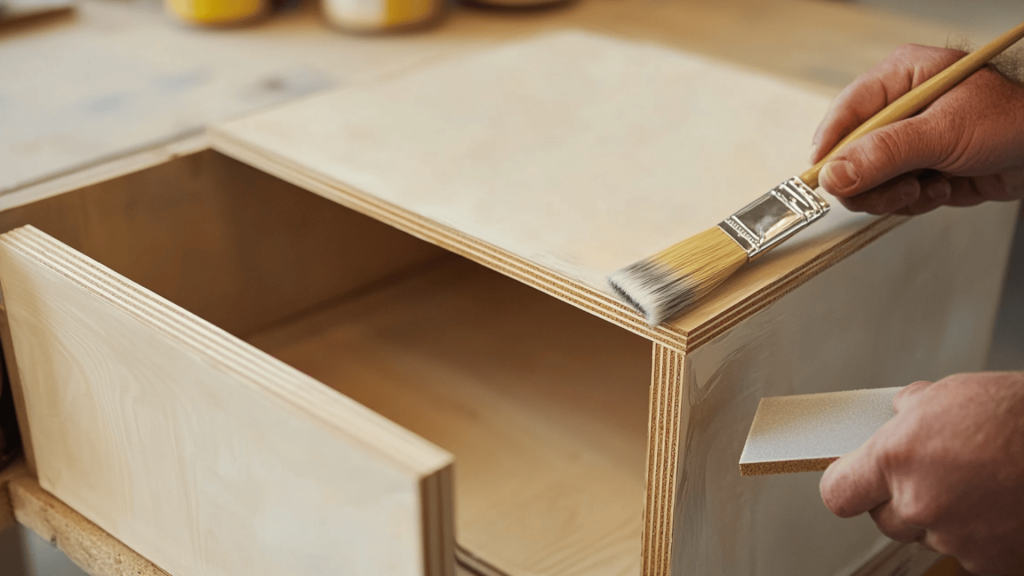
Apply a protective finish like polyurethane or polyacrylic to shield MDF from moisture, dust, and wear.
Proper finishing boosts durability while giving your project a polished, professional look.
It also helps the rack withstand the wear and tear of a busy workshop.
Tools & Materials Required
Here is a table of tools and materials required to complete the paint can rack project using a Onefinity CNC machine:
| Category | Item | Purpose |
|---|---|---|
| Machine | Onefinity CNC Router | For carving the MDF pieces |
| Material | ¾-inch MDF Board | The main building material for the paint rack |
| Adhesive | Double-Sided Tape | To secure MDF to the CNC workbed |
| Tool | Surfacing Bit / End Mill | For flattening and cutting the MDF |
| File | CNC Design File | Digital template for cutting |
| Sanding | 80 – 120 Grit Sandpaper | To clean up the edges of cut pieces |
| Assembly | Wood Glue | To secure joints during final assembly |
| Optional | French Cleat | For wall mounting the finished rack |
Step-by-Step Guide to Store Paint Cans
Here is a step-by-step guide to help you store paint cans in your house efficiently:
Step 1: Power On and Learn the Controller
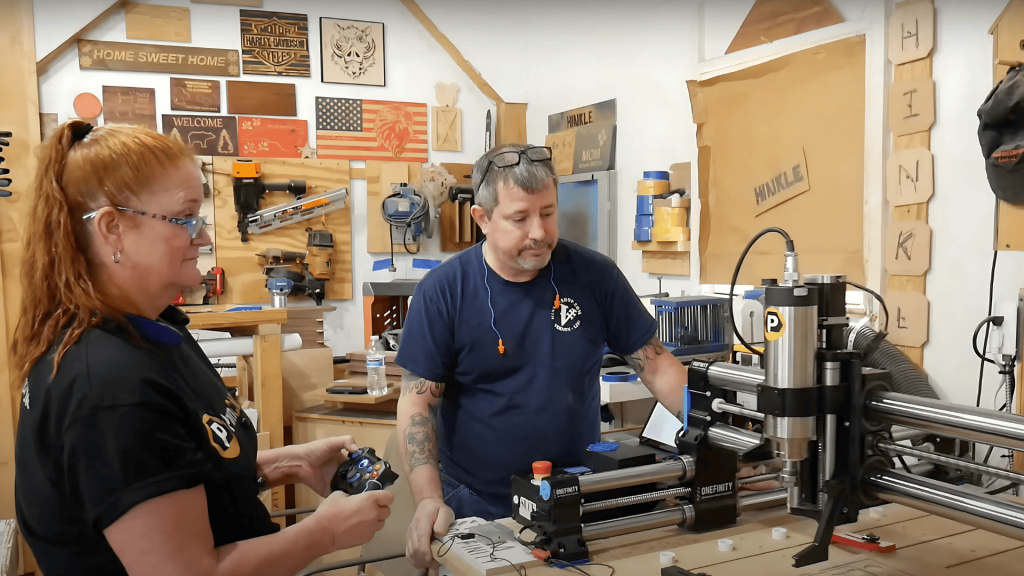
Start by pressing the center button on the Onefinity CNC remote until it lights up solid blue, confirming it’s powered on.
Familiarize yourself with the controls, use the left joystick to move the machine along the X and Y axes, and the right joystick to adjust spindle height.
The “B” speed button is ideal for beginners, offering balanced movement.
Practicing basic movements now builds confidence and helps prevent mistakes during setup, positioning, and cutting operations.
Step 2: Position the Machine and Material
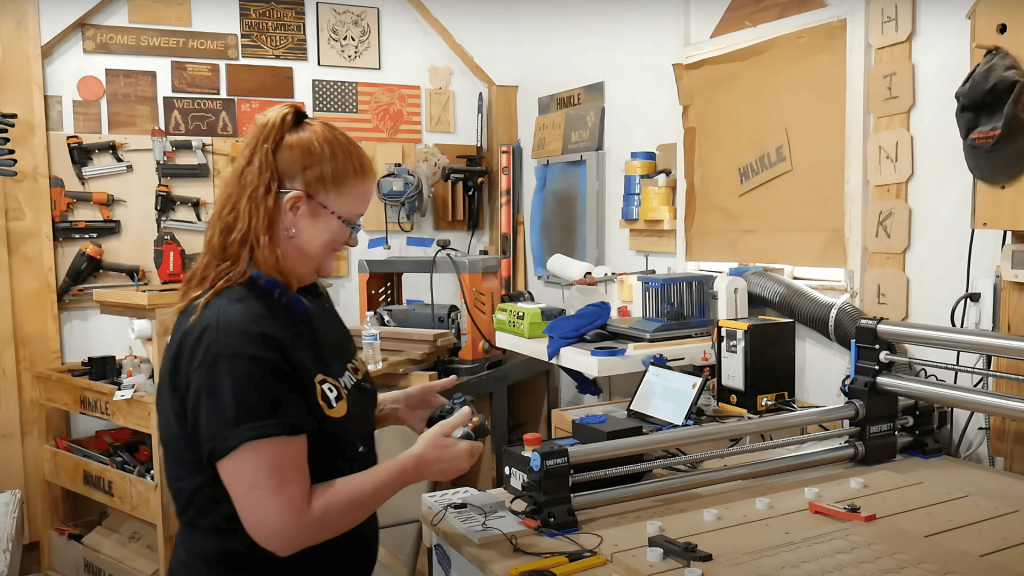
Use the left joystick to move the CNC to the center of the workspace.
Starting from this neutral point helps ensure proper alignment and reduces errors during carving.
Next, apply double-sided tape to the back of your MDF board. Press it firmly onto the CNC workbed using even pressure across the surface.
This secures the material without clamps or tabs, preventing shifting during cutting and ensuring accurate, clean results throughout the carving process.
Step 3: Surface and Start the Carving

If your MDF board is thicker than your design requires, like using ¾-inch stock for a ½-inch file, run a surfacing pass to bring it to the correct thickness and remove surface imperfections.
Once leveled, upload the CNC design file to your controller. Carefully zero the cutting bit to ensure accurate depth.
Ensure the board lies flat, then start carving. Watch the cut for lifting or shifting that could affect precision. After carving, remove and prepare the pieces.
Step 4: Sand, Assemble, and Mount the Rack
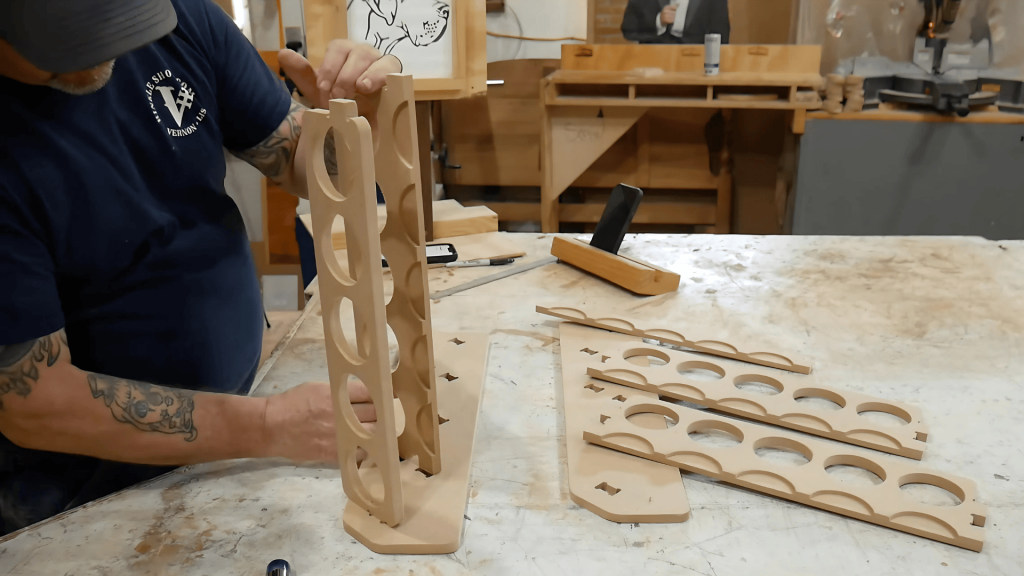
Once carving is complete, remove the pieces and sand all edges with 80–120 grit sandpaper to eliminate splinters and improve fit.
Begin assembly like a puzzle, starting with the top panel and inserting dividers.
Apply wood glue to loose joints and clamp until dry for added strength. To mount the rack, attach a French cleat to the back.
This bracket system allows secure wall hanging while making it easy to remove or reposition the rack later.
Step 5: Store Cans and Apply the Finish
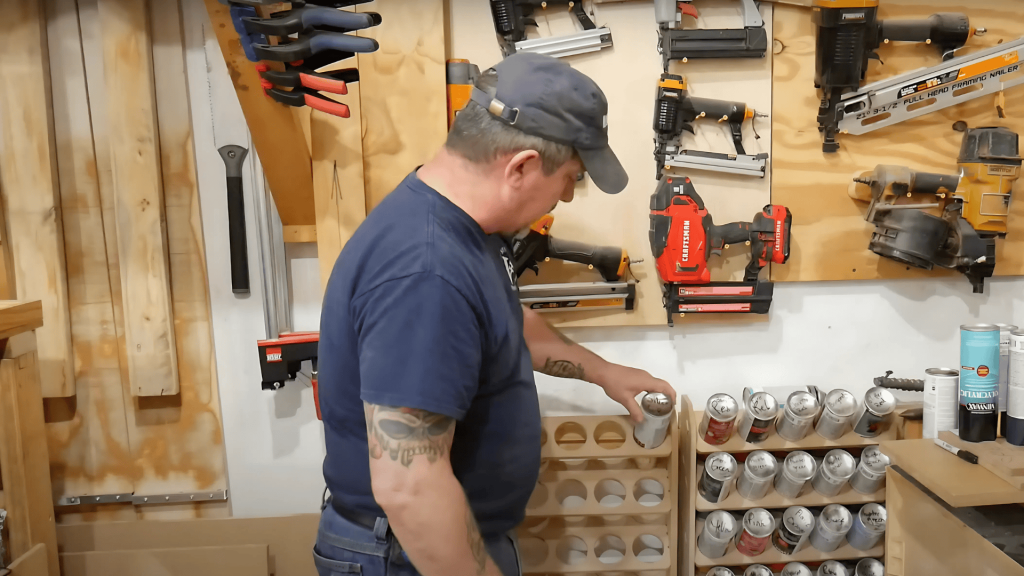
Place your paint cans upside down in the rack to prevent the dip tube from drying out and extend shelf life.
Since the labels are hidden, write the color names on the bottom of each can with a permanent marker for quick identification.
To protect your rack, apply a clear coat of polyurethane or polyacrylic.
This finish seals the MDF against dust and moisture, enhances durability, and gives the storage system a clean, polished appearance for long-term use.
Watch How It’s Done: Storing Paint Cans
For more information, check out this video tutorial by Hinkleshop.
Common Mistakes to Avoid
Avoiding these critical errors during your paint can storage build will save time, materials, and frustration while ensuring a professional-quality finished product.
- Skipping the surfacing step: Failing to surface MDF to the proper thickness can cause assembly issues and poor joint fit, especially when using ¾-inch material for ½-inch designs.
- Inadequate material securing: Not applying enough pressure when placing double-sided tape leads to material shifting during cuts, resulting in imprecise dimensions and potentially ruined pieces.
- Poor controller familiarity: Rushing into cuts without practicing joystick controls first often causes positioning errors, crashes, or damaged workpieces that could have been easily prevented.
- Ignoring bit zeroing: Starting carving operations without properly zeroing the cutting bit results in incorrect cut depths and misaligned features throughout the entire project.
Taking time to avoid these common pitfalls ensures your paint storage rack will be both functional and durable for years of workshop use.
Finishing Tips for Long-Term Durability
Proper finishing changes your paint can storage rack from a basic shop project into a durable organizer that withstands years of heavy use.
- Apply protective coating: Use polyurethane or polyacrylic finish to shield MDF from moisture, dust, and workshop wear that can cause swelling and deterioration over time.
- Sand between coats: Lightly sand with 220-grit paper between finish applications to ensure smooth adhesion and eliminate brush marks or bubbles for professional results.
- Focus on edges: Pay extra attention to cut edges and joints where MDF is most vulnerable to moisture absorption and potential failure points.
- Allow proper cure time: Let each coat fully cure according to the manufacturer’s specifications before handling or loading with paint cans to prevent finish damage.
These finishing techniques ensure your storage rack maintains its structural integrity and appearance throughout years of service.
Wrapping It Up
Building your own paint can storage rack isn’t just about decluttering; it’s about creating a system that protects your materials, streamlines your workflow, and reflects the care you put into your workspace.
Using CNC, inverted storage, French cleats, and proper finishing, you can create a durable, professional organizer tailored to your needs.
Even if you’re a seasoned woodworker or a DIY enthusiast, taking time to plan, build, and finish your rack properly will pay off for years.
If you’re interested in more DIY projects for your home, feel free to click here and check out our collection of easy weekend makeovers and step-by-step renovation tutorials.