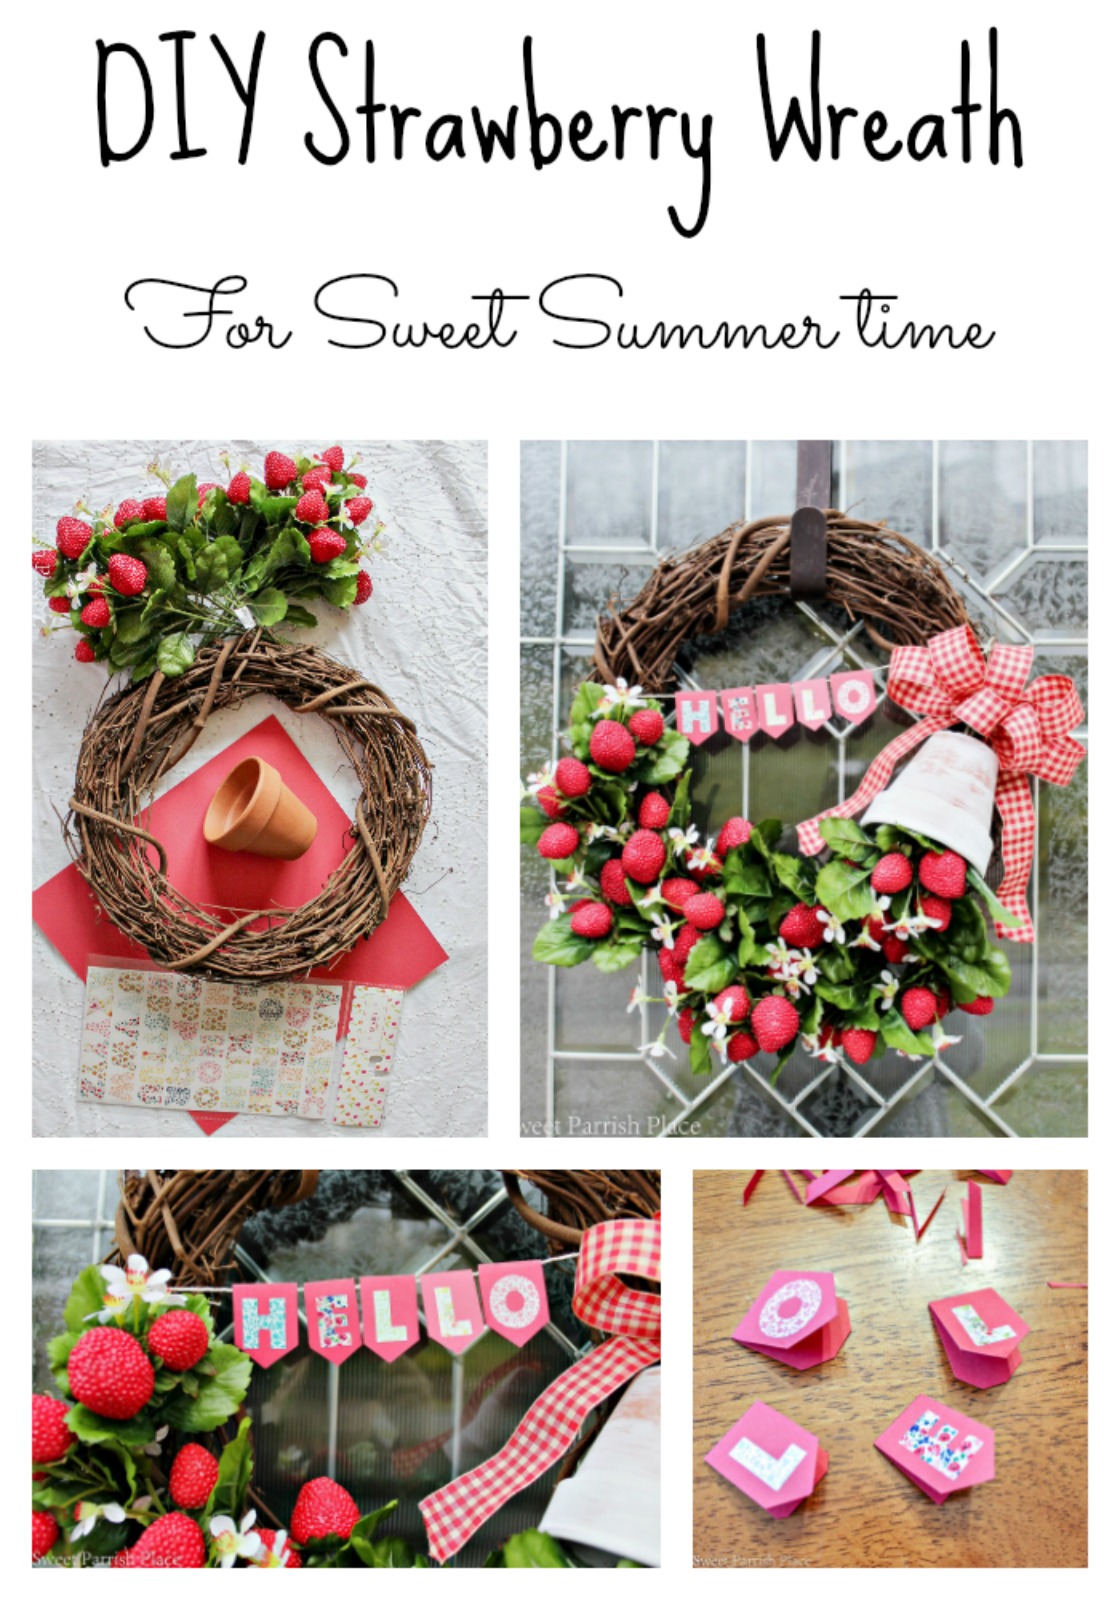
Spring is my self proclaimed favorite time of the year, but Summer time sure runs a very close second with me, that is for sure! Working in the school system allows me to be off during the summer, and I get to spend so much time with the kids, vacationing, piddling around the house, and working on the blog, so each year, I cherish my time off. I wanted to share this DIY Strawberry Wreath I made for our front door for summer. This is the perfect summer time wreath because strawberries are so abundant and ripe at this time of the year, and my family eats them by the boat loads!

I have been making my own wreaths for a few years now, and ever since I have figured out how to make a beautiful wreath on my own, I don’t think I will ever go back to paying the huge price tags to buy one. Plus, if you start with a simple grapevine wreath as your base, you can easily strip everything from it when you are tired of it and want to change it out to something different.
I purchased all the supplies for my wreath at AC Moore, simply because it is one of the only craft stores in my area that is really close by.
Needed Supplies to Make a DIY Strawberry Wreath:
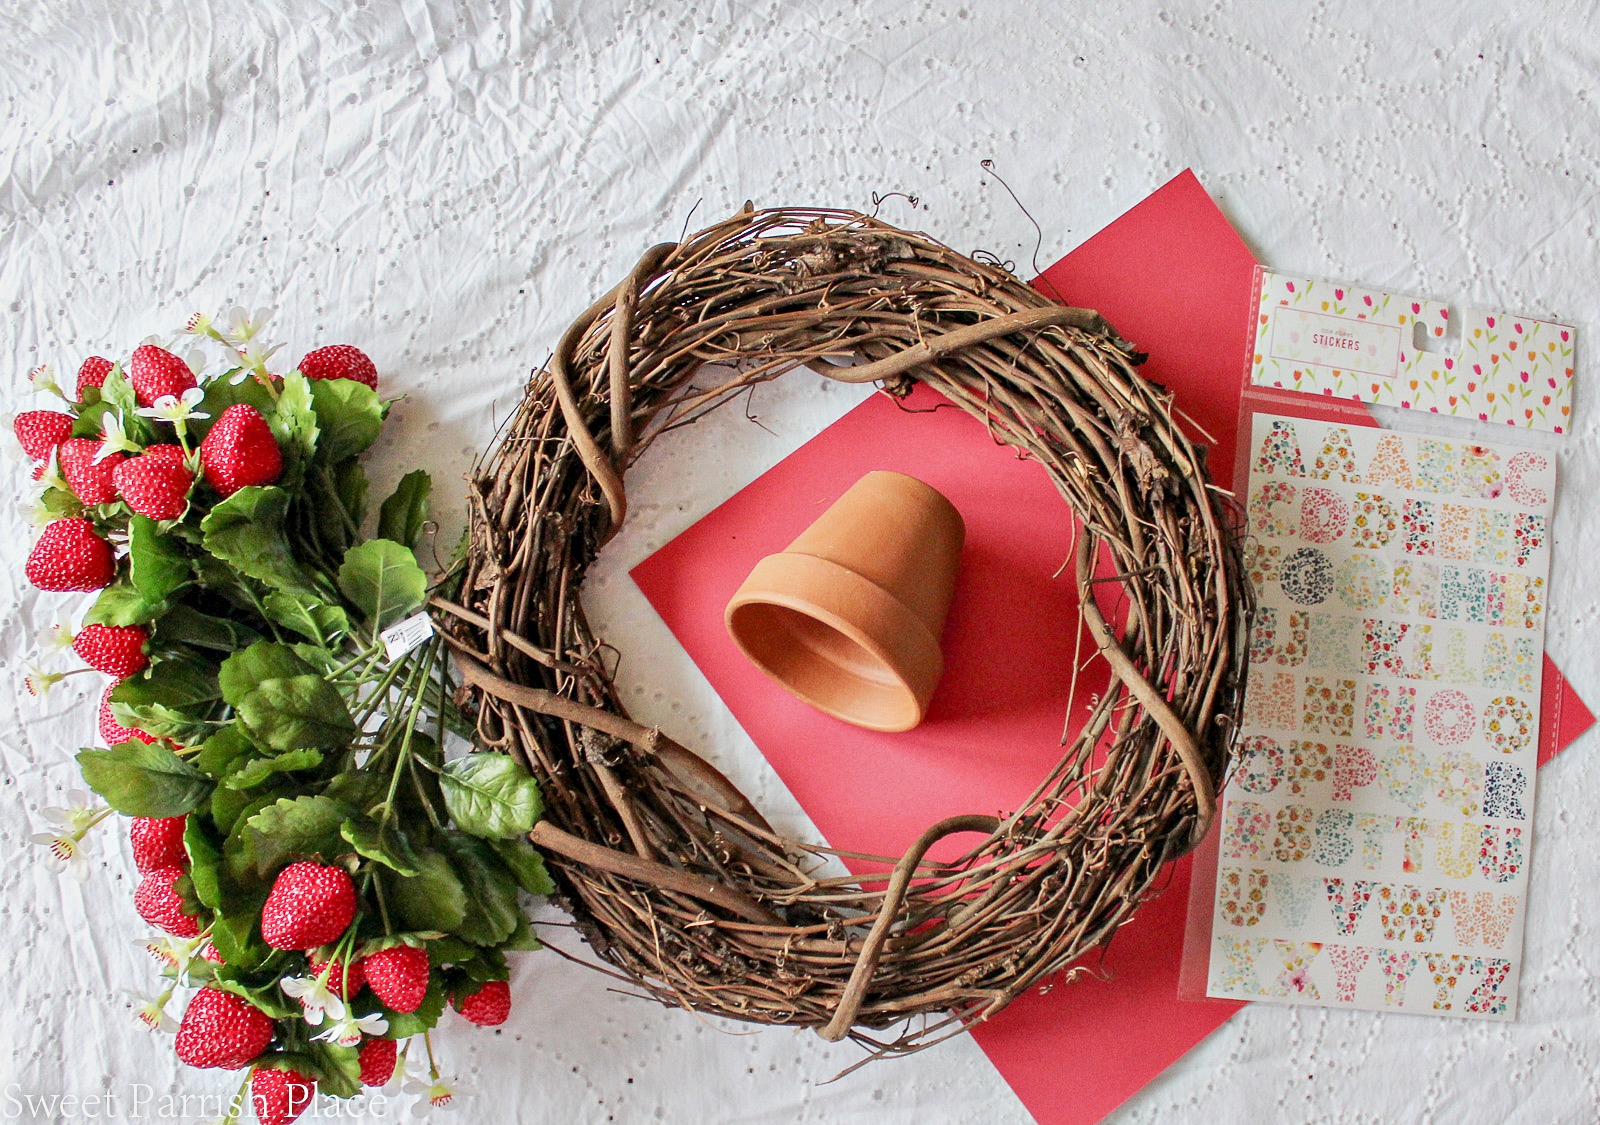
- grapevine wreath form
- two bunches of faux strawberries
- small terra-cotta pot
- red card stock for the letters
- stickers with letters ( I chose the cutest floral letter stickers)
- jute twine to make a hello banner
- hot glue gun
- floral snips
- white chalk paint
- small paint brush
- paper towels
- Ribbon for a bow ( I chose a red plaid ribbon)
- Floral wire to make the bow

How to Make a DIY Strawberry Wreath
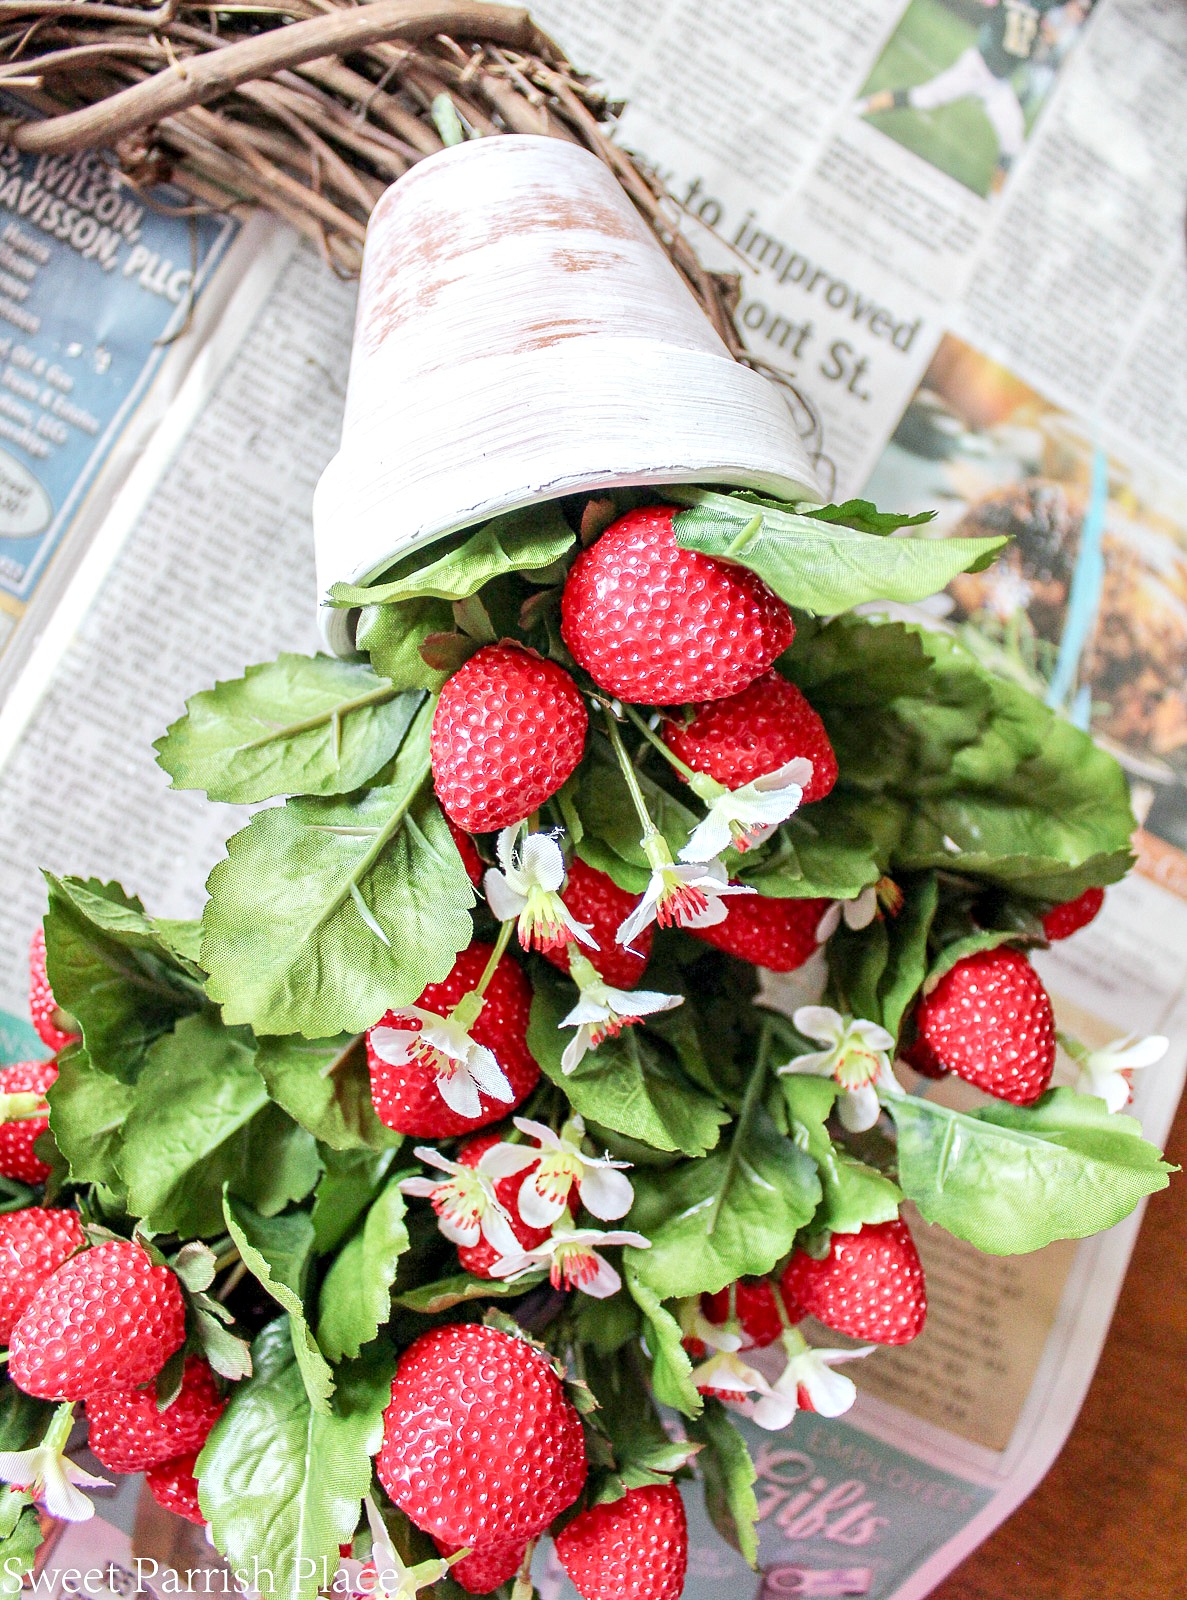
Start out by painting the small terra-cotta pot. I dry brushed mine to give it an aged look. I did this by simply dipping my brush in my white chalk paint and then dabbing it on a paper towel until the paint was almost completely gone from the brush, and then I lightly painted around the pot. Allow it to have time to dry. It will dry very quickly.
While waiting for the pot to dry, I broke down my two bunches of strawberries using my floral snips. As you can see in the photo above, I had several tiny sprigs of strawberries afterwards.
Next, I hot glued the small pot onto the wreath upside down, because I wanted it to look like the strawberries were spilling out of the pot. After the pot was dried and secure on the wreath, I started adding in my strawberries. the ones that were sticking into the pot, I hot glued, but as I worked my way down my wreath, I just started sticking sprigs into the grapevine wreath, and I no longer needed to glue them.
I spread my strawberry sprigs out through the bottom half of the wreath, and then I added a red plaid bow right on top of the flower pot. The one thing you will not be finding on my blog is a tutorial for how to make a bow. I consider myself an amateur at this, and I usually tie a simple bow, but I did venture out for this wreath, and I actually watched a video that helped me make this one. I wish I could remember which video I watched, but I don’t. You can find loads of videos that will teach you how to do this though.
I have to say, I am quite proud of the bow I made. I usually don’t get them to turn out this good. Once I had the ribbon secured to the wreath using floral wire, I wanted to add a tiny banner to the center of the wreath that could greet our guests with a hello.

I used red card stock paper to make a small banner, and then I attached the sticker letters I purchased to spell out the word hello. I determined how big I wanted my red banner shapes to be, and then I just cut out the paper in the size and shape I wanted. If you look at the next three photos, you will see the process of making this, and you should be able to figure it out. I made the banner so that it was pointed down, and I wanted the paper to be able to fold in half over the twine so that it would hang properly.


Once I folded the banner papers over the jute twine, I dabbed a dot of hot glue in between the folded paper so it would stick together. I then simply cut a long enough piece of twine to spread across the wreath and tied it to the grapevine wreath.
Keep in mind – if you decide to make a banner – the size of the wreath and where you will be placing it. You want to make it an appropriate size for your wreath. I had my wreath sitting by my side the entire time I was making my banner and I checked it often to make sure it was going to work for me.

Once you have your banner secured onto the wreath, you are ready to rock and roll and hang your new DIY strawberry wreath on your front door, and wow everyone who comes to knock!

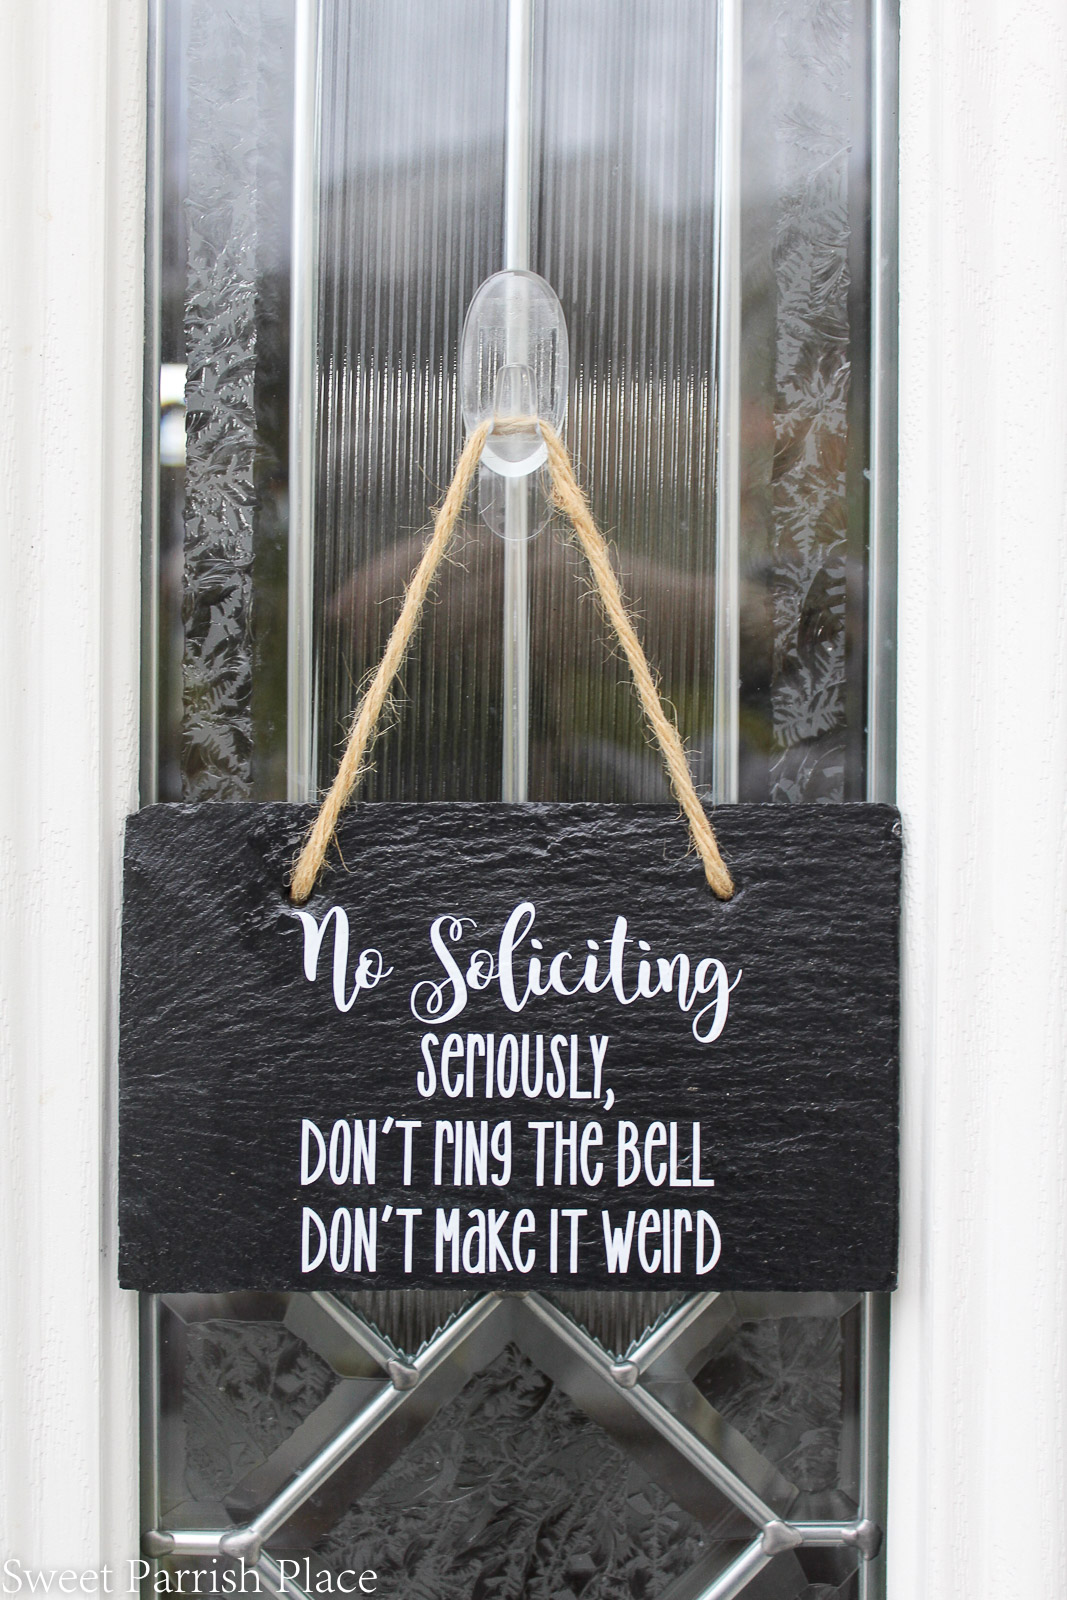
Except if you are a solicitor. Then don’t knock, please! We hung this trusty little sign right next to our front door to keep them away. Some people might be thinking “well, how rude”! But in my opinion, it is rude for people to drive their kids around my neighborhood and have them knock on every door, trying to sell me something that my own kids are probably selling themselves. And it is usually overpriced junk. So, no thank you. And since we hung this sign up, not a single solicitor has come a knocking. So it has been quite blissful, I have to say!
But if you are just coming by for a visit, or a glass of wine, or both, I hope you will enjoy my summer wreath. It makes a nice little first impression. And now I am craving a glass of strawberry wine, mmmmm!

I thought sharing my DIY strawberry wreath right before the 4th of July would be fitting, because I even think it is quite patriotic! We even have a local Strawberry Festival every summer just a half hour away from here. And it strawberry everything for a whole weekend!

I wish I could invite everyone of you over for a little visit this summer. But since that would be impossible, I will be sharing a little summer home tour, coming to the blog very soon! So stay tuned for it!

If You Like It, Then You Wanna Put a Pin On It!
Do you have champagne taste and a tiny budget too?
Love fashion, DIY, crafting, all things vintage and thrifty? Stick with me, I’ve got you covered!
Sign up to get my posts delivered to your inbox here
You May Also Like
Charming Cottage Chic DIY Journals


Super pretty! Love the strawberries. I also love your sign. I need something like that at our house. Visiting from Show+Tell party.
That sign changed our lives, I tell ya! We were constantly being bombarded by uninvited people knocking on our door to sell us things we didn’t want or need. It helped tremendously!
I think this is one of my favorite wreathes ever! I am pinning it to make later!
Mary recently posted…How To Create a Relaxing Outdoor Space
What a fun wreath idea. I’ve pinned it for next spring! Thanks for sharing on Show+Tell. xo Tauni
How wonderful! Thanks so much!
This is so pretty! I especially love the banner in the middle! Thanks for sharing at the #HomeMattersParty ! And I love the sign:)
Melissa recently posted…Home Matters Linky Party #143
Love how it turned out, thanks for sharing the directions for how to make it.
Via B Design recently posted…Fourth of July Brownies
This is the cutest wreath I have ever seen! Love it!
Well that is the sweetest compliment, and much appreciated. Thanks!
This wreath is seriously an all time favorite now! I think I may have t run to the craft store and try my hand at creating one for our porch. I just finished taking down the patriotic decor and was brainstorming on what to do next to finish out the summer.
That is so sweet of you! So glad you like it! I hope you find the supplies you need!
Your strawberry wreath is delightful. I was going to make one this year and I know I had strawberry bushes from a few years ago, but I couldn’t find them and Michaels didn’t have them either. I am glad you were able to get some.
I thought they may be hard to find. I just lucked into them. Thanks so much!
OMG, I thought the strawberry plant was real and was wondering how you got it to grow like that. Beautiful and creative wreath. Happy Summer, Kippi
Haha that’s funny! Thanks so much for sharing that!