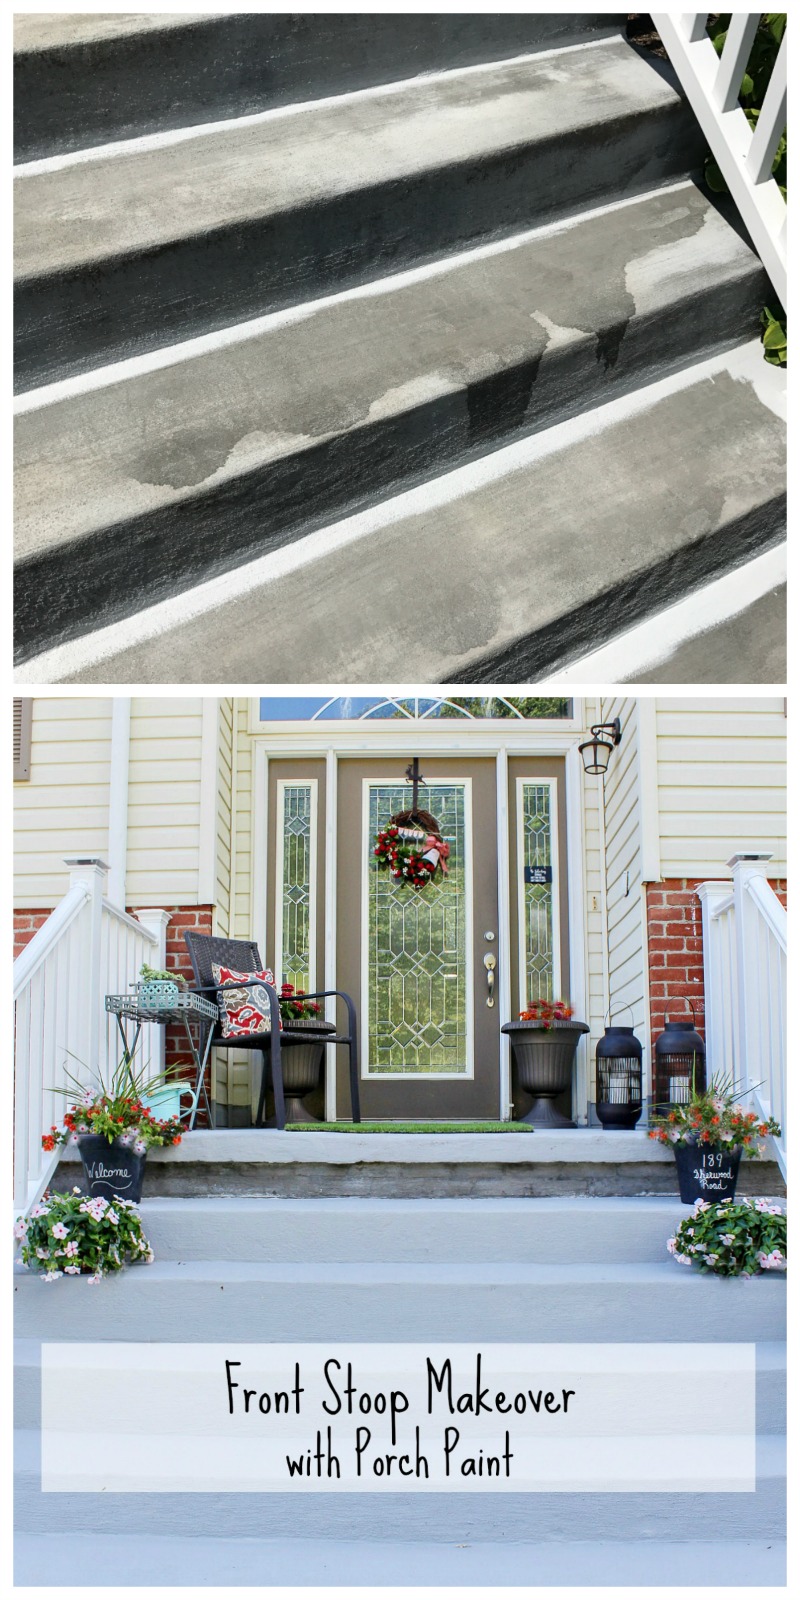
Over the summer, we did a little front stoop makeover with porch paint, and it completely transformed the look of our front stoop!
Hey friends! I’m excited to share our front stoop makeover with you today! I swear, the power of paint amazes me every single time! Transforming things with paint is one of my favorite ways to give something a makeover, but I honestly never imagined I would use paint on our front stoop. You see, last summer we had our concrete resurfaced. And it turned out to be kind of a disaster. It’s a long story, but we ended up having to fire the first guy we hired and then start from scratch. And it ended up costing us a whole lot more money than we budgeted. In the end though, we still weren’t completely happy with the outcome. Yeah, at least the concrete was no longer crumbling under our feet, but the guy sealed it, and whatever he used left the concrete splotchy and streaky. Take a look below at what it looked like. It makes me cringe even now.
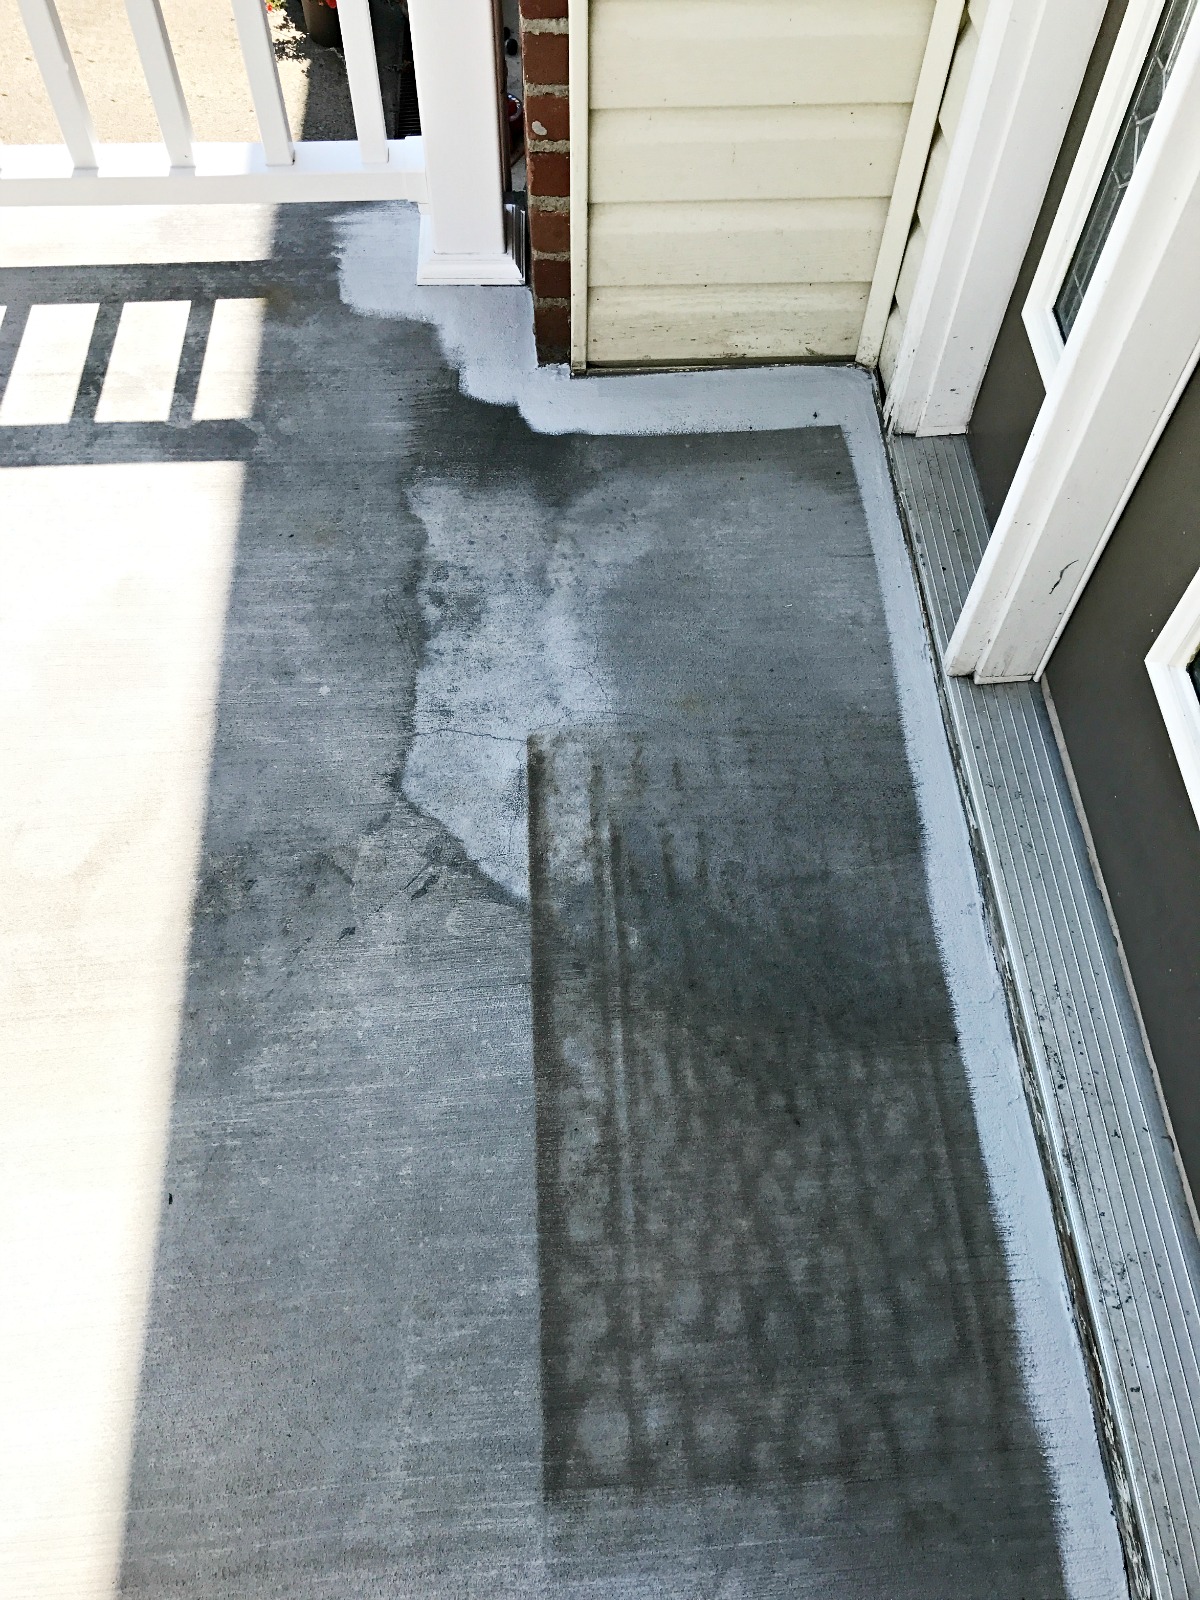


It was so very disappointing to have spent the entire summer in the process of trying to improve our curb appeal, to be left with this eyesore. And at first, we thought the streaky, splotchy mess would wear off over the winter with the harsh weather, but no luck. When Spring came, it was still ugly and messy looking. So I started brainstorming ways to make it look shiny and new on a very small budget, because we didn’t want to put much more money into this project gone bad.
We were in Charleston, WV one day last spring, walking around the cutest little neighborhood, and I saw a woman outside painting her stairs. And it occurred to me that I could probably salvage our front stoop and stairs with paint! Why hadn’t I thought of it before? I guess because after you spend quite a chunk of change on paying someone to fix the concrete, the last thing you want to have to do is paint it. But we were out of options for this one. So I made the proposal to my husband. After some discussion, we decided to give it a go, and good golly, are we ever glad we took that plunge, because it looks SO. MUCH. BETTER!!

We simply could not be any happier with the outcome on this front stoop makeover, and everyone who comes to our house makes sure to tell us just how much of an improvement it is. Even neighbors walking by have stopped by to say how much they like it. As a matter of fact our next door neighbor is preparing to sell, and she came over and wanted to know exactly what we did and how, because she wants to do the same thing at her house! So I am counting this one as a big win, and I can’t tell you how much better I feel walking up those steps now, I smile instead of cringing and slowly dying inside.
Front Stoop Makeover | What we did
I started by going to Home Depot. I don’t know if I have ever told you this, but there is a guy who works in paint at my local store, and he is the best. He is a full timer, and I would be lost without him. We are on a first name basis by now, because I go in there and buy paint so much. He always wants to see before and after photos, and who am I to deny him? He is so knowledgeable, and I knew he was the person to ask about exactly what I should do, and he did not disappoint me! Honestly, if I go in there and he isn’t there, I have turned around and left before, so now, I know exactly what hours and what days he works, so I just make sure I go when I know he will be there. Kudos to Home Depot for keeping him around! Anyhoo, here is what I did to paint my front stoop.
I started with a good primer, which he tinted for me to match my paint I used. He stressed to me very strongly that I needed to prime the entire thing first. And he also stressed to me that after I primed it, I needed to let it dry for 24 hours before I painted it. So I followed his directions exactly. I put on my short shorts and my tank top and got to work. After all, I may as well get some sun while I worked, right? Don’t worry, I used sun screen, but let me just say, that sun was beating down on me the entire time, and I was miserably hot. The primer I used was what he recommended and it was Glidden Gripper Interior Exterior Primer and Sealer. I used a brush to cut out around all of the edges as usual, and then I used a roller to roll the rest of the paint and primer on. It was hard work because the surface had a lot of ridges, so I had to press pretty hard with the roller to get the coverage I wanted. By the very end, I had to have my husband finish the bottom sidewalk because I completely lost the strength in my hand to get it done. After the primer was finished, we did as he told us and waited for 24 hours to paint.

The next morning, I tried to get an earlier start so that the sun wouldn’t be beating down quite so much. The primer was nice and dry by then, and I gave it two coats of porch paint. I used Behr Premium Low Lustre Enamel Porch and Patio Paint. I can’t remember the color I had it mixed to off the top of my head, but I will come back and update this post with the color this evening. This is not your average wall paint, people. This is porch paint. It is made to stand up to harsh weather and rain. I also noticed it has a thicker consistency. After the sun beat down on it all day, it was dry by nightfall. I didn’t place anything back onto the stoop until the next day.
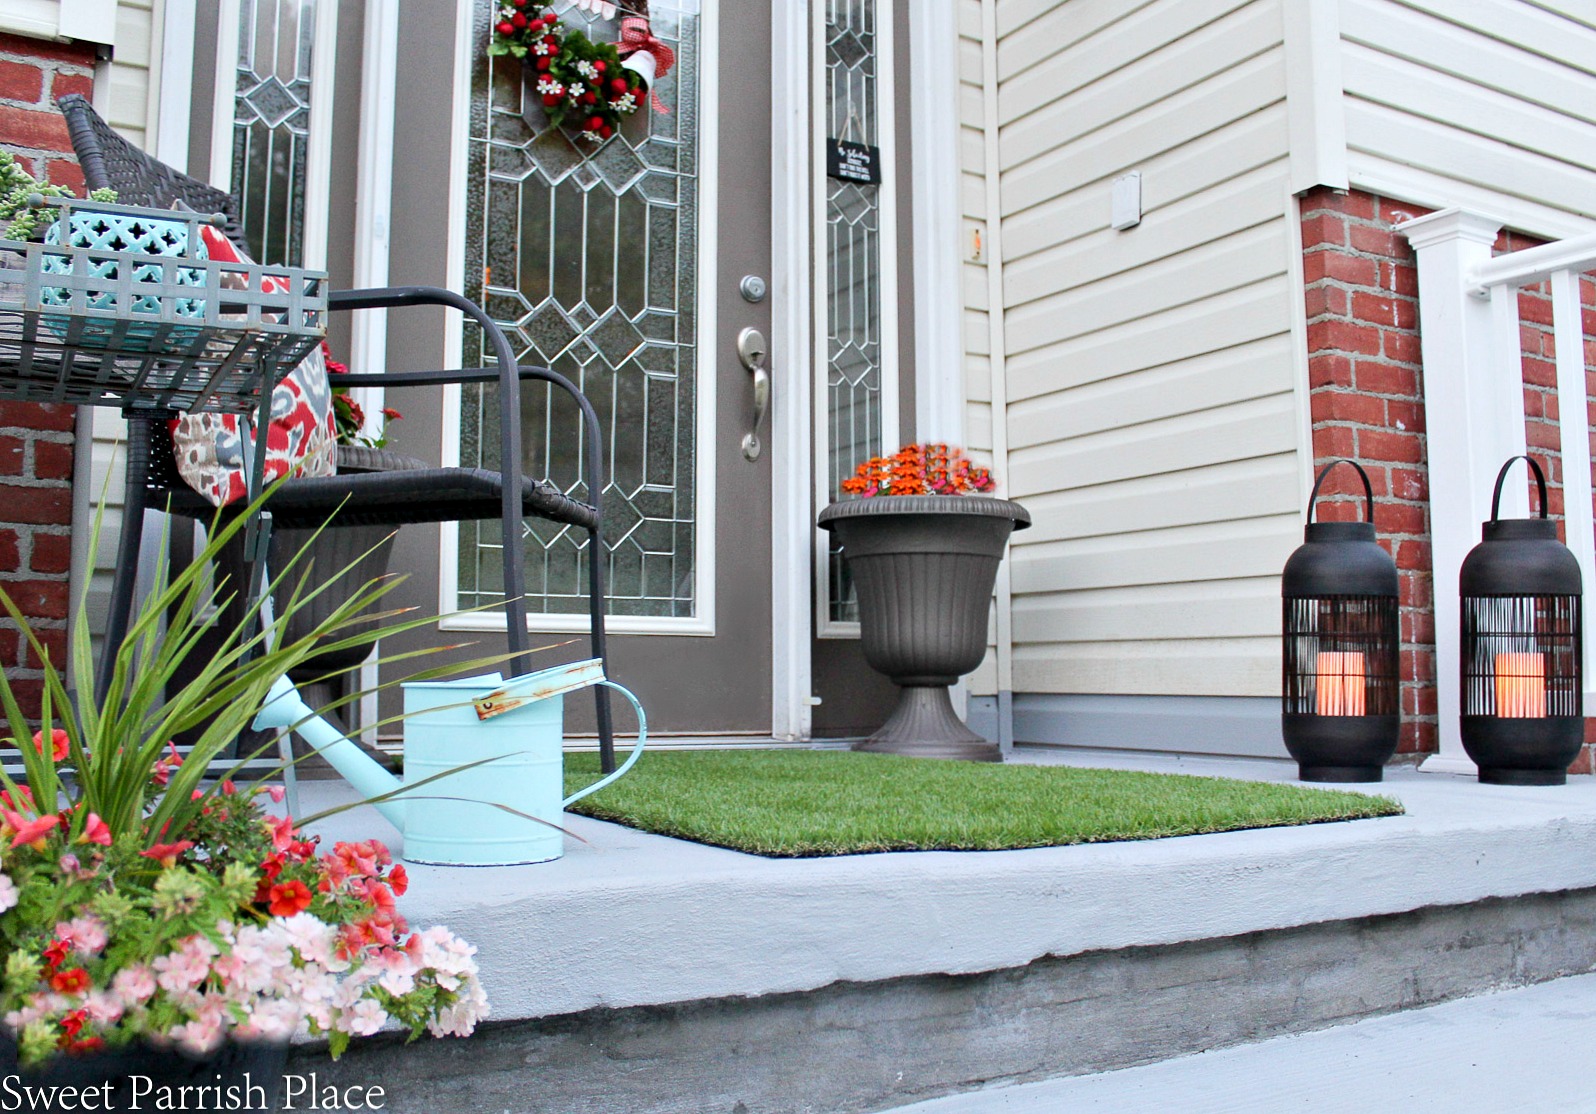
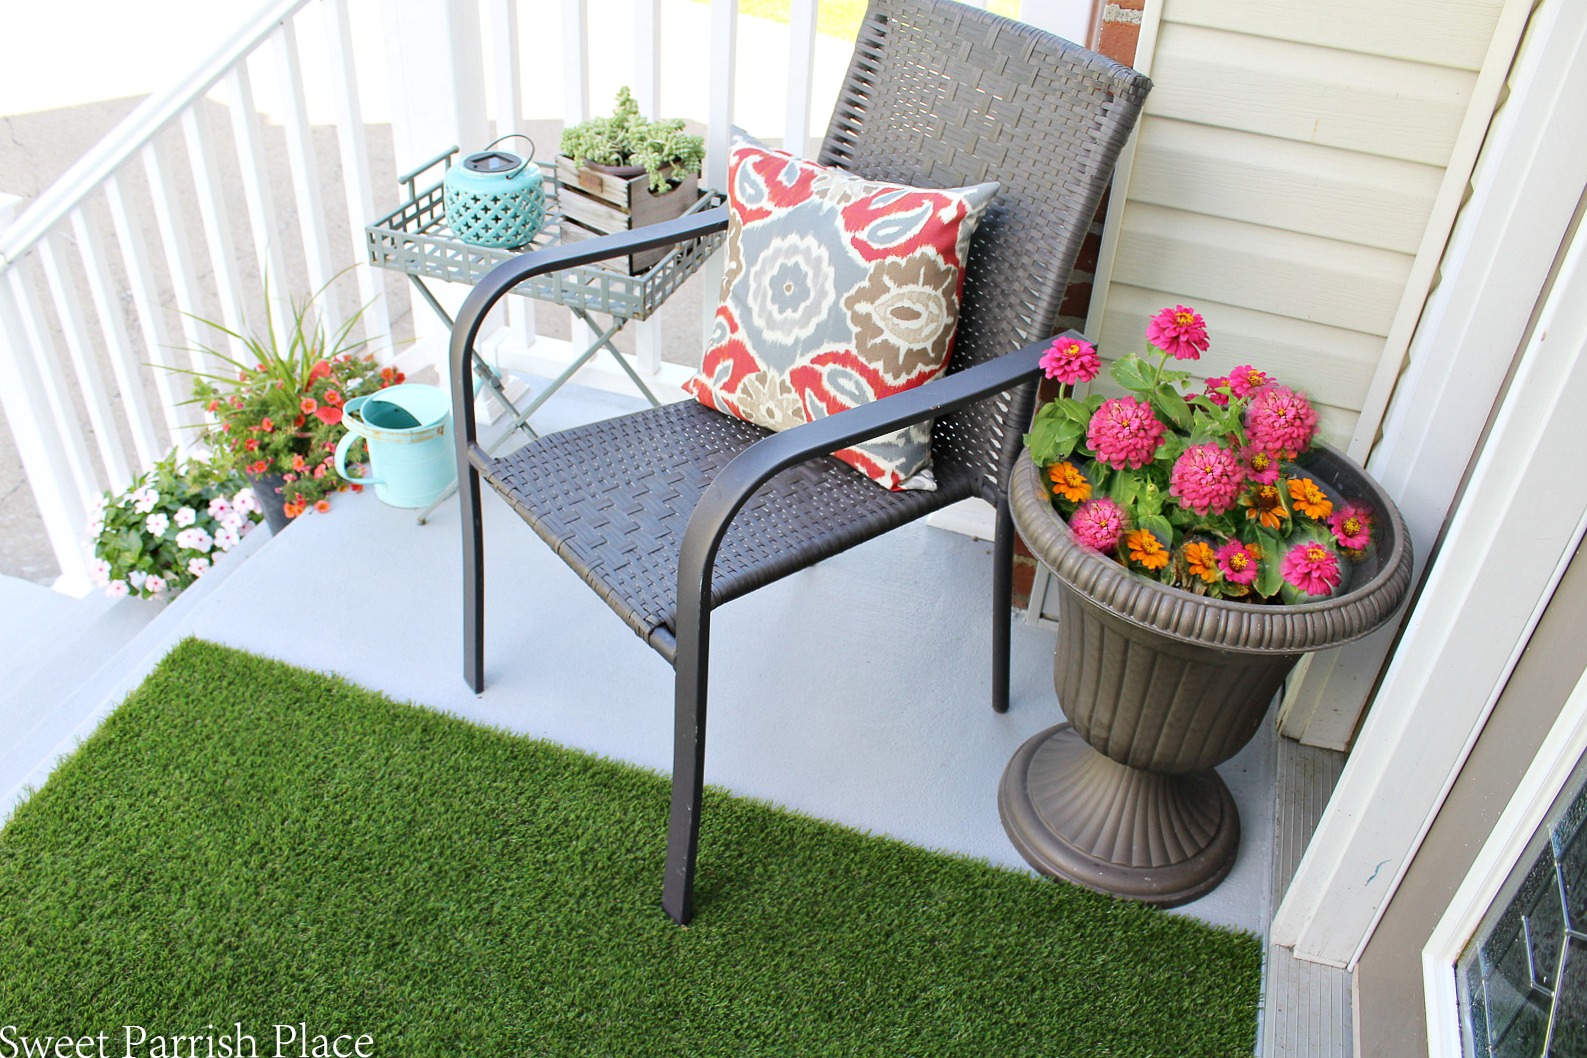
We finally feel like we have a front stoop we can be proud of. But it was a long road getting there! We also replaced the railing last summer as well, so everything finally looks new, it just took an extra year to get there. Now, let’s talk about the totally cool and retro grass rug I placed on the stoop. I’m in love with it! Do you remember back in the day when everyone put similar stuff on their porches? Well, I never thought I would see the day when I wanted to mimic that, and I don’t want to mimic it exactly, but this is a new and more modern version, with a slight nod to the past. At least, that is what I am telling myself. It helps me sleep at night, ha!
I ordered my artificial grass rug on Amazon. It is actually a runner. And it was long enough that I was able to cut it down a bit and use a piece of it for a floor mat on our back deck as well. I really like it a lot. It is great for our dog, and it seems to trap dirt and debris so much better than our previous door mat did. It is soft and comfy underfoot, and it looks like real spring grass!


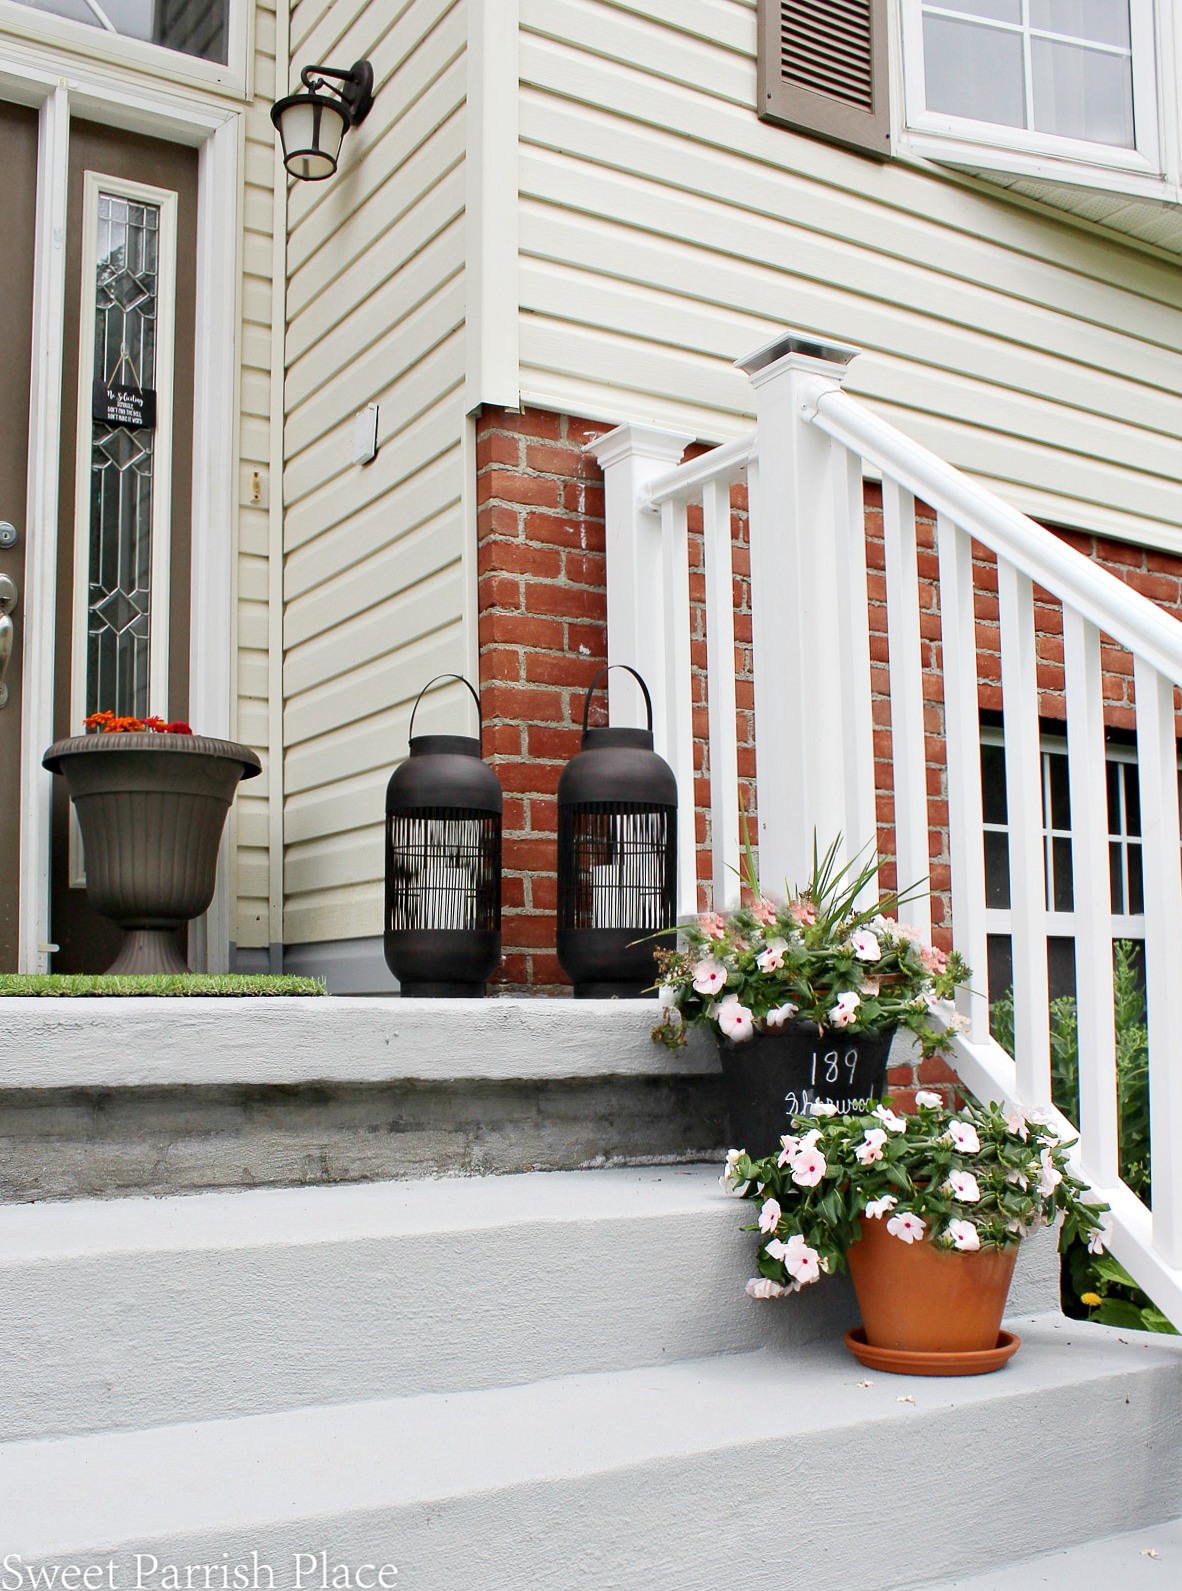
I did decide to do something else a little unexpected out here on the front stoop. I decided to paint the bottom part of the siding with the porch paint I was using. It may seem extremely weird that I did this, but here is why I did it. The bottom of the siding was severely stained, and no matter what we tried we could not get it to come clean. It was like this before we ever moved in. While I was painting, the thought occurred to me to paint that bottom piece of siding to blend right in with the front stoop. I discussed it with my husband, and he said to go for it. So I did, and I’m not sorry. It isn’t something that most people would even notice at all, but it made it look more fresh and clean. We both think it was a good move, so that is our story, and we are sticking to it.

In addition to the new artificial turf runner on the front stoop, I also purchased these cute LED lanterns for out here. I love them because they are substantial in size, they are made out of dark grey colored PVC, and the LED candle flickers like a real candle. It can also be set on a timer, so I have it set to come on at dusk, and then it stays on for several hours. I have been having it on at night all summer and so far have not had to change the battery yet.

I made the DIY strawberry wreath on the front door. It has been a cute little wreath for summer, but I’m starting to plan something different to change it to for Fall.

If you will notice in the photo below, I did not paint the riser right below the stoop. Underneath of that concrete, there is brick that matches the house. This was not something that I wanted the person who resurfaced our concrete to cover, but he did. So I chose not to paint it because I plan to try to remove that thin coat of concrete at some point. I didn’t want to make it more difficult by painting it.
This project was great for our curb appeal, and I am anxious to see how it holds up over the next few years. I’ll keep you updated on that. We are hoping it will last us until we decide to sell our house, which we think will happen sometime in the next few years. This house was never meant to be our forever home. And with our two oldest children being almost out of the roost, we will be moving on to different pastures at some point. That is all quite up in the air right now.

If you like it, then you wanna put a pin on it!
Thanks for stopping by today and reading about my front stoop makeover! We are certainly happy with it. Let me know if there are any questions you have. I will be happy to answer them!
Do you have champagne taste and a tiny budget too?
Love fashion, DIY, crafting, all things vintage and thrifty? Stick with me, I’ve got you covered!
Sign up to get my posts delivered to your inbox here
Follow me here:


This is such an amazing transformation. Lovely makeover.
Thanks so much!
It’s such an improvement and looks great, but why did you not paint the riser just under the porch floor at the top of the steps? It looks a little unfinished – unless this is just a shadow that shows up in the photo. Just wondering…..
Hi Pat! That is a very good question! Actually, I did purposefully choose not to paint that part. Underneath of that skim coat is actually the same brick that matches the house. I didn’t actually want the person who resurfaced the concrete to cover that brick. I want to find a way to remove that thin coat of concrete so that the brick is exposed, but I just haven’t had time to take it on yet. So I din’t want to make the job more difficult by painting it.
What a great makeover! Pinning! Thank you for sharing on Merry Monday! Hope to see ya next week!
Kim
Thanks so much!
Do I need to prime front door before painting?
This is an absolute masterpiece, Nick! I am so amazed by this unbelievable makeover and transformations within the budget. I will give it a try on my next projects. It looks great, and the improvement is mind-boggling. Keep up the great work!
Tulsa Concrete recently posted…Hello world!
Thank you so much for sharing an awesome post and great photos. I learned a lot of new information from your post. I love painting, and porch paint always comes as a challenge. Your post will undoubtedly help me. Cheers
SATX Concrete Delivery recently posted…Hello world!
Outdoor spaces can be so cool! Updating your patio door is a great way to give the area a new look, especially if your existing door is too small, outdated, or unsightly.
The right patio door can upgrade your patio from a basic outdoor area to an extension of your home’s interior and help create a proper outdoor living space 🙂
There are more tips, take a look: https://portella.com/blog/how-to-give-your-patio-a-new-look-for-summer/