Sweet Parrish Place

I'm the girl with champagne taste and a tight budget

  • Home
  • About
    • About Nicki
    • Shop My Amazon
    • Contact Us
    • Blog Love
    • Link Parties
    • Advertise | Disclosure | Privacy Policy
  • Home Tour
    • Yellow Prairie House Tour
    • West Virginia Home Tour
    • Seasonal
  • Projects
    • Trashtastic Treasures
    • Holiday
    • Decorating
    • DIY
    • Crafting
    • Paint Projects
    • Cleaning/Organization
  • Style
    • Fall/Winter
    • Spring/Summer
    • Sweet Parrish Place Style
    • Tips/Tricks
    • Shop My Looks
    • Shop My Amazon
  • Travel
  • Lifestyle
    • Family
    • Decor
    • My Favorites
    • I’m Loving It
    • Personal
    • Shop My Amazon
  • Yellow Prairie House Tour

How I renewed my Grout for $6

July 7, 2014 By Nicki Leave a Comment

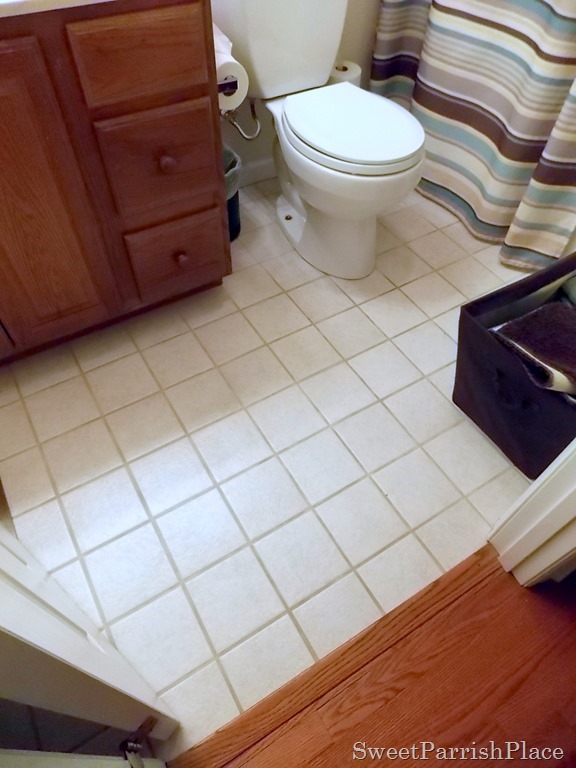
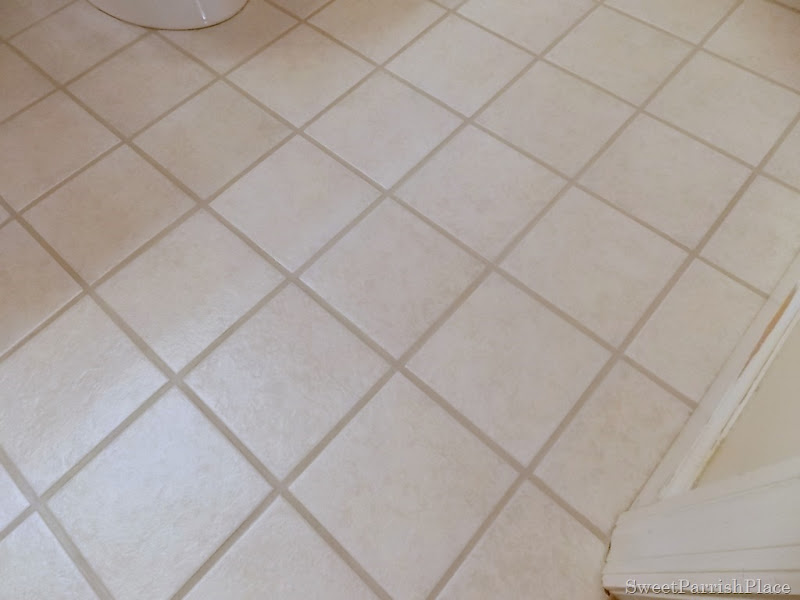
Hi all!  How many of you have experienced dirty, dingy, stained grout?  Try as you might, it just refuses to come clean.  I know I have experienced this in more than one home I have lived in, and this house is no exception. For the past two years, we have had two bathrooms full of stained, dirty looking grout.  But no longer!  I transformed my boy’s bathroom in less than 4 hours!  This is an after picture.  It’s always better to show a pretty picture of the finished product first, right?


Not to say that this bathroom is exactly pretty, yet.  This is actually the first thing I have done in this room since we moved in.  I have plans for this room to be transformed though.  This is a close up of the stained grout.
DSCN5371
If there is one lesson that everyone on earth needs to learn, it is to never, ever, ever lay new tile and use white or cream grout!  Trust me, it never stays that color!  Here are a couple more pictures of what the grout looked like before I worked my magic on it.  And I am also gonna tell you how I did it.  These next two pictures actually make it look way better than it actually looked.
DSCN5370
This is also before.  Remember, this grout was originally a cream color.
DSCN5373
So, you are dying to know how I did it, I am sure.  This is what I used: Rejuvenate Grout Remover Pen.  I purchased this at Home Depot for $5.97.  It comes with two pens.  And it also comes in three colors, buff, white and grey.  Just so you know, I was not paid to promote this product, and I did not receive the product for free.  I purchased this at Home Depot, and I wanted to share the results because I am amazed!

This is what the description of these pens says on the website:  These paint pens restore dingy, stained grout to new without all the work and expense of replacing the tile around it. Rejuvenate Grout Renewer Pens make restoring or coloring your old grout a snap. Easy to apply and safe to use, these Grout Renewer pens allow anyone to get professional results in no time. Get 2 premium pens per package, each comes with a fine applicator tip and control fit grip. Available in White, Buff and Gray to suit most applications.

  • Brightens grout
  • Restore grout to new with one pass
  • Make dirt & grime disappear
  • 2 pens per pack

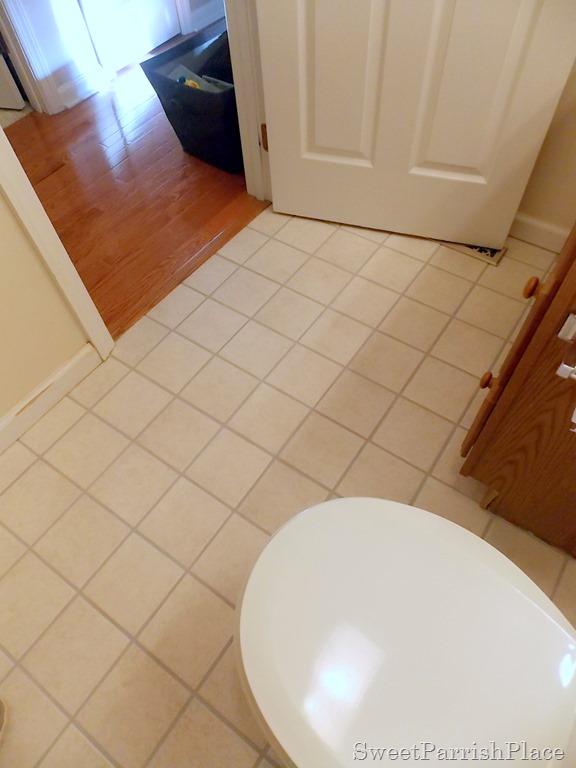
And afterwards, it looks like a new floor!  And I am going to show you way too many pictures of the finished product, mmmmkay?  But I want you to see how great it turned out!  You can clearly see in the below pictures that my baseboards need painted desperately.  Don’t judge.  Like I said, on the list.

DSCN5375
This bathroom is not a large room.  I am not sure of the exact size, but you can see that is is on the small side.  It took both pens to finish this space.  And I think I am going to go buy another pack just to touch up a few areas, because I was really stretching it to finish up.  By the end, both pens were completely dry.
DSCN5376
Basically, you just vacuum and clean the floor really well before you begin.  Next, you just take one of the pens and shake it up for two minutes.  Then you just press down for several seconds until you start to see the paint seeping down to the tip.  and after that you just fill in the existing grout lines like you are coloring.  You have to be careful not to get it on the tile, but if you do, it is easy to wipe off.  I just kept the Clorox wipes nearby.
DSCN5379
At times, I had a hard time getting the paint (or whatever it is) to flow out of the pen, and I would have to shake it and press down several times to get it flowing again.  But I was actually surprised at how much paint I squeezed out of each of those pens.
DSCN5380
I spent two evenings on the job.  I probably spent an hour and a half on it each time.  I waited until late in the evening when the kids were all asleep and no one was going to be wanting in there.  At first when I started applying it, it was looking a little blue to me.  But after it dried it was grey.
DSCN5389
I started by doing all around the edges and wall, and worked my way into the center of the room and out the door.  It really did dry very fast though.  You can see what bad shape the baseboards are in in this room.  Look right across from the toilet.  So many of the baseboards in this house were like that when we moved in.
DSCN5384
The décor in this bathroom was brought from our old house, and I just plopped it all in there.  Hopefully I will get to this room before the year is over.  But this floor was a good start!
DSCN5382
It really is amazing how much cleaner this room feels now that the grout is refreshed!  My son was away at 4H camp when I did this, and when he came home I never mentioned it to him.  Finally last night he asked me if I painted the grout in here.  He even noticed, so that is saying something!
DSCN5383
And just in case you were wondering, this is what the walls look like in here.  I took these photo’s probably 4 years ago at the beach.  I had them developed and I framed them when I was making over the kid’s bathroom in our old house.  I still love them!
DSCN5386
I purchased all of the white frames at Target.
DSCN5387
Just one more, and I promise, I will stop.  But don’t we all love a good side by side?

The pictures (or maybe it is my photography skills) do not do justice to the change in this floor in person.  The tiles look brand new!  They are pretty simple cream colored tiles.  They are neutral and would match anything, so I never have had a problem with the tile.  But the grout was showing it’s age for sure.  For $6!  The difference looks like $1000!  Even LC is pleased with the improvement!  This is the bathroom that our guests use.  It is also the bathroom that our two boys use.  It is located in the hallway outside of their bedrooms.  So at the very least I want it to look clean.  And this sure did the trick!


Have you ever tried refreshing, painting, or renewing your dirty, tired looking grout?  If so, how did you do it?  I would love to read about it in the comments!  What do you think of this transformation?

Have a great week!I am linking up here:

Monday:
Monday Funday
Between Naps on the Porch
The Dedicated House
Thrifty Décor Chick
Home Stories A to Z
Inspire me Monday
Project Inspired
Tuesday:
Not Just a Housewife
A Stroll Through Life
Coastal Charm
Wednesday:
Savvy Southern Style
The DIYers
Work it Wednesday
Glitter Glue and Paint
Friday:
Inspire me Please
The Shabby Nest
Remodelaholic
Sunday:
DIY Showoff
DIY Sunday Showcase

Filed Under: changing grout color, Cleaning/Organization, DIY, grout pen, how to paint grout, how to refresh grout, how to refresh tile grout, painting grout, rejuvenate grout renewer pen, Uncategorized

Leave a Reply Cancel reply

Your email address will not be published. Required fields are marked *

CommentLuv badgeShow more posts

This site uses Akismet to reduce spam. Learn how your comment data is processed.

Hi, I'm Nicki I'M THE GIRL WITH CHAMPAGNE TASTE AND A TIGHT BUDGET. I'M SO GLAD YOU'RE HERE!
  • Bloglovin
  • Facebook
  • Instagram
  • Pinterest
  • Twitter

VIP Real Estate

NO PLACE LIKE HOME

No Place Like Home

ORC Bathroom Makeover

Kids/Guest Bathroom Makeover

One Room Challenge Week 6 Kids-Guest Bathroom Reveal

It's week 6 of the One Room Challenge and this is … [Read More...]

ARCHIVE

ORC

Shop My Faves!

Spring Trends
PicMonkey Photo editing made of win
Get Sponsored by Big Brands

SheKnows

Linquia Influencer

FYI

Find Your Influence

INSTAGRAM

Recent Posts

  • Cozy and Casual Christmas Tour | Part 2
  • Casual and Cozy Christmas Tour | Part I
  • Farmhouse Bathroom Makeover Progress | $100 Room Challenge

Archives

Find It Here

Copyright © 2022 · Sweet Parrish Place