This is not a sponsored post. I am writing about this product of my own free will because I tried it and I want to share my honest opinion about it with my readers.
How many of you out there have a ceramic tile floor somewhere in your home, and the tile looks just fine, but the grout is disgusting??? Go ahead, give me a show of hands! It is one of those problems that people are always looking for a solution for. I have even written a similar post to this one titled How to Renew Stained Grout. Have you read it?
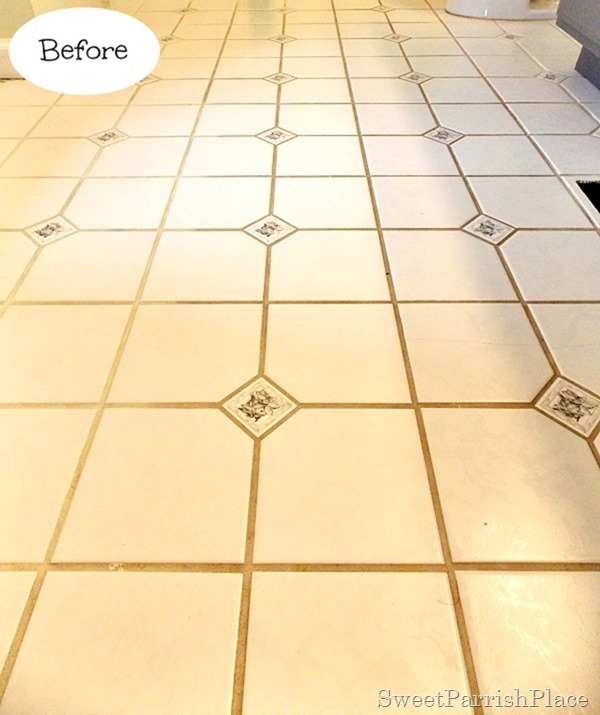
Well, unfortunately, and much to my dismay, the product I used in that post has been discontinued. I was seriously bummed when I found this out. I had been to Home Depot looking for it several times, and they didn’t have it. So I just figured they stopped carrying it in the store. So I got online to order some for my master bathroom, and that is when I found out that it is no longer being made. I even looked on Ebay and Amazon, but I could only find it in bulk. So, it was back to the drawing board to find another similar product. The product I decided to try was Polyblend Grout Renew Colorant. I wasn’t too enthused about it because I loved the other stuff I had used. It was like a marker that you just colored onto the grout with 9and has held up beautifully, might I add). With this stuff, the directions say to apply it with a toothbrush and then wipe off the excess. Before I go on, let me show you my bathroom floor before I used this product. Be forewarned, although it was technically clean, it was stained badly.
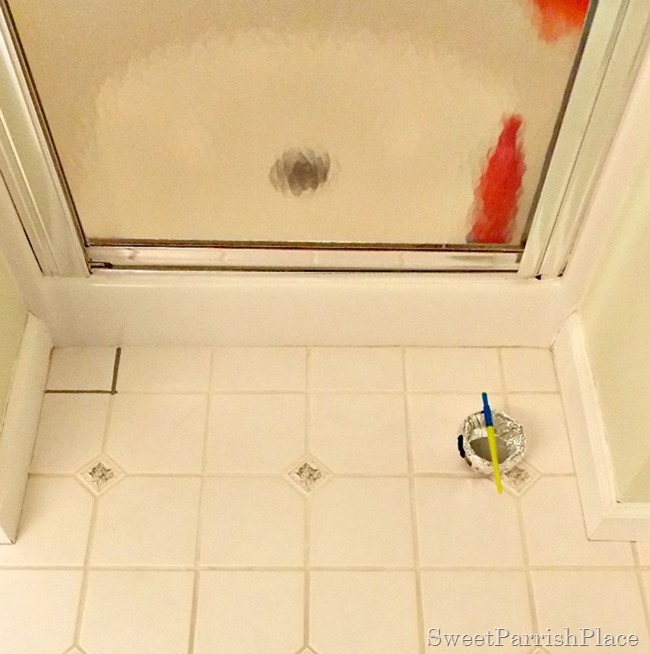
This picture is the best one that shows what the grout should have looked like before it was stained- just white. The spot right in front of our shower was clean because a rug must have always been there. You can also see in the picture below that I opted not to go the toothbrush route. I poured some of the product into a bowl, and found a paintbrush that matched the width of my grout as closely as possible. And I painted it on. I did keep Clorox wipes handy to quickly clean up any mistakes I made.
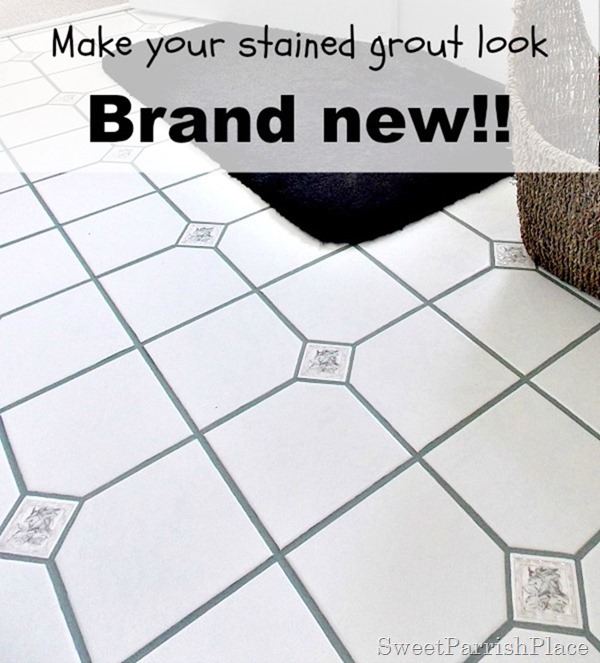
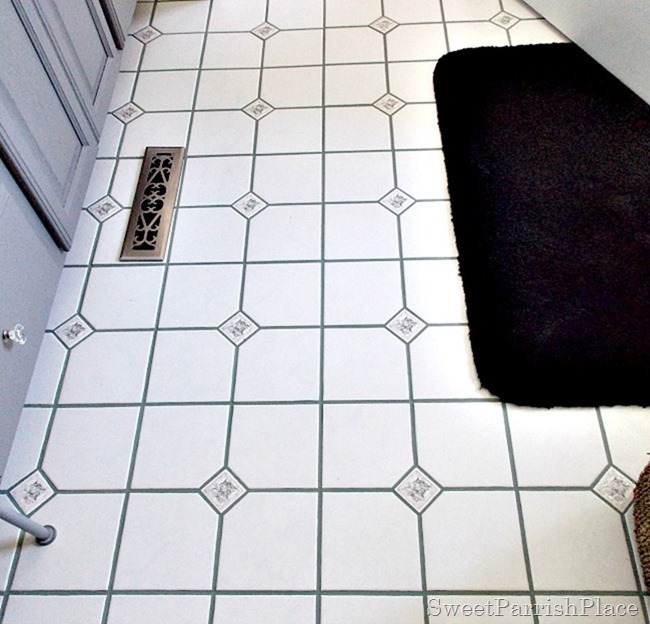
I worked on this project during a week that we had snow days all week. It took me three evenings, working for a few hours each time. And I had to wear my reading glasses to see the up close details so that I would not mess up. But in the end, I am just as thrilled with the results as I was with my other bathroom floor. The floor looks practically brand new! Now, let’s be honest, this is not the tile I would choose if I was doing my dream bathroom, which I showed you here. But a new floor is not in the budget, so this is what I have, and I wanted it to look as clean and fresh as possible.
The color I used is called bay leaf. And I have to say that I would probably choose a different color, but stupid me started painting without testing it out first, so there was no going back. You can’t really tell in the pictures, but it is grey with a green tint. I was not wanting a green tint, and online, that color did not look green to me. But I am telling you in case you go to purchase it, it does have a slightly green tint. I would have rather had a more true grey color.
I completed this project during the dead of winter, so it has been finished for a while. And since then, LC dropped and broke an apothecary jar on the floor, and there is a spot of the grout renew that came off. I am not for certain that is how it happened, but I was not home when he broke it, and when I got home, I noticed the grout was messed up in that spot. It was not like that when I left the house. I am very perceptive! Anyway, it is no biggie, it just needs touched up.
Luckily, I only used about half of the bottle, so I have plenty of this product left for touch ups. But I will say that in our other bathroom, where I used the different product, no such thing has happened, and the grout still looks as good as the day I finished it. So I still wish they made that product again.
But overall, so far I am happy with the product, and if you are looking to do something similar with your grout, I would have no hesitation in saying you should try it!
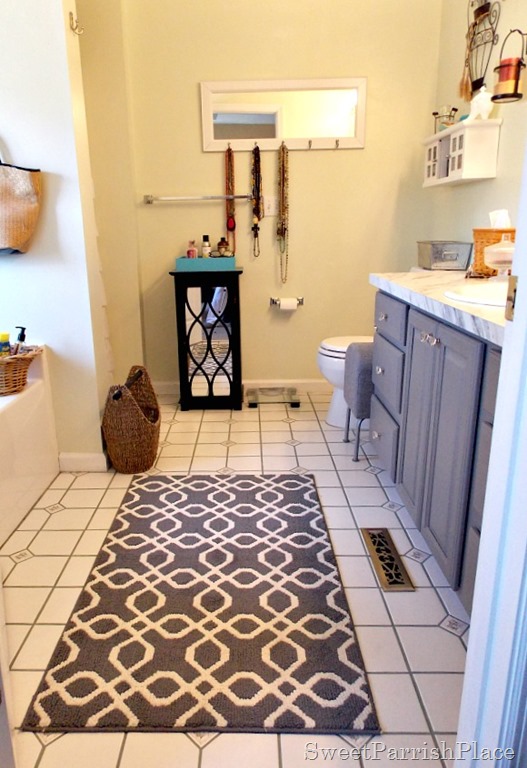
I have also purchased a new rug for the bathroom since finishing this, and since taking the pictures of the floor. Here it is below. I wanted a larger rug that I could move more into the center of this section of the bathroom, instead of just in front of the tub. I had been on the hunt for one for quite some time, and I finally found this rug at Target for $24.99- and if you purchase it right now, you can get an extra 10% off! (you can read about how I made over my bathroom vanity here.)
I love the new rug. It really pops on the floor, and it provides a soft and warm place for me to stand now, where I only had that when I was getting out of the tub with the old rug. And it has a nice rubber back, so it does not move at all, which is a huge plus. We also purchased a new toilet seat. I didn’t think you would want to see that though. am I right?
I am so glad to have this floor finished, and looking fresh and clean. Next up for this room is to change out the light over the sink. I have already purchased it, but it is sitting in the garage now. We also need to paint the walls, and add a backsplash. Hopefully we will have this room finished before the year is over.
What do you think of the improvement in the floor? Have you ever tried this product? If so I would love to read about your experience with it.
Have a happy Tuesday!
This is where I party:
Tuesday:
Show and Share// Inspire me Tuesday// Project Inspired// LouLou Girls Fabulous Party
Totally Terrific Tuesday
Wednesday:
Wow us Wednesdays//
Thursday:
Think and Make Thursdays
Friday:
Frugal Friday// Craft Frenzy Friday// Freedom Fridays// Home Matters// Weekend Retreat
Saturday:
Found and Foraged
Monday:
Motivational Monday// Inspiration Monday// Amaze Me Monday// Something to Talk About
Metamorphosis Monday// The Scoop






Leave a Reply