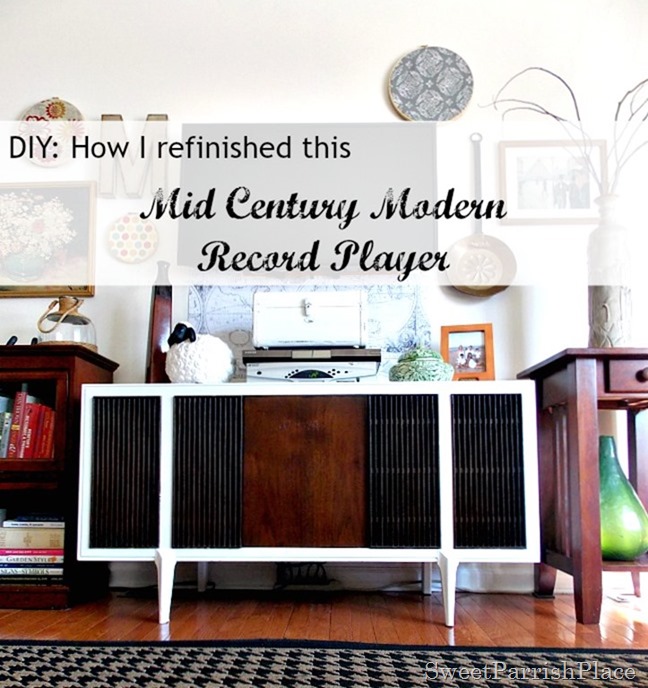
I was so excited to reveal my Mid Century Modern record player to you about a month ago, and I am back today to share how I refinished this piece of furniture. I did quite a bit of research online about refinishing furniture while I was in the process of starting this project. I read lots of different blogs and I wish I had saved the links to them all so that I could share them here today, but at the time the thought did not cross my mind. I did not use any certain tutorial that I read. What I did was to read a bunch of different things I found, and then kind of used a little bit from here and there.
This record player was a very solid piece of furniture, and I knew I wanted it to last for years to come. I did not want to diminish it’s value, and I wanted to do it properly in a way that the paint finish would last. I have painted and refinished other pieces of furniture, and admittedly, I did a half ass job. I wanted this job to be the whole ass, if you know what I mean. So here is how I refinished my MCM record player, with some really bad iPhone pictures taken in a garage with no natural lighting, I apologize in advance.
The supplies I used:
A good quality paint brush (My favorite is this one from Sherwin Williams)
A pad sander (this is the one I own from Sears)
A 220 grit sanding pad
3M Sanding sheets- 80 grit and 320 grit (for the sander)
DAP plastic wood
Minwax Wood Finish Stain Marker (dark walnut)
Kilz Primer
Behr Marquee Semi Gloss interior paint in cameo white
Lint Free rags
Tack cloths (for wiping down furniture after sanding)
Howard Restor-a-Finish in Walnut
Minwax Polycrylic in clear gloss
How I Refinished This Furniture
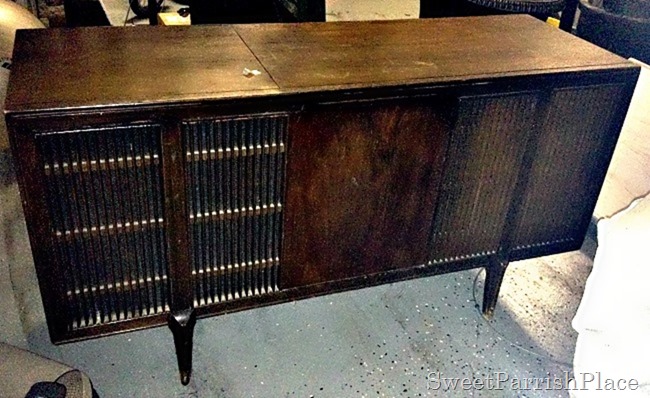
Ok, so now I am going to do my best to walk you through how I refinished this piece of furniture. The top of the furniture was very scratched up and the veneer in the back was damaged, as pictured below. This picture was taken in the process of sanding it down. The damage to the veneer is the reason I decided to paint this piece.
I spent the second day using my electric sander to remove the original finish off of the top, sides, and legs. I also used it on the front on the parts that are painted white. This was a lengthy process, but necessary when you want to refinish a piece correctly. I sanded it until I was down to the original wood. There were some parts on the front where I could not use my electric sander, and I did sand it by hand as best as I could. On those parts I did not get down to the original wood, but I was satisfied that I roughed it up enough for the paint to adhere.
My garage is sub zero temperatures in the winter, so after I got it sanded, I wiped it down with a tack cloth, removing all dust from sanding, and then I had LC and Mr. 14 Year Old move it up to my nice warm living room. They did not want to because it would be in the way, but I whined and moped prevailed and talked them into it. It was in the middle of our living room while I slowly worked on it for a few weeks.
After I got it upstairs and let it sit there for several hours to acclimate to the temperature, the first thing I did was to work on repairing the left front leg that had a chunk of wood missing, cue the DAP plastic wood. I simply molded it onto the leg to match the shape of the leg as good as possible. Then I let it harden and sanded it with a my sandpaper until it was smooth.
After I had repaired the leg, I could then start priming it. First, I taped off the front part that was going to remain stained. I painted the primer on with my paintbrush – one coat. After the paint was completely dry, I wet sanded it. If you have never wet sanded before (I hadn’t either), you just take a spray bottle of water and spray down the furniture, and then you sand lightly with a sanding pad. After you are finished using the sanding pad, you take a lint free cloth and wipe it down until clean and dry. I wet sanded between each coat of primer, paint and poly. I loved the way the wet sanding worked, and I will forever use this method when I refinish furniture. It did not remove any paint, but it just smoothed everything over and made the finish feel like butter.
After the primer was dry I started to paint. This process happened over a period of weeks, as I found time to work on it. I painted three coats of paint, and I wet sanded between each coat, allowing plenty of drying time before sanding of course.
Next, I painted on two coats of poly, wet sanding again in between each coat. The second coat of poly did the trick, and I was finished with the painting part. All I needed to do was let it dry.
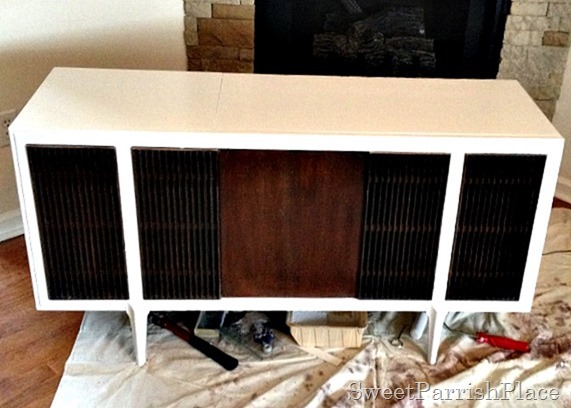
After it was thoroughly dry, I started on the parts of the cabinet that were going to remain the stained wood. The stain on the front of the cabinet was in pretty good shape, and I opted not to remove the existing stain. I lightly sanded everything that had wood stain though. I also carefully taped off my new white paint job. This is a picture of the cabinet right before I taped it off to work on the stain.
All I wanted to do was refresh the stain, I was not starting from bare wood here, so it is important to note that. After it was taped off, I used a clean rag to apply the restore a finish to the center front piece of wood. Then I wiped it off with another clean rag. I gave it two coats, wiping it off each time.
Next, I used the Minwax stain marker on the slatted parts of either side. This was a tedious job. But I think this marker was perfect for the slats I was using them on. I did not wipe this down between coats, and they only needed one coat. So after I was finished I just let it dry for a couple of days.
Once the stain was dry, it was looking like brand new, and it was time for poly. I painted on three light coats of the poly, wet sanding in between. I wanted this piece of furniture to be able to take some abuse and not have the paint chipping off if it got scratched.
Once the poly was dry, I was finished!! I am seriously in love with this piece of furniture! And if you missed the reveal post I wrote, you can click here to see lots of pictures of the finished piece.
Thank you for stopping by today! I hope that if you came across this post because you are researching how to refinish a piece of furniture, you found this tutorial valuable. I am very happy with the process I used, and I am confident that this piece of furniture will last for many years.
Have a great week!
This post does contain affiliate links. If you click on them and purchase an item, I will receive a small percentage of commission. By clicking the link, you are NOT paying any more than you ordinarily would for any item.
Show and Share// Inspire me Tuesday// Project Inspired// Loulou Girls Fabulous Party
Wednesday:
Wow us Wednesdays// Work it Wednesday
Thursday:
Think and Make Thursday// 2 Favorite Things
Friday:
Frugal Friday// Weekend Retreat// Craft Frenzy Friday// Freedom Fridays// Home Matters
Creativity Unleashed// Show me Saturday
Saturday:
Found and Foraged
Sunday:
That DIY Party// DIY Sunday Showcase
Monday:
Amaze Me Monday// Inspiration Monday// Bloggers Brags// Motivational Monday
Motivation Monday//Metamorphosis Monday// Something to Talk AboutMonthly:
Remodelaholic (1st Friday)
Pretty Preppy Party (1st Thursday)
Best of the Nest (last Friday)


This is beautiful! I have been trying to find ideas to paint a 1960s Packard bell console that I have. I love the idea of leaving some of the wood while modernizing the piece. Did you use a brush for all applications or did you use a foam roller for the paint?
Thank you so much! I used a brush for the entire thing. I talk about the process I went through in the post. But I wet sanded between all coats of paint. I no longer own this pience, but I gave it to a cousin who loved it and it held up beautifully!