It’s reveal week for the $100 Room Challenge, and I’m sharing my modern farmhouse dining room/office reveal!
Hey friends! I’m almost a day late, but not a dollar short in sharing my modern farmhouse dining room/office reveal, which I am bummed about, but I hope it was worth the wait for you guys because I am sooooo smitten with this room transformation! This room has changed so much that I can hardly believe it myself, and we are still a little giddy about the improvement and this new vibe in our home.
First, you should totally check out week 1, week 2, week 3, and week 4 of this challenge! I have also been sharing a lot about this room refresh in real time on my Instagram stories.
If you are new to the $100 Room Challenge you can read more about it here. But the basic premise for the challenge is this: you get one month, and $100, to completely makeover one space in your home. I know what you may be thinking… $100 is not a lot of money. Just wait. What you can do with $100 (and a little creativity) will absolutely blow your mind. And if you don’t believe me, just follow along, and click through and see what the other participants are doing for this challenge, and you will see so many great things happening with just a $100 budget. You can see the mudroom I made over for my first time participating in the $100 Room Challenge here.
If you found me through the $100 Room Challenge Link up, welcome! I am so happy you are here! My name is Nicki and I am the blogger behind Sweet Parrish Place. I love to share our DIY and home decor shenanigans, along with some organization, fashion, travel and other lifestyle types of topics. Thanks for reading!
Just to refresh your memory, here is a vision board that I posted during week one when I revealed my plans for this space.

I honestly feel so much more at home in this space, and I feel like our main living area is making so much more sense now. It fits my design style so much better than it did before, and I feel like I met all of my goals for this space. My main goals were to lighten, brighten, and neutralize this space, and we were definitely able to accomplish that!

Please note: Some of the links in this post are affiliate links, which allows me to make a small commission from your purchase, but your purchase price stays the same.
Seriously, check out the before version of this room!

I had a friend over to see the reveal on Sunday and after I gave her the tour, we left the room. She walked in there a little later for something and she told me it was uncanny how much more bright the room seemed, so I think I achieved my goal. This continues to be a difficult room to photograph for me, what with the large window in the middle of the room, but I do my best.
It’s been a trying week for me professionally, at my school and my position as a school counselor, and we have been dealing with some traumatic events, so I was unable to get this post up on time. I’m going to share mostly photos of the space for you to enjoy, and as I have time, I am going to come back and fine tune this post and update it with as many sources as possible. Then I plan to write some smaller posts a little later so that I can focus in for you on some of the details of the room transformation.

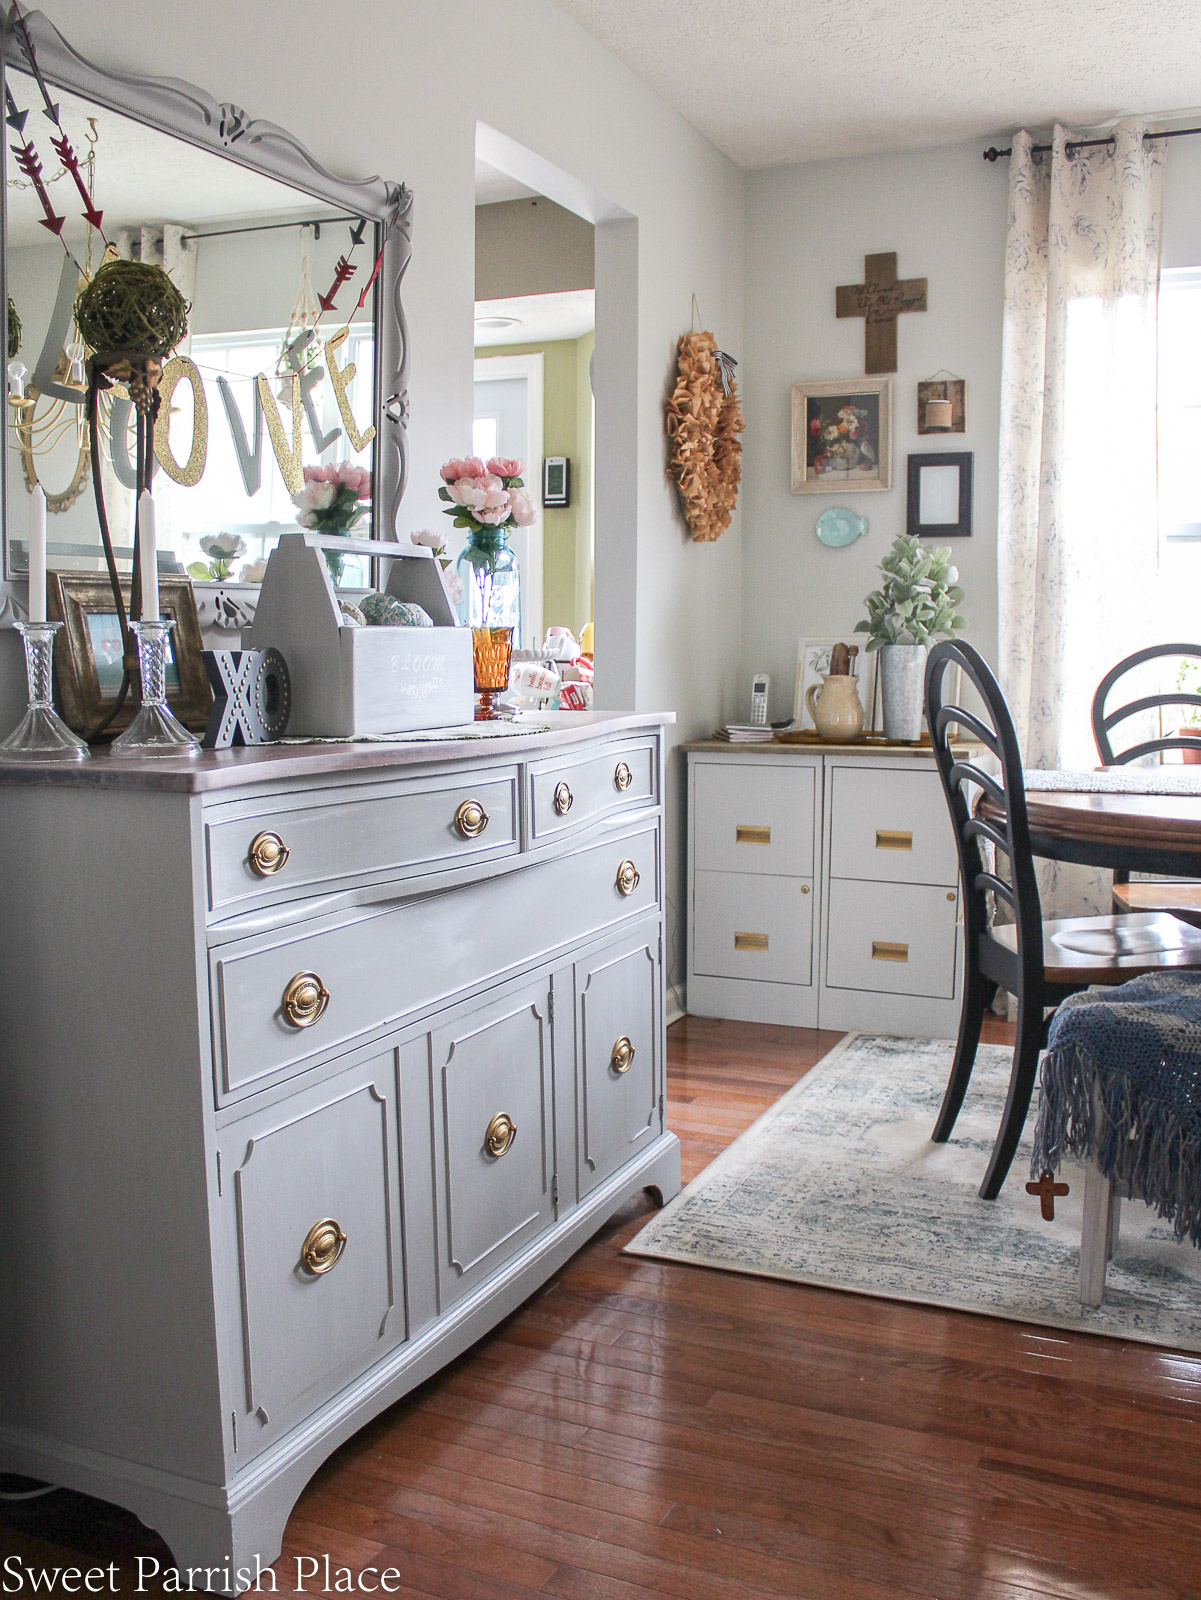
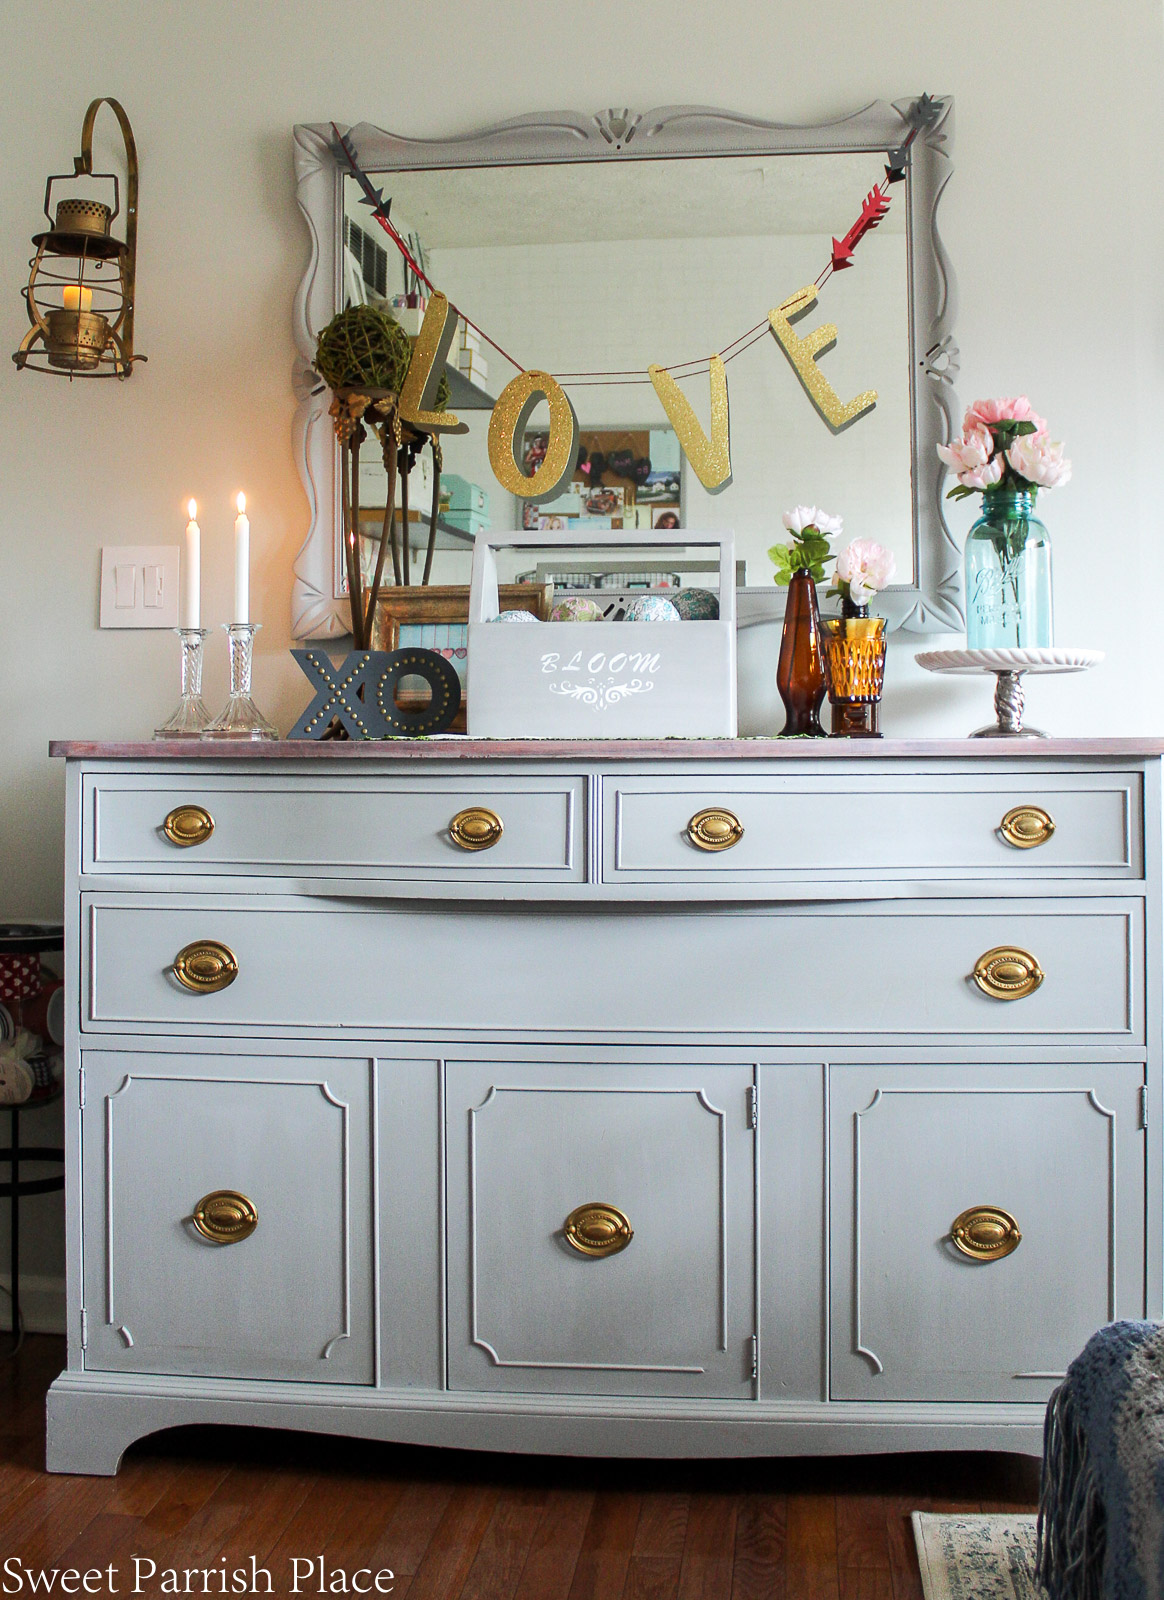
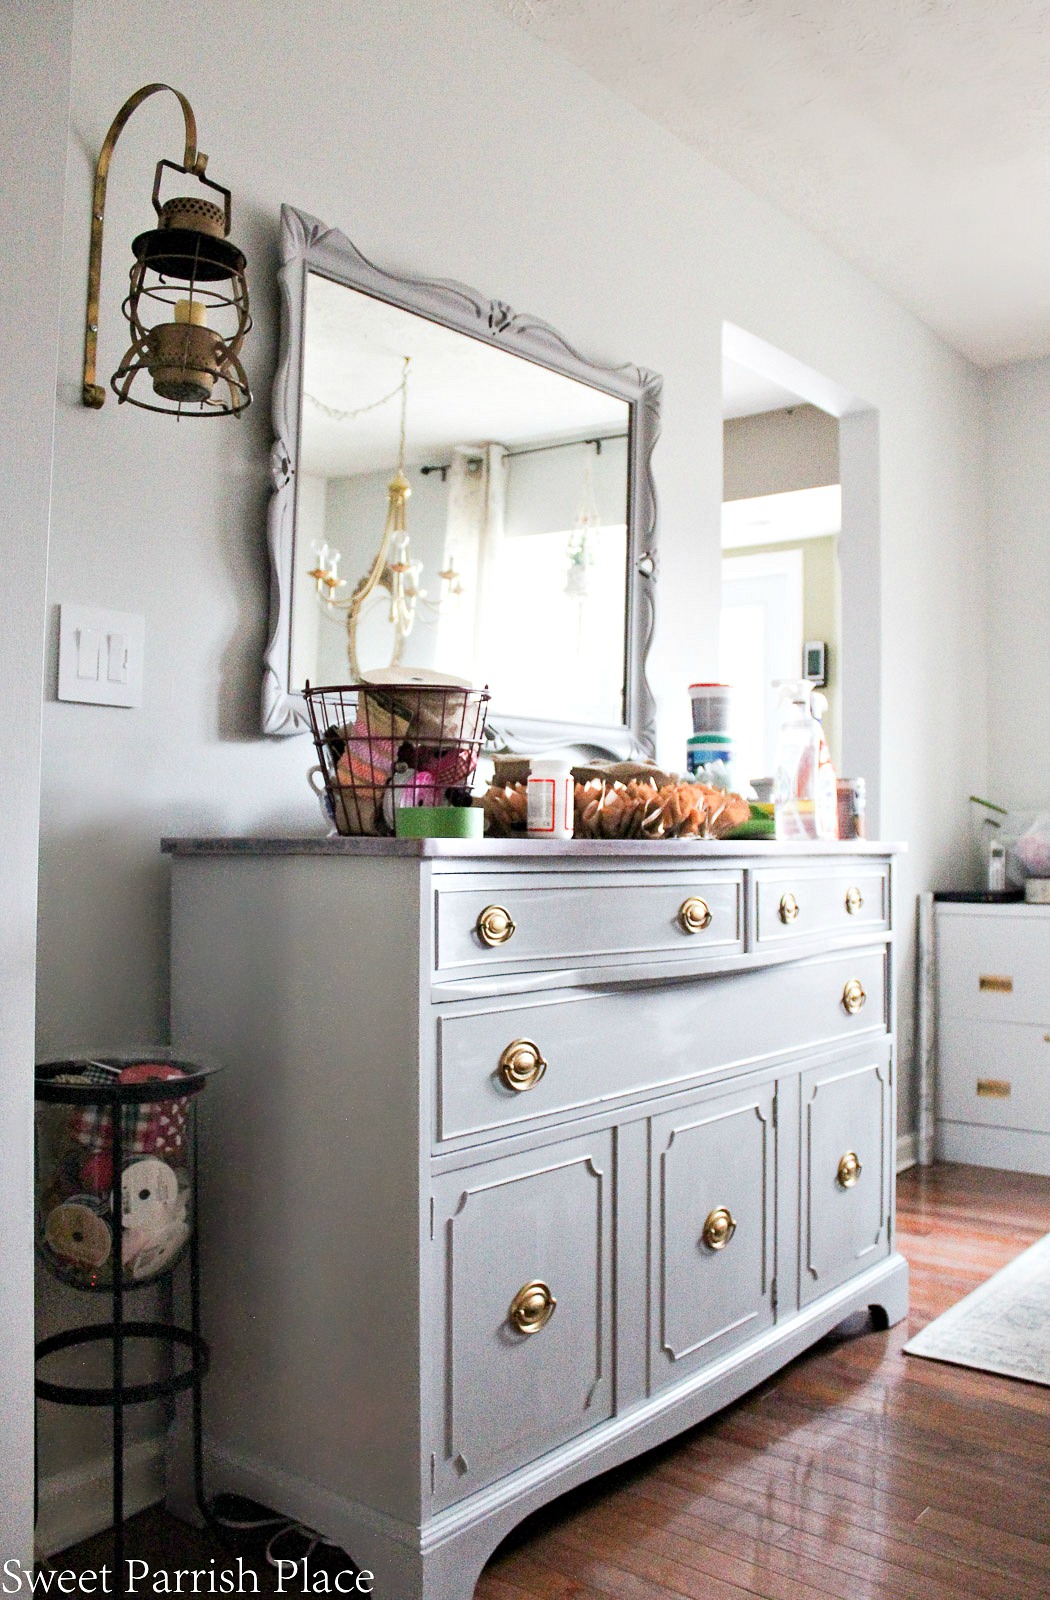
This painted buffet is my favorite part of the room, and I have fallen madly in love with this piece of furniture all over again. I loved it 26 years ago when I bought it, but I love it so much more now. I Just think it has more personality and it feels more current this way. I mixed this paint color myself using paint I had on hand, so I was able to complete this for free. You can find the recipe that I mixed to get this color in my week 4 post. I used DecoArt Metallic Lustre in gold rush on the drawer pulls. I love the pop of gold against the grey of the buffet. You can read more about how I made the DIY book page wreath by clicking the link.

The gold chandelier is a DIY project that I did about a year and a half ago. Can you believe I paid $5 for this at a yard sale?

This photo below was taken about three months after we moved into this house. I painted the walls this color of my own free will. I never liked it even after I had just painted it.

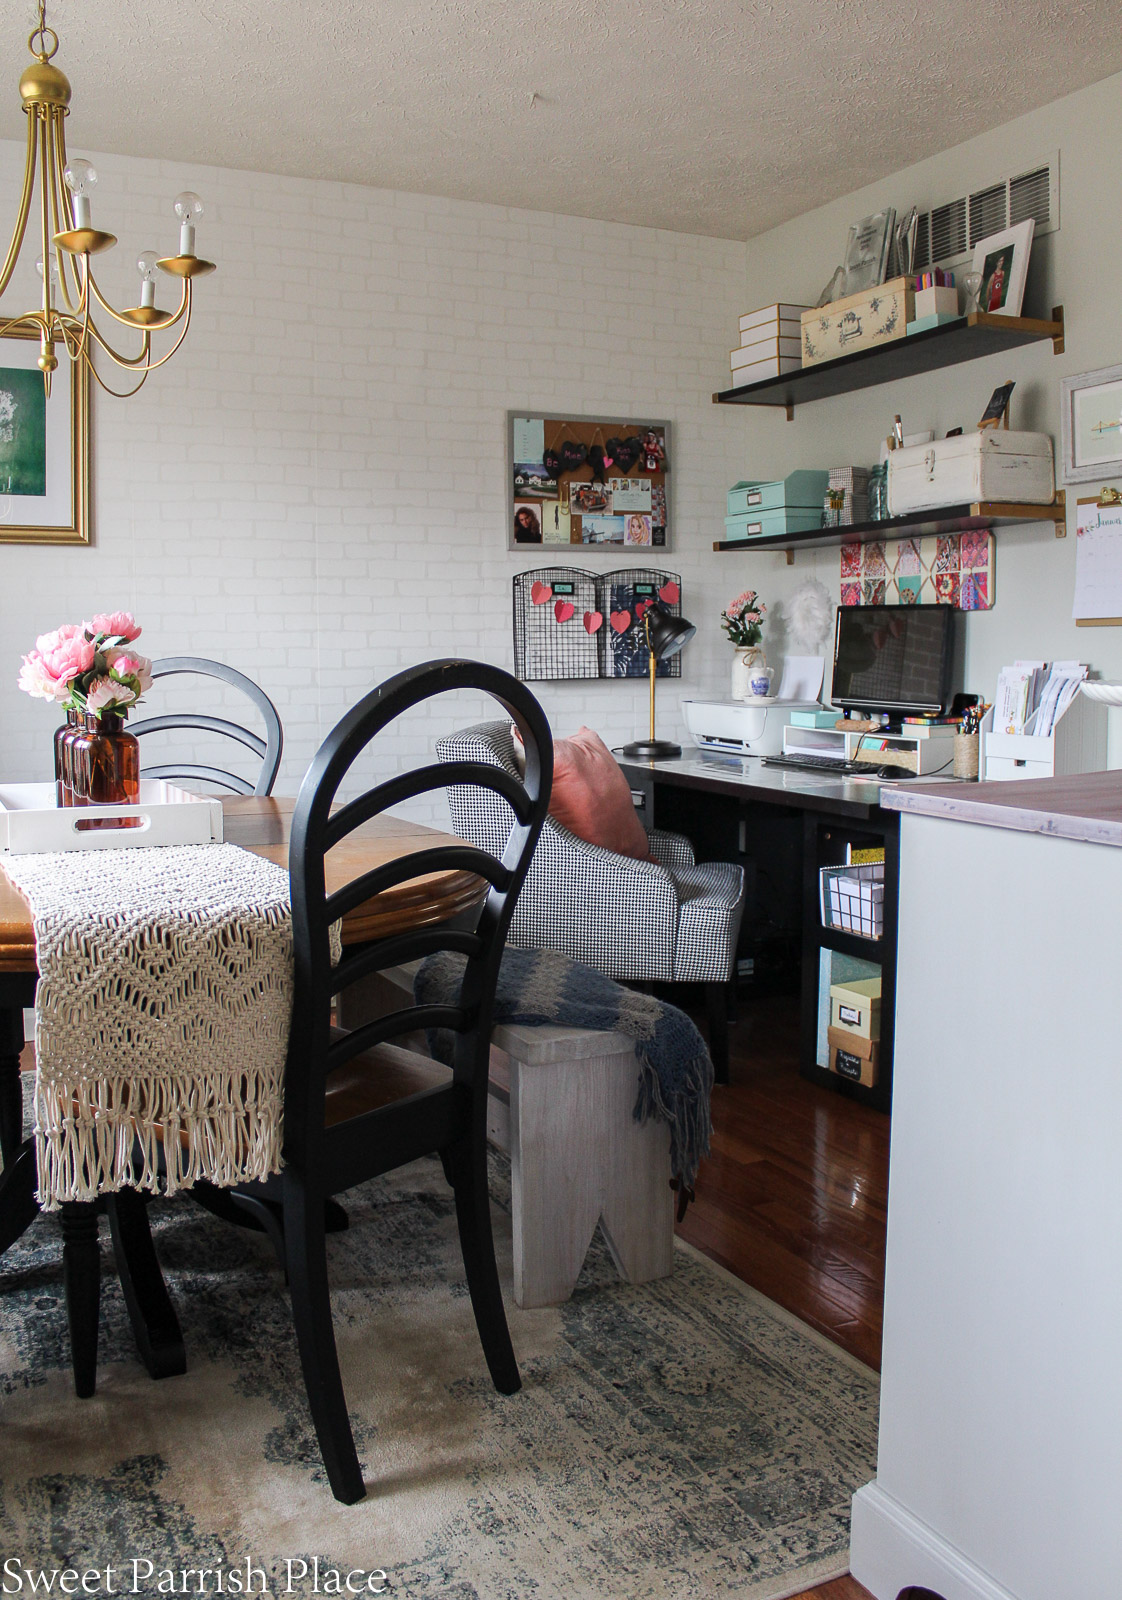
This is the only place in our house where we were able to fit in a home office, and we have done our best to make this space work. It is definitely one of the hardest working rooms in our home, as so many hours are spent here on the computer, paying bills, and many family meals have been had here.
This is the before of the desk area. It’s such a more pleasant space to work now. I reorganized this space and added some storage and organization and did it all using things I already had.


I had so much fun decorating my new space for Valentine’s Day. And I think it is sweet and romantic.
Here is a before photo of the buffet right after I had removed the drawer pulls to paint them.


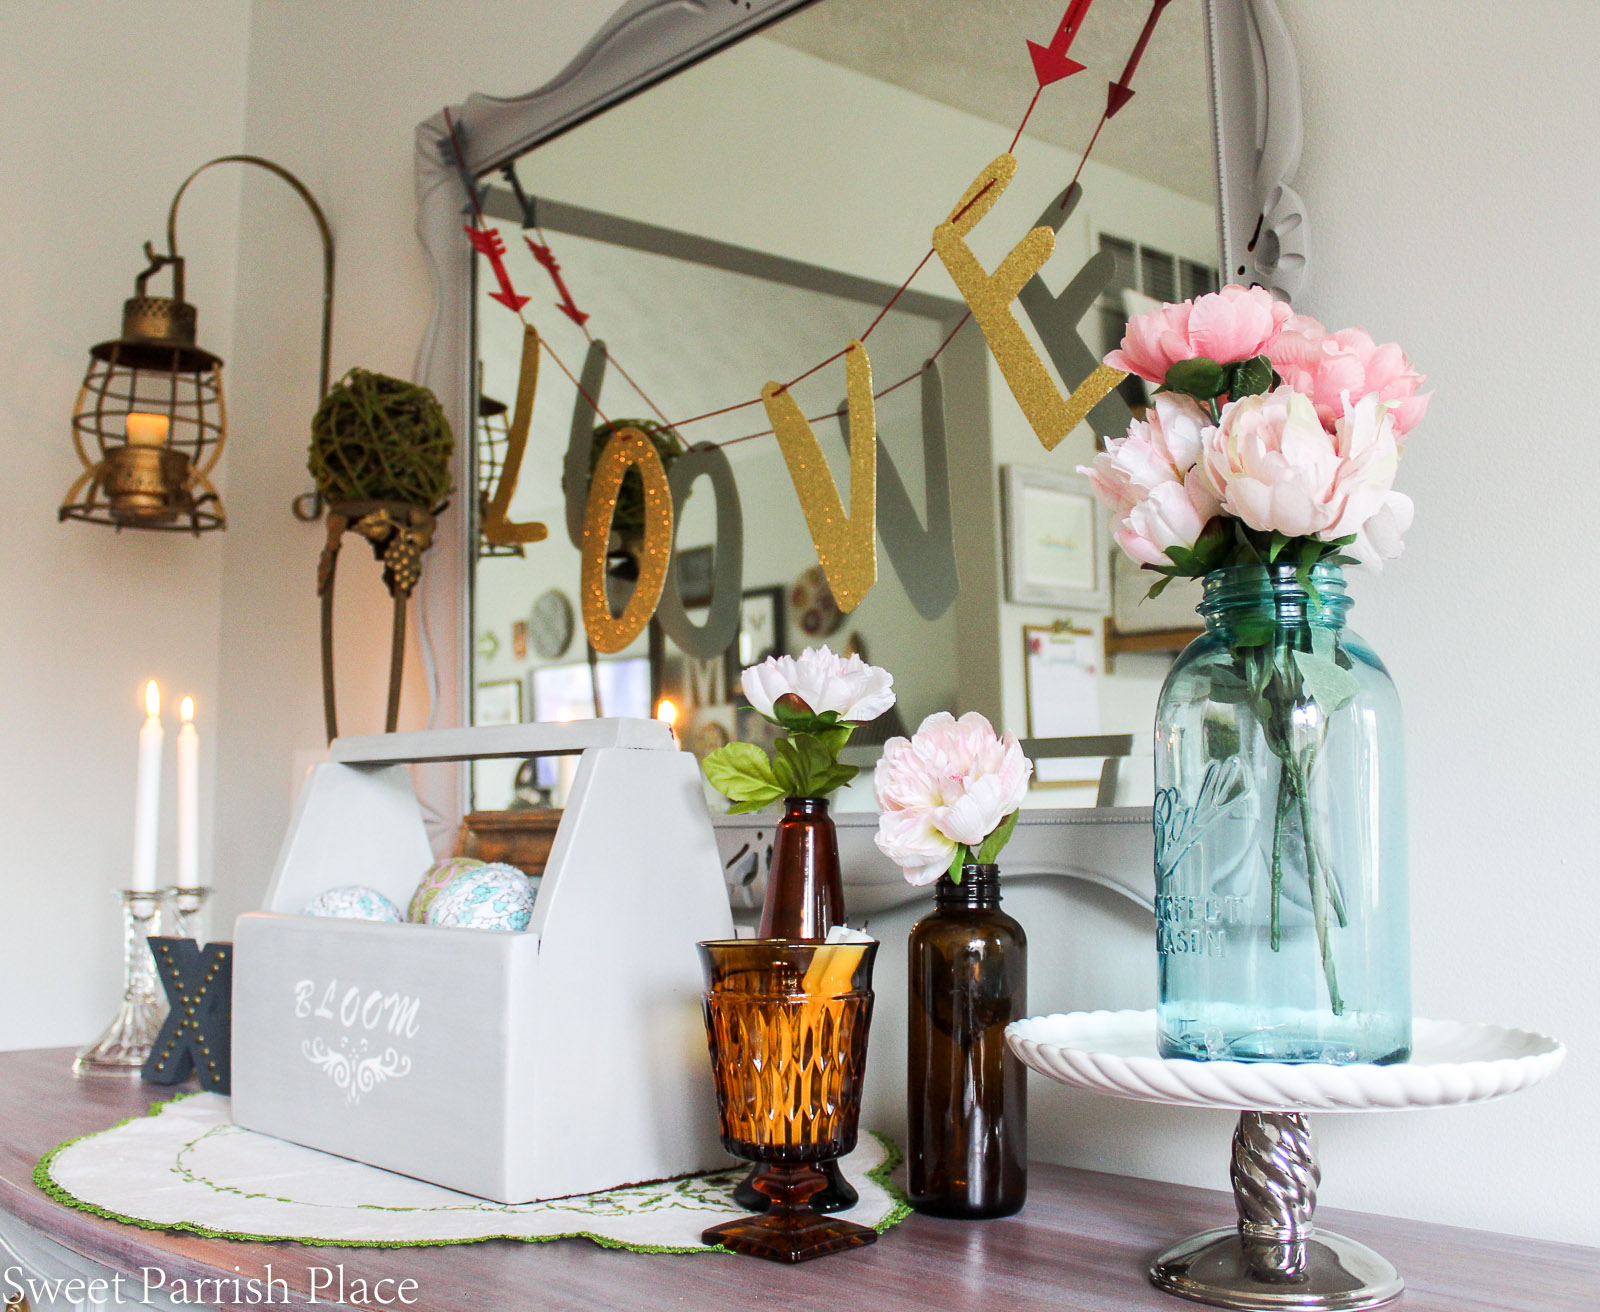
I found the art that you see in the frame that leans against the mirror at Deposit Photos and printed it out myself, so that was a little piece of free art. It was free for me because I paid for a one year plan where I am able to download 100 images for $100, and I have one year to do so. This is something that I invested in to use as a resource for my blog several months ago. It would cost a regular customer probably around $14.99 to download this image. I enjoy having access to download images on this website, and if you are a blogger, this might be something you would be able to use as well.

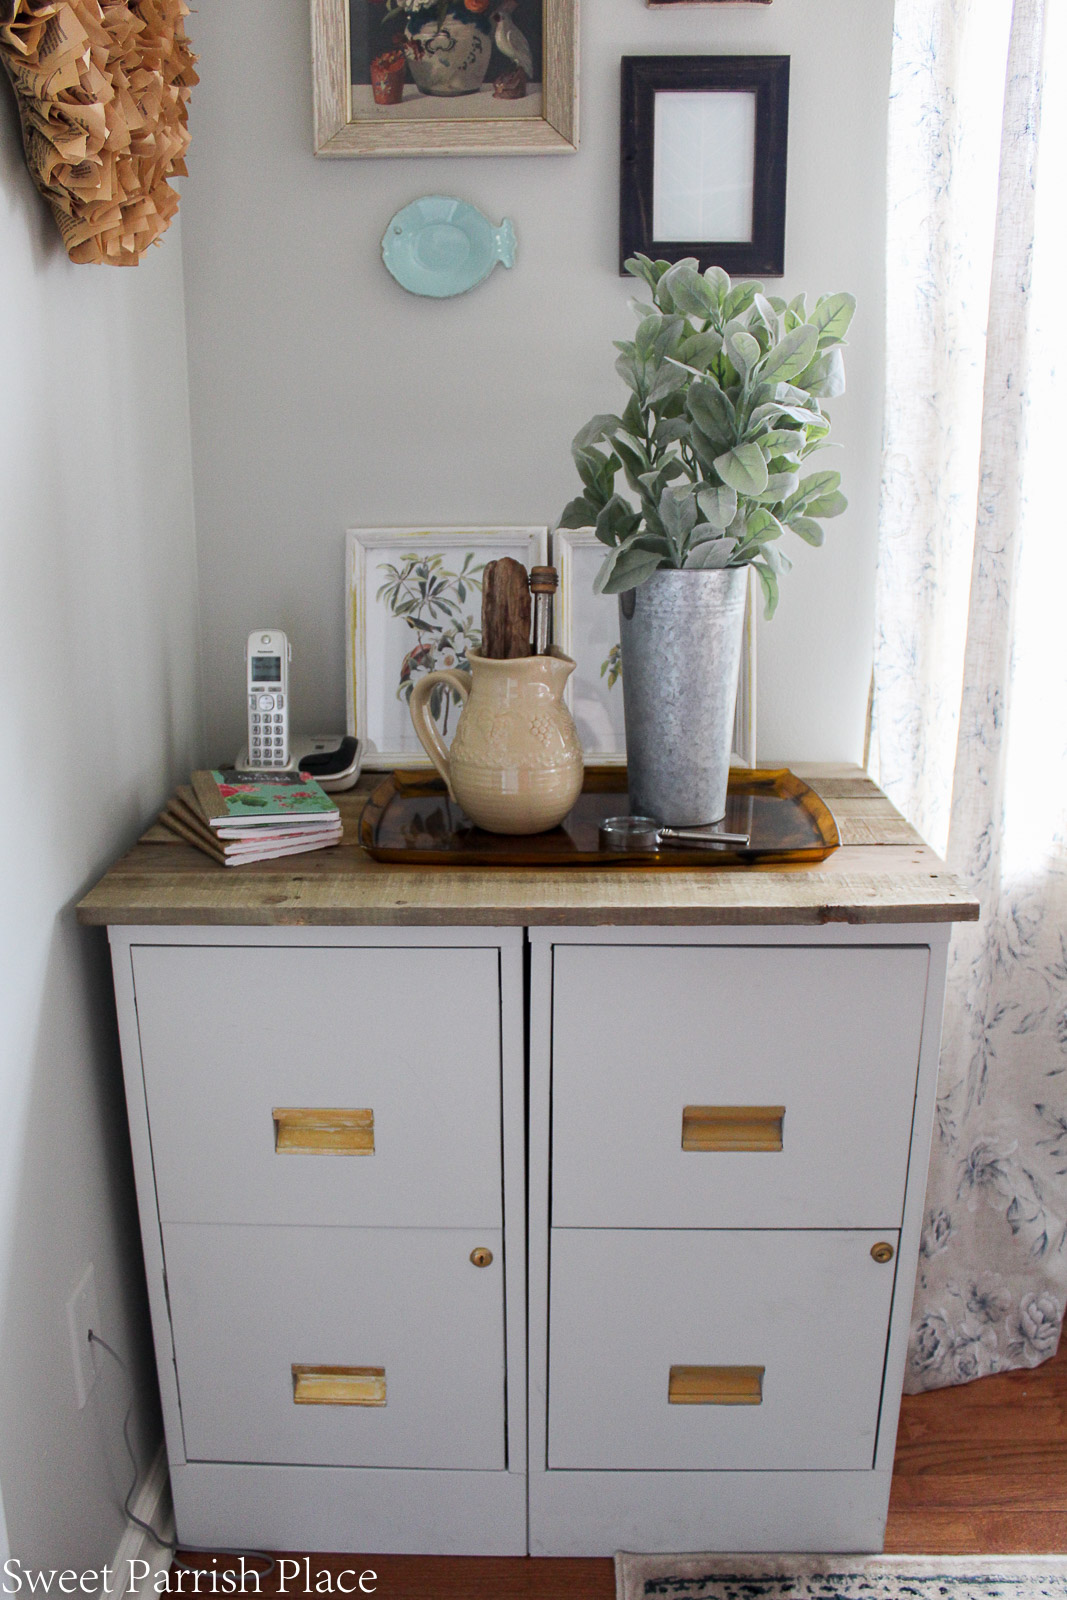
I mentioned several times in previous weeks that I was planning to add some rustic wood to the top of these file cabinets. The goal was to make them look more like a piece of furniture. I do have a confession to make. In actuality, a large printer goes in this spot. But I wanted to style the space for pictures without that monstrosity. And so far I haven’t been able to bring myself to put the printer back here. So we are going to either have to relocate the large printer or live with it. The printer is most likely going back in this spot though.
I plan to write a separate post about this file cabinet update on the blog soon. I like the way it turned out a lot.


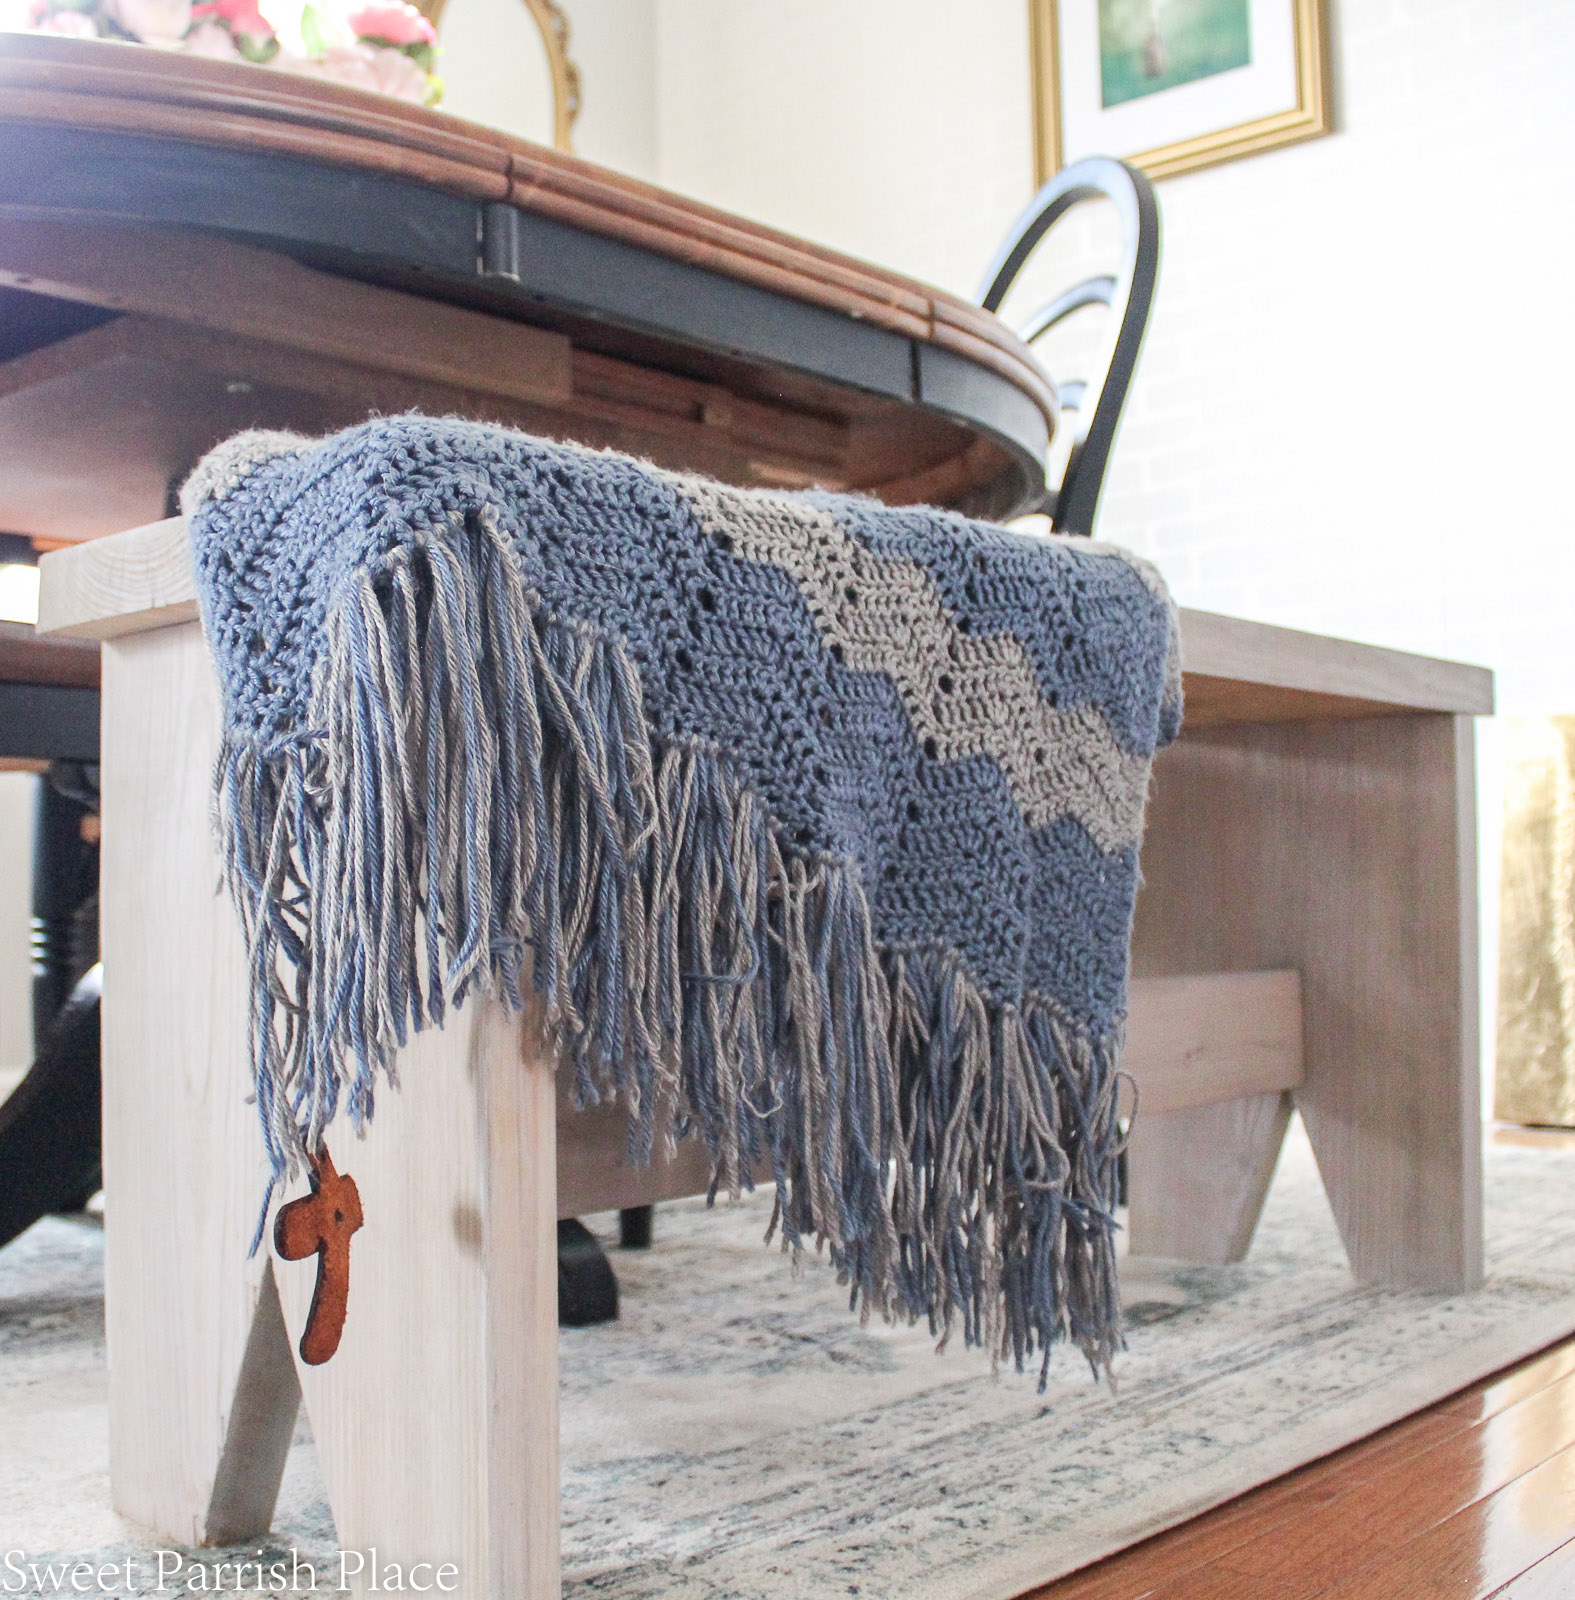
It was very important to me that I increase the seating in this room, but trying to fit two more chairs in here would have been way to much for this small space. So I wanted to add a bench that could be tucked under the table, and this bench is what I spent half of my $100 budget on. But it was totally worth it! We can now seat 6 people here, and the bench takes up less space, physically and visually. Plus, I will be able to use this bench in other areas in the future. I plan to write a post about this bench and how I got it to look the way it does. The afghan you see lying here on the bench was a prayer blanket that used to belong to my grandmother.


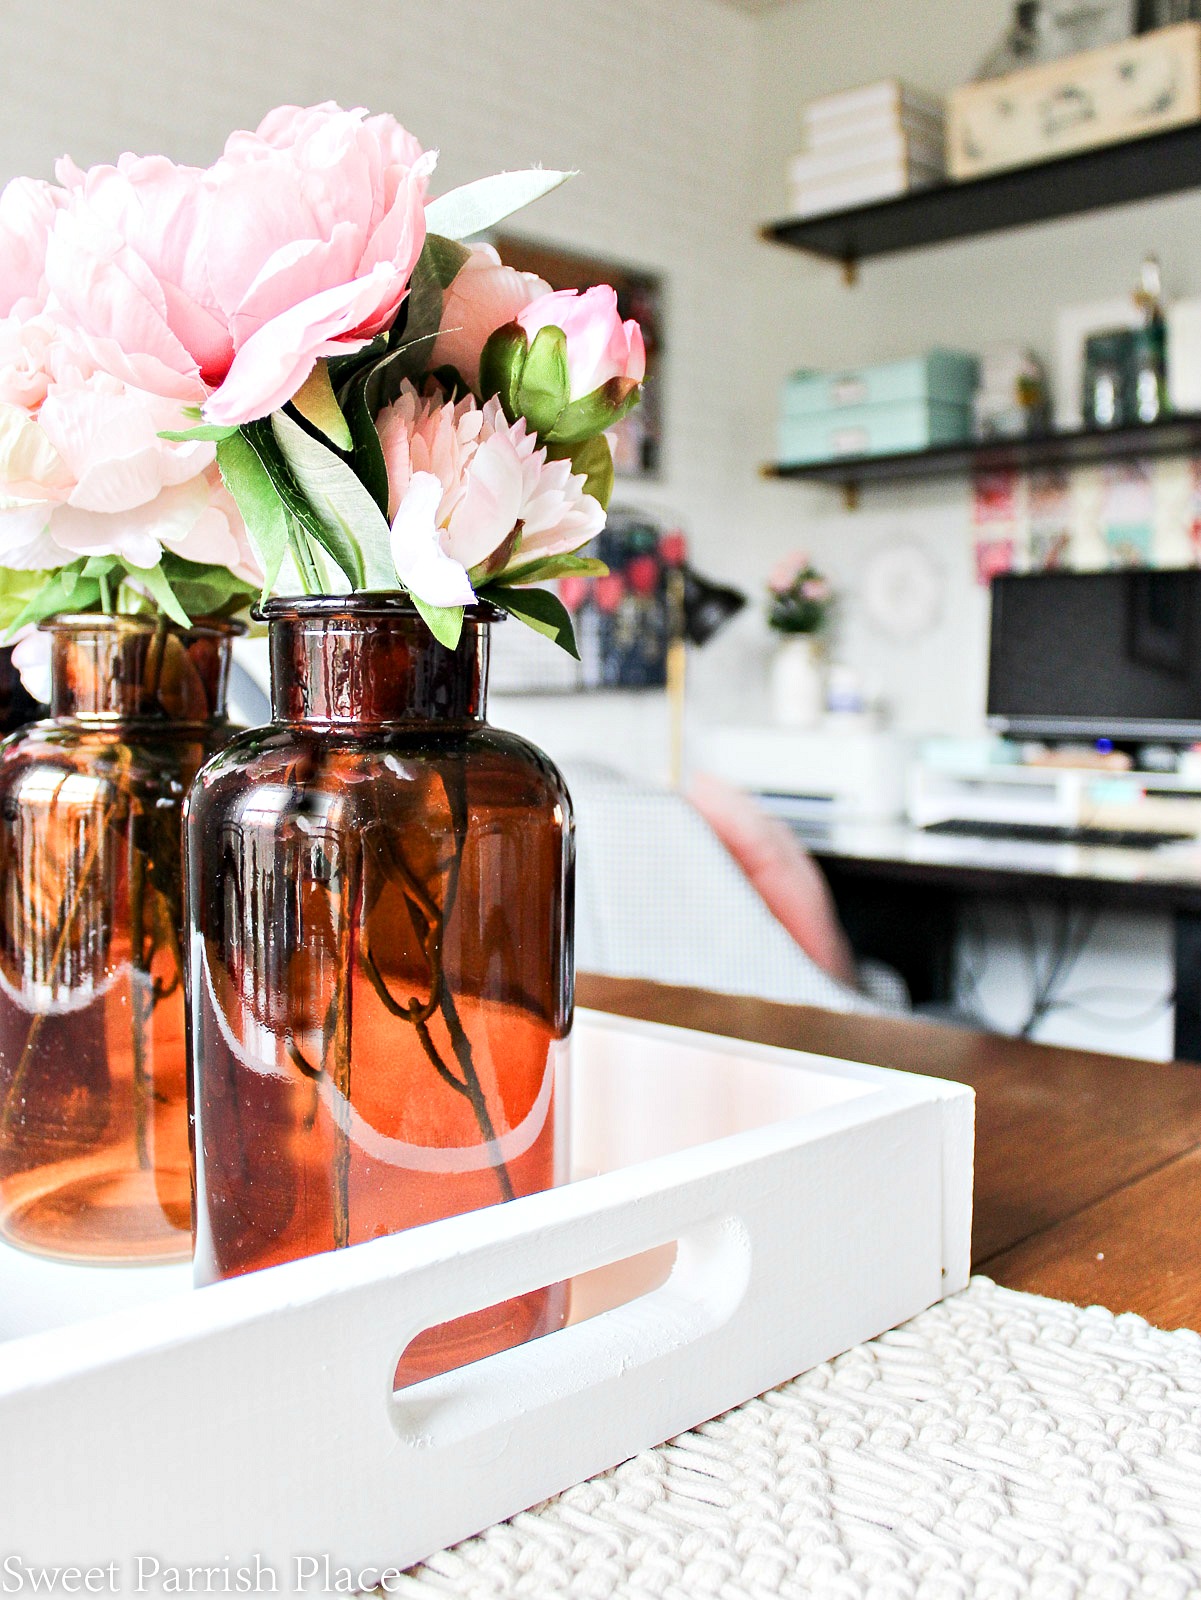
I wanted to point out this marble looking desk pad you see here on our desk. This is actually just a piece of wrapping paper that I cut and taped down onto the desk with double sided tape. I’m not exactly thrilled with the black desk and wall shelves, but it isn’t in the budget right now to replace these things, and my husband isn’t on board with me painting them. So I tried lightening up this area with a lot of white accessories, and this wrapping paper helped to lighten up the desk. It just so happens that this particular wrapping paper has sort of a shiny coating on it which makes it a bit more durable. It’s more just for looks, but I have a whole roll of this stuff that I bought awhile back so I can replace this sheet with many more sheets if needed. I can’t even remember where I bought it, because it was months ago.
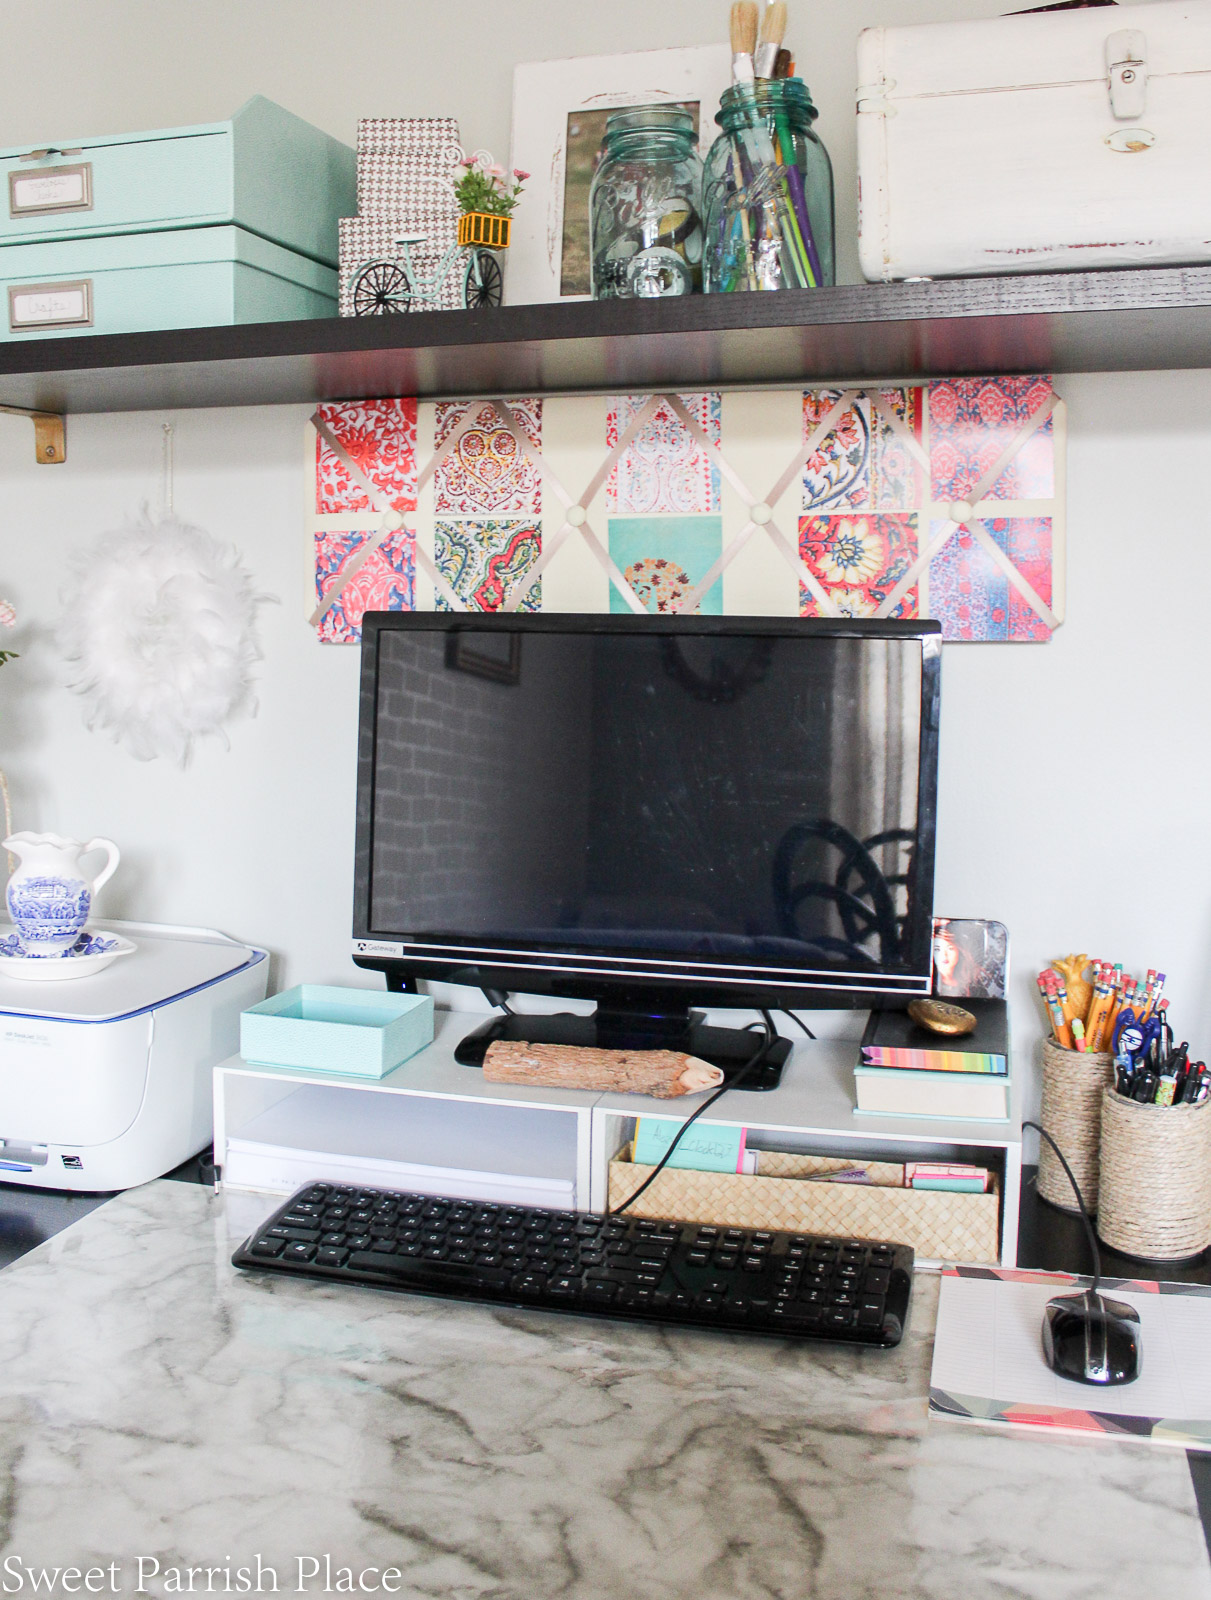

I couldn’t resist adding this little bicycle that I had found on clearance at Pier One before I ever even came up with a plan for this space. I knew it would come in handy somewhere because it is stinking cute! I used two blue jars that I already owned and filled one with paint brushes and one with washi tape.

I decided to add a small gallery wall in this little corner, and I love the hippy chic vibe it gives the room. Everything you see hanging here in this corner were things I already had. I pulled a few pieces from other rooms in my house, and a couple of these things were in the room before I started this update.

I found this piece of wall art on Etsy, and I downloaded it and printed it out as a photograph at Staples. There was a gallery wall on this wall, but I wanted the wallpaper to be the focus of this wall, so adding this single piece of art is the feeling I was looking for on this wall.


These 96 inch curtains are new and I love the longer length in here, I feel like it makes the ceilings look higher and I like the way the light filters in through these.The macrame plant hanger is holding a faux succulent in a pot that I already had, but I hope to find a hanging plant to place here at some point.


The white tray I used on the table was an unfinished tray I brought home from Haven Conference two years ago, and it was sitting down in my garage patiently waiting to be finished and used in my home, and this was the perfect opportunity because I needed something free. So I sanded it lightly and painted it with two coats of white chalk paint that I already had on hand.

Source List For My Dining Room/Office
Wall Color- Gray Owl (Benjamin Moore color)
Golden Gate Bridge art (hanging next to desk)
Leaf art (in gallery wall over file cabinets)
Wall art (on wallpaper wall)
DecoArt Metallic Lustre (used on buffet drawer pulls)
Bulletin board (I painted the frame)
Faux fur sheepskin rug (on corner chair)
Heart framed art (on buffet)
My To Do List For The Dining Room/Office Refresh
Paint 3 walls
Hang faux white brick wallpaper on green wall
Paint buffet
Add bench to one side of dining table
Add rustic wood to top of filing cabinets
Hang new curtains
Restyle and reorganize shelves using items I already own.
Paint metal lantern hanger gold
Add art to walls for free
Add bulletin board to wall above desk
My Budget For The Dining Room/Office Refresh
Faux Brick Wallpaper– $000
Paint- (I used paint I already had so zero)
Curtain panels- $28.99
Wall Art- $12.49
Bench- $50.00
Calendar $3.00
Can you believe I spent $94.48 of my $100 budget? I am amazed at what I was able to accomplish on this tight budget! And in the spirit of keeping it real, I do want to mention that I was able to complete this room on a $100 budget because of the fact that I am a home blogger, and I have a pretty good inventory of supplies and things lying around that I was able to use in this room transformation. If I were not always working on a project around here, I would have had to go out and purchase some of these things, which would have increased my budget. But even then, you could still do the same type of thing in a room of your own for not a lot of money at all! Now, don’t forget to check out the big reveals of all of the other $100 room Challenge participants! I am super excited to check them out myself!
Do you have champagne taste and a tiny budget too?
Love fashion, DIY, crafting, all things vintage and thrifty? Stick with me, I’ve got you covered!
Sign up to get my posts delivered to your inbox here
Follow me here:
Facebook / Twitter / Instagram / Pinterest / Bloglovin / Google + Stumbleupon
![]()
You may also like:
Dining Room/Office Refresh | $100 Room Challenge
Painting Progress In The Dining Room/Office| $100 Room Challenge

My Wallpaper Saga | $100 Room Challenge Week 3

Painted Buffet |$100 Room Challenge #4
This room looks like it doubled in size. I seriously kept scrolling back and forth between the before and after. I cannot believe the change. You certainly accomplished brightening it up, and that buffet… I cannot get over how gorgeous it turned out. Continued prayers as you work through the trauma at work. Thanks for joining another round of the challenge!
Thanks so much Erin! I know, I still can’t believe it myself! I put this whole plan together at the last minute because I really wanted to participate in this challenge, and I am so excited about this room! Thanks for starting this challenge, it is so awesome!
Very Lovely Nicki, I am so proud of you. You are very talented!!
You are so sweet, thanks so much!
Nicki, this looks so good! The buffet is just so so beautiful! I love the change that painting it made. The whole room is just so light and bright. I think my favorite part is how you were able to beautifully incorporate your office space. Love!
Aww thank you so much Beth! In a perfect world this would be just a dining room, but for now we make it work. I appreciate you!
Wow! This transformation looks so great! It is amazing what we can do when challenged like this! P.S. I just love all of your furniture in this room, the buffet, chairs, bench, side chair – so cute!
Thank you so much Kristen! I am over the table, but don’t want to replace it. I am going to give it a little makeover sometime in the future though. I jus didn’t have time for this challenge. But the buffet is my fave!
Nicki, you did a beautiful job. That room was far from bad before but now…. It’s totally gorgeous. Something right out of a magazine. I wouldn’t be surprised if a magazine contacted you about it . Well done!
Wow, that was an awesome compliment. I am so glad you like it! That would be a dream come true but I won’t hold my breath! haha Thank you so much though!
HI Nicki! Your room looks great! I love the buffet too. What a difference! Everything looks so much brighter! Very pretty!
Thanks so much!
The transformation of this room is amazing! I love everything, but the buffet…Wow. Absolutely stunning!
It’s may very favorite part! Thanks so much!
It’s such a pretty space! I love the wall color so much. And the chandelier looks fantastic. Great job!
Thanks Emy! I painted that chandelier a few years ago, and it looks so different in these new surroundings!
I would say you completely carried out your vision board for this space! It’s so bright and open feeling, and all the little details work so well together. I can’t believe you were able to do all this for under $100. Well done!
Thanks Meredith! It was using a lot of what I already had, and it all needed to be used up!
Wow!!! I am so impressed with how this room turned out!! It’s gorgeous!
Lovely room. Where did you find those lovely amber bottles? Thanks.
Thanks so much! I got them at Target dollar spot last year. But I linked to some similar on Amazon!
This room is so pretty! I absolutely LOVE the buffet with the new color and the way the gold handles tie into everything. All of your accessories look amazing. Great idea too with the file cabinets, too!
Colleen@ Life on Kaydeross Creek recently posted…$100 Room Challenge -Family Room Reveal
Thanks so much Colleen! You are so sweet!
I love your dining room with such pretty antiques. I also love how you made it practical with an office space.
This all turned out so beautiful – that buffet is a show stopper and I love all the floral and vintage touches, especially that gorgeous centerpiece. It’s such a functional hard working room and you did an amazing job.
Thank you so much Melissa!
What an amazing job you did on this challenge! This room looks completely different! I kept going back to look at the before pics! It’s so much lighter and brighter and so pretty! Way to go coming in under budget! I love the bench and your grandma’s prayer blanket!
Nicki, I absolutely agree with you and Erin. This looks like it has made your room a much wider space, with so much more ligthe. It shows how important it is to pick the right colors, the right furniture in every room.
Kostas Chiotis recently posted…Best Home Office Desks Review
Great office chair. This is such a good thing to have in offices, maybe it would increase office performance.
This room looks fantastic! Love it!
It looks fantastic! Great makeover!
Happy Hiller recently posted…Telltale Signs You Need a Heating Repair
I am looking to change my windows this year and somebody said that read some blog posts to find out which window company is best and after reading your post I am sure now that upvc windows are the best choice, thanks for sharing this awesome post.
Alex kevin recently posted…Kairos Group Collapses
This is an amazing challenge to participate. We can challenge our family members to revamp there rooms in a budget amount.
I really appreciate the ideas you shared with the given post as new and innovative creativity makes room ambiance more relaxing and eyecatching this I can identify by the given pictures. Thank you for sharing such a classy and innovative ideas . Keep sharing new updates in the future.
Using crockery for storing utensils is a perfect accessory for the farmhouse look. Group whisks in one piece, wooden spoons in another and utensils are instantly organized. Utensil crocks are easy to place anywhere in the kitchen.
rustic home decor recently posted…Grey Check Charger
The modern rustics never forget the fifth wall: the ceiling. A-frame homes with cathedral wood-covered ceilings are quite popular, or big beams adorn the rustic space.
farmhouse kitchen recently posted…Clear Silicone Bulbs Pack of 2 – 5W
Looks nice!