It’s week three of the One Room Challenge, and today I am sharing my modern rustic file cabinet makeover and a vintage desk that I added to my son’s bedroom makeover. 
Hey friends! I can’t believe we have already reached the halfway point of the ORC! In three more weeks it will be the big reveal. If you follow me on Instagram, you may have seen this file cabinet makeover in my stories on Sunday. Before we get started with today’s post, you may want to go back and start at the beginning with week 1 and week 2 of my boy’s bedroom makeover.

If you have not heard of the One Room Challenge (also called ORC), currently in its twelfth season, is a widely anticipated biannual event every April and October. Each round, twenty design bloggers take the challenge and transform a space. It is hosted by Calling It Home and House Beautiful. Wednesdays is the day for the design bloggers to go live with their progress, and Thursdays is the day for all the guest participants to go live. You guys will be amazed at these reveals, they are just beyond words good!
If you found me through the ORC Link up, welcome! I am so happy you are here! My name is Nicki and I am the blogger behind Sweet Parrish Place. I love to share our DIY and home decor shenanigans, along with some organization, fashion, travel and other lifestyle types of topics. Thanks for reading!

Modern Rustic File Cabinet Makeover
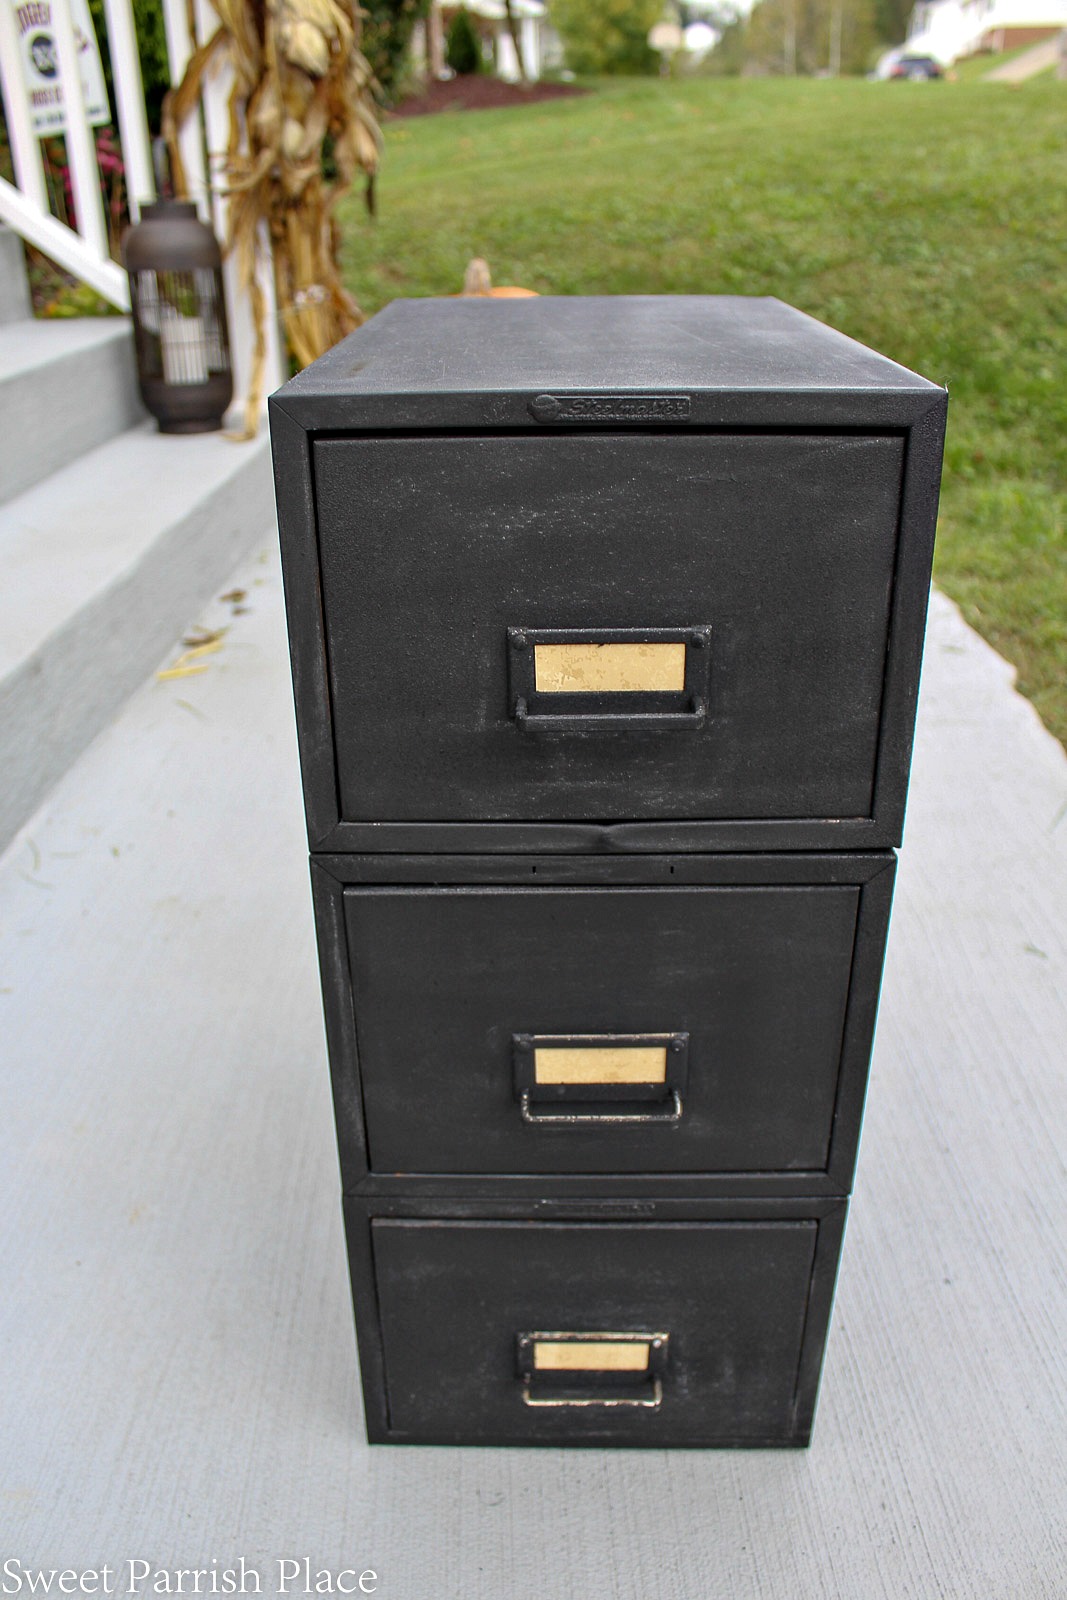
I love the way this file cabinet turned out, so I wanted to share how I did it. I am also sharing the vintage desk that I brought into the space. I bought this old file cabinet at a thrift store over the summer, and I just knew it would be perfect to hold some of my son’s crafting supplies. This is the cabinet after I had used my palm sander to sand it down. There was some rust on the cabinet that I needed to smooth out.

After I sanded down my cabinet, I wiped it with a damp cloth, and then I rubbed it down with some isopropyl rubbing alcohol. I had read that it would help the paint adhere really well to the cabinet. So I thought it was worth a try.
Please note: Some of the links in this post are affiliate links, which allows me to make a small commission from your purchase, but your purchase price stays the same. Thank you for helping support my blog! I greatly appreciate it!
After it was prepped, I spray painted the cabinet with 4 light coats of black chalkboard spray paint. I let that dry really well, and then I lightly sanded the entire cabinet with a fine grit sanding block.
Next, I seasoned it all over with a piece of chalk. This is how it looked afterwards. To season something that is painted with chalkboard paint, you just take a piece of chalk and place it on it’s side, and then rub it all over the cabinet. In case you have not heard of seasoning chalkboard paint, let me tell you why it is important. If you write on your chalkboard without seasoning it, you will never be able to completely erase what you just wrote. A faint image will remain forever. It’s called ghosting or shadowing. Now, for this particular cabinet, I don’t intend for it to be written on, but I still wanted the look of the seasoned chalkboard. When you season chalkboard paint it is no longer that stark black, but it is a little distressed looking, which is the look I was going for.

Black Chalkboard Paint | Chalk
Please note: Some of the links in this post are affiliate links, which allows me to make a small commission from your purchase, but your purchase price stays the same. Thank you for helping support my blog! I greatly appreciate it!
To finish the cabinet off, I took a soft dry cloth and buffed the chalk out off of the entire cabinet. And it left a perfectly modern rustic finish. I painted the handles as well, and then sanded them lightly to give it a slightly distressed look.
I printed out a piece of vintage looking paper and then I used it to make little tags to slide into the handles. I haven’t committed to writing anything on them yet. But I will soon. I love the way the vintage inspired paper looks against the chalkboard paint.
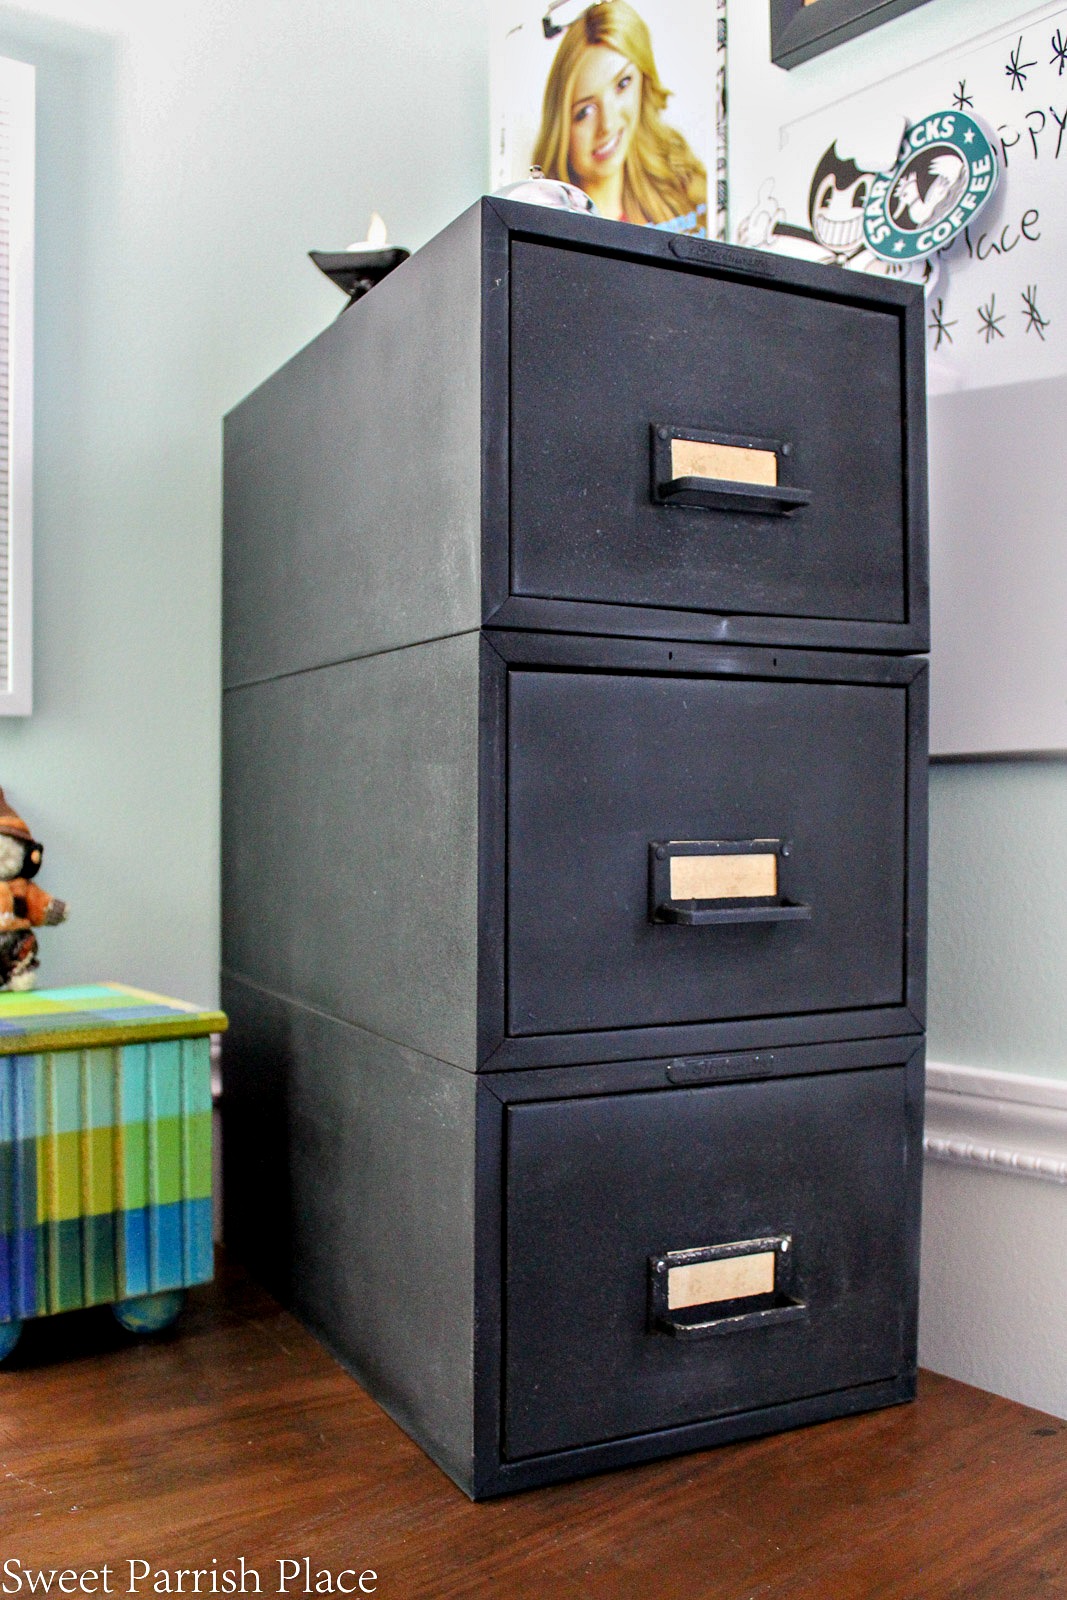
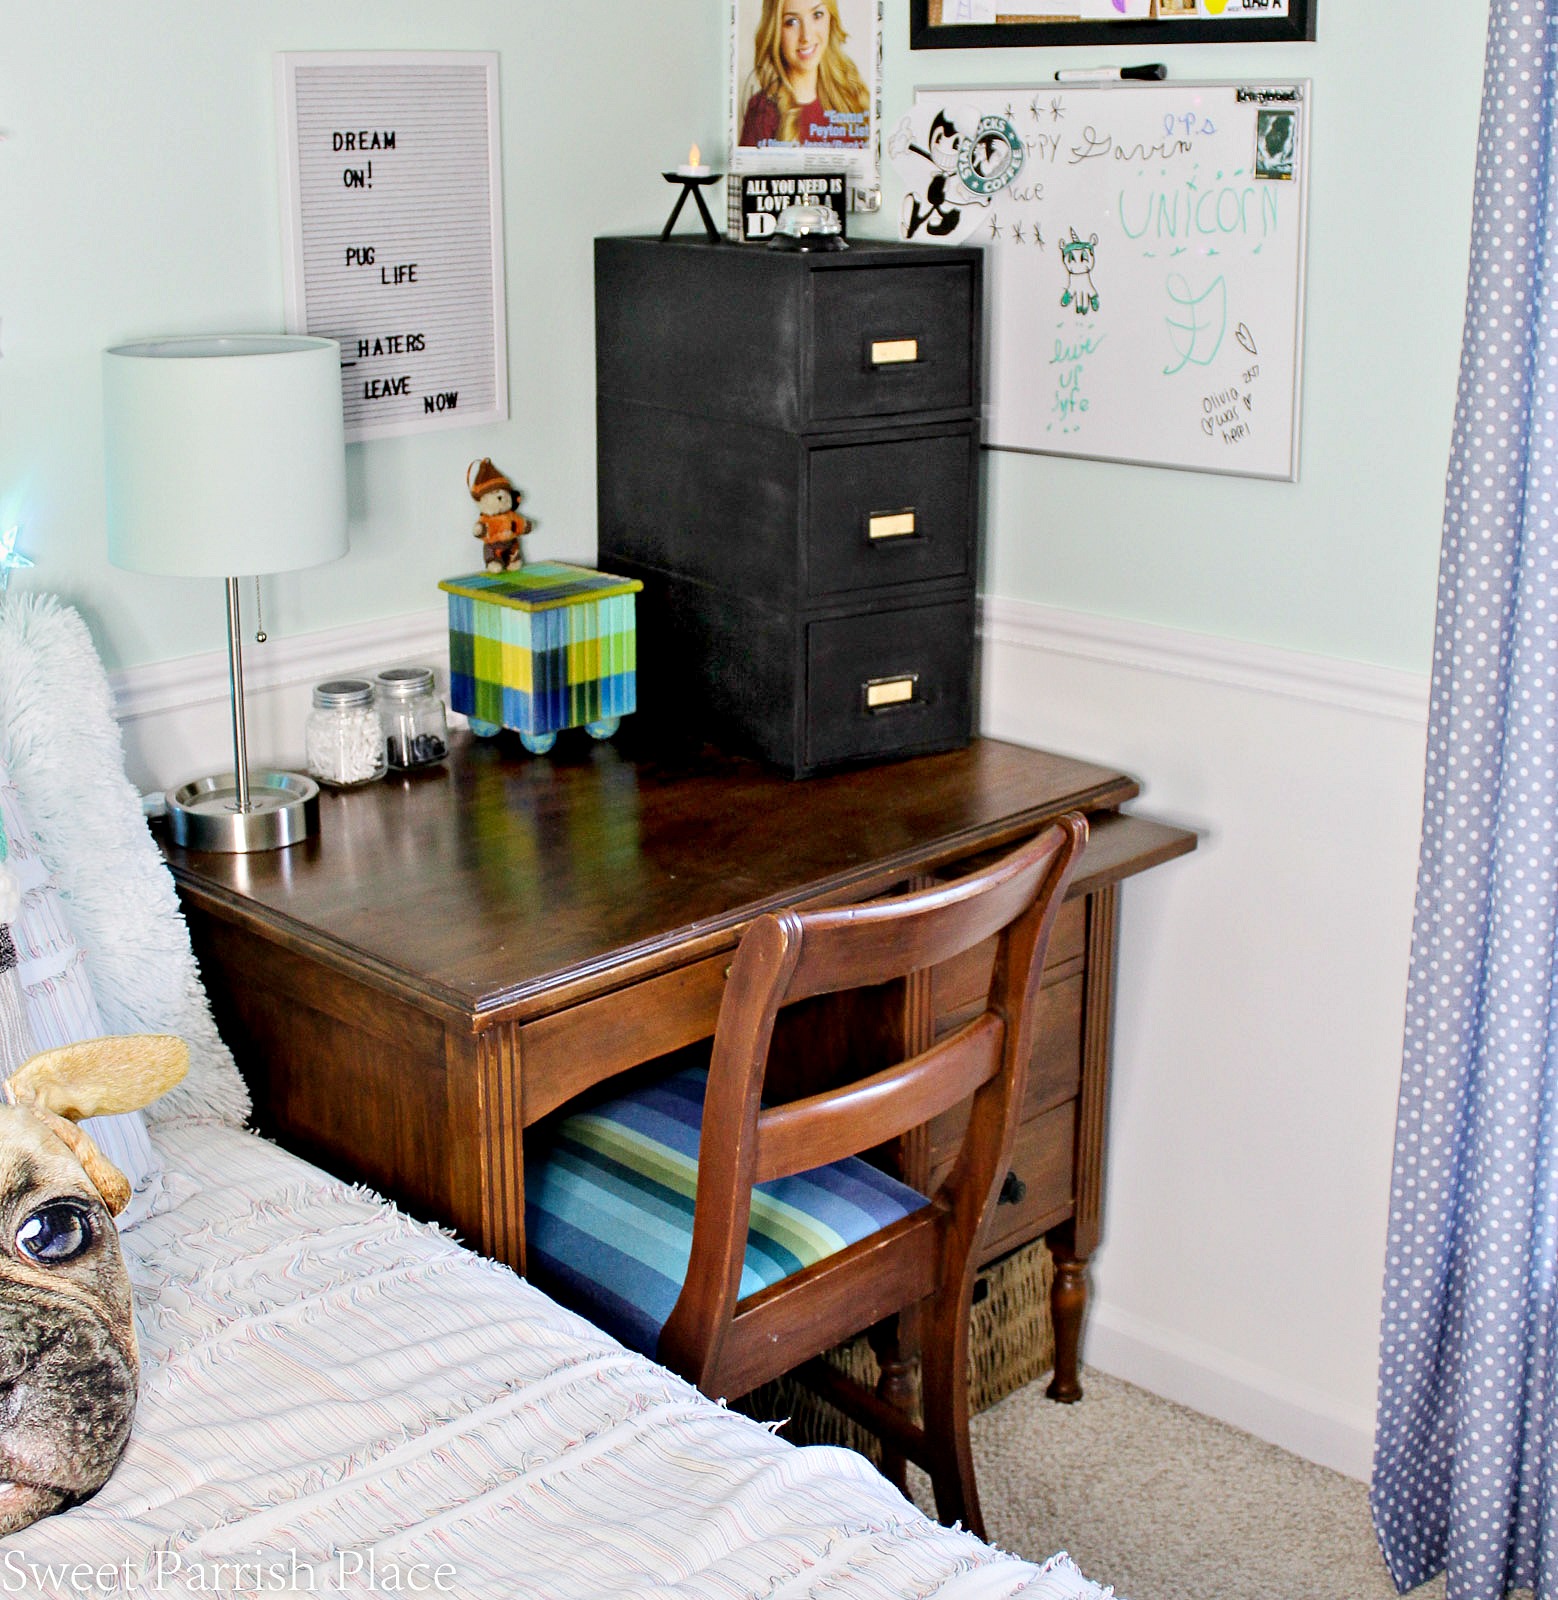
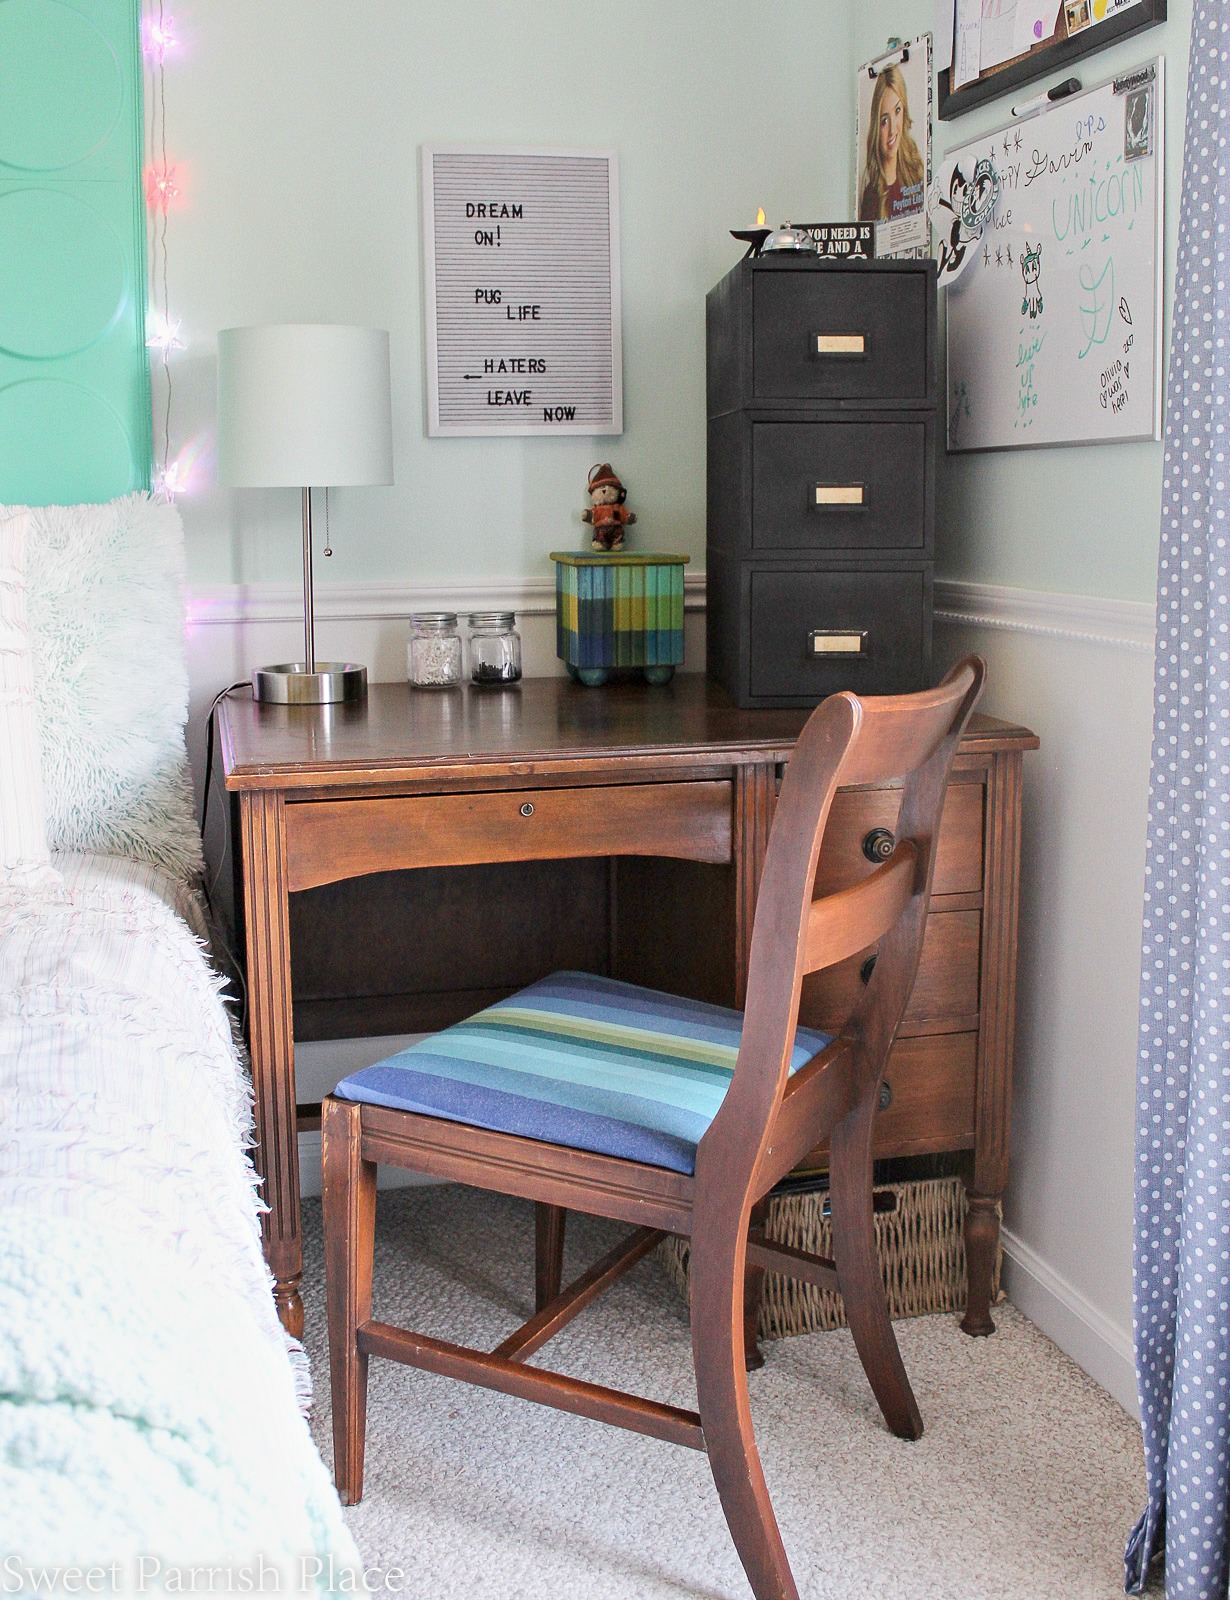
The cabinet looks great sitting on this vintage desk I added to the space. He got busy loading it up as soon as I put it there. I let him organize it the way he wanted to.
Vintage Desk
I was gifted this desk by a friend of mine! How lucky was I? She had bought it to use in her son’s new bedroom when they moved into a new house, but she didn’t like the way it fit into the room. So she asked me if I wanted it. I offered to pay her but she refused. I am so grateful to her for giving it to me! And it fits perfectly in the room.

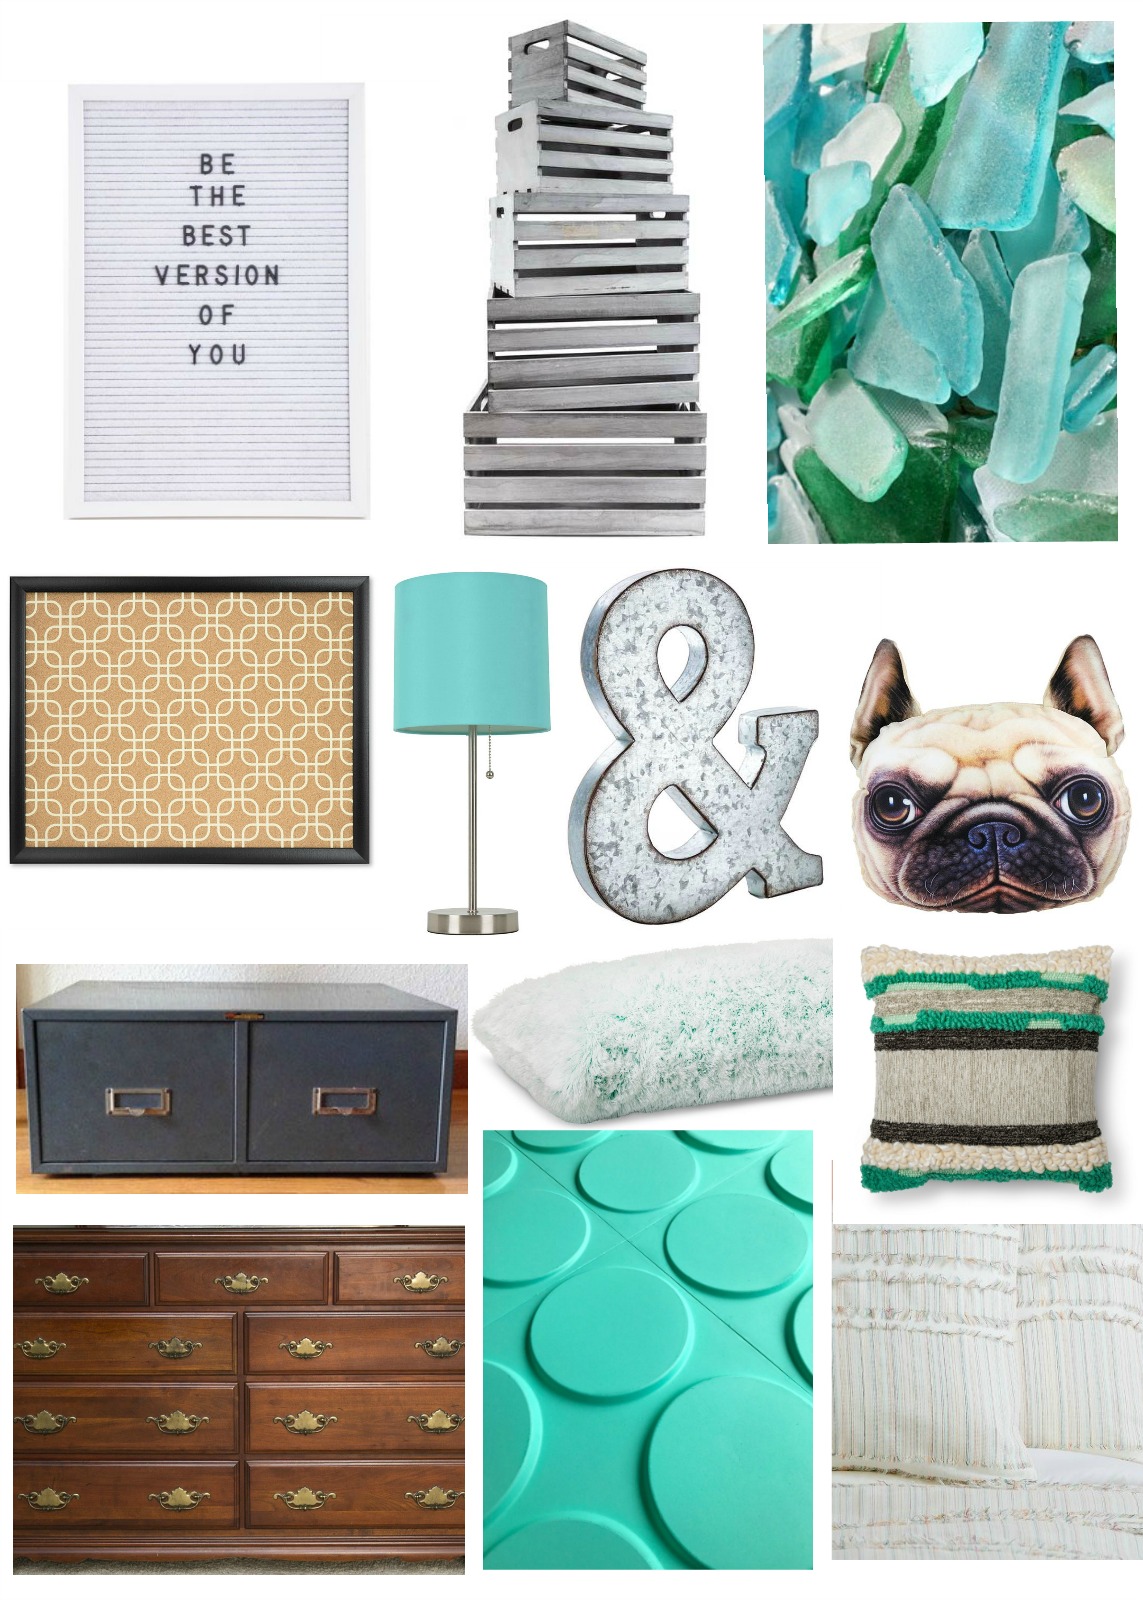
I made this headboard and wrote about it a bit before the One Room Challenge began. It was the perfect whimsy focal point to the room.
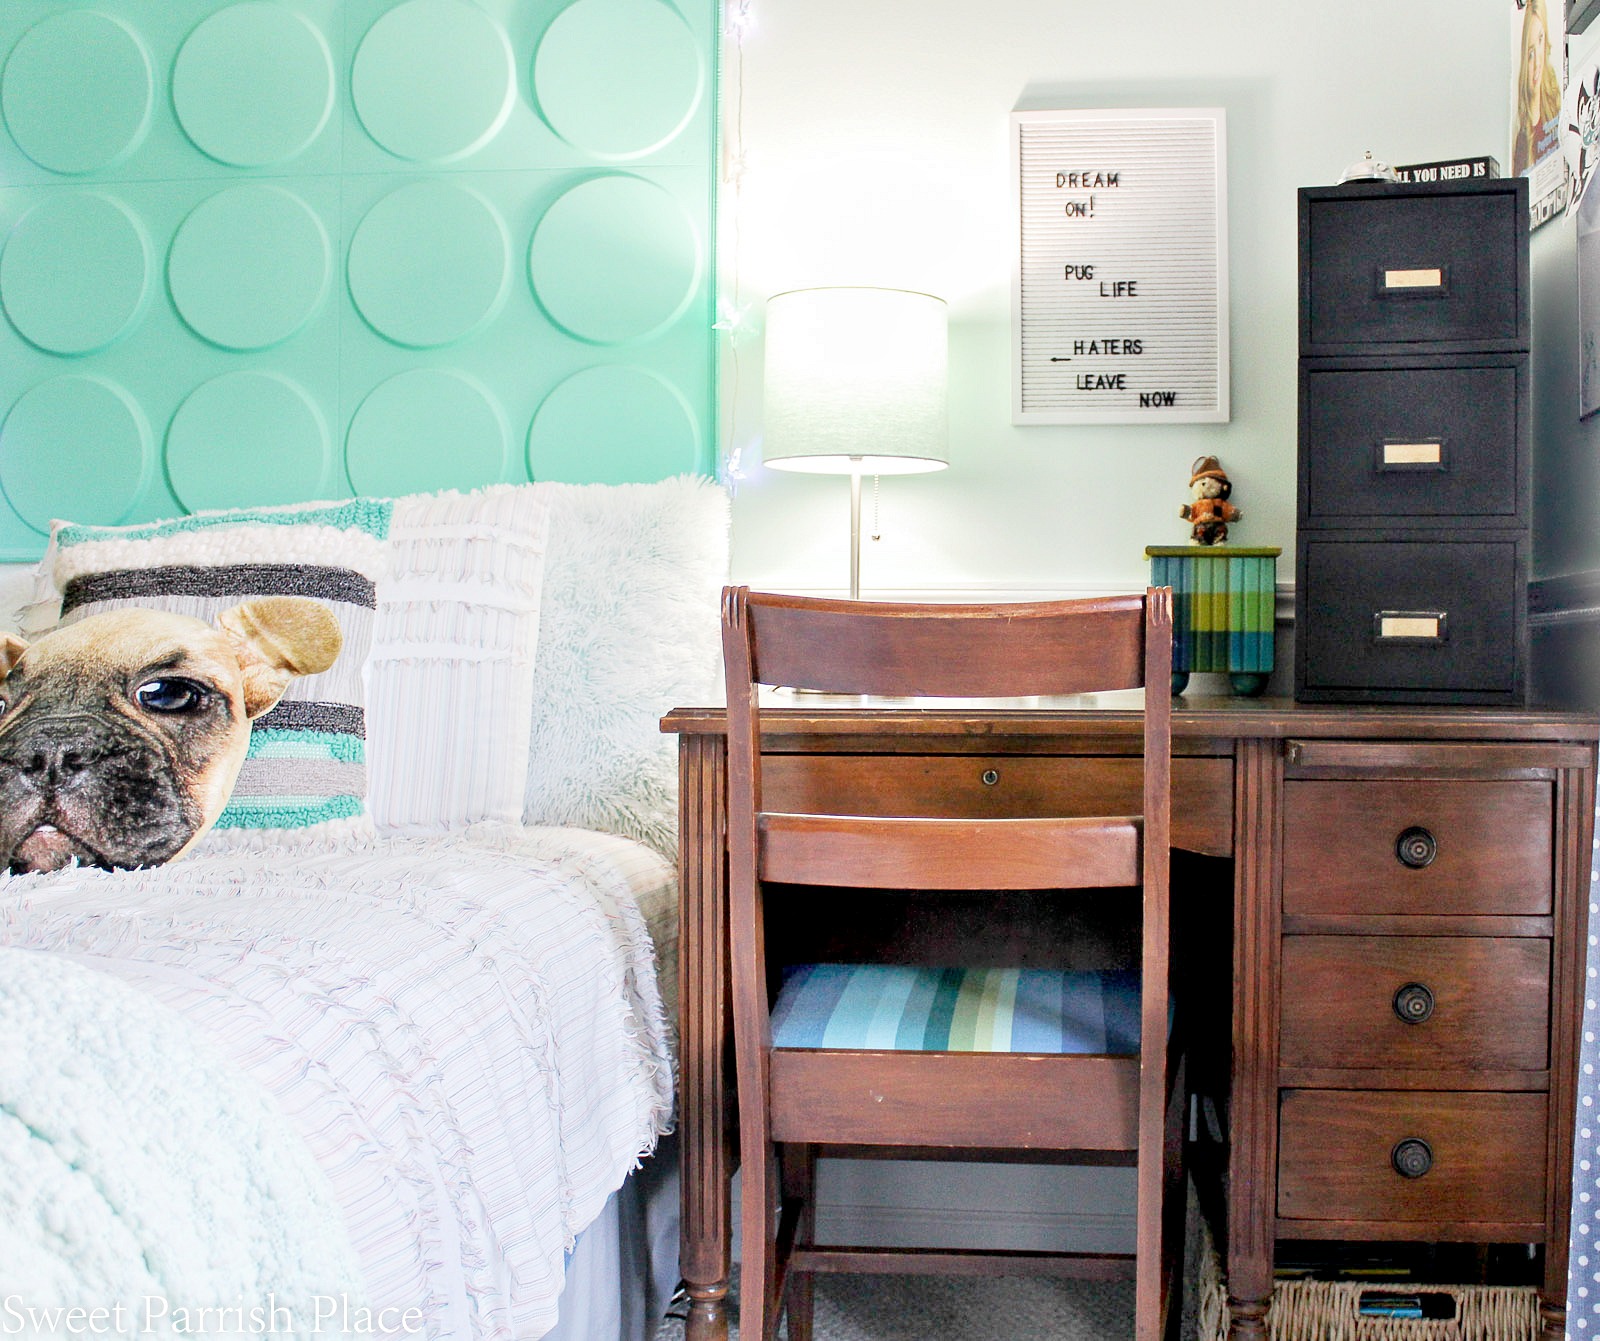
String lights | Dog Pillow | Wall panels |Woven square throw pillow | Popcorn knit throw | Faux fur throw | Lamp | Comforter set
We also added a white board and a bulletin board and he did what he wanted with these. I’ll probably style them better for the big reveal. I found the letterboard for a great price and I let him add the words. I will style this as well, but for now, I thought I would show you the real life version of these spots. I love the lamp because it actually has an outlet on the base to charge a phone or something. The little plaid cube is part of a set of 5 of them, and the other ones will be added to the space. They are nesting boxes, and this is the smallest one.

My girlfriend’s mother reupholstered this chair for me with this striped fabric I picked up at Walmart. I liked the shades of blue and green that mimic the colors in the cubes I’m adding to the room.
I already painted the existing mirror in the room and hung it. I also found a dresser that I am using in here on Craigslist. I’m going to be adding some crates that will be hung on the wall to use as shelves and some hooks for jackets. and I am hoping to find a furry rug to layer on the top of the berber carpet, and then it will be time to decorate and style the room. I’ll be sharing more progress in the space next week, so don’t forget to stop by!
If you like it, then you wanna put a pin on it!

Do you have champagne taste and a tiny budget too?
Love fashion, DIY, crafting, all things vintage and thrifty? Stick with me, I’ve got you covered!
Sign up to get my posts delivered to your inbox here
Follow me here:
Facebook / Twitter / Instagram / Pinterest / Bloglovin / Google + Stumbleupon
![]()
You may also like:
Boys Bedroom Makeover | Before and Plans
ORC Week 2 | Painting a Laminate Cabinet With Chalk Paint

Spring ORC | Boho Eclectic Bathroom Reveal

I can’t believe this is the same cabinet! I have not heard of seasoning the chalkboard paint but it makes sense. He is going to love his new room.
Thanks Sherry! He is so excited about his new space!
I love how the cabinet turned out! The size is great and the chalkboard paint will be useful and fun. I spy the mint green lego looking piece above the bed – looking forward to seeing the whole room reveal!
Thanks so much Joy! I made the DIY headboard over the summer, and I love it!
Nicki recently posted…Modern Rustic File Cabinet Makeover & Vintage Desk
That is the coolest thing ever! Now I’m going to be hunting for filing cabinets to DIY this onto! Gorgeous!!
Thanks so much Jen! That is sweet of you to leave such a nice comment!
Wow! You have done alot! The cabinet turned out great despite the roadblocks I saw in your IG stories!
mary recently posted…Mudroom Built-ins (One Room Challenge) – Week 3
Thanks so much Mary!
Nicki recently posted…Modern Rustic File Cabinet Makeover & Vintage Desk
That file cabinet turned out perfect. Love the finish and retro feel of it. Thanks for the tutorial on how to get that kind of finish. I can see using it in the near future!!!!
That is awesome that you liked it Jen! Thanks so much for stopping by today!
Amazing job on the filing cabinet. It turned out beautifully. And how lucky on that desk! Bet your son is loving the way his room is coming together!!
Tammy recently posted…How To Create A Barn Wood Accent Wall
Thanks so much Tammy! He is!
Nicki recently posted…Modern Rustic File Cabinet Makeover & Vintage Desk
I love the file cabinet! Totally didn’t realize it was tabletop-sized at first. Such a great makeover. Thanks for sharing it with us at Merry Monday this week.
Thanks so much Marie! I know the size is deceiving isn’t it? On my instagram stories, I stood next to it to show that it is small. But I didn’t take a picture that way for the blog. Thanks so much!
The chalkboard finish looks great!!
It looks awesome! Now I want to paint my old boring file cabinet 🙂