Sweet Parrish Place

I'm the girl with champagne taste and a tight budget

  • Home
  • About
    • About Nicki
    • Shop My Amazon
    • Contact Us
    • Blog Love
    • Link Parties
    • Advertise | Disclosure | Privacy Policy
  • Home Tour
    • Yellow Prairie House Tour
    • West Virginia Home Tour
    • Seasonal
  • Projects
    • Trashtastic Treasures
    • Holiday
    • Decorating
    • DIY
    • Crafting
    • Paint Projects
    • Cleaning/Organization
  • Style
    • Fall/Winter
    • Spring/Summer
    • Sweet Parrish Place Style
    • Tips/Tricks
    • Shop My Looks
    • Shop My Amazon
  • Travel
  • Lifestyle
    • Family
    • Decor
    • My Favorites
    • I’m Loving It
    • Personal
    • Shop My Amazon
  • Yellow Prairie House Tour

More Progress In My Hallway/Mud Room

July 18, 2013 By Nicki 4 Comments

Wow!  I am blown away by how many hits I have had on my Brown Paper Floor Reveal!  I told LC if I could just post a big project like that every day, this little blog of mine might take off!  Unfortunately, I cannot.  Those kinds of projects might happen a few times a year and that is all.  Today is a continuation of that same space.  We are definitely making progress!  My dad came over the past two days and installed quarter round around the base boards, and thresholds in the door ways.  I painted the space and color that I am loving, and I got all of the trim painted.   I will show you the progress we have made and the things that still need to be completed. 

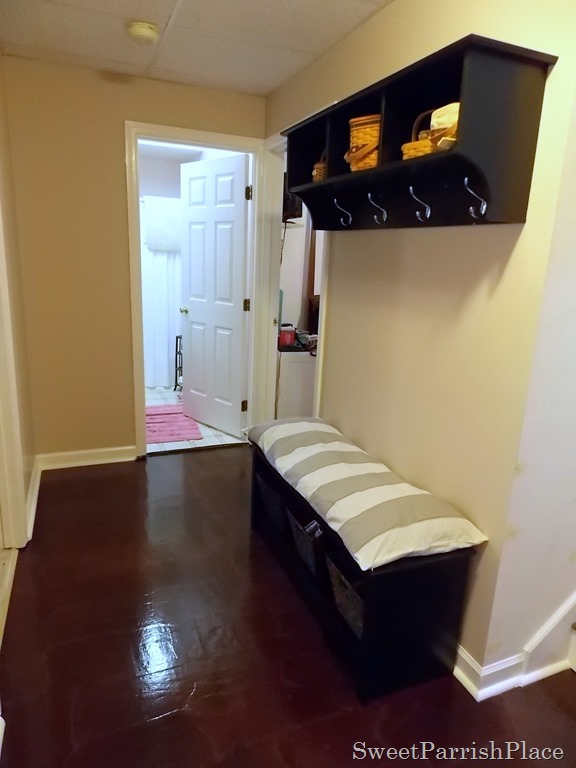
This is what the room looks like today after painting the walls, installing of the quarter round and thresholds, and painting all of the trim.  The color I used for the walls is a Martha Stewart Living Color called Sharkey Gray MSL 240.  I actually bought Olympic paint from Lowes and had it color matched to this color.  I have never bought that type of paint before but decided to give it a try.  It went on just fine and I was satisfied with it.  It is the paint and primer in one, and I had it mixed in eggshell. The color of the trim is crisp linen white by Behr in a high gloss.  It is the same color I used on the trim in my dining room and kitchen.

DSCN3197
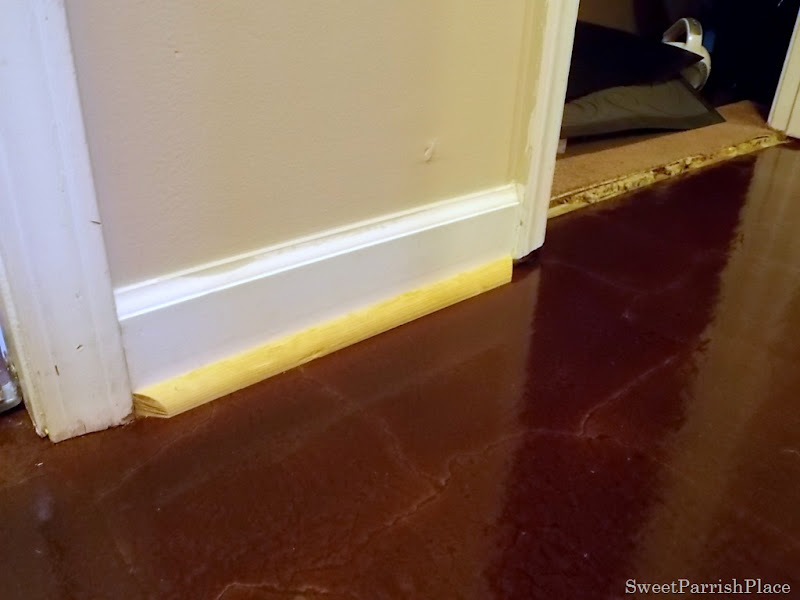
These first few pictures are of what the quarter round looked like after my dad installed it.  I used a fresh container of spackle to fill in all the gaps and spaces and let it dry overnight before painting it.  I have read that a lot of people use caulk for this, but I think spackle is easier to work with and serves the same purpose.  I just used my finger to smooth it into the crevices, and then after it was dry I took a wet rag and wiped it all down to smooth it out.  You can see in these pictures that the base boards were in sad shape. 
DSCN3172
This spot was a tricky one for my dad.  See how the two pieces of quarter round at the bottom of the stairs are not a straight line?  He wasn’t sure what he should do and I suggested he angle it on the same diagonal.  He was concerned it would not look right, but I felt that it looked better with the quarter round than without, so I don’t think he agreed, but he put it in that way.  I just used spackle to fill it all in and after I painted it, I think it looks just fine. 
DSCN3173
This is the same exact area after the spackle and paint.  What do you think?  It was the best he and I could do, and it is barely noticeable.  I don’t think anyone is going to be looking at it with a magnifying glass!
DSCN3187
DSCN3188
This was another very tricky spot for Dad.  See the right corner?  He did not know what to do about it.  We considered just one piece of quarter round and placing it flat against that wall, but it left a small area that looked bad, so I begged him to put a small angled piece right there.  He did not agree, but did what I asked.  I assured him I could make it look just fine after I was finished with it. 
DSCN3174
This is the same spot after I spackled and painted it.  Barely noticeable, right?
DSCN3183
Here it is again in the far right corner. 
DSCN3185
You can see here what the doorways looked like before the thresholds were installed. 
DSCN3175
Here is the same area after spackle, paint, and thresholds.  I need to remove the door hardware from this doorway.  we took the down the door and will not be putting it back up. 
DSCN3195
Before.
DSCN3176
After.  This is a good picture to show you the biggest dilemma.  See the gap between the door trim and the floor?  Dad and I do not know how to fix this problem other than to replace the trim, which is not in the budget right now.  I need to find a budget friendly solution.  Any suggestions?  For right now, I am going to leave it.  I will come back to it at some point though. 
DSCN3179
DSCN3190
Another shot of the space under the door trim. 
DSCN3194
The threshold’s still need wood filler, stain, and polyurethane.  But they look ten times better than they did. 
DSCN3177
DSCN3191
Dad did not install the threshold leading to the bathroom yet.  I am eventually going to replace the floor in there so we decided to leave it as is for now.  I do think I am going to tack it down though so that the edge is not sticking up. 
DSCN3193
Here are a few more pictures just so that you can see the wall color.  what do you think of the color?  I am liking it a lot.  It is a light grey, but it can also look a little tan in certain light.  I am planning to carry this color on up into the stairway/entry way. 
DSCN3181
The walls and base boards look so clean and fresh compared to before.  And even thought the color is not a drastic change, it is so much better!
DSCN3182
You can see here that to the left of the stair is the new paint color and right around that corner is the old paint color. 
DSCN3186
DSCN3198
DSCN3199
DSCN3200
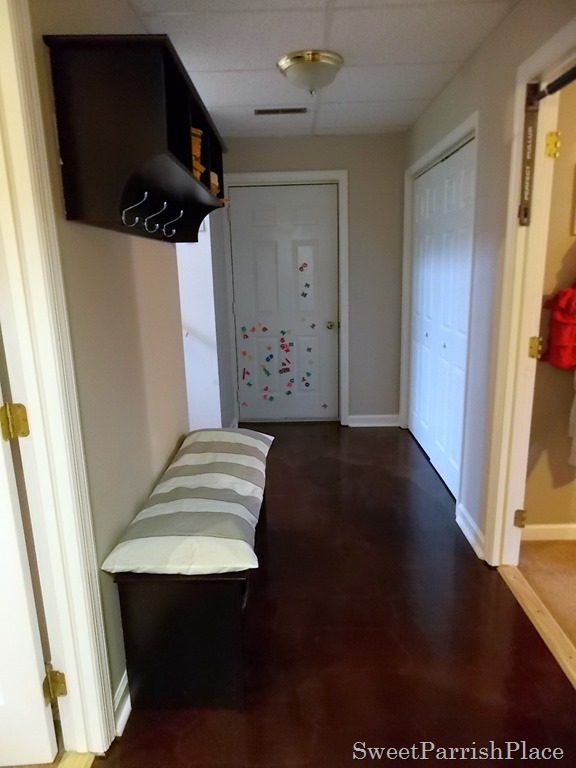
We also reinstalled the laundry closet doors.  We are not happy with these doors.  they never have fit perfectly.  They are a tad too small for the opening.  You can see gaps and the doors are uneven.  but they were that way before we took them down too.  The door knobs were just bare wood, but I painted them white while I was painting the trim.  We have tossed around the idea of taking them down altogether and hanging a nice drapery.  You can see these doors when you walk in our front door.  What is your opinion?
DSCN3201
DSCN3202

Here is a before and after progression of this area.  It is just so much more clean and modern feeling.  So much more “us”.  I can’t stop walking down there and staring at the difference.  I am over the moon about it!

hallway collage

Update 08/04/14:  Click here to see more hallway progress!

What is still left to do?  Here is a little list for you, including what we have already completed, just because I love marking things off a list!

Remove Carpet
Remove Linoleum
Remove sub floor under linoleum
Install brown paper floor
Paint walls
Install Quarter round
Install thresholds
Spackle and paint quarter round
Replace ceiling light
Find solution to gap under door trim
Purchase or make a larger rug for in front of laundry closet
Paint shelf to hang on wall
Add décor
Paint ceiling vent white

I would love to know what you think of the progression of this space.  Do you like the paint?  What would you do to fix the gap under the door trim? 

Ok, now I have to go and pack, we are leaving for vacation tomorrow morning and I haven’t packed a thing!  EEEK!

I am linking up here:

Inspire Me Please
http://houseofroseblog.com/inspire-me-please-weekend-blog-hop-19/


http://www.theshabbycreekcottage.com/2013/07/transformation-thursday-no-213.html#more

The Shabby Nest
http://shabbynest.blogspot.com/2013/07/frugal-friday_18.html

Suburbsmama
http://suburbsmama.blogspot.com/2013/07/sunday-linky-17.html

http://www.remodelaholic.com/2013/07/top-ten-ideas-welcoming-porch/

DIY Show Off
http://diyshowoff.com/2013/07/21/that-diy-party-26/
Filed Under: Hallway, mud room, Uncategorized

Comments

  1. Vel Criste says

    July 18, 2013 at 4:16 pm

    Looking great Nicki! You really did it! Let us know how well it holds up to all the traffic. 🙂

    Reply
  2. Cheryl Thornton says

    July 18, 2013 at 6:53 pm

    Looks great! I think I would have just continued the quarter round trim around the door trim since you are not going to put the door back up anyway.

    Cheryl @ The Creative Me and My McG

    Reply
    • Nicki Parrish says

      July 23, 2013 at 6:17 am

      I wish that would have worked Cheryl, but it wouldn't fit! We tried. However, I found an awesome solution that I will be sharing on the blog as soon as it is done! STay tuned!

      Reply
  3. Karen C says

    July 18, 2013 at 11:09 pm

    Looks great! Job well done. As far as the gap under the door trim…Perhaps you could slide a plain block/shim of wood under there and use spackle to fill in the gaps. You worked wonders using it to fix the other problem areas, and I think the same process will work for the door trim as well. Good luck!

    Reply

Leave a Reply Cancel reply

Your email address will not be published. Required fields are marked *

CommentLuv badgeShow more posts

This site uses Akismet to reduce spam. Learn how your comment data is processed.

Hi, I'm Nicki I'M THE GIRL WITH CHAMPAGNE TASTE AND A TIGHT BUDGET. I'M SO GLAD YOU'RE HERE!
  • Bloglovin
  • Facebook
  • Instagram
  • Pinterest
  • Twitter

VIP Real Estate

NO PLACE LIKE HOME

No Place Like Home

ORC Bathroom Makeover

Kids/Guest Bathroom Makeover

One Room Challenge Week 6 Kids-Guest Bathroom Reveal

It's week 6 of the One Room Challenge and this is … [Read More...]

ARCHIVE

ORC

Shop My Faves!

Spring Trends
PicMonkey Photo editing made of win
Get Sponsored by Big Brands

SheKnows

Linquia Influencer

FYI

Find Your Influence

INSTAGRAM

Recent Posts

  • Cozy and Casual Christmas Tour | Part 2
  • Casual and Cozy Christmas Tour | Part I
  • Farmhouse Bathroom Makeover Progress | $100 Room Challenge

Archives

Find It Here

Copyright © 2022 · Sweet Parrish Place