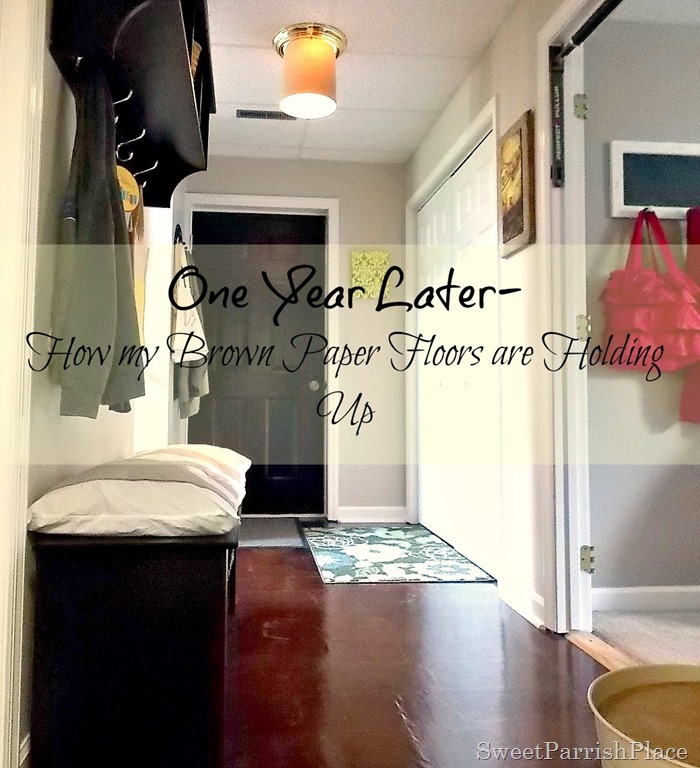
Do you remember back in the summer of 2013 when I installed brown paper floors in my downstairs hallway? Yep! I did! That was my big project during my summer break. Well, it has been a little over a year so I thought I would give you an update- one year later- how my brown paper floors are holding up.
Do I still like the floor? Yes, I do! I really do still like the look of this floor. And for the price, you can’t beat this solution. If I remember correctly, this floor set us back maybe $100, if that. If you would like to view the original post I wrote about these floors, click here. This floor was originally half carpet and half linoleum. You can see how I removed the carpet and how I removed the linoleum.
Would I do it again? Yes, I would do it again if I needed an affordable solution for flooring to replace hideous carpet and linoleum.
This hallway is obviously a high traffic area. It is located right where we come in from the garage (through the black door). I am going to be honest, this floor has some scratches. Both big and small. I took some pictures of what it looks like today so that you can see the wear and tear.
This first, and biggest, scratch was caused when my husband and his friend were trying to move a sofa out of the family room. They did not bother to protect the floor first. Yeah, that was not a happy day full of marital bliss. And his friend saw a side to me that I am sure he did not want to see. This floor was only about three months old at the time. I was furious at them both, not gonna lie. I will spare you the details of my rage at them that day ( I did apologize to the friend later, but not the husband, he stayed on my shit list for at least a day or two). And just so you know, the sofa did not end up leaving the family room because they couldn’t get it out the door! We have no clue how someone even got it in the door in the first place. There were people here helping us move in, and someone besides LC must have moved the sofa in.
This is the same scratch from a different angle. You can see that the polyurethane is the only thing that is really damaged, not the paper itself. It is fixable.
The rest of these scratches are just from general wear and tear. And the pictures, taken close up, look way worse than the floor actually looks in person. You can see just a bunch of light scratches.
There are times that laundry baskets get dragged across this floor because our laundry closet is in this hallway. So I think some of these were caused by that.
This area actually still looks pretty good.
And more scratches.
I knew going into the installation of the brown paper floors that there was a possibility of scratching, from what research I had done. It is possible that I did not use a good enough polyurethane.
What is my plan for these floors? They are staying for the foreseeable future. My plan is to sand them down and put a few more coats of polyurethane on them. In one of the tutorials I read for installing brown paper floors, it said to sand between each coat of poly. I did not do that, and now I wish that I would have. Maybe it would have made it wear better. If I could do it over, I would definitely not skip that step. So when I do sand it down, I will be sure to sand between coats when I reapply the poly.
I also think that I will purchase a more high quality polyurethane than what I used last time. I used Varathane Water based Polyurethane for floors. One of the tutorials I read recommended Pro-Finisher water based Polyurethane for floors that you can purchase at Home Depot. I was at Lowe’s, and they didn’t have that, so I bought the other type. I don’t know if that made any difference, but I think I will probably purchase the other type next time and see if it wears any better. I will let you know how that turns out.
All in all, I am happy with the floor. The scratches on the floor are just surface scratches. There is no damage to actual paper, so I am confident that a little elbow grease can restore it to the way it looked originally. Here is a picture of the way the floor looked when I first finished it.

Read more about my ceiling light here.
I hope this post will be a help to you if you are considering installing a brown paper floor. Have any of you ever tried one before? If you have, I would love to read about your experience in the comments. Do you have any suggestions for me? I am open to those as well.
I will be sure to show you how the floor looks after I finish sanding and applying more poly to it. But honestly, I don’t know when I am going to get around to it. Add it to the list, right?
Have a great weekend!I am linking up here:
Friday:
The Shabby Nest
Craft Frenzy Friday
Inspire Me Please
Remodelaholic
Fabulously Creative Friday
Creativity Unleashed
Domestic Superhero
Link Party Palooza
Thrifty Décor Chick
Sunday:
DIY Sunday Showcase
DIY Showoff
Monday:
Between Naps on the Porch
Dwellings- the Heart of Your Home
Clever chicks Blog Hop
Make it Pretty Monday
Project Inspire
Inspire me Monday
Tuesday:
Not Just a Housewife
A Stroll Through Life
Show and Share
Show Me What ya Got
Wednesday:
Wow us Wednesdays
Work it Wednesday


Leave a Reply