Do you remember the post I did about my new kitchen faucet? Well, if your old kitchen faucet is broken, you have to get a new one. And if you get a new kitchen faucet, you have to take everything out from under your sink. And if you take everything out from under your kitchen sink, you might as well organize it. And if you organize it, you may as well do a blog post about it! So that is what I am doing today. This is how I organized under my kitchen sink.
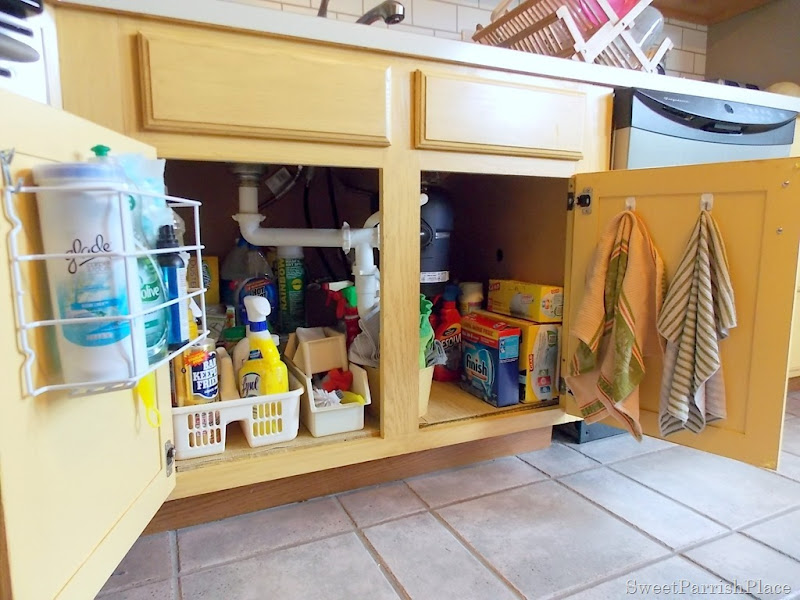
I started by taking everything out and purging what I needed to get rid of. This is the right hand side of the cabinet.
This is the left side. I had LC install this nifty little rack on the inside of the door. It contains my carpet freshener (which I make myself, I just use a container of old carpet fresh to put it in), dishwashing liquied, goo gone, screen cleaner for our TV and computer screens, lemon oil, and a Swiffer duster. It really freed up a lot of space under our sink for other items.
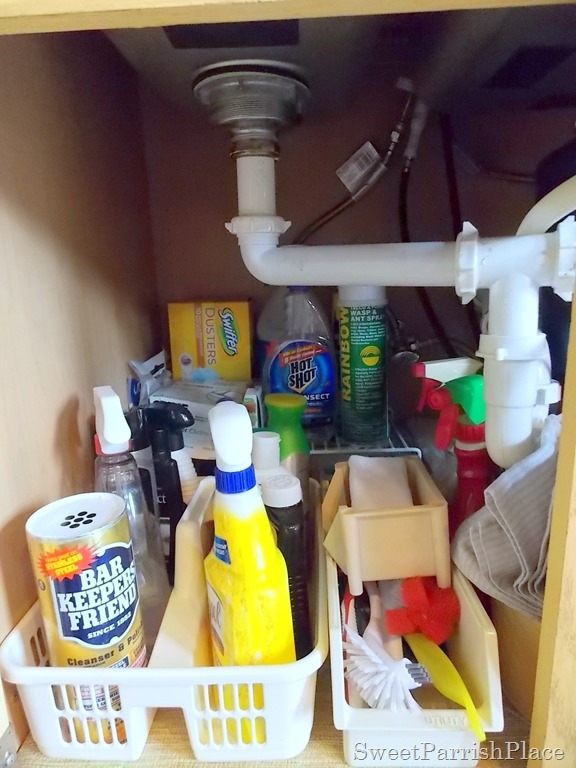
Here is a cloer look at what is under that left side. First off I have a little wire rack clear in the back to raise what is back there up a little. Plus I can keep things under it that I don’t need to get to that often. In the little bin in front are all of the things I use most often. I like it because it has a handle and I can just pull the whole thing out and carry it wherever I need to go. To the right of that are two more small plastic bins. The very small one on top contains a brillo pad and a magic eraser. The bottom one contains cleaning tools, like a bottle brush, toothbrush, etc.
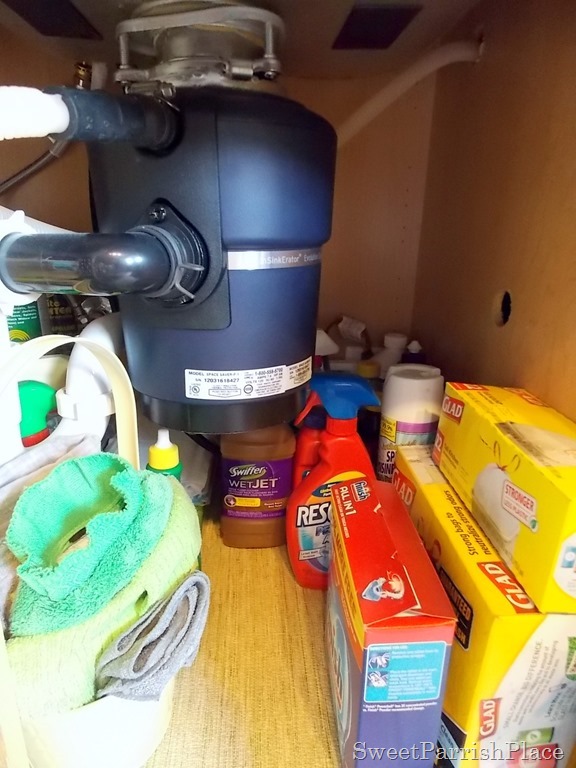
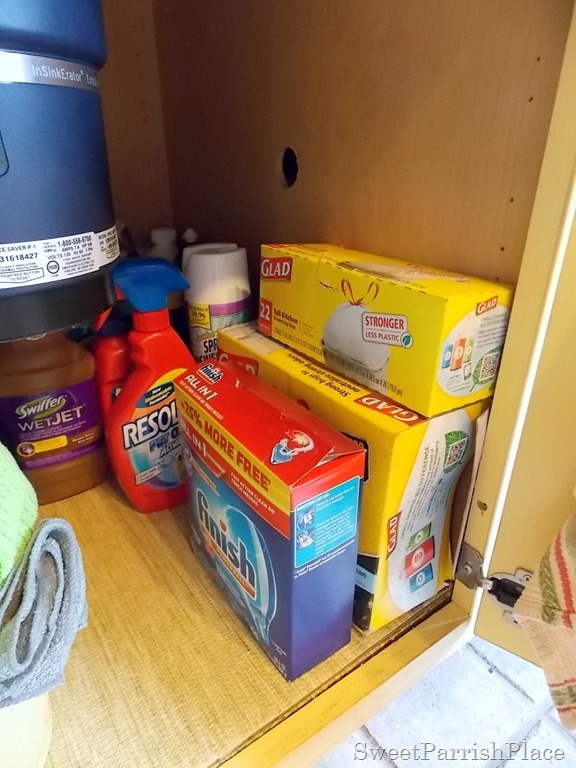
This is the right hand side. I keep my garbage bags and dishwasher detergent over here. In the back are more cleaning products that I only need occasionally.
The little yellow basket was from a fruit arrangement someone sent me at work as a thank you gift for helping him complete his thesis. YUM! Now it is holding all of my cleaning rags and dusting cloths.
This is a cloer look at the back left of my cabinet. You can see my Swiffer dusters, bug spray, and ammonia.
And another closer up shot of the right side. I even have some empty space here now! I have this cabinet lined with some contact paper that kind of resembles grass cloth. I lined al of my kitchen cabinets with this because when we moved into this house they were in poor shape. They were water logged, like people had been putting wet dishes away in them for years. A shame really.
I hung these two little hooks on the inside of the right cabinet to hang my dishcloth and dish towel on. Nifty! I usually keep them out, but now when company comes I have a place to hide them away.
That is pretty much it! Nothing fancy. I see other bloggers with such beautiful organized cabinets. I would love to have some of them, but I have too many other big projects to do in my house that the inside of cabinets being pretty and matchy matchy is the last thing on my list of things to do around here. As long as it is clean and organized that is all that really matters to me.
If you would like to see more of my kitchen, I have painted my kitchen cabinets, painted a subway tile backsplash, painted the walls, made DIY no sew café curtains, made over a mirror, painted my door black, and stenciled a lampshade in here. Next on my list is to paint our island. I think I have decided to paint it a simple white. I hope you will follow along with me and see how this room and the rest of my home will evolve!
Cheers from Destin! Have a great weekend!
I am linking up here:

http://www.theshabbycreekcottage.com/2013/07/transformation-thursday-no-215.html

http://www.athoughtfulplaceblog.com/2013/07/top-10-organizational-tips-link-party.html

http://shabbynest.blogspot.com/2013/08/frugal-friday.html
http://www.remodelaholic.com/2013/08/organized-mudrooms/

http://iheartorganizing.blogspot.com/2013/08/woop-woop-its-monthly-challenge-link-up.html

http://homecomingmn.blogspot.com/2013/08/the-diyers-and-my-new-rug.html





Can you come and do mine??!I call mine the 'black hole' since all sorts of stuff get stuck there and I never seem to get it as organized as you did. Hopefully with my new kitchen, I can be as organized as you!
do mine too..mine too…….
Honestly, my least favorite part of our house because it's such a mess down there! Great organization. I'd love for you to link up to The DIY'ers! http://homecomingmn.blogspot.com/2013/08/the-diyers-and-my-new-rug.html
First we have to look how much gap we are taking for kitchen cabinets if they are wider or deeper we should get a backer rod the foam its available in different thickness stuff the gap with the backer rod and then caulk or wood fill the gap stay away from the expansion foam there are couple of different types and they may expand too much and could get contact paper while cut a wider than the shelf and cover the shelf and run it up the back of the cabinet and seal the gap that way.
Good read and Great article. and I really appreciate all the great content you have here. thanks for sharing with us
Thank you for your helpful feedback.