It’s Week four of the $100 Room Challenge and I’m sharing my DIY painted Buffet and mirror.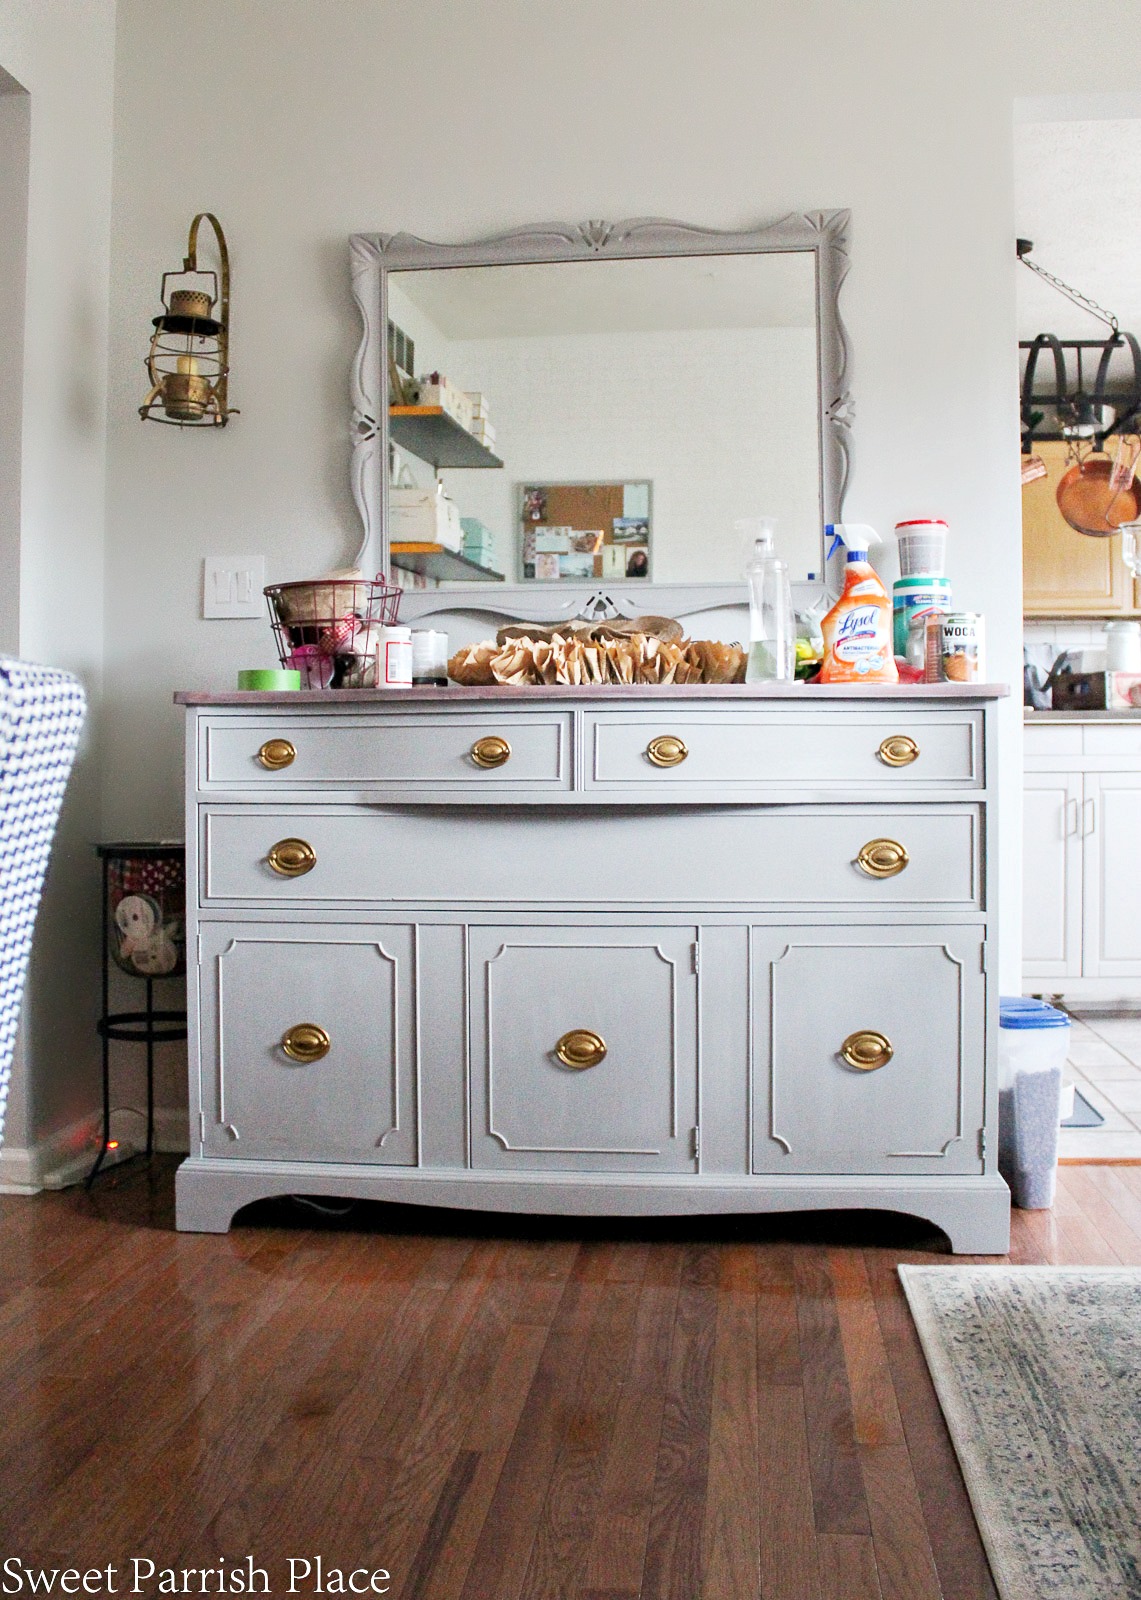
Hey friends! I have been imagining this day in my mind for years! The day I finally motivated myself to paint this mirror that I had been imagining painting in my mind for years was a good day indeed! In my mind, this mirror has been a myriad of colors, including black, white, denim, navy, turquoise, coral and red. But in the end I decided to paint it in a neutral color that will withstand the test of time. And I figure suppose I can always paint it again one day when I tire of this. But I do not see that happening for years to come, because at this very moment, I’m in love! Let me tell you all about the transformation of my buffet and then I’ll share the progress I have made in the rest of the room as well.
First, you should totally check out week 1, week 2, and week 3 of this challenge! I have also been sharing a lot about this room refresh in real time on my Instagram stories.
If you are new to the $100 Room Challenge you can read more about it here. But the basic premise for the challenge is this: you get one month, and $100, to completely makeover one space in your home. I know what you may be thinking… $100 is not a lot of money. Just wait. What you can do with $100 (and a little creativity) will absolutely blow your mind. And if you don’t believe me, just follow along, and click through and see what the other participants are doing for this challenge, and you will see so many great things happening with just a $100 budget. You can see the mudroom I made over for my first time participating in the $100 Room Challenge here.
Let me refresh your memory about where this buffet started. I have had this since 1992, and I bought it from a local paper called The Bulletin Board. It originally included the buffet, mirror, table and chairs, and a hutch. This is the only piece I kept over the years, and it is a regret of mine that I let the other pieces go.

You guys, the dramatic transformation is real! Can you believe it? I mean honestly, I can hardly describe how much I love this furniture update! I don’t think I will ever regret painting this buffet. I did consult an expert on the matter, I know an antiques dealer who told me it was Ok to paint this piece. So I feel great about it. I feel like I have a brand new piece of furniture, and believe it or not, I transformed the whole thing for FREE!
I knew I would be spending $50 of my $100 budget on a bench, which you will see below. For that reason, I was trying to keep my other costs very low, and I was confident that I could paint this piece using paint I already owned. But I didn’t have quite the right color, so I decided to mix a couple of paints I had together and come up with a color I liked. And I completely love the color I came up with!
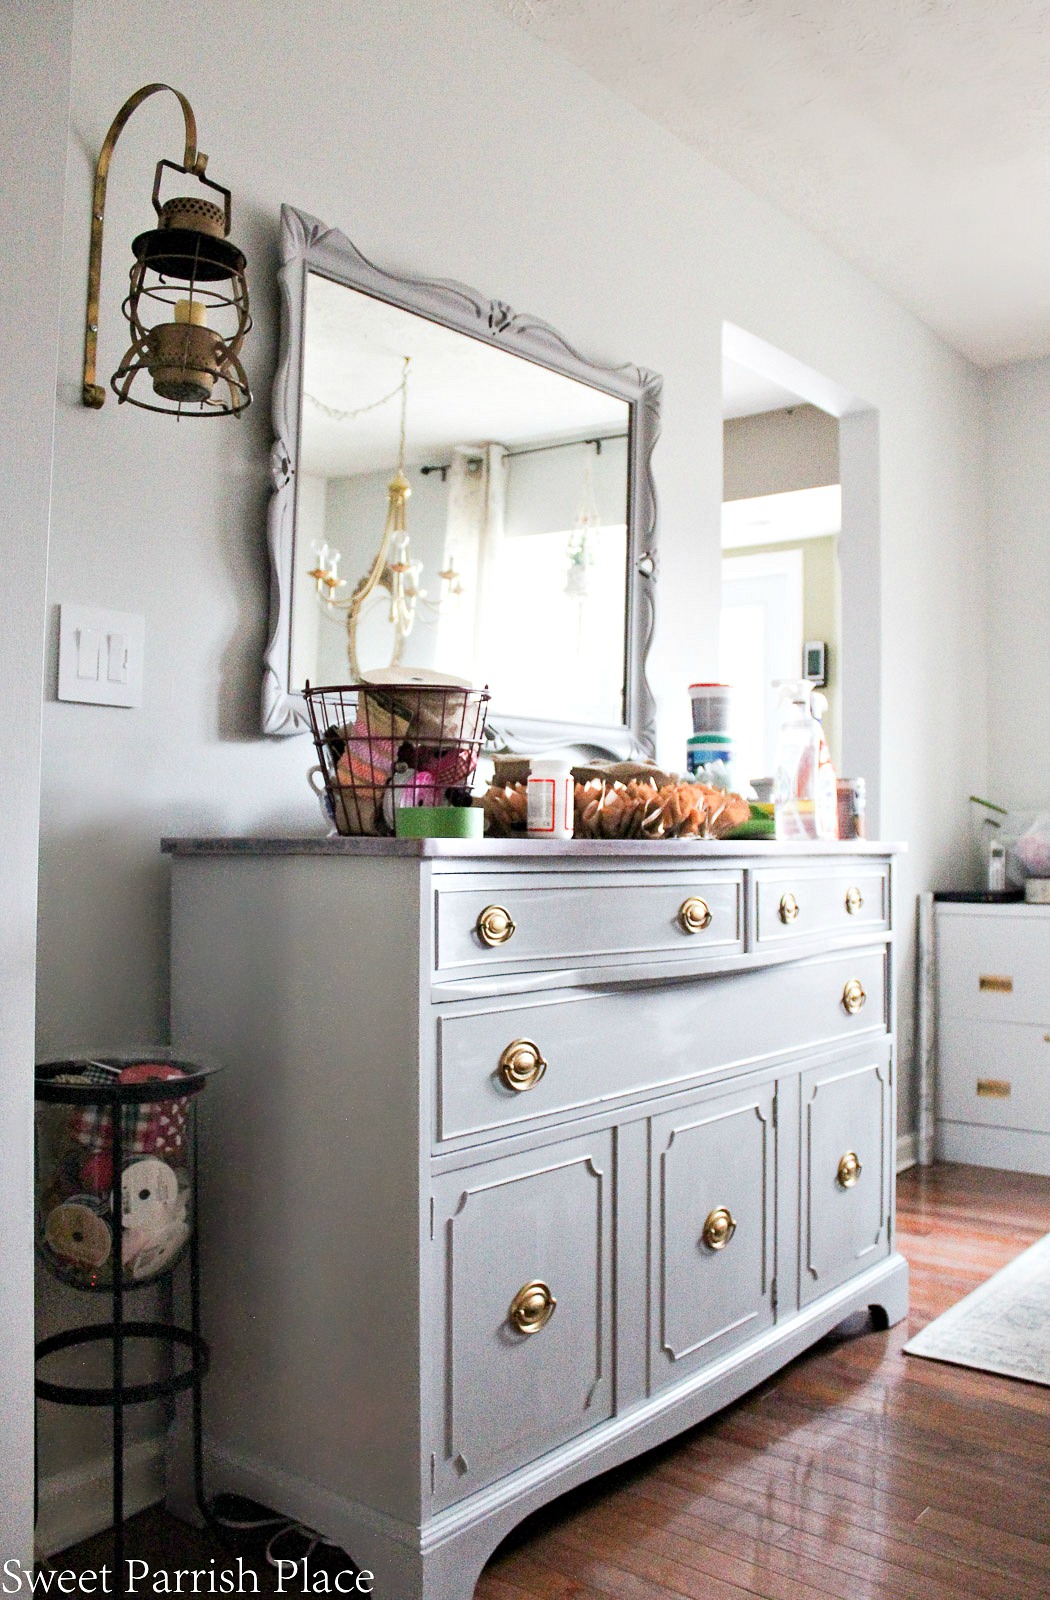
As you can see above, I also painted the mirror using the same paint I used on the buffet. But here is a great shot of what it looked like without paint. I am so glad I took the time to paint this too because it makes a huge difference!

Please note: Some of the links in this post are affiliate links, which allows me to make a small commission from your purchase, but your purchase price stays the same.
How I Mixed this Paint Color
1 part Suede Gray by Behr (flat) – this is the color I used on my vanity in our master bath
1 part Gray Owl by Benjamin Moore (satin) – the color I used on the walls in this room
Black acrylic paint
When I mixed this paint, I used the screw on mug on a child’s soup thermos. You know the kind you can put in a lunch box? That’s what I used, but you can use whatever you want. I am guessing this screw on cup measured almost a cup. I mixed these two colors together with a paint stick, and then I added three quarter size squirts of black paint, slowly. I added each squirt one at a time, and then stirred well in between. Remember to add the black slowly so that you can watch the paint color, and keep adding black until you like the color you have. This didn’t happen to me, but if you add too much black, just add more of each of the other paint colors in equal parts. When you look at the color of this buffet, you wouldn’t imagine any black was in it, would you?
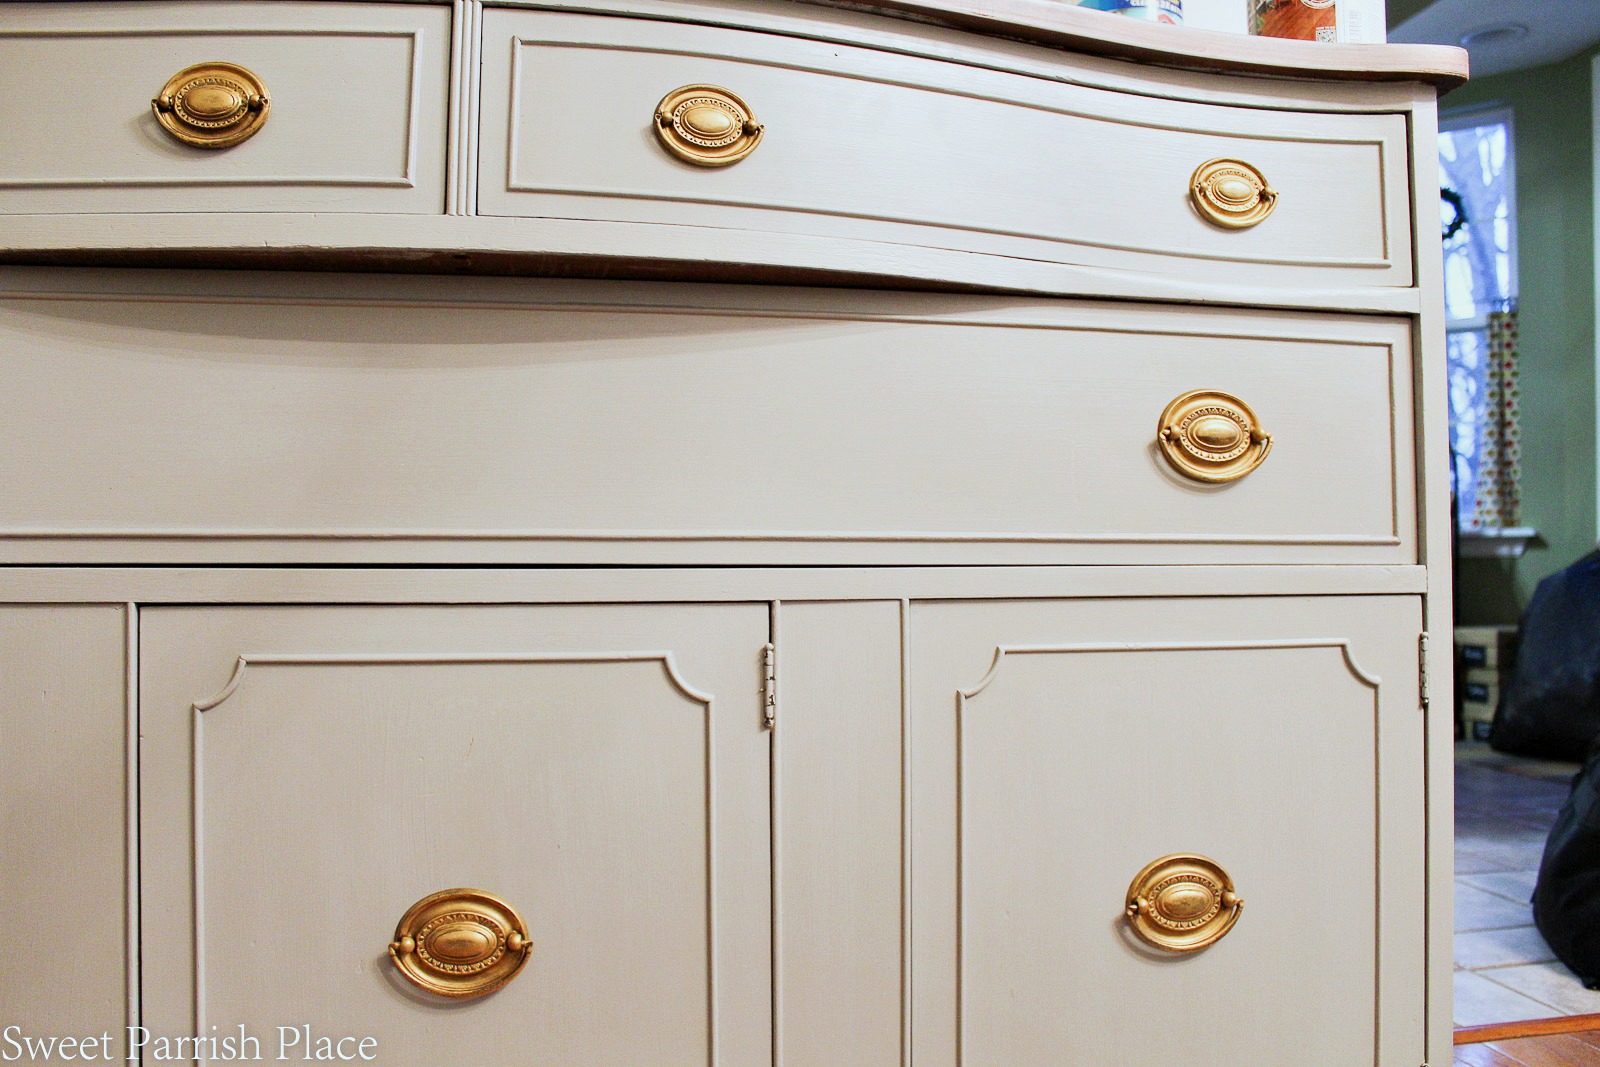
Last week I shared this photo below of the top after I removed the varnish and sanded it with two different grits of sandpaper, I was left with this. And I debated about whether to darken it or lighten it. And thanks to so many of you for giving your opinions on what I should do with this top. A lot of you suggested that I darken it, and I seriously considered that.

But ultimately, I went with my gut and decided to lighten it. I did this for two reasons. First off, my main goal for refreshing this space was to lighten it up. And I just felt like the darkness of this furniture had been weighing this room down for far too long. I was so ready for this change! Second, I knew if I had darkened it and didn’t like it, it was going to be a real pain to change at that point. But I felt like if I whitewashed it, I would be able to scrub that off pretty easily. As soon as I began whitewashing it, I knew I had made the right decision, and I adore it now!

A few years ago, I had used some antique gold Rub ‘n Buff on these drawer pulls, but they were in need of a refresh. This time, I used DecoArt Metallic Lustre in gold rush. It works pretty much the same way, you rub it on with a soft cloth and then buff it out with a clean soft cloth. So easy, and I love the gold rush color! I particularly love it against the grey of the buffet.

I am also happy to report that I received the 4th roll of wallpaper I needed, and we completed this self adhesive white brick accent wall. You can read all about my wallpaper saga in week 3. I love the way it looks, it lightens and brighten this space and adds the perfect bit of texture. I will say that I have been having some problems with this wallpaper bubbling up repeatedly, and I have had to keep smoothing it out every so often. It is yet to be determined whether this will be here for the long haul. When there are no bubbles, I love the way it looks, but I need to find a way to keep it sticking to the wall for good.

I mentioned in weeks 1-3 that I was having a bench made to use at this table, and I am happy to report that I picked it up on Saturday and I love it! It has clean and simple lines, and it is a solid wood, heavy piece of furniture that I can imagine staying with our family for years. I met the woman who built it on the Facebook Marketplace and she agreed to build this for me for $50. I sent her some inspiration photos and told her to choose any one of them to replicate a bench for me. I also requested that she leave it unfinished so that I could paint it myself.

I can hardly believe the change in what is reflecting back in this mirror now.

You may remember that I had downloaded some art for this wall on Etsy, and I had it printed at Staples. I also bought a white mat and then I used a frame that I already had in this room. I really love the way it turned out, and I like it against the white brick wallpaper. There was a gallery wall of sorts here before, so this is a much more peaceful and simple wall than it used to be. But I am enjoying the change.
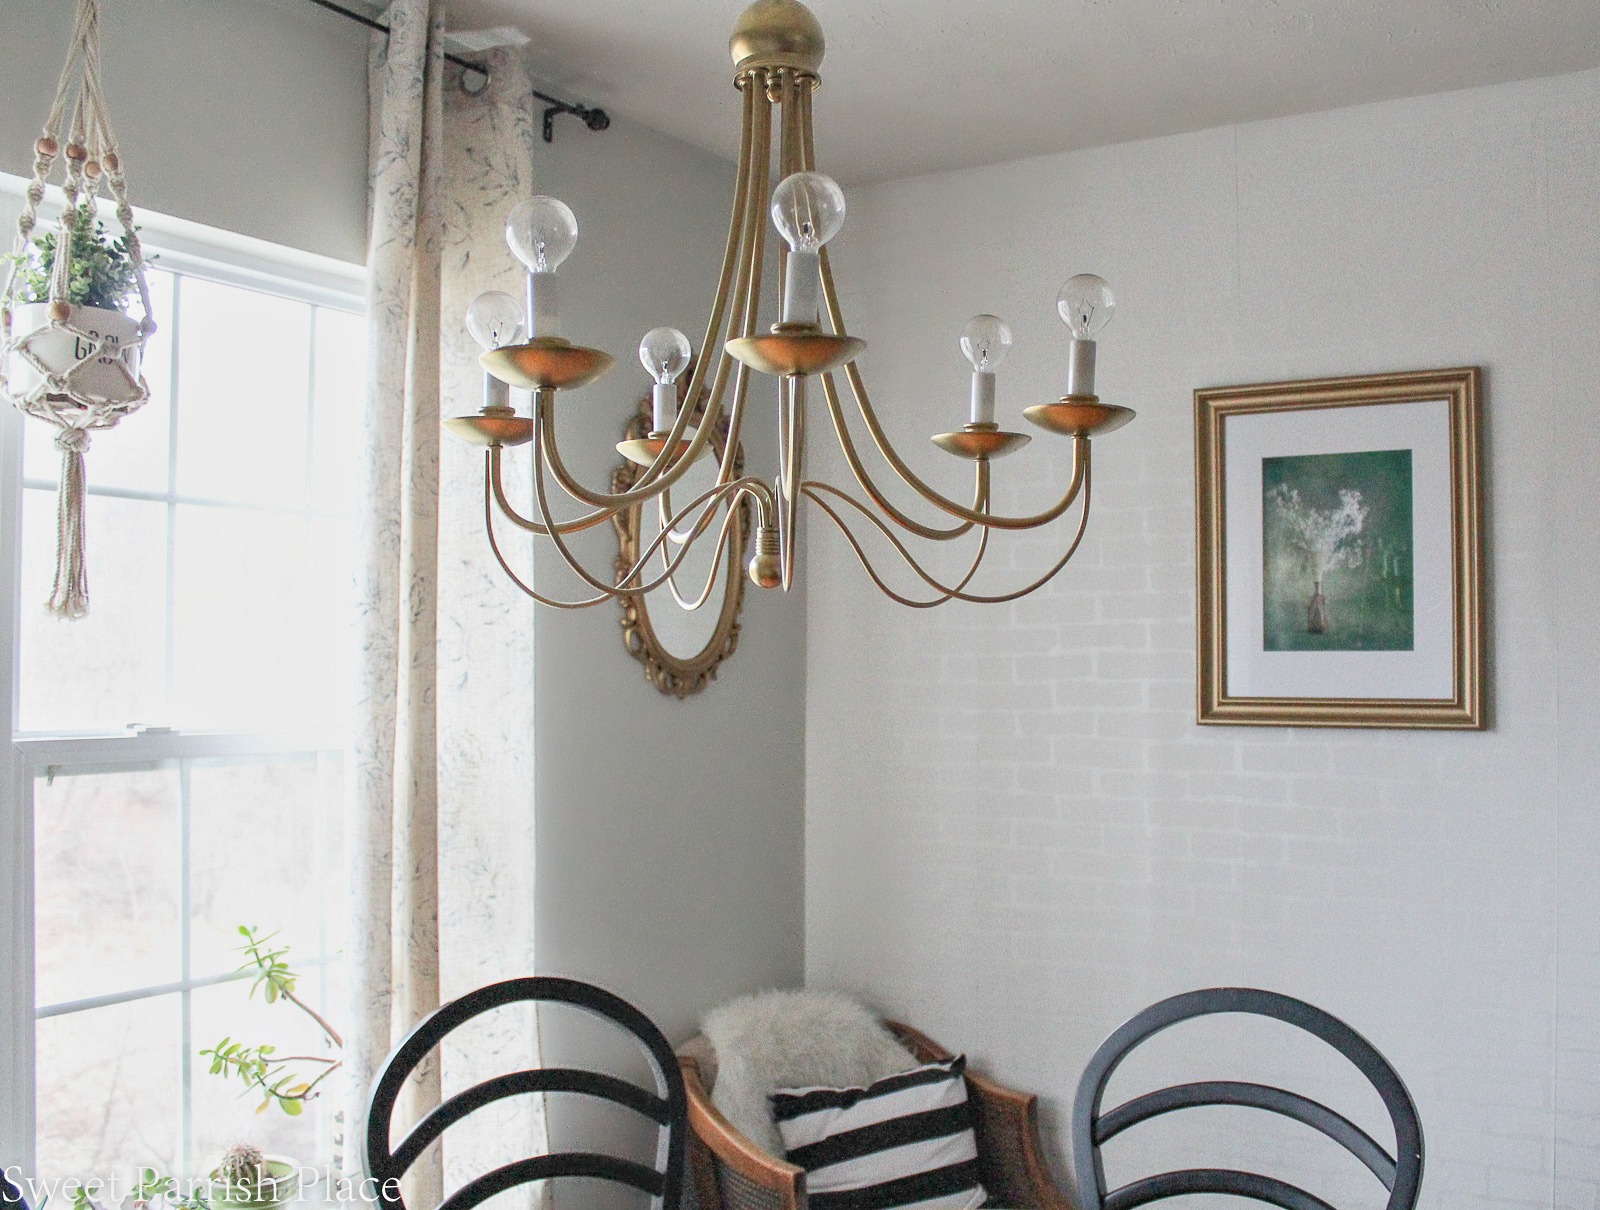
I bought this macrame plant hanger last summer at World Market, and I finally got around to hanging it in here. I used a planter I already had and a faux succulent for now, but I plan to find a live plant that I can hang here eventually. It isn’t in the budget for this challenge though.

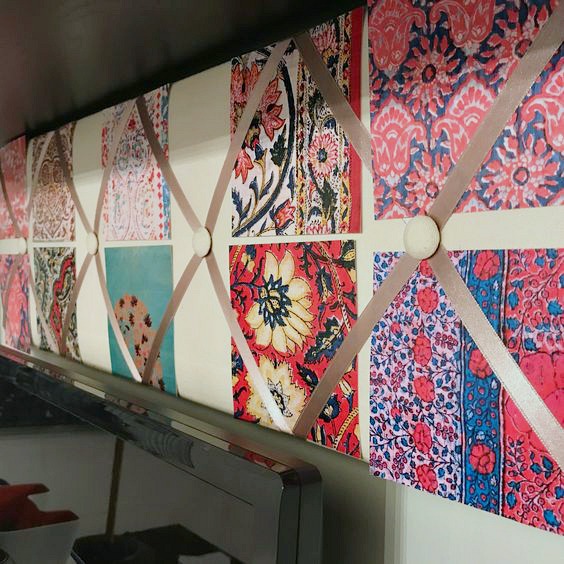
Over in the office corner of this room, I hung the hanging organizer back up that I already had in here, and I added this bulletin board that I had taken down from another space and decided not to get rid of.

I didn’t like the wood frame on the bulletin board, so I gave it a couple of coats of the paint I used on the buffet and the mirror. So. Much. Better.

I freshened up this desk lamp using some of the same gold rush I used on the drawer pulls. I like the change.

I also used it on the file cabinet pulls. My plan is to move the rug so it isn’t making these cabinets lopsided, and then I want to use some pallet wood I have in the garage to add a rustic wood top. Hopefully this will make it look more like a piece of furniture. I don’t love having these in this space. Unfortunately they are necessary. We plan to work on it this coming weekend.

I brought two art pieces upstairs from the family room that I have had for 3-4 years and they are both from Minted. I decided to bring them up here where I could enjoy them because people rarely hang downstairs. The only people who do are the kids and their friends. And honestly, they just don’t care. The calendar is something I bought at the Target Dollar Spot.

These colorful spares used to be a monthly calendar that I had used in 2016. I had ordered it on Etsy, and I just used scissors to cut of the months from the bottom of each card and made a pretty little eye catching place right above the computer screen.
I almost ended up painting the bench, but in the end I chose to whitewash it like I did the top of the buffet. And I love the way it turned out! I originally planned to put the bench behind the table, but having both chairs on the side where the bench is was just too much for the space. It looks much better with the chairs behind the table and the room is more open that way.
I white washed this bench using this tutorial. I used the rag technique. I just made the whitewash and dipped a rag into it and wiped the bench down with it, which is the same thing I did on top of the buffet. I am considering whitewashing the top of the table and chairs, but we’ll see how much time I have this coming weekend. That may have to wait for another time.


This space is sooooo close to being finished! I just have to finish up the file cabinets and style and photograph the room, and that part is going to be the most fun of all! I can’t wait for this space to be done and then our family can start using it daily and enjoying the much lighter and more cheerful space.

What do you think of the progress I have made so far? Do you like the painted buffet or are you more for the original wood? I would love to know what you think in the comments below! I’ve been tracking my progress each week with a to do list and a breakdown of the budget, so here is where I am with this room refresh after week 3.
My To Do List For The Dining Room/Office Refresh
Paint 3 walls
Hang faux white brick wallpaper on green wall
Paint buffet
Add bench to one side of dining table
Add rustic wood to top of filing cabinets
Hang new curtains
Restyle and reorganize shelves using items I already own.
Paint metal lantern hanger gold
Add art to walls for free
Add bulletin board to wall above desk
My Budget So Far For The Dining Room/Office Refresh
Faux Brick Wallpaper– $000
Paint- (I used paint I already had so zero)
Curtain panels- $28.99
Wall Art- $12.49
Bench- $50.00
Calendar- $3.00
Right now, I have spent $94.48 of my $100 budget. I will probably buy something else small to use to style the space, but I’m mostly finished with spending my budget.
Now, don’t forget to check out the week three progress of all the other $100 room Challenge participants!
Do you have champagne taste and a tiny budget too?
Love fashion, DIY, crafting, all things vintage and thrifty? Stick with me, I’ve got you covered!
Sign up to get my posts delivered to your inbox here
Follow me here:
Facebook / Twitter / Instagram / Pinterest / Bloglovin / Google + Stumbleupon
![]()
You May Also Like:
Dining Room/Office Refresh | $100 Room Challenge Week 1

Paint Progress In The Dining Room/Office | $100 Room Challenge Week 2

My Wallpaper Saga | $100 Room Challenge Week 3

Wow!!! The paint on that buffet is amazing!!
Thanks so much Ashley! I am thrilled with the results!
You did a beautiful job on that buffet and mirror! And whew, glad they finally sent you the right wallpaper!!
Thanks so much Molly! I know, I was so relieved!
Lol. I love that rub n buff wax too. Been using it for years. I may not have thought about going with gold for the gray buffet but it turned out gorgeous. Your room is looking so much brighter and is coming together perfectly.
The stuff is addictive! Thank you!
This turned out great! I {heart} paint! The gold pulls are so perfect with the grey as well. Can’t wait to see it all come together next week
The power of paint never ceases to amaze! Thanks Gabby!
The buffet looks sooo good! I love the hardware, too!
Thanks Meg! I love the vintage hardware all shined up!
That buffet is beautiful in any color, but it’s really stunning now! I LOVE the paint color you mixed up for this!
Thank you Roxanne, I was really tickled I did such a good job mixing my own color! Hehe!
Your room is looking amazing! The buffet turned out beautiful!
Thanks so much Emy, I’m really so happy!
Oooh I like the whitewashing you did to the top of the buffet. If the goal was to lighten everything up you definitely achieved it! Love that furniture piece!
Kristen recently posted…Shiplap Wall in the Laundry Room! – $100 Room Challenge Week 4
Thanks so much, I have always seen the potential of this piece to look great painted, and sooo glad I finally took the plunge!
This piece turned out gorgeous! Love the gold handles. 🙂
Thanks so much! I can’t wait to style it today!
It’s coming along so beautifully! And when I first saw the buffet top, my first thought would’ve been to darken it to, but wow – the white wash is perfect!! So glad you held onto that one over the years – it’s beautiful.
I’m so glad you think so! Most people told me to darken it, but my gut was screaming lighten it. So, beiing that I have to live here, I went lighter, and I’m glad I did. So glad you agree!
It’s coming along beautifully! I love the buffet painted. This is going to be such a great space for your family!
Thanks Renee, that space is now finished and we celebrated today when we finished the photos!
Nicki, It’s looking fabulous! What a difference the paint made with the buffet and mirror!
Carol recently posted…Flourless Chocolate Cake
Thank you Carol, I am stunned at the difference!
I cannot get over that buffet. It turned out beautifully!!! Everything looks like it is coming together. Popping over to check out that reveal 🙂
Awww thanks Erin! It’s my favorite part of the room!
I love the colors for that buffet and you did an amazing job! The mirror adds so much! #MM
Nicki, your room looks stunning, the buffet and mirror are perfect.
Is it possible for you to turn your file cabinets to face in the opposite direction? I’m sure that you won’t have time but you could make the top and 2 sides that frame the files, but are not attached.
Cynthia
Thank you so much! No, that isn’t possible with the space I have. But I did end up giving the file cabinets a little something more too! Hopefully in time this space won’t be a shared office/dining room anymore and those file cabinets will be delegated to the office.