Ready to witness the ultimate furniture flip?
Your weathered rattan is about to have a jaw-dropping glow-up!
Think faded basket weave converted into Pinterest-worthy perfection – we’re talking dramatic before-and-after magic that’ll make you wonder why you waited so long.
What’s your rattan story?
Thrift store find?
Inherited piece?
Patio furniture that’s seen better days?
No matter where you start, painting rattan furniture is your ticket to a custom style without the custom price tag.
From rustic allure to modern chic, you’re just a few brush strokes away from furniture that screams “expensive designer piece.”
Time to express your inner furniture magician!
Why Restyle Rattan Furniture with Paint?
Last month, I spotted two worn-out cane chairs while scrolling through Facebook Marketplace.
They looked sad and forgotten, with faded color and tiny scratches all over.
But I saw something others missed – these old chairs had good bones and so much promise!
I brought them home for a total of $40.
My husband thought I was crazy, but I had a clear picture in my head of what they could become.
The curved backs and woven patterns were still in decent shape – they just needed some love and care.
The steps weren’t complicated: thorough cleaning, careful painting, and new cushions.
But the change was dramatic!
These chairs are the stars of my sunroom, with their soft, white finish and bright, patterned cushions.
What I love most about this project is how quick and budget-friendly it was.
In just a weekend, with a total cost of less than $100 (including the cost of the chairs), I created beautiful seating that looks like it came from a high-end store.
Materials & Tools You’ll Need
Before you begin your chair makeover, it’s essential to have all your tools and materials ready.
Having everything on hand will save you time and frustration during the process.
| ITEM | DETAILS/PURPOSE |
|---|---|
| Rattan or cane chairs | Use vintage or used chairs as the base for your makeover |
| General Finishes Milk Paint | Millstone color was used for a warm, classic finish |
| Paint sprayer | Wagner Flexio is recommended for a smooth, fast application |
| Cleaning supplies | Includes soap, water, and a scrubbing brush to prep surfaces |
| Painter’s tape | To protect areas you don’t want painted |
| Black paint | Used to add accent touches for visual contrast |
| Hand towels (optional) | Handy for wiping surfaces or drying hands during prep |
| Neutral seat cushions ( optional) | Adds comfort and complements the finished chair aesthetically |
Note: The paint sprayer was the biggest investment but made a noticeable difference in the finish quality and efficiency. It’s especially worthwhile if you plan to tackle more furniture projects in the future.
Step-By-Step DIY Rattan Chair Makeover
Taking old, forgotten chairs and restoring them to their former beauty is incredibly satisfying.
The whole process took me just one weekend, and I’m still smiling every time I look at the results.
Step 1: Inspect and Clean the Furniture Thoroughly
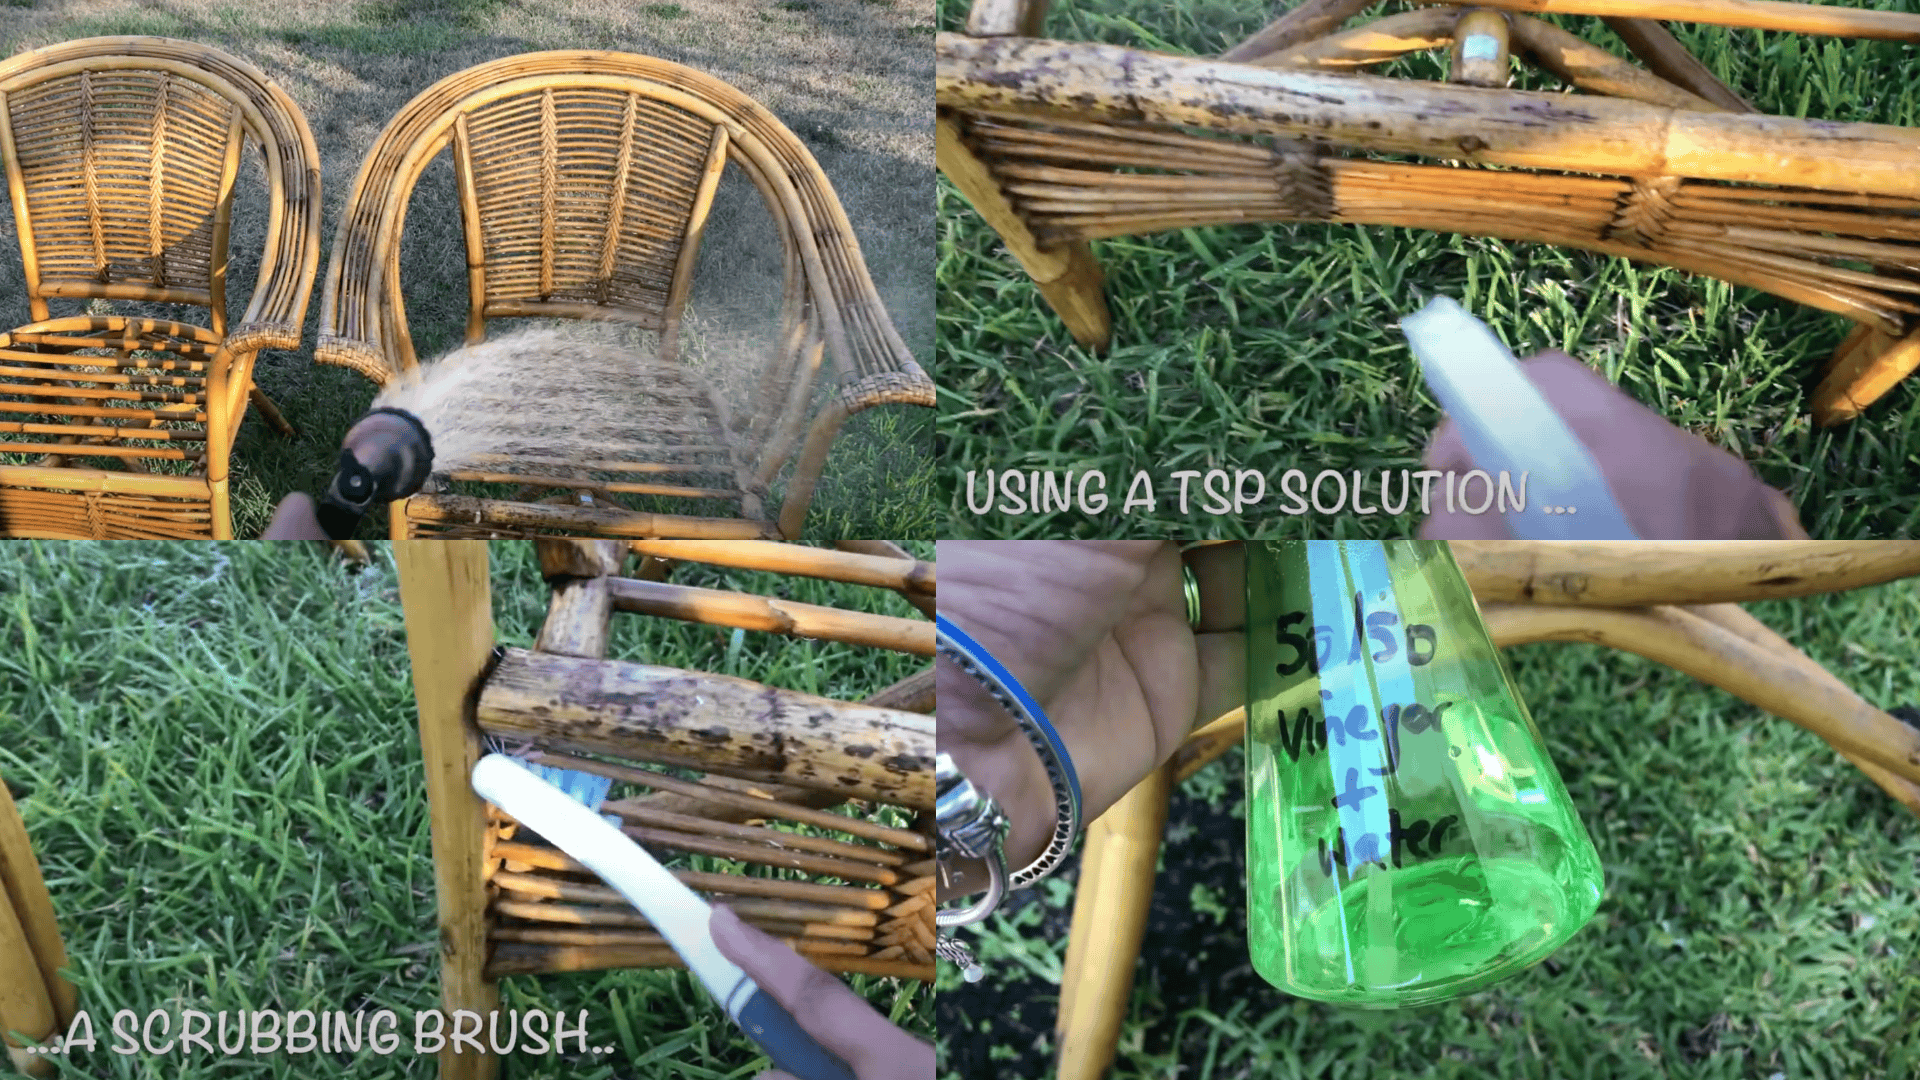
My chairs were covered in dust and had some sticky spots from who knows what.
Don’t skip this step, paint won’t stick well to dirt!
I started by using a soft brush to remove loose dust from all the nooks and crannies.
Then I mixed warm water with mild dish soap and gently scrubbed the entire surface with a soft brush.
The amount of grime that came off was shocking!
For stubborn spots, I used a slightly damp cloth with a slightly more concentrated soap.
I had to clean the chairs twice to get them truly ready for paint.
Ensure that they dry completely before proceeding to the next step.
Step 2: Evaluate Whether to Restore or Paint
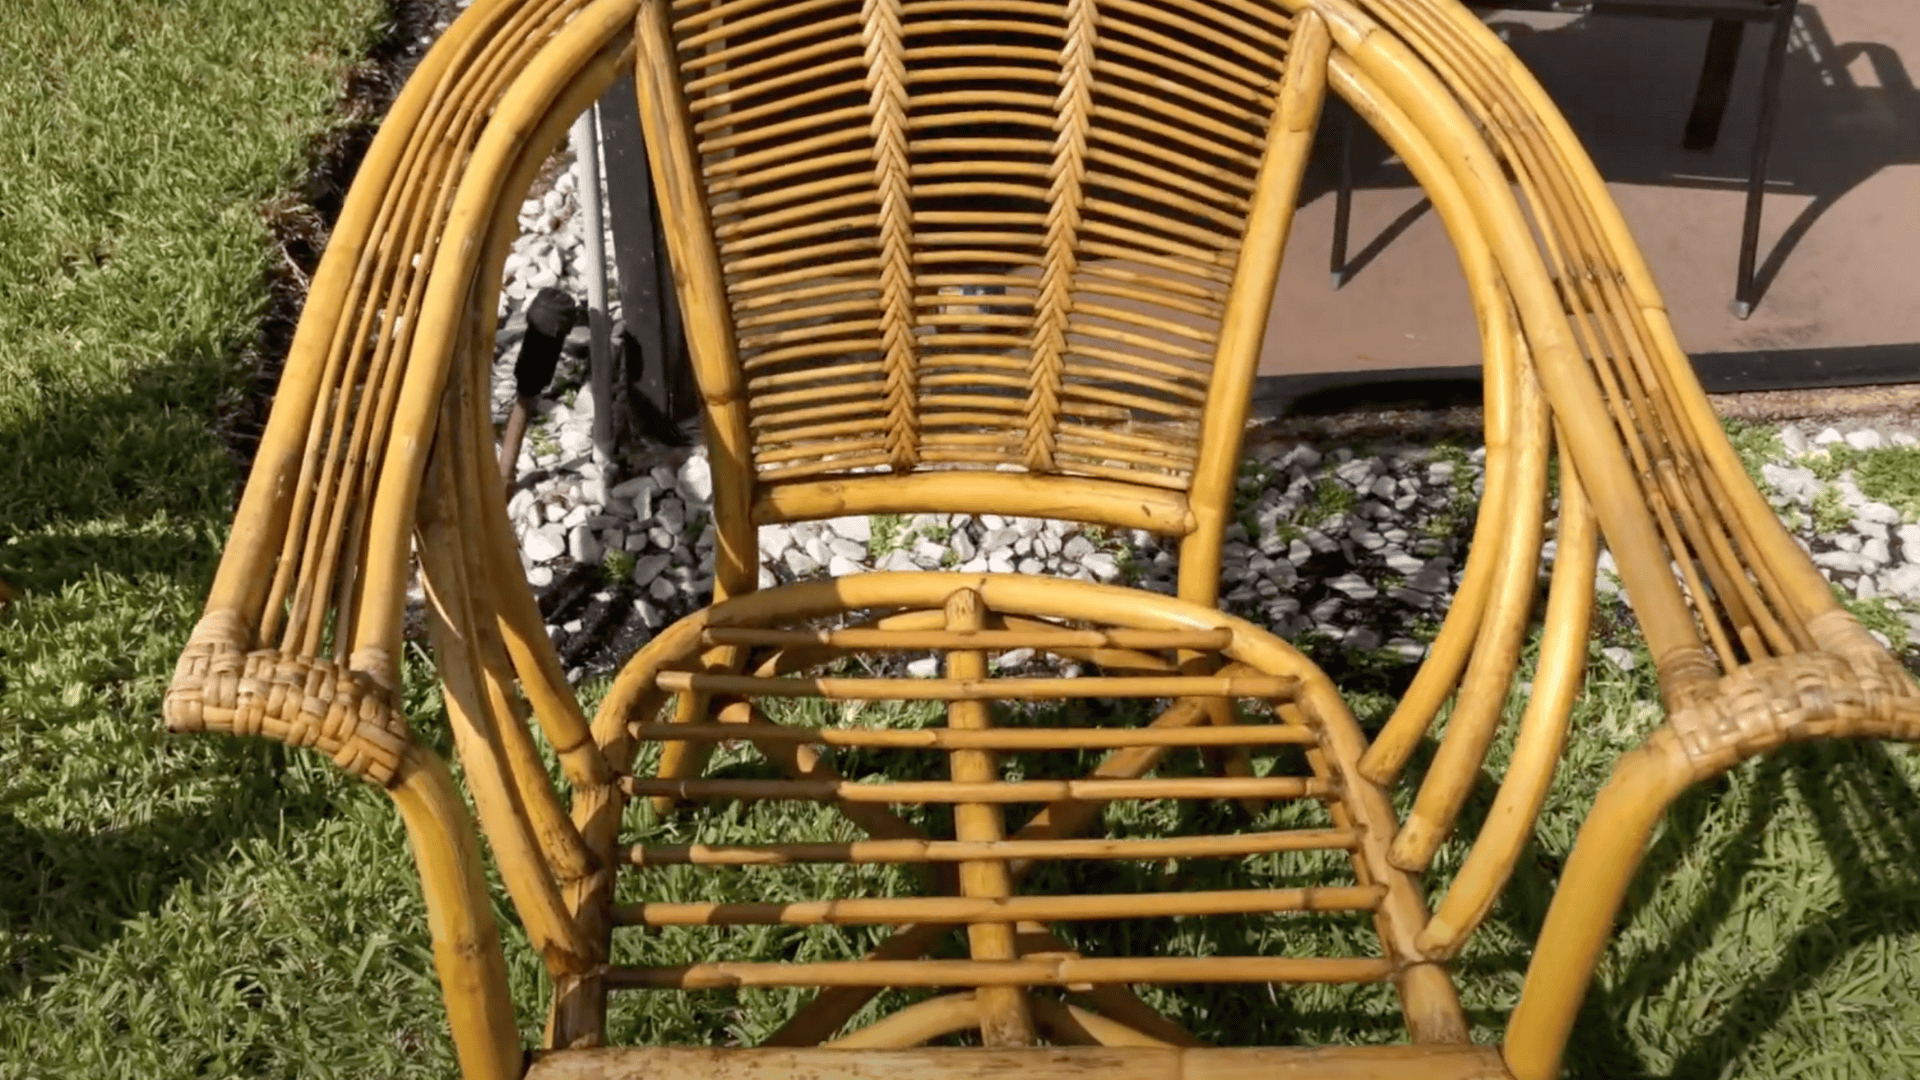
After cleaning, I looked at my chairs with fresh eyes.
Sometimes old rattan can be brought back with just oil or wax, but mine had water stains and some discoloration that wouldn’t come out.
I ran my hands over the weaving to check for loose pieces or damage.
Luckily, the structure was solid; they just looked tired and dated.
This confirmed that paint was the right choice for my project.
If your rattan has major damage, you might need to repair it first.
Small breaks can sometimes be repaired with wood glue, but larger sections may require professional assistance.
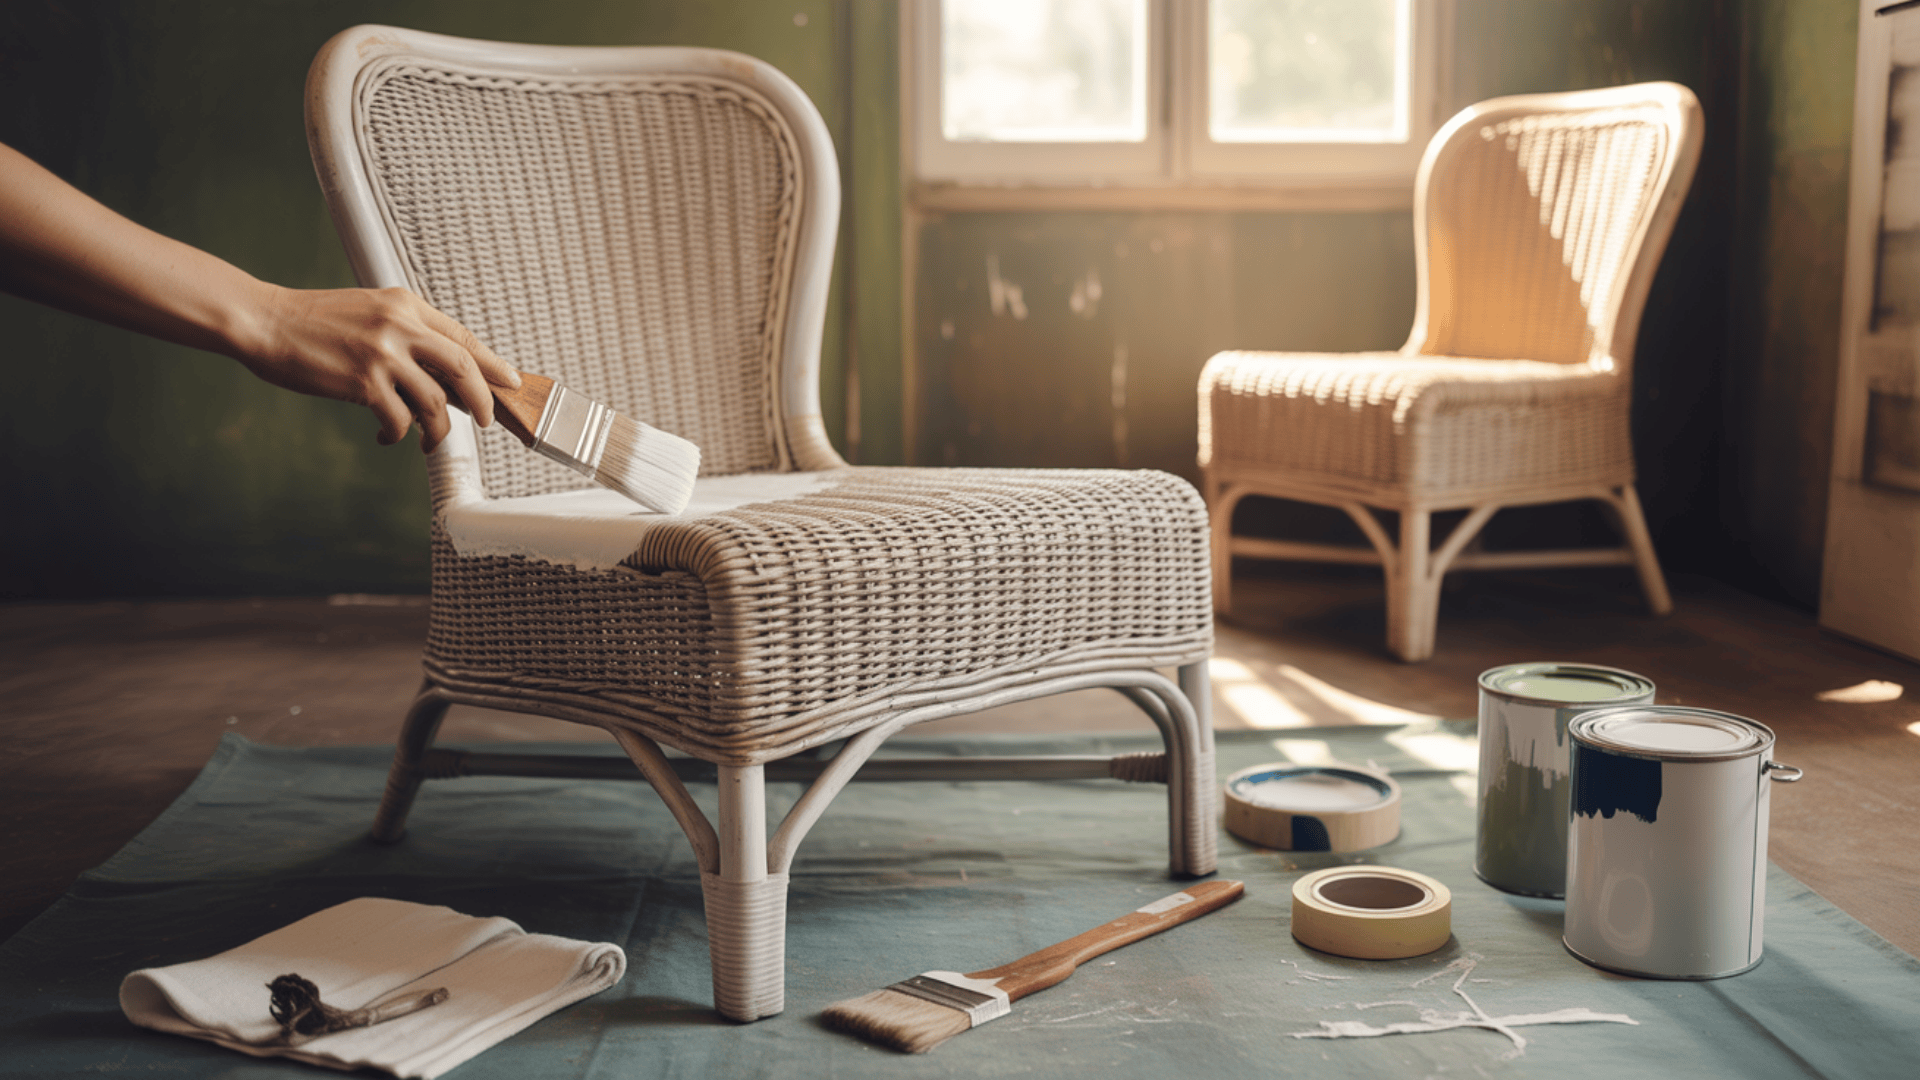
Step 3: Apply the First Coat of Paint
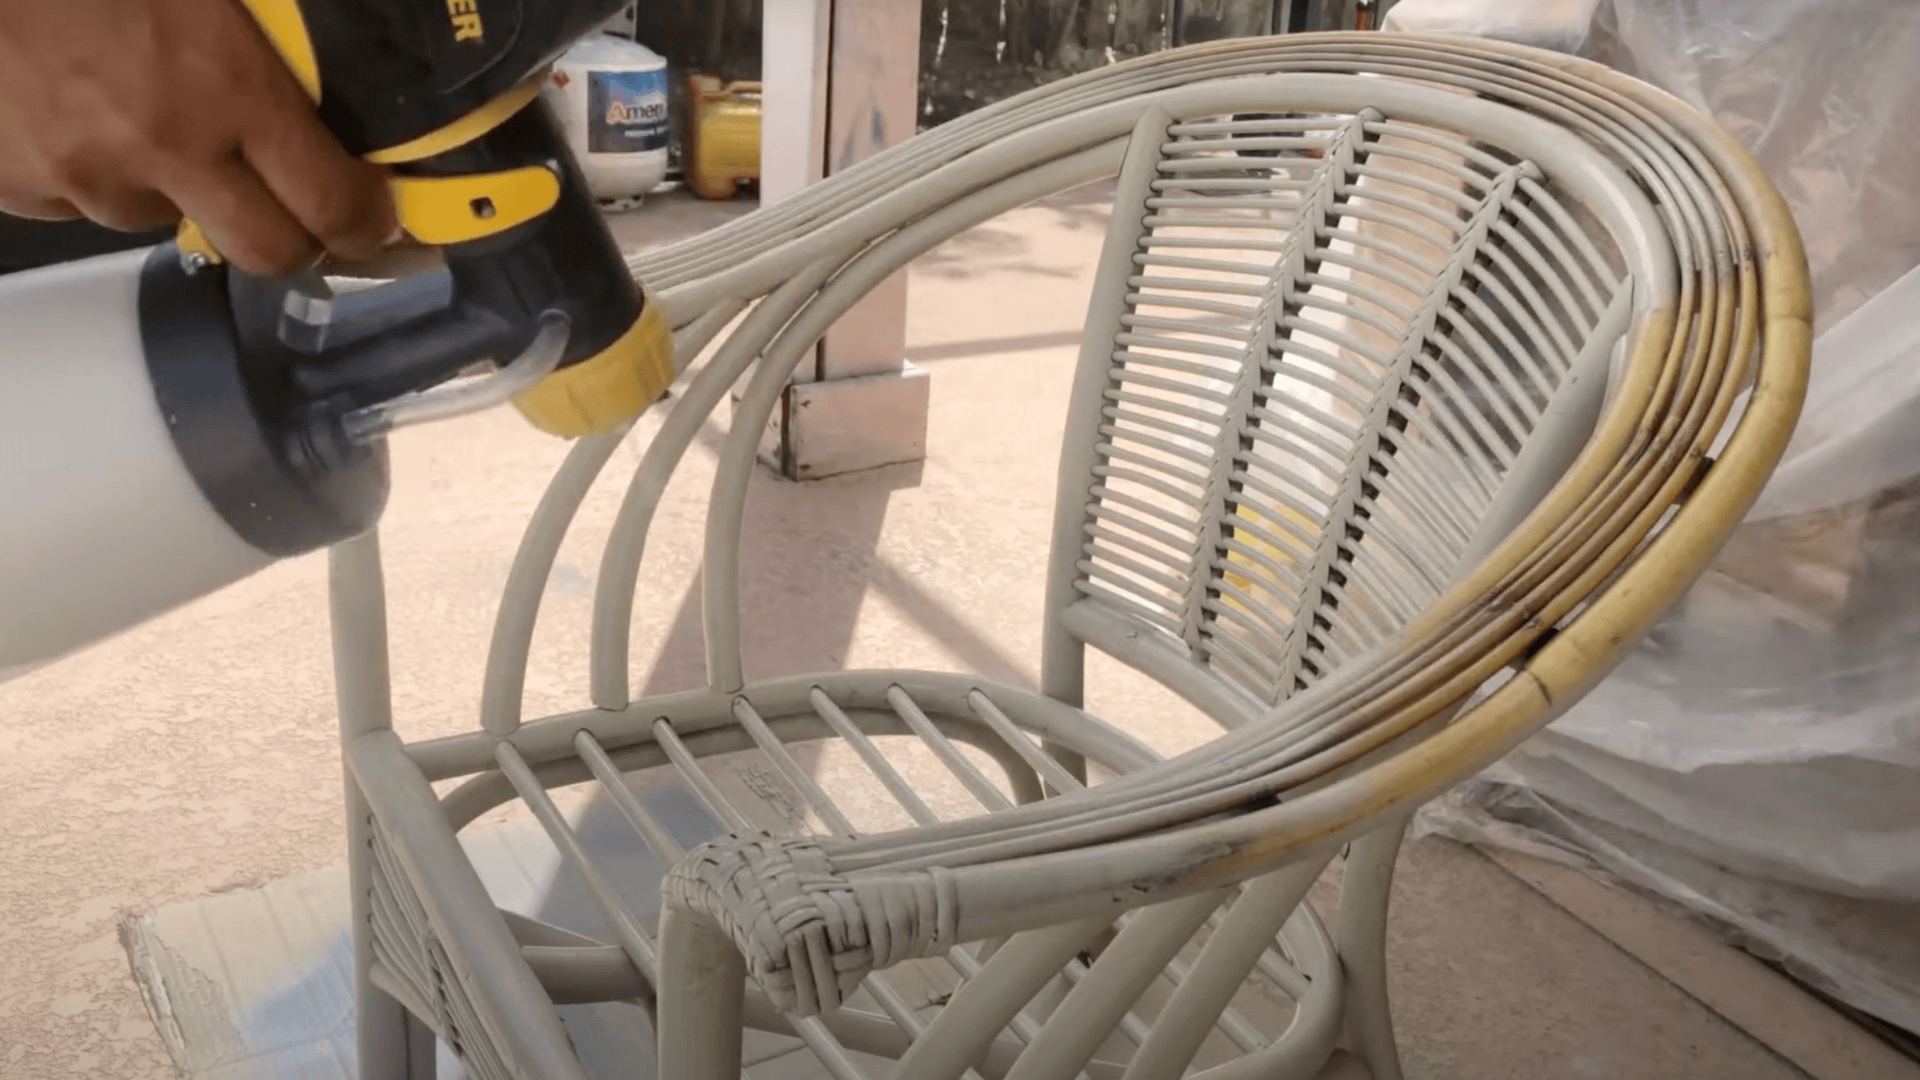
This is where the magic starts to happen!
I set up in my garage with a drop cloth to catch overspray.
The milk paint I chose is perfect for this, it’s thick enough to cover the weaving well but thin enough not to clog it.
I filled my paint sprayer and tested it on some cardboard first to get the right pressure and flow.
Working from top to bottom, I sprayed light, even coats.
The key is to keep moving – don’t hold the sprayer in one spot or you’ll get drips.
I was careful to check for missed spots in the woven areas and hit them from different angles.
After the first coat dried (about 2 hours), I could already see how much better they looked!
Step 4: Add Decorative Paint Details
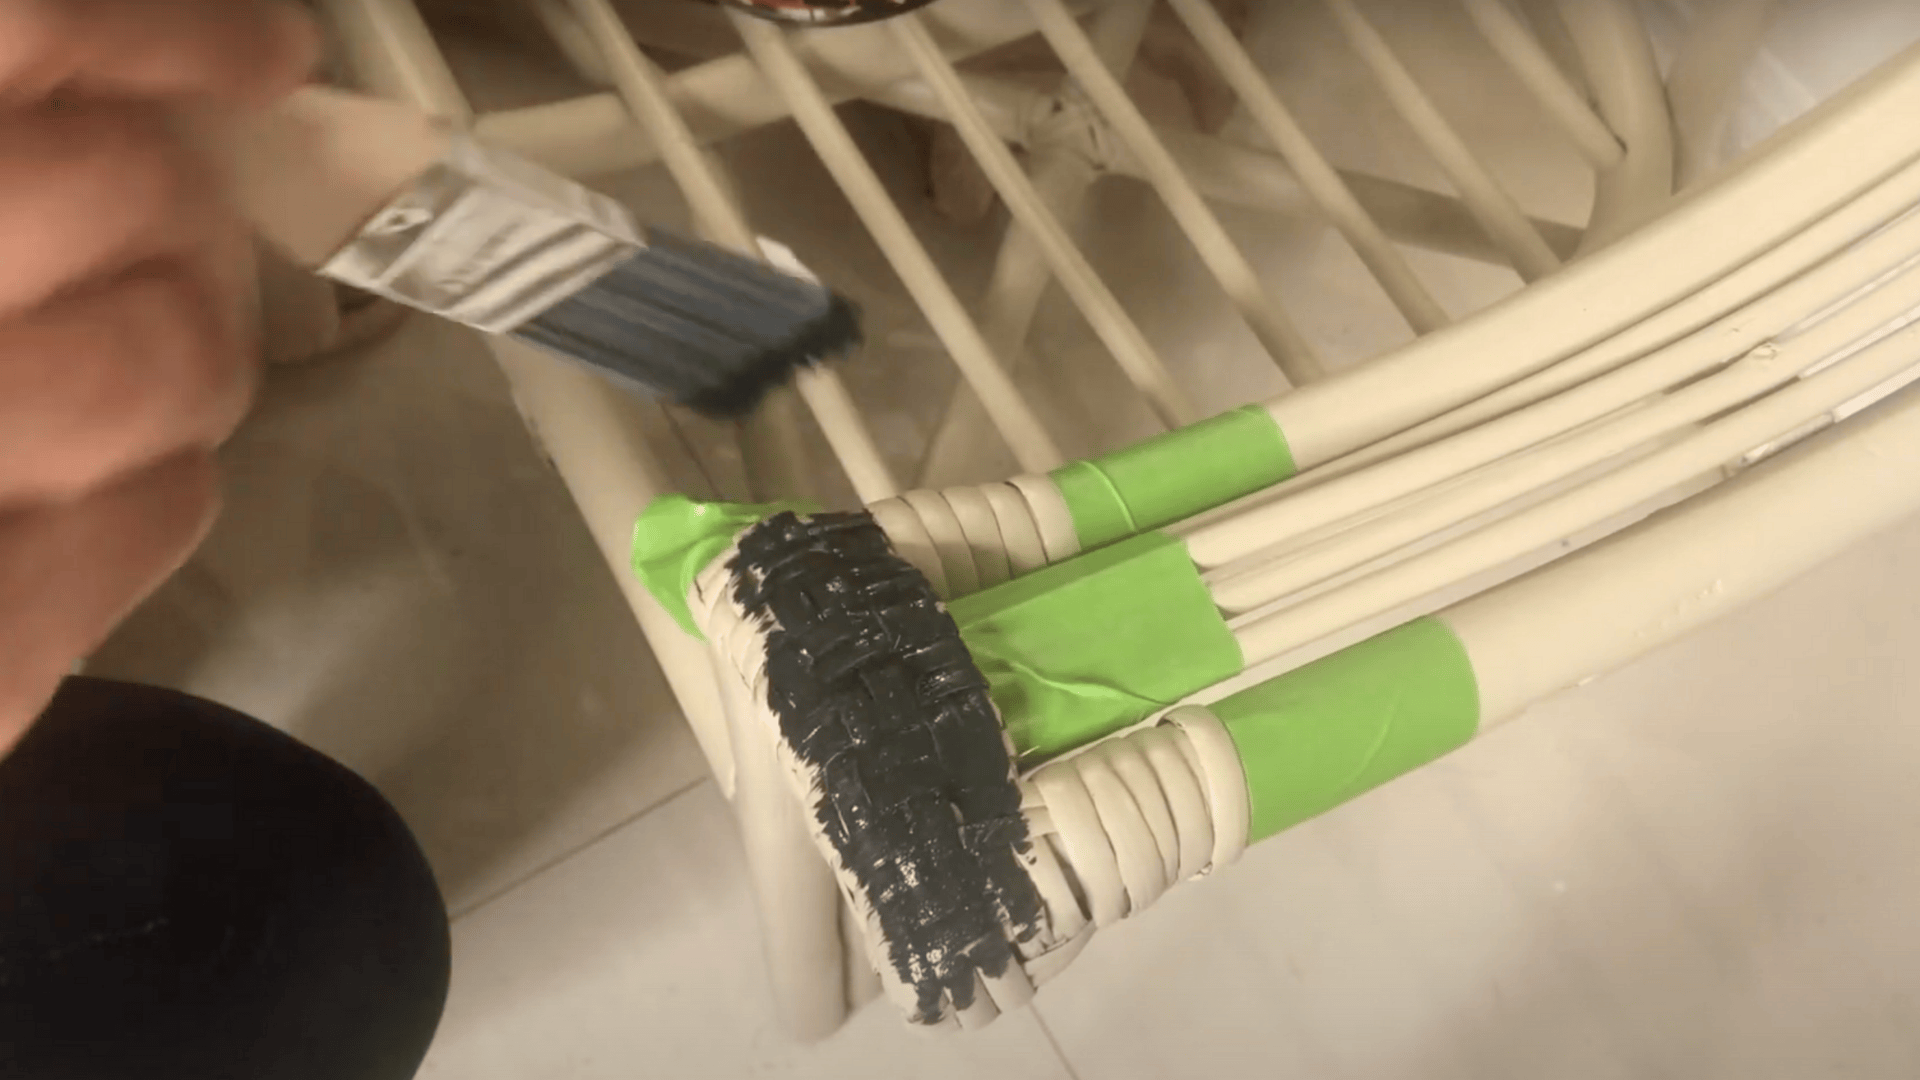
To make my chairs stand out, I decided to add black accents.
This step is optional, but it really makes the finished piece look special.
I used painter’s tape to mask off the armrests and the front edge of the chair frame.
Then I carefully applied black paint with a small brush.
The contrast against the light base color gave the chairs a modern, custom look.
When removing the tape, I pulled it slowly at an angle to avoid peeling any of the base paint.
The clean lines between colors made such a difference!
Step 5: Style with Cushions for a Finished Look
Once the paint was fully dry, it was time for the fun part – adding cushions!
I found standard seat cushions at a home store, but I got creative with the backrest.
I folded soft hand towels in a color that matched my room and secured them with hidden safety pins.
They look like custom cushions but cost much less!
The cushions not only make the chairs more comfortable but also protect the fresh paint from wear and tear.
Plus, I can easily change them out when I want a new look.
Video Walkthrough: See How Experts Do It
For more information, check out this video tutorial by DIY Decor Diary
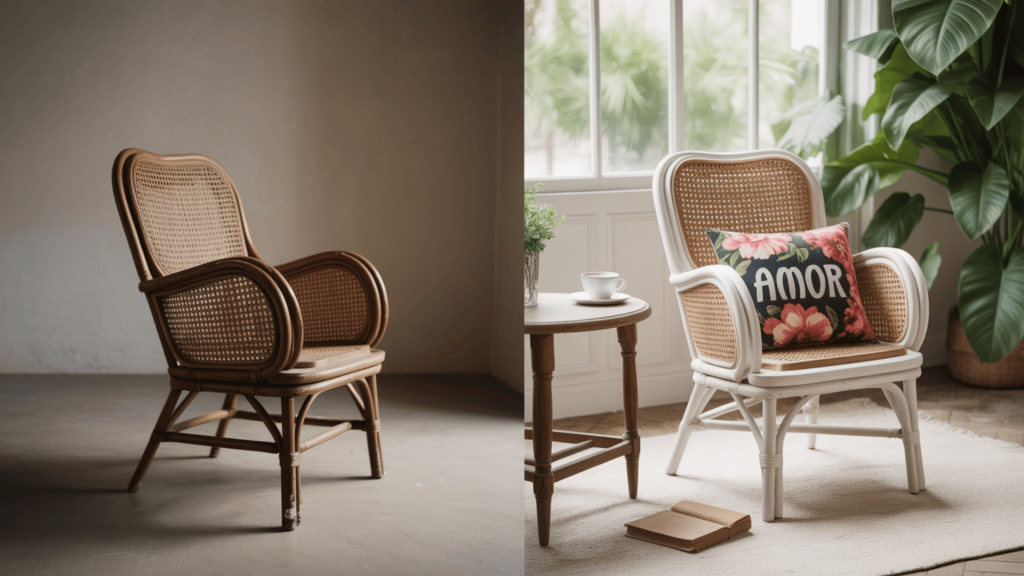
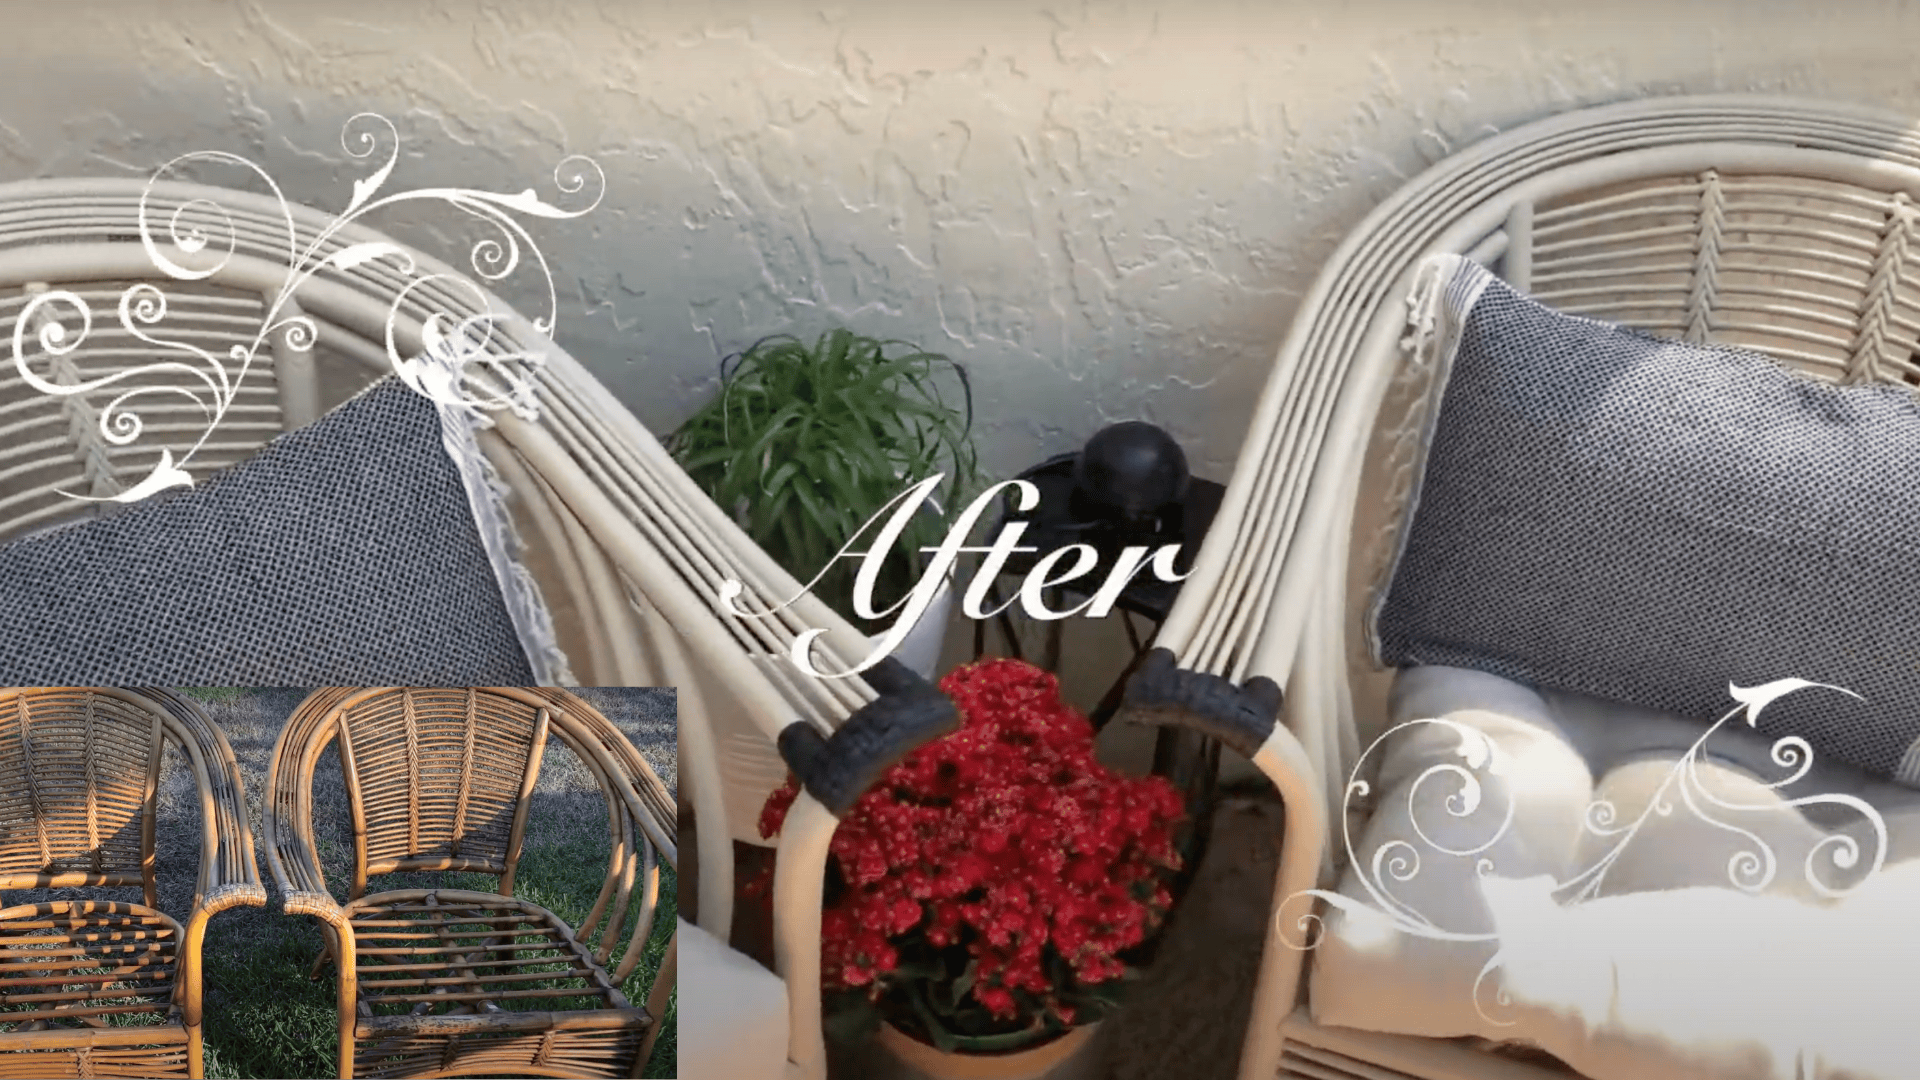
Before and After Results
The change in these chairs is truly night and day!
What started as dingy, yellowed seating is now bright, clean, and stylish.
| BEFORE | AFTER |
|---|---|
| Dull, yellowed finish | Bright, fresh white color |
| Visible stains and water marks | Clean, smooth surface |
| Dated, forgotten look | Modern farmhouse style |
| Uncomfortable to sit on | Cozy with new cushions |
| Unattractive pieces | Statement pieces that draw compliments |
| Worth maybe $20 each | Looks like $200+ boutique chairs |
What surprises me most is how much more comfortable they seem to be.
Maybe it’s just that they look so much nicer now, but I find myself choosing to sit in them all the time when reading or having coffee.
These chairs would work just as well on a covered patio or in a bedroom corner.
The neutral colors mean they’ll match almost any decor style.
Tips for Painting Rattan Furniture Like a Pro
After completing this project, I learned some valuable lessons that will help you achieve great results on your own rattan makeover.
These simple tricks made a huge difference in my final results.
- Clean thoroughly – paint won’t stick to dirt or oils
- Test paint on a hidden spot before doing the whole piece
- Apply multiple thin coats instead of one thick coat
- Work from top to bottom to avoid drips on finished areas
- Paint the undersides too for a truly professional look
These small steps might add a little extra time to your project, but they’re worth it!
The quality of your finish will be significantly improved, and your furniture will appear as if a professional did it.
Summing It Up
From forgotten Facebook finds to statement pieces – what a change a little paint can make!
My once dingy rattan chairs now shine in their fresh coat and bold accents.
The project taught me that most old woven furniture doesn’t need to be tossed – it just needs the right care.
I smile every time I sit in these chairs, knowing they cost a fraction of the price of new ones but look just as good.
Next time you pass by worn rattan at a thrift store or online marketplace, remember my inexpensive chairs.
Look past the dust and stains to see what could be.
With some paint, patience, and these simple steps, you can create something truly special for your home as well.
What colors would you pick for your own rattan refresh?
Share your paint palette ideas below.
I’m always on the lookout for fresh inspiration!