Hey all! Welcome to Trashtastic Tuesday! This is a little series around here where I show you something that I thrifted, sometimes I make it over, sometimes I don’t. Or it may be something that I have owned and I am tired of, or no longer like, so I make it over. But nevertheless, it is usually something that I paid very little money for. For today’s project, I covered a lampshade with an old sweater.
This is a fairly simple thing that you can make on your own, no sewing required. All you need is an old sweater, some tape, and scissors.
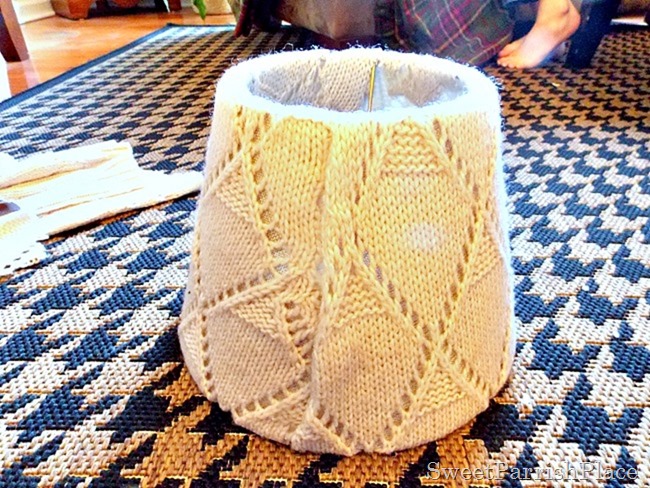
All you do, as you can see above, is to pull the sweater down over the lampshade. I would recommend using the bottom of the sweater, however for this project I did was not able to do that. My daughter had used this sweater to make a Christmas stocking (super cute too!), and I used the remainder of the sweater for this project. But in an ideal world, it would look better if you used the bottom of the sweater. Because I did not, I had the sleeves to deal with. Which made it a little more difficult to deal with the seams downs the sides of the lamp shade. I’ll get to that in a minute, but you simply take the sweater and pull it over the lampshade and wrap it around to the inside of the shade pulling until it is as snug as possible, then you tape it all around the inside with invisible tape. I did not want to attach this permanently, because I will probably remove it for summer.
Below, you can see how I dealt with the sleeve holes. I simply cut off the sleeves, and then pulled them tightly to make a straight seam down each side. Now, if you know how to sew, it would be a lot better to sew the sides, but alas, I do not even own a sewing machine. So I used double sided taped and worked with it until I had the seams as smooth as possible. I also cut little slits on the inside of the shade to accommodate the metal parts that attach to the lamp.
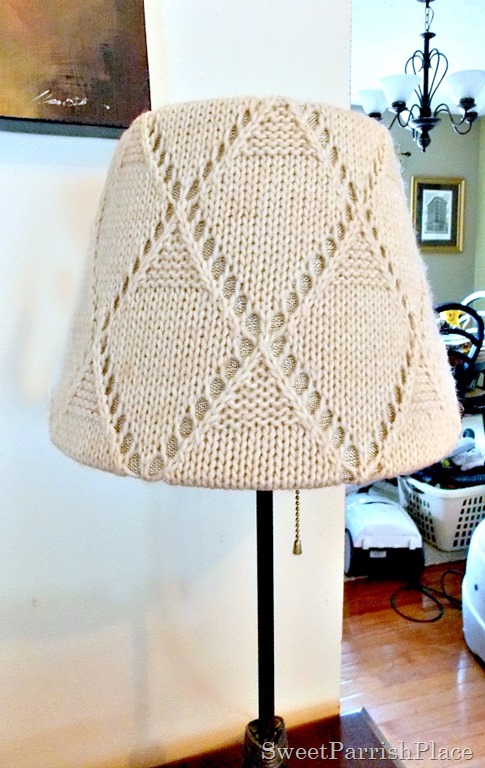
And there you have it, this is the finished product! I think it is a cute way to add a little winter coziness to out living room.
I really like how it looks on our sofa table. What do you think? Have you made anything from an old sweater? Any creative ideas you would like to share with me? I would love to hear some below in the comments!
Thank you for joining me today for Trashtastic Tuesday! I love this trashtastic little project! Have a great day!
 Please check out some of my other Trashtastic Tuesday projects here.
.
This is where I party:
Monday:
Project Inspired//Get Your DIY On // Motivational Monday// Masterpiece Monday
Metamorphosis Monday// Amaze me Monday// Frugal Crafty Home// Inspiration Monday
Your Designs This Time// Bloggers Brags// Much Ado About Monday//
What’d You do This Weekend
Metamorphosis Monday// Amaze me Monday// Frugal Crafty Home// Inspiration Monday
Your Designs This Time// Bloggers Brags// Much Ado About Monday//
What’d You do This Weekend
Tuesday:
Wednesday:
Wow Us Wednesdays// Whimsy Wednesday// Work it Wednesday
Thursday:
Think and Make thursdays// My Two Favorite Things
Friday:
Weekend Retreat// Remodelaholic// Frugal Friday// Craft Frenzy Friday// Freedom Fridays
Friday Feature
Saturday: Found and Foraged// Show me Saturdays
Sunday: DIY Sunday Showcase// That DIY Party


Leave a Reply