This is a tutorial for a vintage trunk makeover that I completed last Spring.
Hey friends! I took last week off from blogging because it was Spring Break. We spent part of the week doing some housework, and the last few days traveling to Ohio to an indoor waterpark and a day trip to Cleveland. I’m glad to be back with you, and I have a fun project to share with you today that is long overdue! It’s been a while since I wrote a Trashtastic Treasures post, and today I have a really good one for you. This vintage trunk makeover was a project I completed while I was working on our mudroom makeover last Spring. I promised a full tutorial, and then kind of never did get around to it. I absolutely love this project so I’m excited to finally be sharing it with you today.

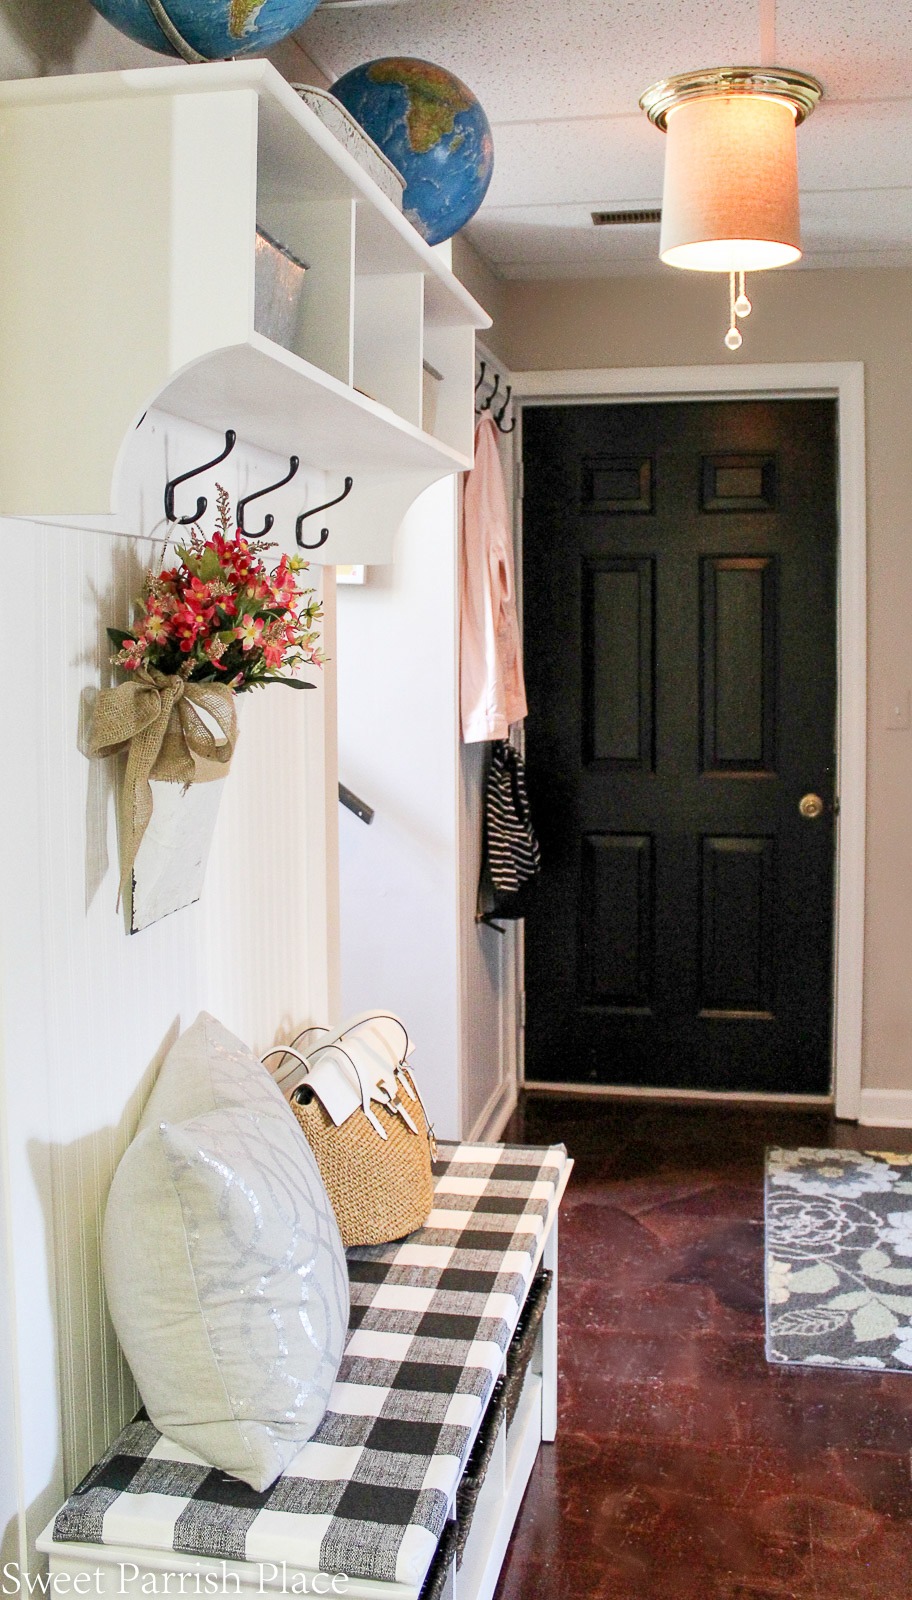
These are a few photos I took last Spring when I was photographing this mudroom reveal. Below I will be sharing a full tutorial for this vintage trunk makeover. My husband surprised me with this trunk one day a couple of years ago. He got it from a physician he calls on through work. It sat in my garage for over a year before I finally found a perfect spot for it in my home and got around to giving it a makeover.


It ended up being a perfect fit in this little corner of my mudroom, and we use it to store extra blankets and pillows for when we have overnight guests. I absolutely love this trunk now, but when I first laid eyes on it, I wasn’t sure what the heck I was going to do with it. It was in pretty rough shape, but it really wasn’t that difficult to get it to where it is today.


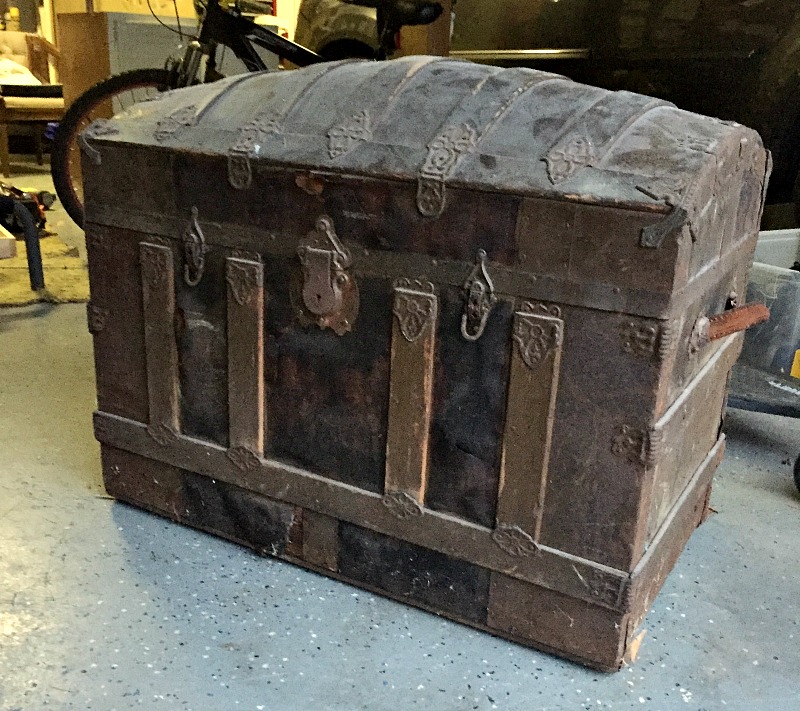
Here it is before, I took this photo right after my husband gave it to me. I did share this with a friend who knows a great deal about antiques before I even touched it, and she assured me it was OK to paint it. I knew I wanted to go with white chalk paint. There was a strange coating of old paper on much of this trunk, and the most difficult part of this makeover was peeling it all away, because it was warped. I didn’t peel every piece away, only the ones that were badly warped.
For your convenience, this post has affiliate links. If you click on them and buy an item, I will receive a small percentage of commission. By clicking the link, you are NOT paying any more than you ordinarily would.
Vintage Trunk Makeover
Supplies You Will Need:
DecoArt Chalky Paint- Everlasting
This is the tutorial. It really was fairly simple. It just took some elbow grease.
- Start by cleaning the piece and allowing time for it to fully dry.
- Use a paint brush and brush on two coats of white chalk paint. The paint I used is DecoArt Americana Chalky Paint in the color Everlasting
Here is the trunk after the first coat of paint.

And here is the trunk after the second coat. I opted to paint all of the hardware. That is because I wanted to be able to go back and distress all of the hardware after.

- Use a find grit sanding pad to distress all of the hardware and the detailed wooden trim so that
it looks distressed.
- I just sanded wherever it felt right to me. You can see in the photo below a close up of what it looked like after I sanded it. This was my very favorite part. I just love the way sanding it down and making it look distressed made this trunk look. This part is the step that made me totally fall in love with this trunk!
- Protect the trunk after the sanding step using DecoArt Creme Wax in Clear. All you do is paint it on with a brush, wait for a little while for it to dry, and then use a clean soft cloth to buff the whole thing. This will protect your work for years to come.


That really is all there was to this vintage trunk makeover. This piece is now a treasure to me, and I am so glad I took the risk and painted it. It is also a very useful storage piece now. I did clean the trunk really well on the inside too, so that it would be a place I could store pillows and blankets. I actually cleaned it and then rubbed it down inside using white vinegar and a rag, and then I let it air out for a while. That took the musty smell away.
What do you think of this old vintage trunk makeover? Have you ever made over an old trunk like this? I simply love turning vintage items into little treasures! Let me know if you have any questions that I didn’t answer in this post today!
If you like it, then you wanna put a pin on it!

Do you have champagne taste and a tiny budget too?
Love fashion, DIY, crafting, all things vintage and thrifty?Stick with me, I’ve got you covered!
Sign up to get my posts delivered to your inbox here
Follow me here:
Facebook / Twitter / Instagram / Pinterest / Bloglovin / Google + Stumbleupon
![]()
You may also like:
Modern Rustic File Cabinet Makeover


Oh such a lovely trunk!! And painted in white and distressed it looks gorgeous!
Thank you so much, I treasure it now!
Nice job lady! It looks great. And thanks for linking to Waste Not Wednesday. It looks like you were our most clicked project for the week.
That is awesome! I’m glad people have liked it. It’s one of my favorite projects! xoxo
What an awsome Trunk makeover! It sure looks right at home there!! I love how all of the hinges and locks have come up all distressed and lovely!!
Sam – Raggedy Bits recently posted…Waste Not Wednesday-100
Thanks so much Sam!
I have the same steamer truck that has been in my family for 90+ years and often wonder what to do with it! Now I know
Thank you for a great idea
That is so awesome and special! Thanks so much!
Really love it, have the exact same trunk only someone painted it completely red. Think I will take all the paint off and do what you did, came out beautifully and really could go in any room.
Thank you so much! Wow, it will be a task to get red paint off of it! I would sand it lightly and prime it then paint it.
Love how your trunk turned out. Now I’m inspired to tackle one that has been in my family for 50 years. I can’t wait to get started on it.
Oh I love reading this! I hope it turns out beautiful!