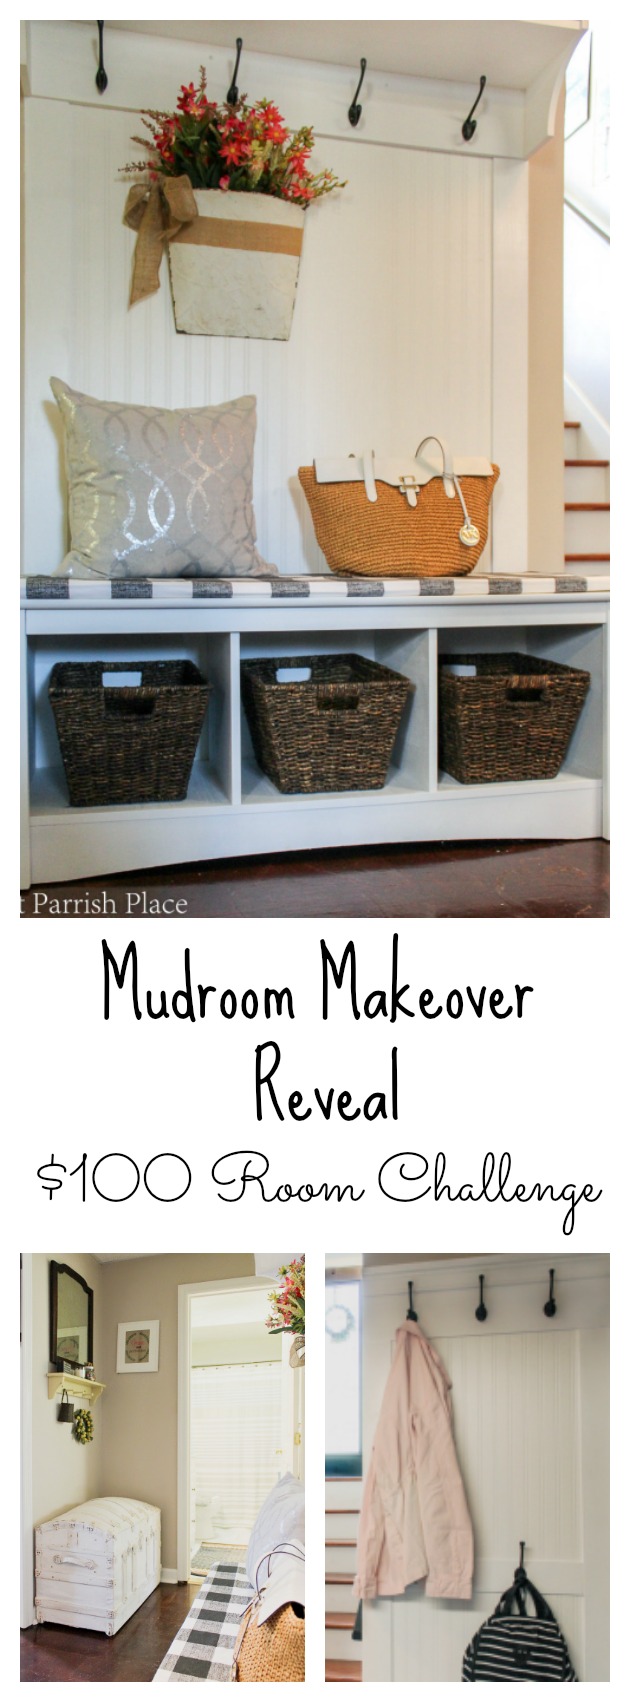
Hey friends! Today is the big day! It is final day for the $100 Room challenge, and my mudroom makeover reveal is ready to rock it out! I’m sooo excited about how this space has transformed, and I can’t wait to show you the entire thing, including the before and after pictures. If you are visiting my blog for the first time today, welcome! I am so happy you are here! To catch you up to speed, I committed to makeover a room in my house aaannndd stay within a $100 budget. This challenge was created by Erin at Lemons, Lavender, and Laundry, and I am thrilled to be a part of it all. This space went from a sad and dreary hallway to a bright and cheerful mudroom, and I could not be more pleased with what I was able to accomplish on a very tight budget. Did I stay within my $100 budget? You will have to read on to find out! The bench and shelf you see below was one of the last parts of this mudroom makeover that I had to finish, and I was sweating it out over the weekend, and worried that I may not make it. But thanks to the help of my husband, I was able to finish.
You might want to start by checking out week 1, week 2, and week 3. Go ahead, I’ll wait!

Americana Decor Chalk Paint | Americana Decor Clear Wax | Deglosser |
Kilz primer | Matte black spray paint | Naomi straw Tote
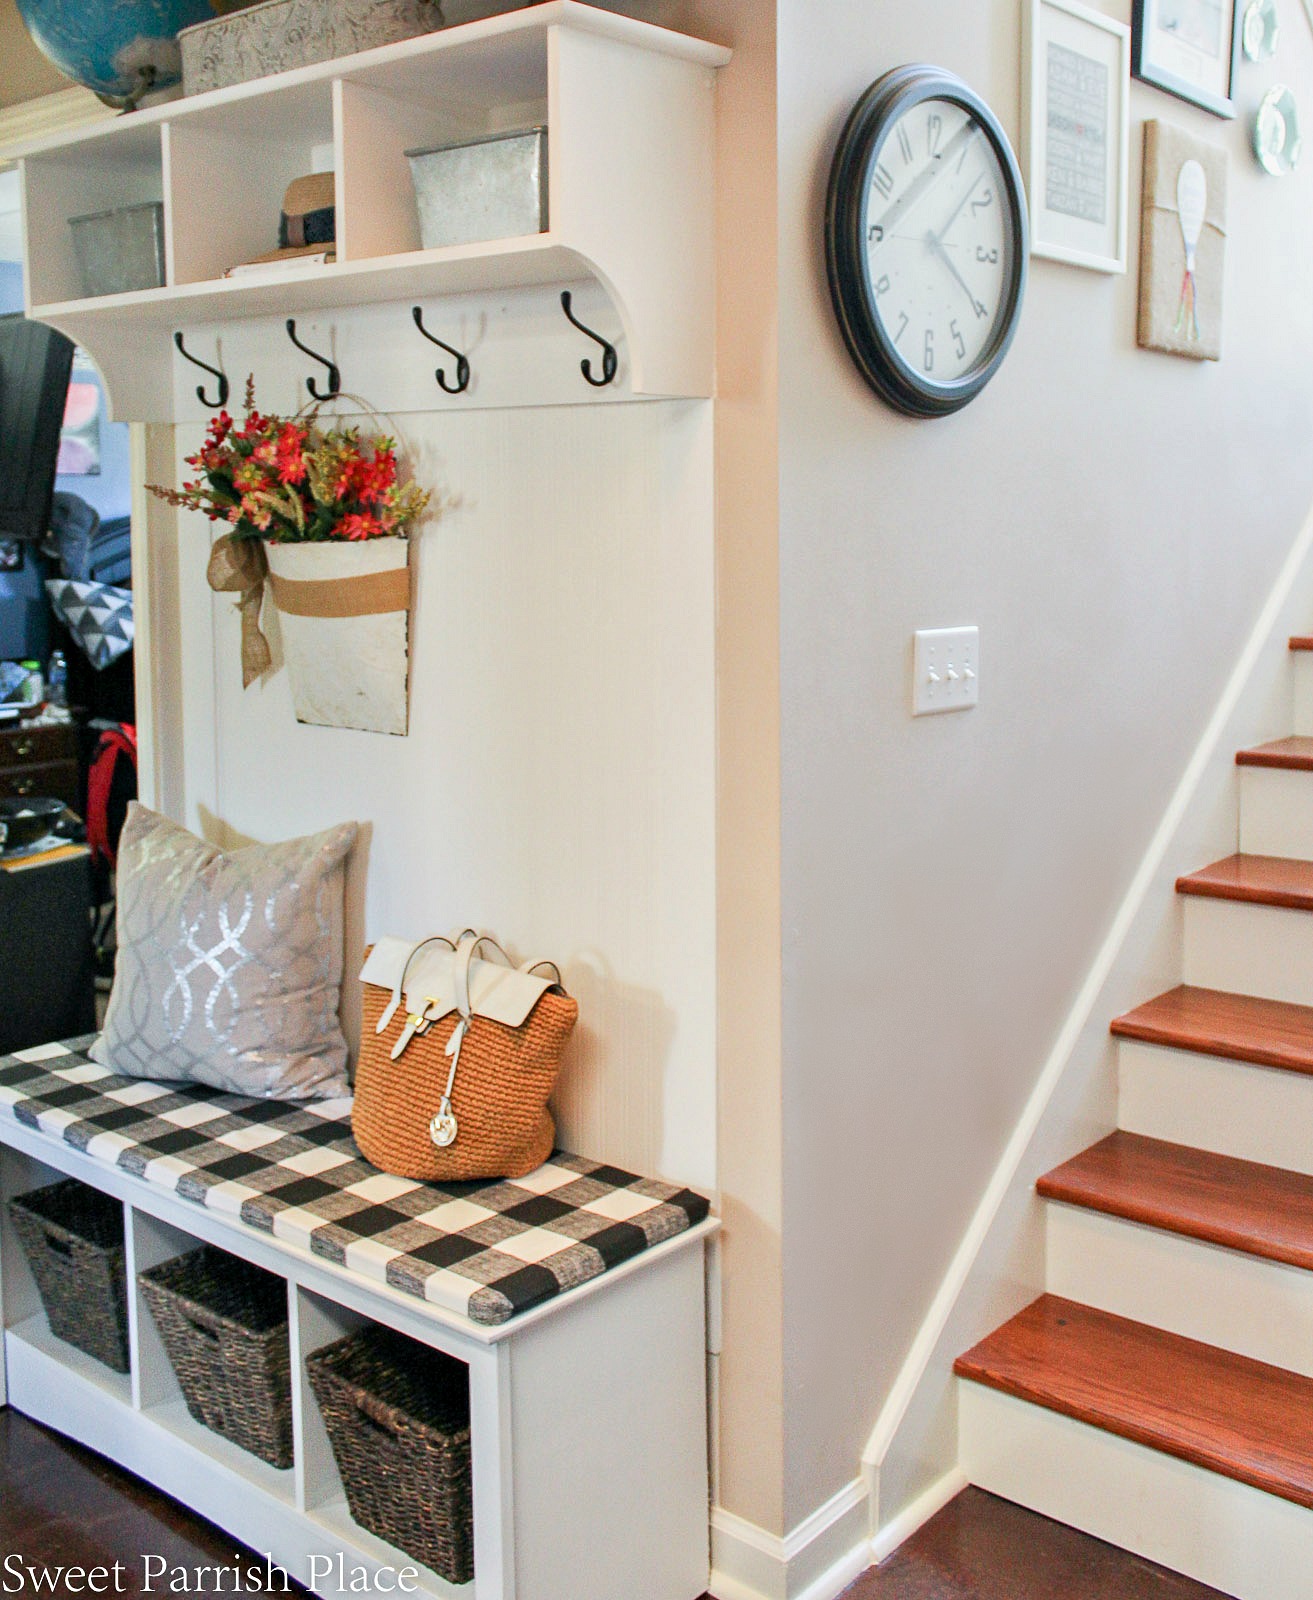
When we last left off, I was saying that I was worried I was going to run out of chalk paint and would have to buy more to finish painting this bench. Well I am happy to report that I was able to make it work. What I decided to do was to prime the bench first with white primer that I had on hand. I gave it two light coats with a paint sprayer. I then switched to the chalk paint and so I didn’t have to spend any additional money buying paint. I actually wish I had done this with the shelf above as well. But hindsight is 20/20, you know. The shelf took 4 coats of the chalk paint and still was not fully covered! Luckily the weather was perfect last Friday, and as soon as I got home from work, I took these pieces outside and was able to use my paint sprayer to paint them. One more coat with my paint sprayer on the shelf and it was finished. I also did remove the hooks, and used some matte black spray paint that I had on hand to paint them. I chose matte black to match the hooks on my DIY coat hook wall. I absolutely love the result!
The bench took two light coats of primer, and then two light coats of chalk paint and it was fully covered. And in case you are wondering- you CAN use chalk paint in a paint sprayer- I did! I was told by the paint guy at Home Depot not to do it. but I thinned it out, and it worked perfectly! Keep in mind, I was not going for a distressed look for these two pieces. I also applied one coat of clear wax to both of these pieces after the paint was dry. Below is a picture of this bench and shelf before. Amazing, #amiright?!

I used bead board wallpaper on the wall between the bench and the shelf, and it was very easy to apply. I painted it white with left over paint from my recent ORC bathroom makeover. And then I added some poplar board at each end going from the bottom of the shelf to the floor. The boards gave it a finished look. I really wanted it to resemble a built in, and I think it does, so I am happy! I did have to purchase one more piece of poplar board to finish this, so it added $4.26 to my budget. I used my Ryobi nail gun to hang the boards. After they were hung, my husband sanded them down smooth, and then I caulked around the edges to give it a seamless look, and painted them the same white color I used for the wallpaper. The white paint I used on the wallpaper and boards is simply white by Benjamin Moore. I used satin on the wallpaper, and a high gloss on the boards. I luckily had more than enough left over paint for the wallpaper and boards, so that did not add to my budget.

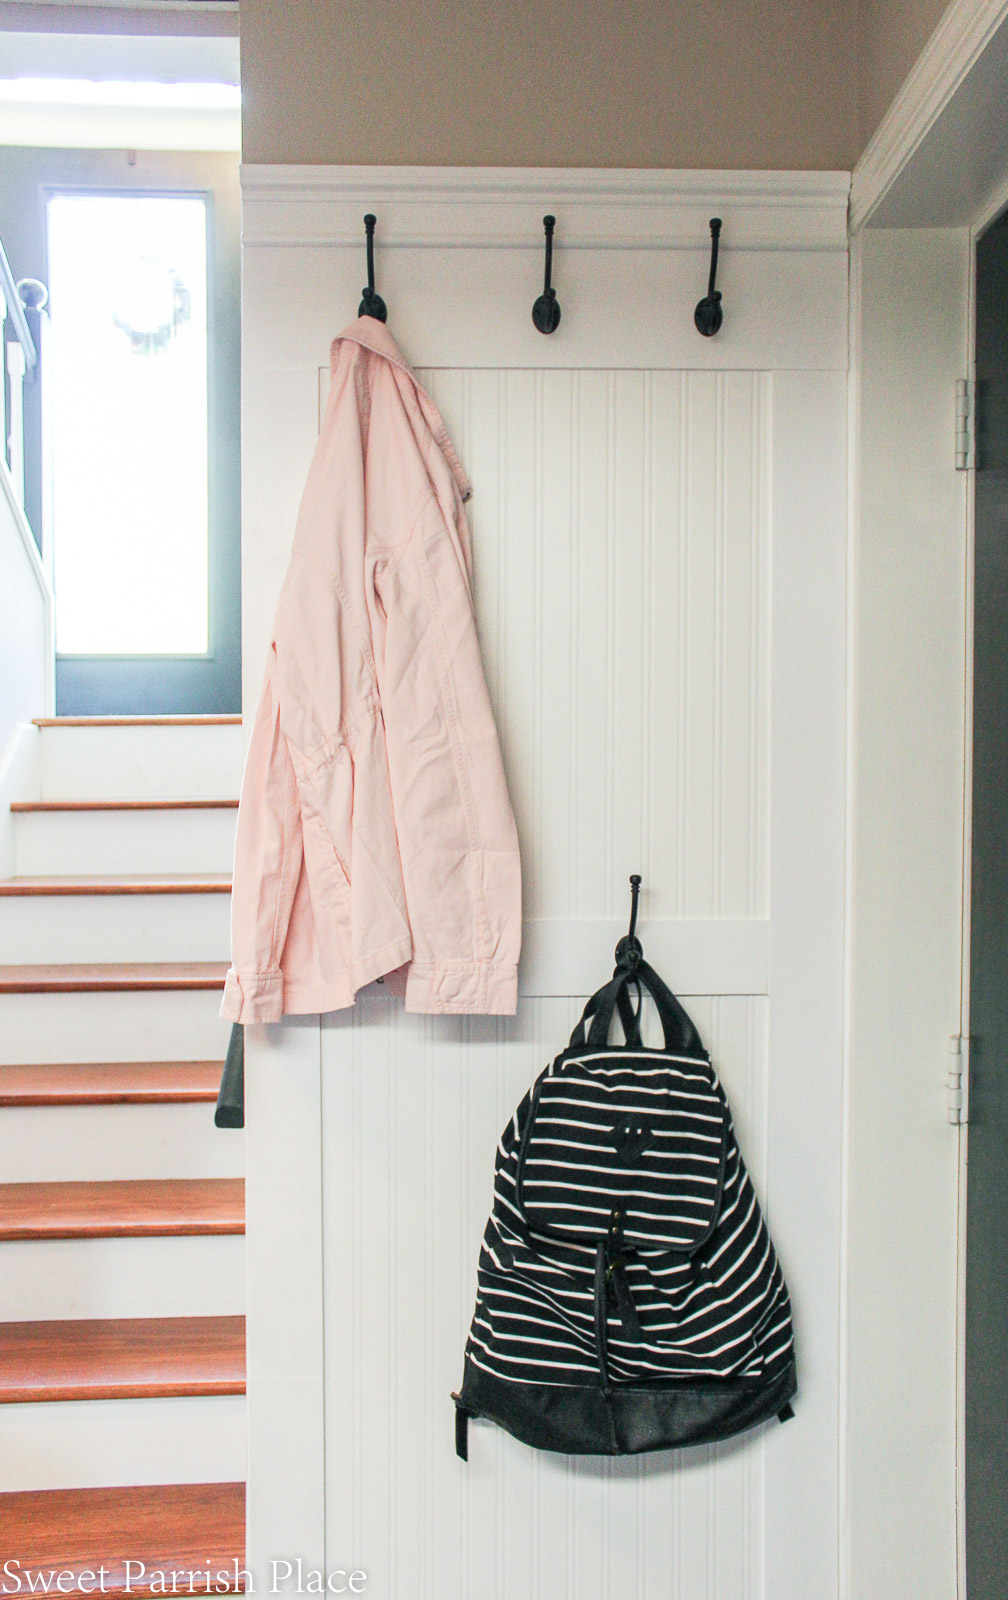
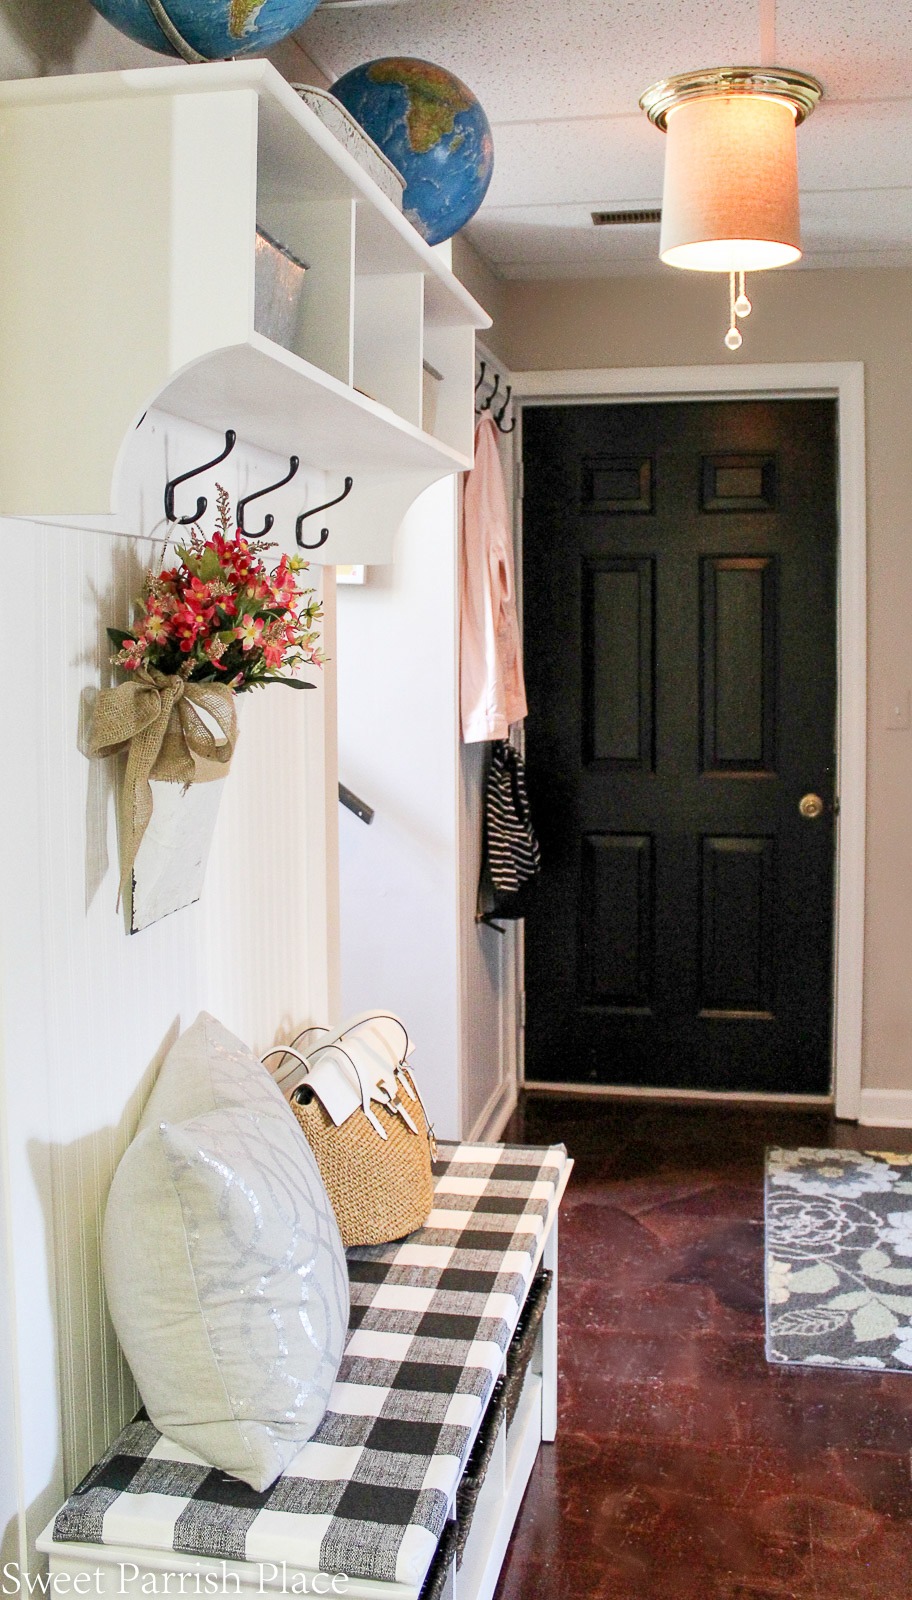
This DIY coat hook wall that I finished during week three of this challenge adds so much character to the room! And it is very functional, it is already being put to very good use, and I know next winter it will be piled full. The bulk of my budget went towards the wallpaper I purchased for the two walls, and the supplies I needed to build this wall. And trust me, it was worth every penny. another small thing that was on my list was to add some bling to my light fixture. This was another free thing I did. The faceted beads that shimmer in the light is a simple curtain tie back that was left here from the previous owner of this home.

Here is a before shot of this same wall, and I think the DIY coat hook wall makes such a huge improvement. And not only in the way it looks, but the way it will function for my family. during the summer, this will be the place we hang all of our beach towels up to dry after coming home from the pool.


Blush utility jacket | backpack option | Black hooks
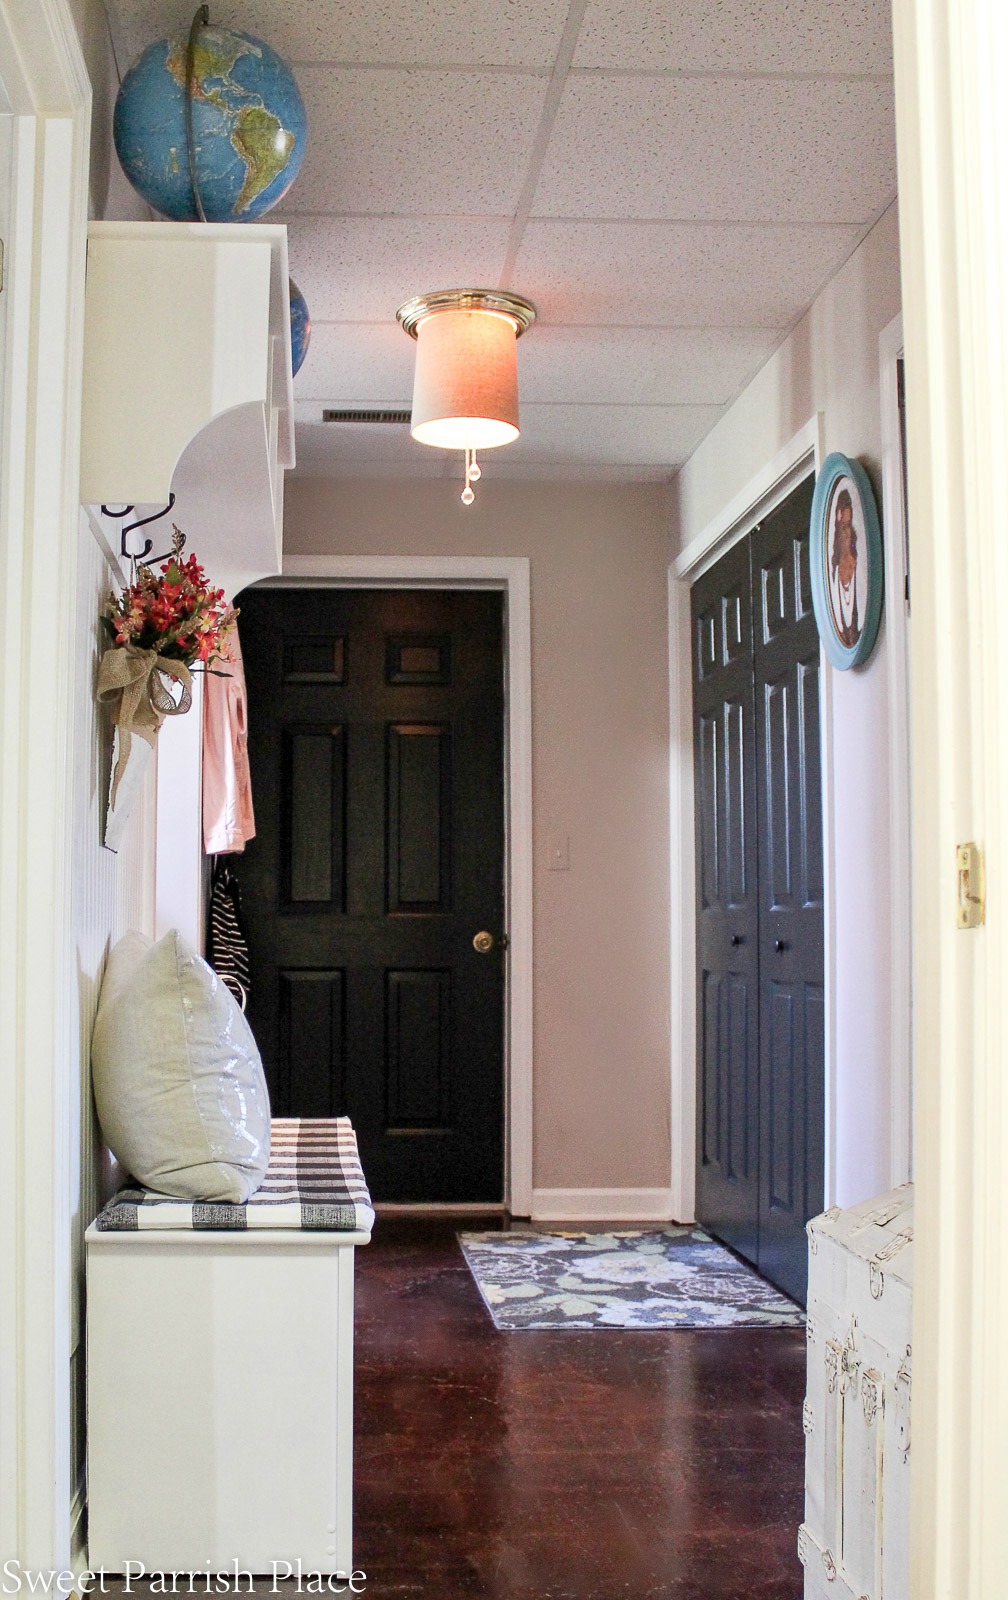
Another of the final projects I completed for this space was to paint these laundry room doors black. I did have to buy a quart of paint, but used the same color I used when I painted my front door and my back door. It is Behr premium plus satin enamel in the color broadway, and it cost me $13.74. It is a really dark grey in my opinion, but close enough to black. The door leading to the garage is not the same color black, but I plan to give it a coat of the same color. I just ran out of time for this challenge. I also plan to paint the doors on the other end of the hallway and also ran out of time. I really wanted to paint all of these, but was not able to do it in the time I had.
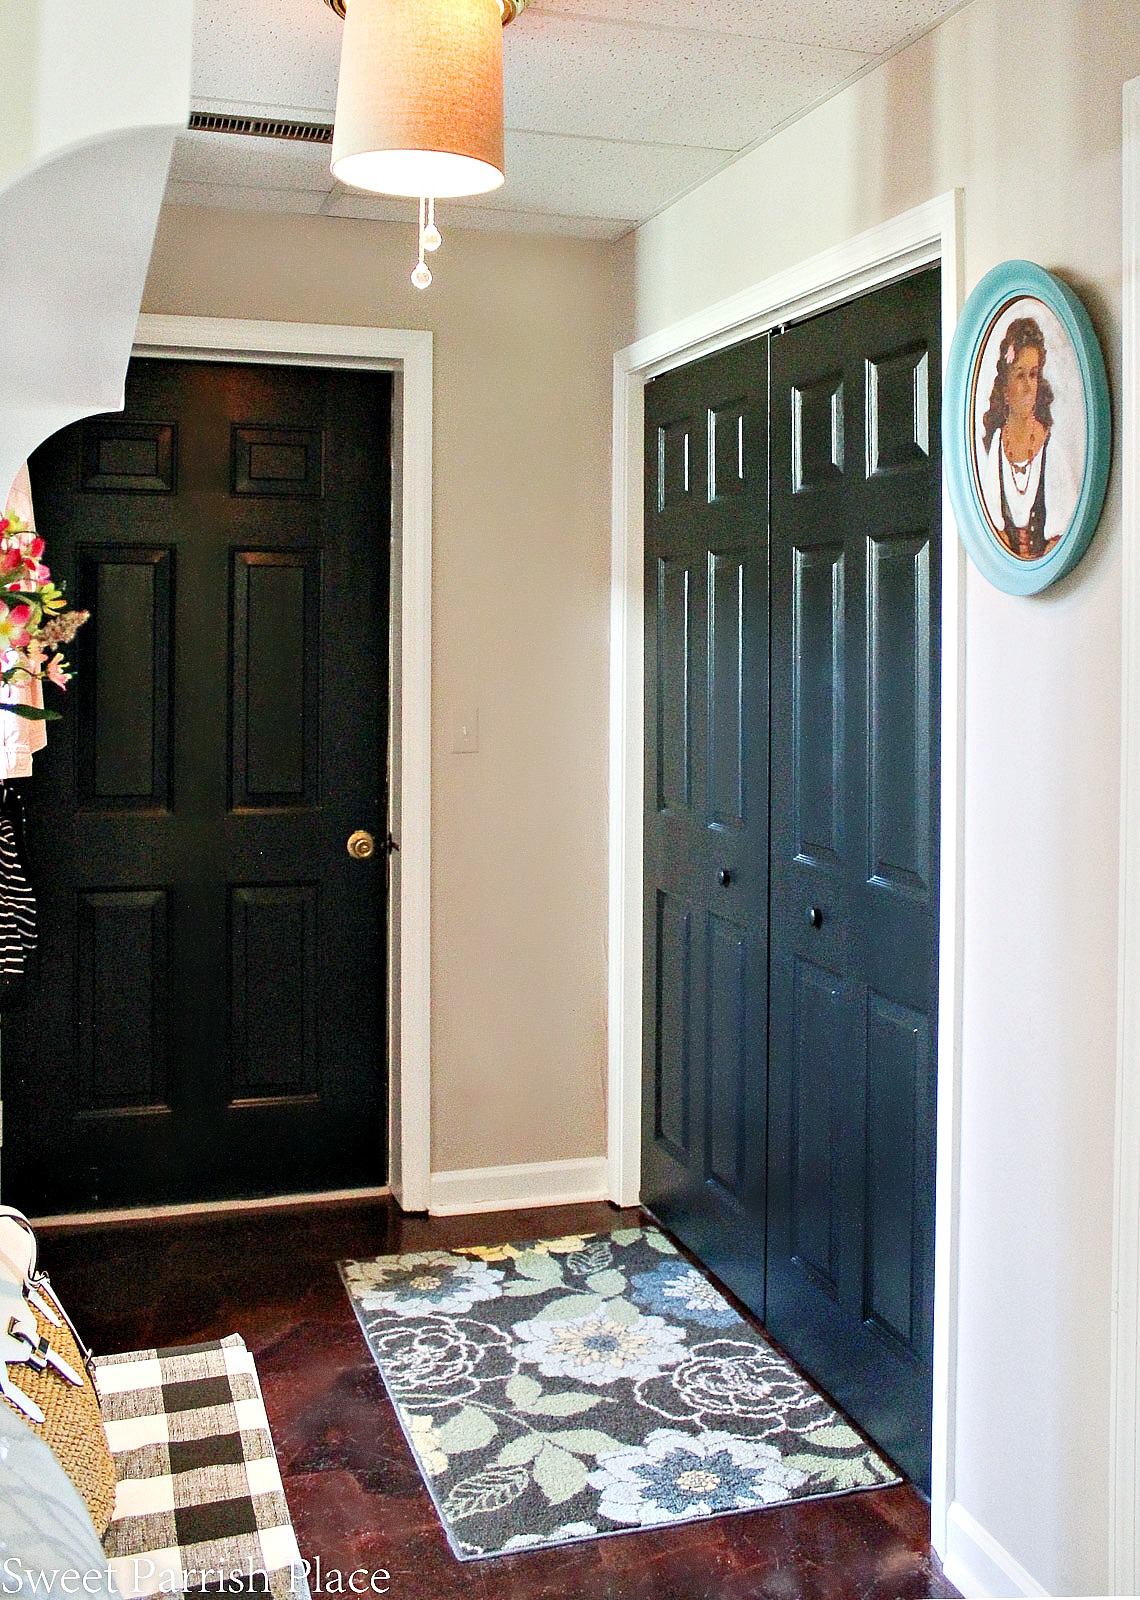
This change from white doors to black is a dramatic change. My daughter gasped when she was home over the weekend and I sent her down there to take a look at the final room. You can see these closet doors from the front door when you enter, and having them be the same color now gives it a more cohesive look. I love black doors, I highly recommend them if you are on the fence about painting your doors. They show literally no dirt, and mine have worn extremely well. All of my doors have three coats. Another small addition to this space is the vintage artwork you see hanging on the wall to the right of the closet doors. I bought this over a year ago at a thrift store, and it had been sitting in my junk pile waiting for some love. It added nothing to my budget because I already owned it. I transformed it by painting the frame, and I also added some of my own paint techniques tot he actual print. I will be writing a separate Trashtastic Treasures post all about this vintage art at some point.
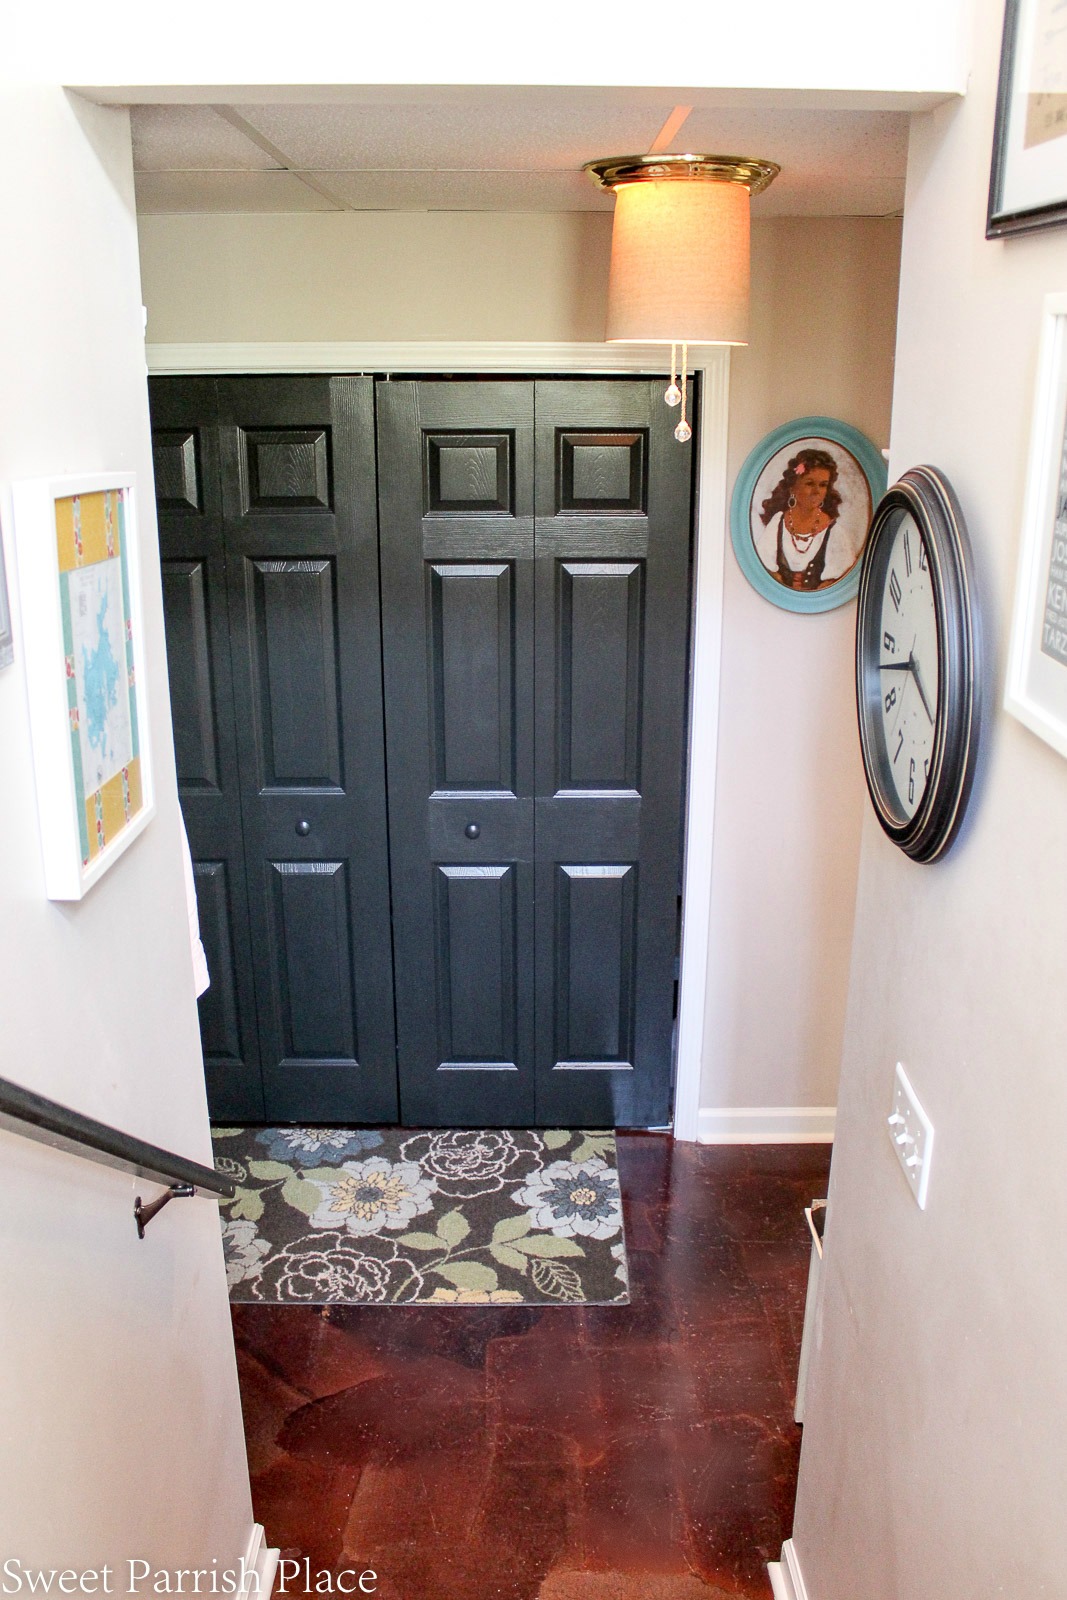
Here is a before shot of the same view going down the stairs. I am happy with the new view!

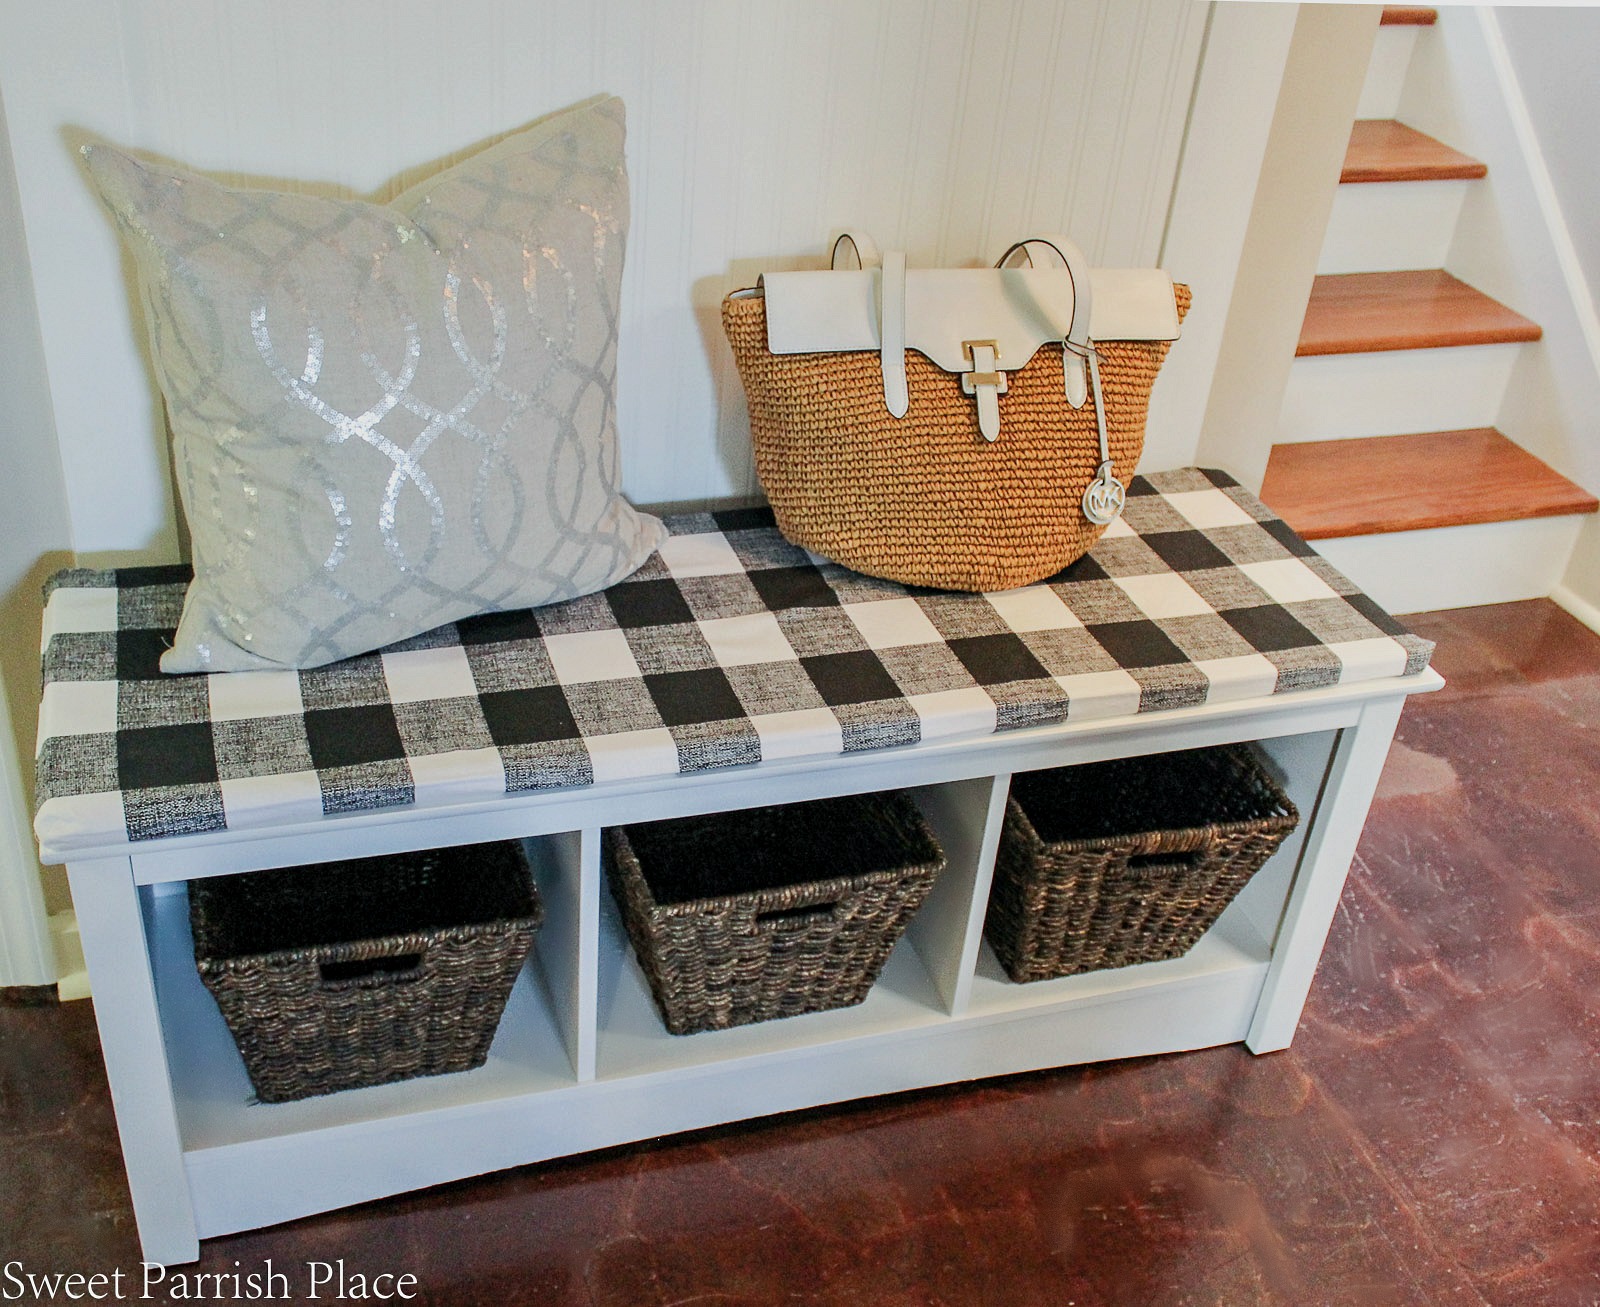
here is another view of the shelf and bench looking the other way. And you can catch a small glimpse of Mr. 17 Year Old’s messy bedroom in this picture, sorry for that. I do not clean his room. I shudder to just go in! Fortunately, he has a lovely grandmother who comes over once per week and cleans it for him, hehe. This white hanging bucket usually lives in my stair well, but I moved it down here to add something pretty for the pictures. Just don’t be surprised if you see it back upstairs at some point. I had lofty goals of adding three matching bins in this wall shelf, but it wasn’t to be. I did not have enought money left in my budget to buy them. So I made it work by stealing two galvanized metal bins from two of our bathrooms. These will not be here permanently because they have other homes and uses, but I needed something to place in these sections so that the shelf would look pretty. I will be purchasing new bins for this space at some point, just not for this challenge.
Naomi straw Tote | Buffalo plaid fabric | foam cushion
My favorite part about this whole bench and wall shelf area is the buffalo plaid cushion! My friend Carol sewed this cushion cover for me. I just ordered the fabric and had it shipped straight to her. She blogs over at The Red Painted Cottage, and she not only sews, but she is a talented artist and a really cool lady. So check out her blog if you have the time! I want to thanks Carol so much for agreeing to sew this cushion for me since I do not sew. She really helped me out, and I definitely owe her one! Carol, if you are reading this, I love the way it turned out! This cushion ended up costing me $8.98 for the fabric, and $5.50 for the velcro she used. But just between you and me, I am going to do something to repay her for her kindness!
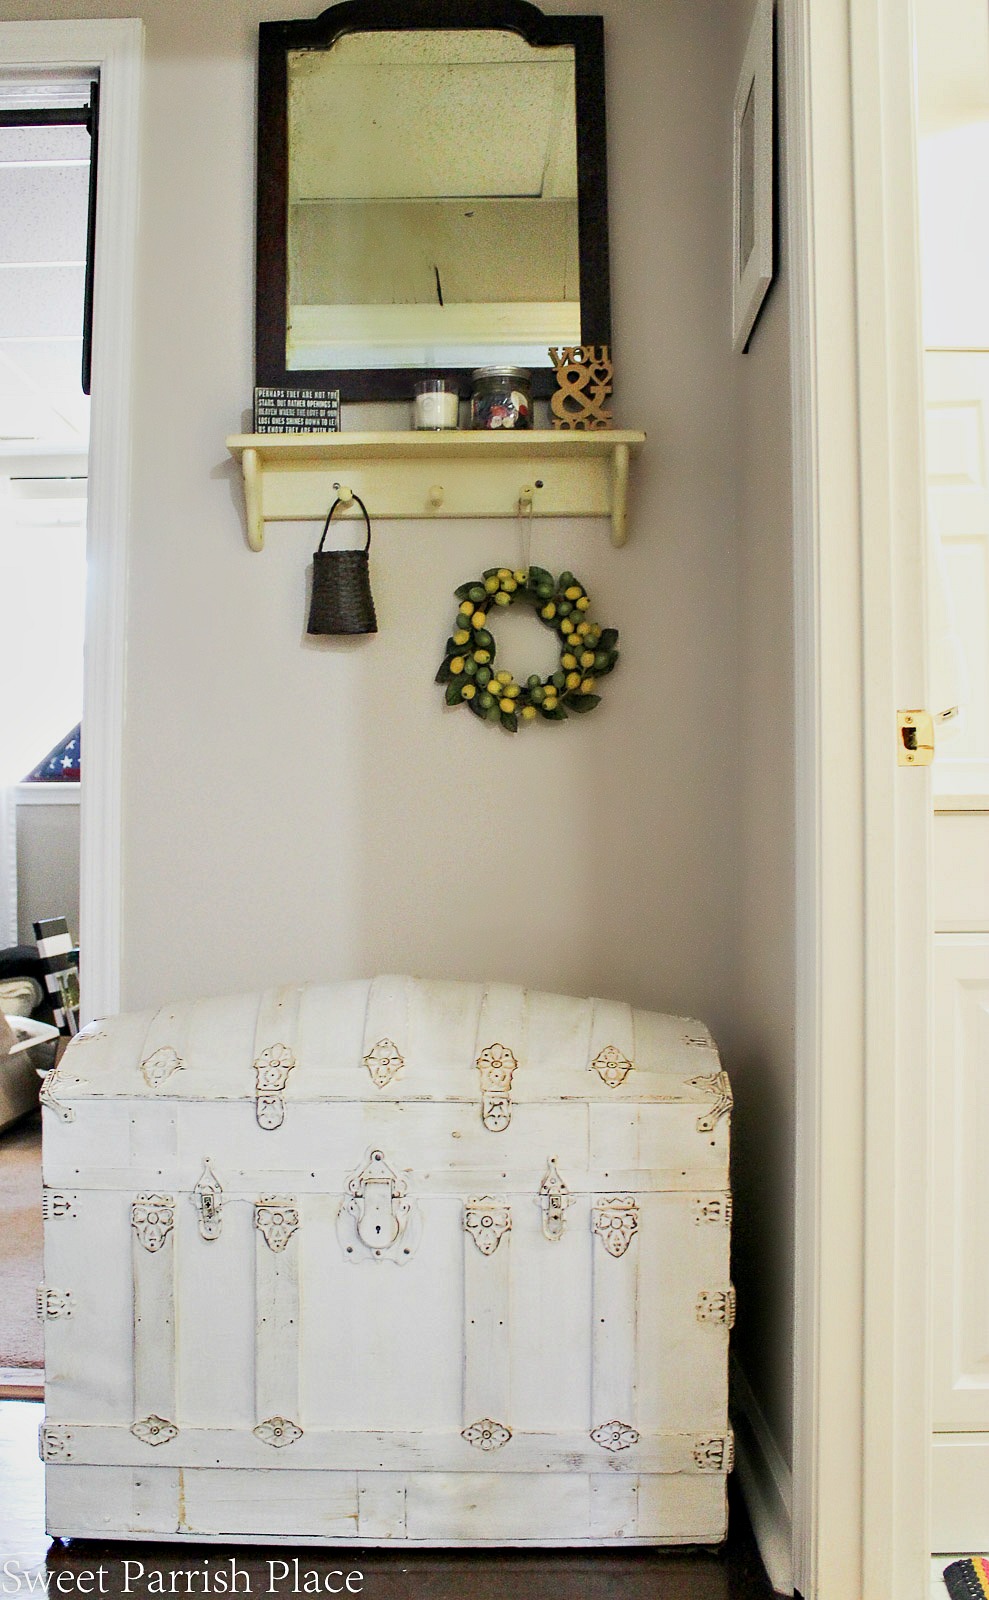
My very favorite piece in this entire mudroom makeover reveal is this antique trunk I made over for the space! You guys, it is to die for! I will be posting a tutorial for this project soon, so if you want to know exactly how I achieved this look, keep checking back to the blog, or follow me on social media and I’m sure you will find it coming soon! This trunk added zero to my budget because I had owned it for over a year before I even planned this room. It now serves as storage for extra pillows and blankets, and it also serves as something freaking gorgeous for me to stare at every time I walk down here, ha! I used the same chalk paint to paint this trunk as I used to paint the bench and wall shelf. Chalk paint really can be stretched a long way. I always keep some of the white color of it around, because I am endlessly wanting to paint something white! I also sealed this with a clear wax, just like the wall shelf and bench.
here is another before shot of this little corner. What an improvement! I actually painted the shelf you see here yellow a couple of years ago, and I still wanted to use it for some knick knacks. So it stayed. But literally everything else changed.


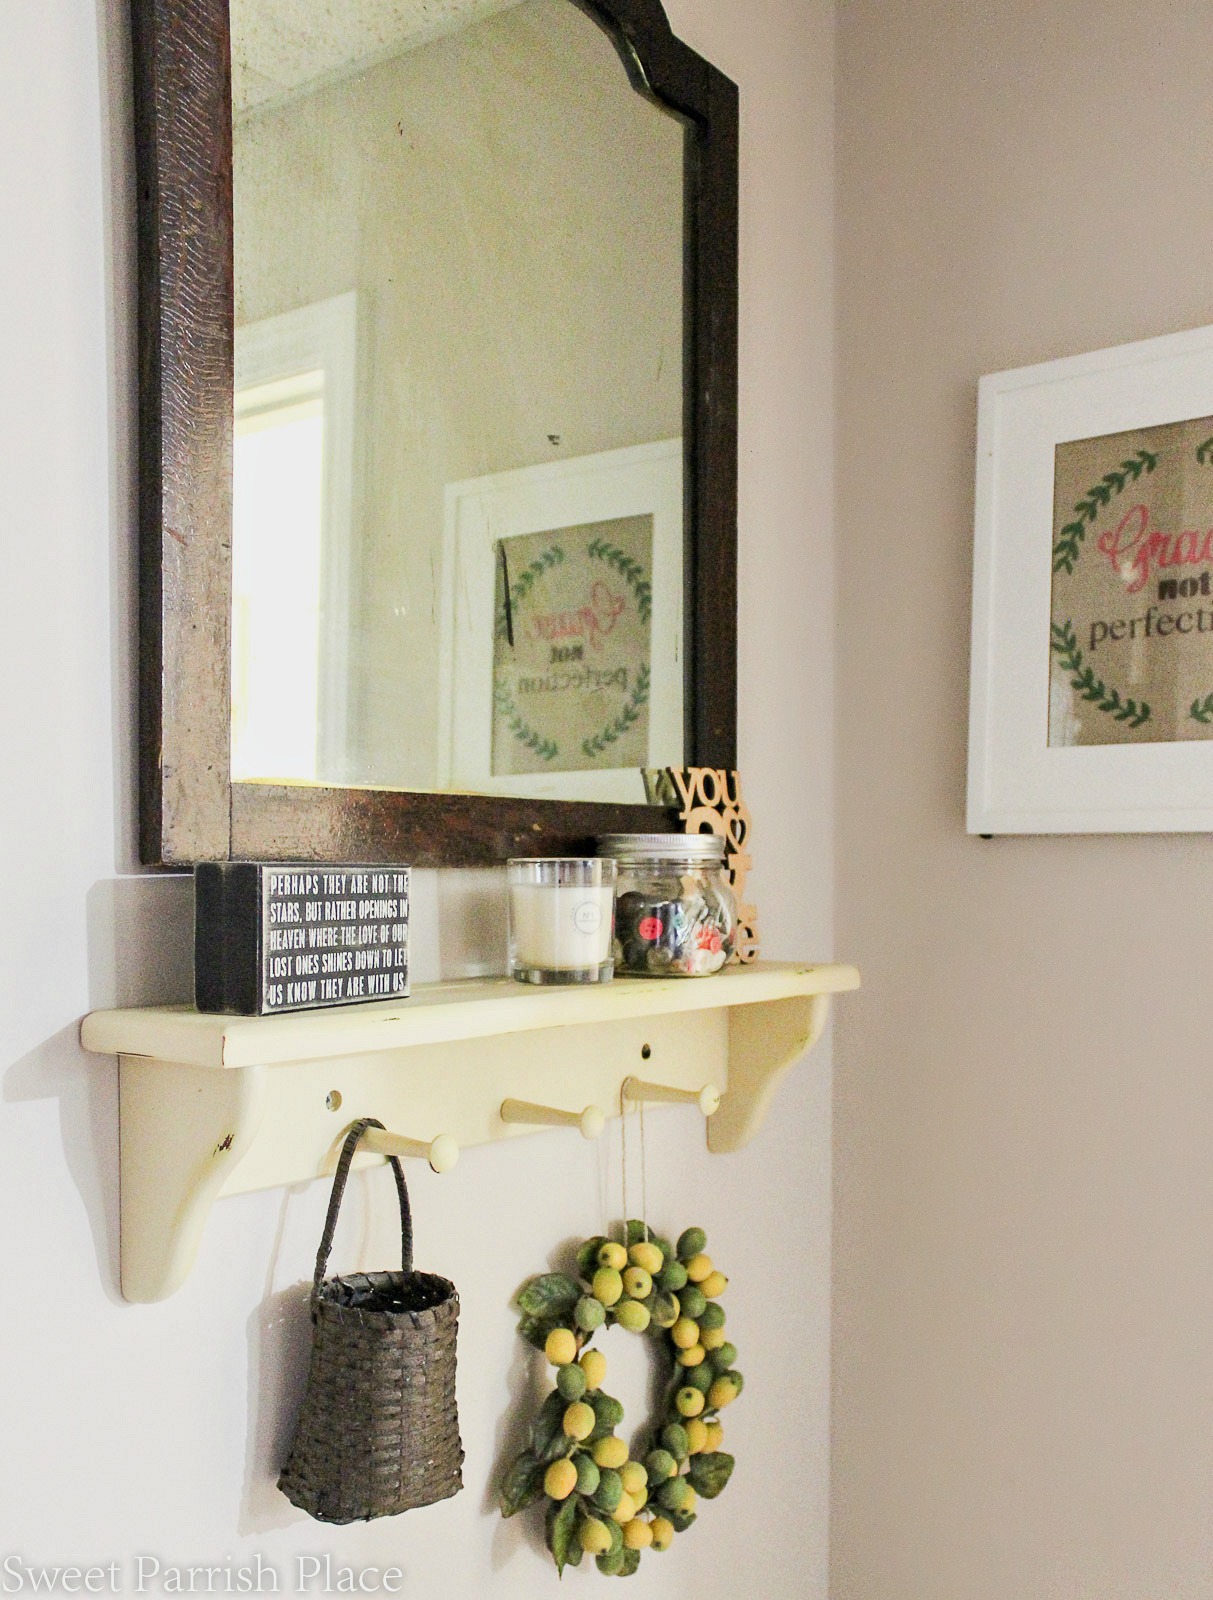
This antique mirror was given to me by my parents. It was actually in the house I grew up in when we moved here, and it had been in their attic for all of these years. My dad recently brought it down and offered it to me, and of course, I obliged! When I told my husband I was using it here, he said what? It has paint on it! it does have a black smudge, but I don’t think it is paint, or I could have gotten it off. I think the mirror has been scratched from the back side. and guess what? I don’t care! I love the patina and the scratches and the imperfections. That is what makes a gathered and collected look, and I accept it just the way it is! The artwork in the white frame hanging to the right used to be in the adjacent bathroom. But it is not my son’s bathroom, and it wasn’t working for him. I had it lying on the floor in the family room, and as I was trying to decide what I could hang there, this popped right out at me, and I thought it would be prefect right here! It is a painting on burlap that says grace not perfection. I think that defines this entire corner, don’t you?
And here are just a couple more shots looking back the opposite way in this mudroom makeover, towards the garage door. This is the door I leave out of and enter into every day. And boy oh boy, do I have a better view to walk into now! also, I actually enjoyed doing laundry down here yesterday, ssshhhhhh, don’t tell anyone! People might get ideas! And just in case you were wondering about the two globes you see atop the wall shelf, I scavenged those from a throw away pile in the school where I work. a teacher was getting rid of them. Thanks Tracy! I don’t even think she knows I took them, we’ll see if she ever ends up reading this, hehe.
And just two more before’s of this view- the before, and the before before. What a difference 5 weeks can make! Oh, and just so you know, 5 weeks can also make a difference in the rest of my house, which has been sorely neglected while I have been working away down here. You guys, my house is a wreck, so this weekend will be spent cleaning. But it was so worth it, so very worth it. Thanks to all of you who stuck with me through this challenge, I hope the mudroom makeover reveal was as enjoyable for you as it was for me. But I doubt it!


For your convenience, this post has affiliate links. If you click on them and buy an item, I will receive a small percentage of commission. By clicking the link, you are NOT paying any more than you ordinarily would, and you are helping support me in keeping this blog up and running, so thank you for that!
Just for a quick reminder, here is a collage I made for week one when I revealed my plans for this room. I have to say, I am pretty darn proud of myself right now for what I accomplished here. I am smiling from ear to ear! I absolutely am addicted to the feelings I get when I transform a space you guys! I put my heart into all of this, and I really hope it shows. This is definitely my passion, and thank God I have a husband who tolerates it all!

My Budget
I spent a total of $98.66
$15.99- 5 hooks (I used a gift card, so this didn’t count towards my budget)
$30.00- bead board wallpaper
$1.98- wallpaper smoothing tool
$6.78- wallpaper paste
$25.56- 1/4 in. x 4 in. x 4ft. poplar boards (quantity of 6)
$6.12- 1/4 in. x 6 in. x 4ft. poplar board (quanitity of 1)
$18.95- foam pad for bench cushion ( I used a gift card, so this didn’t count towards my budget)
$8.98- fabric for bench cushion
$5.50- velcro for bench cushion
$13.74- Behr paint for laundry closet doors
The total I have spent on this mudroom makeover was $98.66. Admittedly, being a DIY and home decor blogger, I had most of the paint on hand that I used for this space. So that saved me a lot. If I hadn’t had that paint on hand, I could not have finished the room for under $100. But even if I had bought every bit of the paint, I still did this room on a great budget. And hopefully you are inspired today to see all of the wonderful transformations of everyone who participated in this challenge and what they did for $100!

Good news! We are giving away $100 in Paypal cash to one lucky winner so you can try your hand at making over a space for $100! Just hop over to my Instagram feed, and search for the image you see below for all of the details!

If you like it, then you wanna put a pin on it!
Now, there are a whole slew of other bloggers who are also participating in this $100 Room challenge, so make sure to check out their spaces as well!
Awesome job, Nicki! It looks really great, very bright!!
Brittany Goldwyn recently posted…Tiny Laundry Nook Update #5 // IT’S DONE
Aww thanks so much Brittany! It was really fun participating for the first time, and really productive!
I love this beautiful and functional space so much! The trunk makeover may be my favorite thing to. I can’t believe how the white paint on the bench brightened up the space. The plaid material is perfect. Great makeover, Nikki!
sherry cole recently posted…$100 Room Challenge Reveal
Thanks Sherry, I am so in love with it, and it is functional too, so awesome!
I love it! It’s so bright and cheerful. Excellent work!
Thanks a bunch Liz!
Nicki, This is such a beautiful area and you did an excellent paint job on the trunk. Thank you, my friend, for the mention. I’m glad the cushion worked out for you!
Carol recently posted…Share Your Style #111
Thanks Carol! The cushion is a huge hit in this space, it wouldn’t be the same room without it!
Nicki recently posted…Changes in our Downstairs Bathroom
Omg, you really did this makeover within $100 budget. It is simply great. Good job 🙂
this space turned out so timeless & classy!
your space feel so happier and joyful! Just love it!
How sweet of you to say, thanks!
I’m loving that buffalo check! Nice work on the transformation!
Jess recently posted…Bright and Fun Modern Girls Closet
I did a double take when you said your “hall-tree” wasn’t one solid piece! It turned out beautifully, the wallpaper was a genius idea! Love the whole space!
Betsy @ Happily Ever After, Etc. recently posted…$100 Room Makeover Craft Room Reveal
Thanks so much Betsy, it is great to hear that because that was the goal!
I love this space, it’s so much brighter and fresh-looking! Great job!
Thanks so much! We are very happy to have it finished and being functional for our family!
I love it Nicki! It all came together beautifully!!!
Tracy recently posted…Boys Farmhouse Bedroom Makeover $100 Room Challenge Week 5
Thanks so much!
I was feeling the pressure last weekend too. I’m so glad you got it done, it looks amazing. I’ve never used beadboard wallpaper before, but want to check it out because I love beadboard.
Kati recently posted…Free Digital Backgrounds for April
It was really fun though, and I got a functional and pretty space in the end, so worth it!
It’s so bright and cheerful now! I love the bench with the checked cushion, and the hooks above it are cute and practical. Way to go!
Thanks so much! It’s already loaded up with stuff! haha
What a great transformation! I would have never guessed that the bench and upper shelves/cubbies weren’t part of a built in. Great job! And I LOVE the trunk! So cool. Thanks for sharing!
Thanks Amy, that is very kind of you to say!
This looks great! Very bright and cheery!
Thanks so much!
What a beautiful entry. I agree that painting those doors black made a world of difference. I love all the details, and that chest is amazing. I’m so glad you joined the challenge. Hope you enjoy this space for years to come 🙂
Erin @ Lemons, Lavender, & Laundry recently posted…$100 Room Makeover: Master Bathroom Reveal
Looks really great you did a good job with all that.