Sweet Parrish Place

I'm the girl with champagne taste and a tight budget

  • Home
  • About
    • About Nicki
    • Shop My Amazon
    • Contact Us
    • Blog Love
    • Link Parties
    • Advertise | Disclosure | Privacy Policy
  • Home Tour
    • Yellow Prairie House Tour
    • West Virginia Home Tour
    • Seasonal
  • Projects
    • Trashtastic Treasures
    • Holiday
    • Decorating
    • DIY
    • Crafting
    • Paint Projects
    • Cleaning/Organization
  • Style
    • Fall/Winter
    • Spring/Summer
    • Sweet Parrish Place Style
    • Tips/Tricks
    • Shop My Looks
    • Shop My Amazon
  • Travel
  • Lifestyle
    • Family
    • Decor
    • My Favorites
    • I’m Loving It
    • Personal
    • Shop My Amazon
  • Yellow Prairie House Tour

Faux Painted Subway Tile- The Tutorial

May 13, 2013 By Nicki 20 Comments

This is a step by step tutorial for how I created my faux painted subway tile in our kitchen.

This is a step by step tutorial for how I created my faux painted subway tile in our kitchen.
I hope you had a great Mother’s Day yesterday, and that you got spoiled for the day, just a little!  I had a pretty good day, with breakfast, some delicious dessert, and my favorite pizza.  All in all it was a low key and relaxing day, just what I needed!  Today’s post is all about my Faux painted subway tile.  I have a full tutorial for you that shows you step by step how you can create one for yourself!

I revealed my painted backsplash back on April 30th, and I am finally back today to give you a full tutorial on just how I did it!  Above is a picture of the finished product.  This project was very cheap!  I bought  a quart of paint, which I used on the tiles, and the trim in the kitchen and dining area, and I still have plenty left over.  For the grout lines I used the same paint I used on the walls in the kitchen and dining room.  I will tell you right up front that this took me a lot of time.  It was very tedious and took a lot of patience and a steady hand.  I spent way more time on this than I did money.  I am estimating that I spent at least 20 hours on this, working on it in my spare time, and LC helped me with 4 of the 5 sections.  And I used at least 2-3 rolls of painter’s tape.

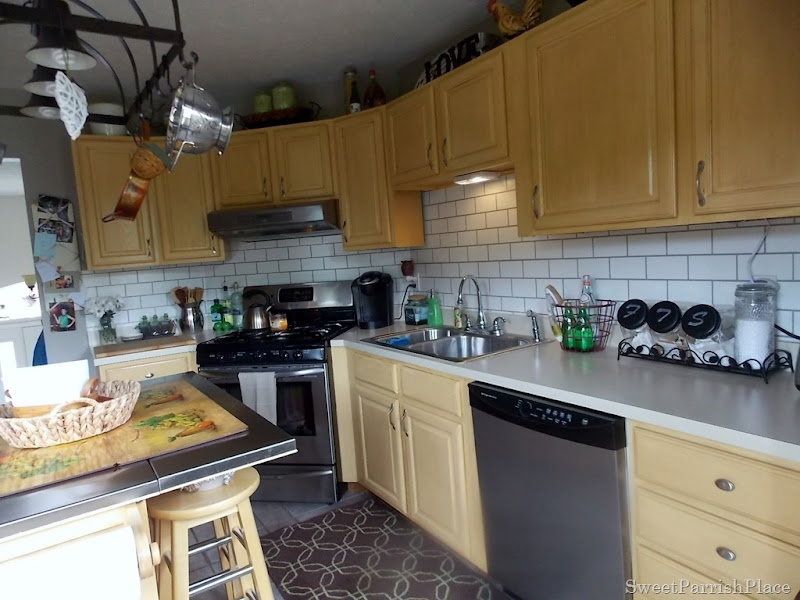
Update- 2/6/19- We have since made over this kitchen, but we kept the faux subway tile backsplash, and it has held up perfectly!  Here is a sneek peak!

Supplies you will need to create the faux painted subway tile:

2-3 rolls of painter’s tape
high gloss paint for the actual tiles ( I used Behr Premium plus in crisp linen white- high gloss)
eggshell paint for the grout lines ( I used Behr Premium Plus in garden wall- eggshell)
A long level
A yardstick
A pencil
Something to use as a spacer ( I swiped used one spacer that people use on actual tile, come on, it is just a tiny little piece of rubber, and they come in bags of hundreds or so, don’t judge me!)
An actual subway tile ( I just purchased one from Home Depot)

How to paint the Faux painted subway tile :

The very first step is to paint the entire backsplash area in the color that you want your tiles to be.  We went with Behr Premium Plus crisp linen white in a high gloss.  Next, you will do the horizontal lines.  I divided up my backsplash into 5 sections, and completed one section at a time.  It made it seem a little less daunting.  The first thing you will do is choose what pattern you want to use.  I just used a traditional pattern.  I started from the bottom left.  I held my actual subway tile up on the wall and marked it off with a pencil by drawing a short line above the tile.  Then I used a yardstick and a level to draw a long line going across the entire section.  After I had my line drawn, I taped directly under that line all the way across.  Once that line was taped off, I used my tiny spacer and held it up on the wall right above that line of tape, and made a small line, then repeated the same process with the yard stick and the level.  I then taped directly above the second line I had just drawn.  Once I got the hang of this, I found that I was able to get away with using the level and yardstick only on the bottom line, and I could eyeball where the top line needed to be.  It sped the process up a bit.  After I had all of the horizontal lines taped off, I painted.  See the picture below.  This will give you a good idea of what it should look like when you are starting.  Be sure to peel the tape off immediately after you paint those horizontal lines.
Faux painted subway tile
Now, I want to point out a mistake that I made that made things a whole lot more difficult for me.  Look carefully at the picture below.  Do you see that bottom horizontal line?  I had intentions to sit the actual subway tile directly on top of the backsplash, so there would only be a grout line right above the tile.  I messed up somehow, so there ended up being an inch under that bottom grout line.  That made my job way way more difficult, because I had to repeat it clear across the entire wall.  Anyhoo, you can now see in the picture below that my horizontal grout lines are finished.  I gave them time to dry, and started on the vertical lines.
Using your actual subway tile as a guide, hold it up on the wall in between the top two grout lines, and trace a vertical line along the side of the subway tile, all the way from one line to the other, and tape a piece of tape to the direct left of the line you just drew.    Next, hold your spacer up and make another line from the top line to the line below it, and tape to the direct right of that line.  Once you have your first two pieces of tape for the vertical lines, hold your piece of subway tile up on the wall, covering the right hand piece of tape, and draw another line, tracing down the side of the tile just like you did for the first vertical line you drew.  After that, you will just repeat that over and over until you are finished with that line.  See the picture below at what my first line looked like.  It was all taped and painted in this picture.  I peeled the paint off as soon as I took this picture, and began on the next line.
Faux painted subway tile
After you have your first row of vertical lines complete, you can use this as a base for your pattern.  Start on the next line right below the one you just completed, and look above at the furthest vertical line to the left.  Hold up your subway tile to the wall, with the middle of the tile being right in the middle of the vertical line above, and draw two vertical lines, one down each side of the subway tiles.  You can see in the picture below, that I skipped a line and taped off and painted the third row down, directly under the very top row.  I quickly figured out that it was quicker and easier for me to just go down one row at a time.  So you can do whatever works best for you, but I recommend starting on the top row and working yourself down row by row.
Faux painted subway tile
When I completed that very first section I was in a learning curve because I had not done this before. I taped off each vertical line in a row and then painted them, one row at a time. Once I had the hang of things, I started taping off all vertical lines in the entire section before painting. This made things go quicker. You can see in the picture below what one of the sections looked like before I began painting it.  This was all vertical lines taped off, not yet painted.  Please note that you need to take your finger nail and run it down firmly at the edge of each and every piece of tape.  If you get lazy and skip that step you will be sorry, because the lines will not be nearly as crisp.  I used three different kinds of painters tape for this job, Frog Tape and regular blue painter’s tape, and blue painter’s tape with edge lock.  I highly recommend the Frog tape.  It gives a much more crisp line.  When I ran out of Frog tape, I resorted to using regular blue painter’s tape on some of it, and I was sorry.  The lines were not as crisp and I had several touch ups to do.  I then used the blue painter’s tape with edge lock, because when I ran to Lowe’s to get more Frog tape, they were out of the size I needed.  I had much better results with the tape with edge lock, but I still found that my very best result was with the Frog tape.
Faux painted subway tile
This is the exact same section as above, after I had painted in between all of the tape.  I immediately began peeling off the tape.
Faux painted subway tile
You can see here if you look to the left of this picture that I had the horizontal lines finished, the vertical lines taped off, and the horizontal lines on the next section over taped off.  I painted the vertical lines in the section to the left and the horizontal lines in the section to the right at the same time.  This was when I had the hang of the way it worked, and felt much more comfortable with the whole process.
Faux painted subway tile


This is a shot of both sections right before I began painting the vertical and horizontal lines.  Again, I immediately peeled all of this tape off after painting.

Faux painted subway tile

This is a finished section.

Faux painted subway tile
And this is a picture of the entire wall, this is four sections.  There was one small section on the opposite wall to complete after these were done.
Faux painted subway tile
So, did you get all of that?  I hope I explained it well enough!  If you have any questions about this process, please feel free to ask me in the comment section below, and I will be sure to answer.  You can see more pictures of the faux subway tile painted backsplash here, here, and here.
This project is one of my best DIY accomplishments, and it has been featured on quite a few different blogs that I read!  You can check out all of the blogs I have had this project featured on here.   The was a long time finishing it, because I work full time and have three kids and had to do it is my spare time, but in the end, I am so happy with it!  I absolutely love it, and everyone who has visited my home has raved about it.  When you run your hand across it, it has a textured feeling, because I used a high gloss on the tiles, and an eggshell on the grout lines.  So it has a slight 3D effect, which I love.  It makes it look even more real.

I hope that I inspired you today to try something that you think you can’t do.  I put a lot of thought into this project before I actually began.  I debated back and forth for quite some time about how I would go about it.  In the end, after doing Internet research on whatever similar projects I could find out there, I decided to go with the method I just described above.  I had a difficult time finding similar projects, they seem to be few and far between.  I do have to say that my main source of inspiration for this project came from Sawdust and Embryos.  They paint backsplashes to look like tile for a living!  And they are amazing!  I did not use the same technique they used, because I could not find any painter’s tape that was narrow enough for a grout line.  I also read on another blog that used very narrow tape that when they went to peel the tape off it peeled the paint off right along with it, and they had to scrap the whole project.  In the end I decided to to use the method I used.  And the project was a huge success in my book!  What do you think?  Have you ever taken on a project similar to this?

Visual Marketing from Tailwind


You May Also Like:

faux painted subway tile

Faux Painted Subway Tile- Reveal

painted kitchen cabinets

Painted Kitchen Cabinet Reveal

Filed Under: Backsplash, Before and After, DIY, kitchen, My Home, My Projects, Paint Projects, Uncategorized

Comments

  1. Vel Criste says

    May 13, 2013 at 11:18 pm

    this is super cool Nicki,still can't believe it's DIY. Love it!

    Reply
    • Nicki Parrish says

      May 17, 2013 at 9:45 pm

      Thank you so much!

      Reply
  2. Emilia Bellflower says

    May 14, 2013 at 10:37 am

    Your painted subway tiles looks so real. Your hard work paid off completely. It looks fab:)

    Reply
    • Nicki Parrish says

      May 17, 2013 at 9:45 pm

      Thanks! I am so glad it is finally finished.

      Reply
  3. G AJ says

    May 14, 2013 at 2:38 pm

    WOW! Very impressed. your patience is astounding!!!

    Reply
    • Nicki Parrish says

      May 17, 2013 at 9:45 pm

      Thank you! I honestly don't know if I would do it again! But I am glad I did it!

      Reply
  4. My name is Rita says

    May 17, 2013 at 6:38 am

    Wow! I love your kitchen! the "subway tile" looks a making! If you get a chance, please share this on my linky party: http://suburbsmama.blogspot.com/2013/05/sunday-link-party-7.html

    Reply
    • Nicki Parrish says

      May 17, 2013 at 9:46 pm

      Thanks I will do!

      Reply
  5. Marty Walden says

    May 17, 2013 at 11:53 pm

    That is a ton of work but it looks great! That's way too precise for me. I leave that detail work to my husband!

    Thanks for linking up at Home{work} Wednesday at our first party! Hope you left a comment and entered the giveaway!

    Reply
    • Nicki Parrish says

      May 18, 2013 at 12:33 am

      Thank you Marty! I am the opposite, my husband leaves the detail work for me! I am glad you like it!

      Reply
  6. Carla says

    May 30, 2013 at 6:14 pm

    Did you seal it with anything? It looks great and being gloss is probably pretty easy to clean but maybe a poly sealer would help.

    Reply
  7. Connie says

    January 30, 2017 at 3:33 am

    OK, you have inspired me! After looking at 1,000’s of painted bcksplashes, your project is what I have settled on due to colors and shapes, can you pls tell me what color you used for the gray “grout”? I have my frog tape, pencil, tape measure ready to go. Thamk you!

    Reply
    • Nicki says

      January 30, 2017 at 10:26 am

      Wow, that is awesome! I really hope it works out for you. It is a tedious job, but it’s worth it. People who are standing in my kitchen don’t know it’s not real unless they touch it. I am going to ve renovating the kitchen this Spring, and I don’t plan to change the backsplash because I like it so much.

      Reply
  8. Anita says

    May 8, 2017 at 8:59 am

    A great result! It looks superb. Has the paint held up to the battering of the kitchen wall?

    I’m going to do this on the back wall of my son’s IKEA play kitchen. Being a DIY enthusiast myself, I considered your method and I think I would shortcut the taping somewhat to speed things up. Personally, I will try doing my vertical measurements (for the horizontal lines) all up the left side and then all up the right side (a tile height mark then a grout height mark, repeated), then just tape straight across each line left to right in one fell swoop (maybe some middle markings would be needed too for guidance). I’m not going to rule lines first, just tape based on the measured marks at each end.

    Once these are painted in, I’ll remove the tape and when dry I will start on my vertical lines. For me, it would be easier to tape the whole thing in repeating vertical lines a tile width apart, then just mark the tape on each level for which ones to paint and which ones not to paint. This way, I don’t have to tape them all painstakingly individually, I just tape the whole height top to bottom and only pain that every second one, alternating. Does that make sense? Seems faster to me to tape a whole section but only paint what is needed.

    I love your idea of the two contrasting textures of paint! A super high gloss white and a matte, even gritty grey for the grout. It would fool some even up close, I imagine. Dulux even has textured paint at the moment like this; I suppose you could also add some fine sand or grit to the paint if you’re a perfectionist like me and want that real grout look.

    Really love what you did here.

    Reply
    • Nicki says

      May 8, 2017 at 4:21 pm

      Thanks for the comment! Yes, my faux subway tile has held up wonderfully, it still looks brand new! And it does fool people all of the time! As for the method you are describing, you should do whatever works for you that you can work out in your own mind! I read tutorials on this as well, but I did it the way it seemed feasible to me at the time. I think there are various ways it could be done with the same beautiful result! Good luck with yours!

      Reply
  9. Nicki says

    July 15, 2019 at 9:47 am

    I wish I could answer this question! This was written in the early days of my blog, and I am not sure why I did not include the paint color in the post! I no longer live in this house so I can’t remember what the color was.

    Reply
  10. Adaku says

    September 16, 2020 at 6:51 pm

    I just came across your site because I’m also interested in painting on subway tiles. I have a question. Would you recommend first painting the area the color of my ‘grout lines’, then measuring/marking the subway tiles measurements, then painting in the subway tiles? I’m just trying to figure out which way is less tedious but then again, why would I waste all that paint if the majority wont be shown.

    Reply
    • Nicki says

      September 19, 2020 at 9:50 am

      Hello! I painted on my white for the tiles, and then painted the grout lines. So that is really the only method I can speak to. I feel like either way you go it is a super tedious job, and in my mind, I don’t think it makes much of a difference either way. It is tedious, but in the end it is very rewarding! Good luck!

      Reply

Leave a Reply Cancel reply

Your email address will not be published. Required fields are marked *

CommentLuv badgeShow more posts

This site uses Akismet to reduce spam. Learn how your comment data is processed.

Hi, I'm Nicki I'M THE GIRL WITH CHAMPAGNE TASTE AND A TIGHT BUDGET. I'M SO GLAD YOU'RE HERE!
  • Bloglovin
  • Facebook
  • Instagram
  • Pinterest
  • Twitter

VIP Real Estate

NO PLACE LIKE HOME

No Place Like Home

ORC Bathroom Makeover

Kids/Guest Bathroom Makeover

One Room Challenge Week 6 Kids-Guest Bathroom Reveal

It's week 6 of the One Room Challenge and this is … [Read More...]

ARCHIVE

ORC

Shop My Faves!

Spring Trends
PicMonkey Photo editing made of win
Get Sponsored by Big Brands

SheKnows

Linquia Influencer

FYI

Find Your Influence

INSTAGRAM

Recent Posts

  • Cozy and Casual Christmas Tour | Part 2
  • Casual and Cozy Christmas Tour | Part I
  • Farmhouse Bathroom Makeover Progress | $100 Room Challenge

Archives

Find It Here

Copyright © 2022 · Sweet Parrish Place