Ever looked at your old, worn-out bar stools and thought they were ready for the trash?
Think again!
Those tired-looking seats are actually hidden gems waiting for their moment to shine.
With just some paint, creativity, and a little elbow grease, you can change any dull bar stool into a stunning piece that looks like it came straight from a designer showroom.
If you’re working with wood, metal, or even plastic stools, the possibilities are innumerable.
From bold colors to graceful finishes, these makeover projects will inspire you to see furniture in a whole new way.
Get ready to turn your forgotten bar stools into show-stopping masterpieces!
Why Paint a Bar Stool?
Before you plunge into your painting project, take a good look at what you’re working with!
Check if your stools are sturdy enough for a makeover; wobbly legs or significant damage may need to be addressed first.
Figure out what material you have: wood, metal, or fabric seats each need different prep work and paint types.
Don’t overlook those garage sale finds or hand-me-downs from grandma; they often have the best bones for stunning makeovers.
Sometimes the ugliest stool makes the most dramatic before-and-after story!
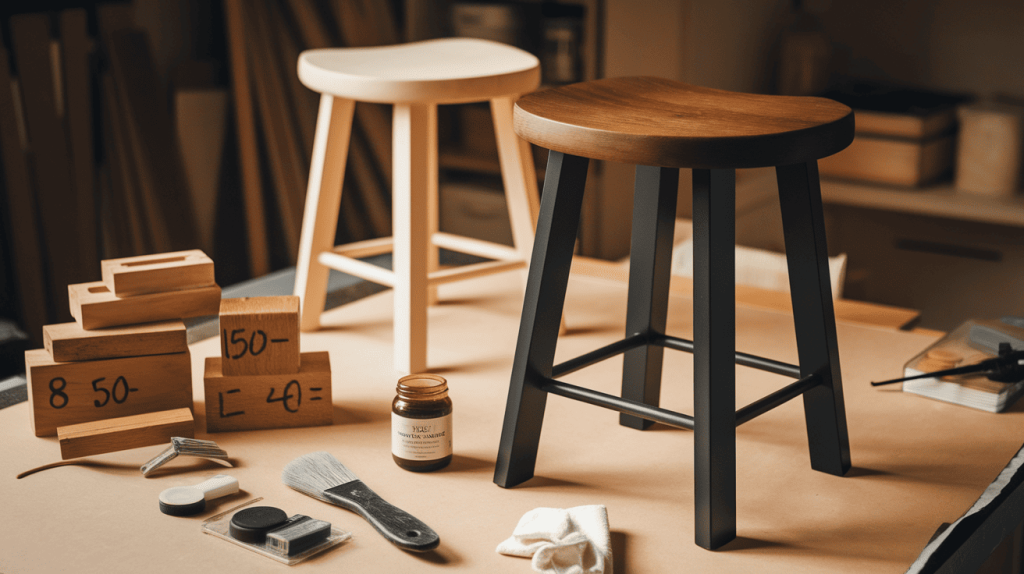
Materials You’ll Need to Paint Bar Stools
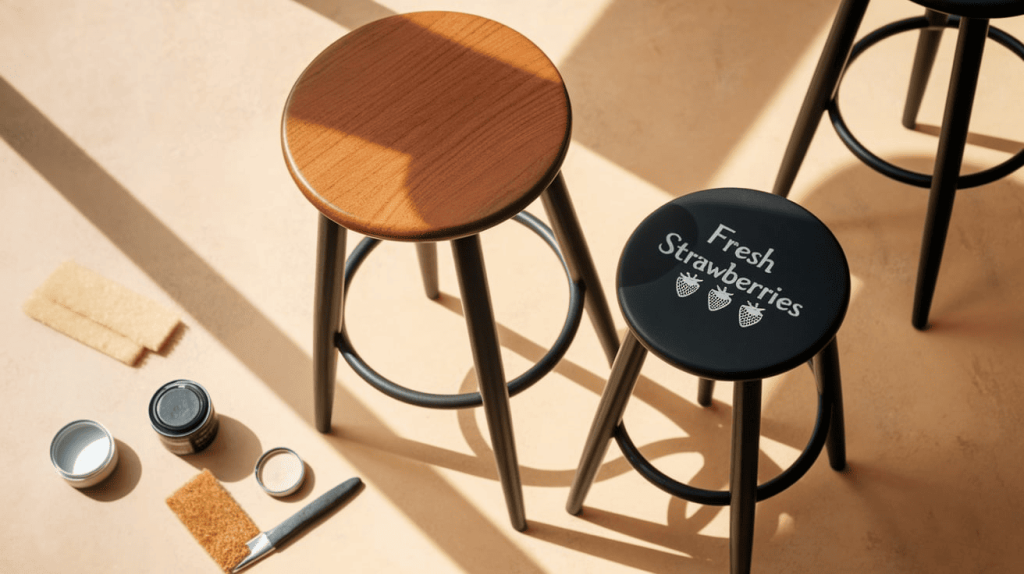
Upcycle your old stools with paint, stain, and love. It’s perfect for refreshing your kitchen or honoring a sentimental piece.
Here is the list of all the required materials-
| CATEGORY | ITEMS | USE |
|---|---|---|
| Sanding | Orbital sander | Smooths stool surfaces |
| Sandpaper (80, 150, 400 grit) | Levels and polishes surface | |
| Tack cloth or damp rag | Removes dust after sanding | |
| Staining | Wood stain (Minwax, Special Walnut) | Adds warm color to stool tops |
| Sponge brush or cloth applicator | For applying stain | |
| Old T-shirt or lint free cloth | Wipes off excess stain | |
| Finishing | Wood finishing paste or wax | Seals and protects the stained wood |
| Lint free cloth | Buffs wax to a smooth finish | |
| Clear wax and soft rag or wax brush | Seals paint and adds a smooth protective finish |
Step-by-Step Guide to Paint Bar Stools
If you have old bar stools that need a refresh, painting them is a simple way to give them new life, and this step-by-step guide will walk you through the process from sanding to sealing.
You do not need fancy tools or experience; just a little time, the right paint, and a bit of patience.
Step 1: Prepare the Stools
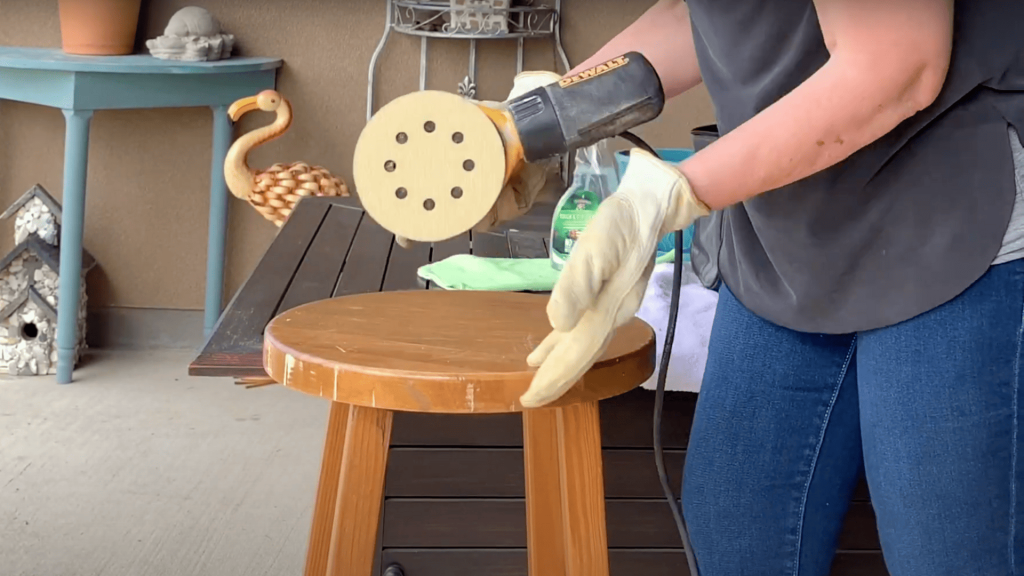
Work outside if possible to avoid fumes and dust indoors.
Make sure all stools are clean and dry.
Use an orbital sander to smooth the stool tops:
- Start with 80 grit for heavy removal
- Move to 150 grit for smoothing
- Finish with 400 grit for a soft surface
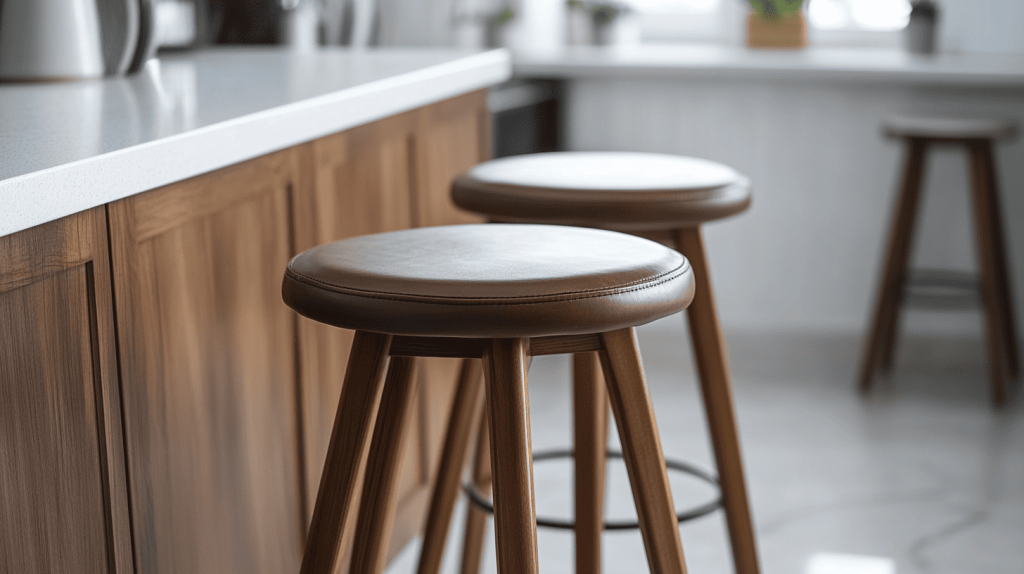
Only the tops of the bar stools were fully sanded. The keepsake stool was lightly sanded all over.
Step 2: Stain the Tops
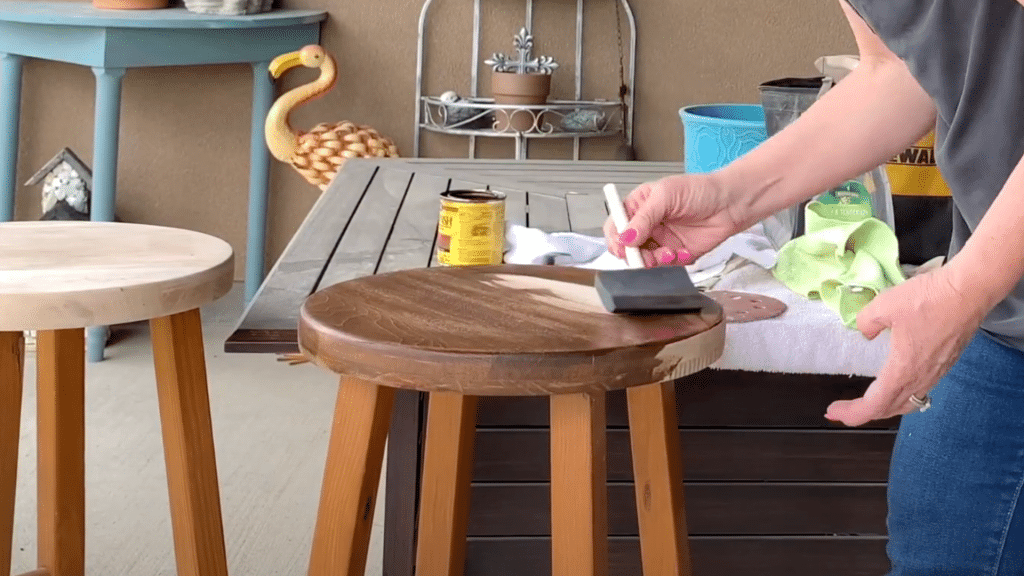
Use a sponge brush to apply Minwax Special Walnut stain to the bar stool tops:
- Apply a generous coat
- Wipe off excess with an old T-shirt or soft cloth
- Let it dry completely
Once dry, seal with Wood finishing wax:
- Let it sit for 15 minutes
- Buff with a clean cloth
- Apply a second coat if needed
After you are done, you can proceed with the other step, which would be painting the legs.
Step 3: Paint the Legs and the Keepsake Stool
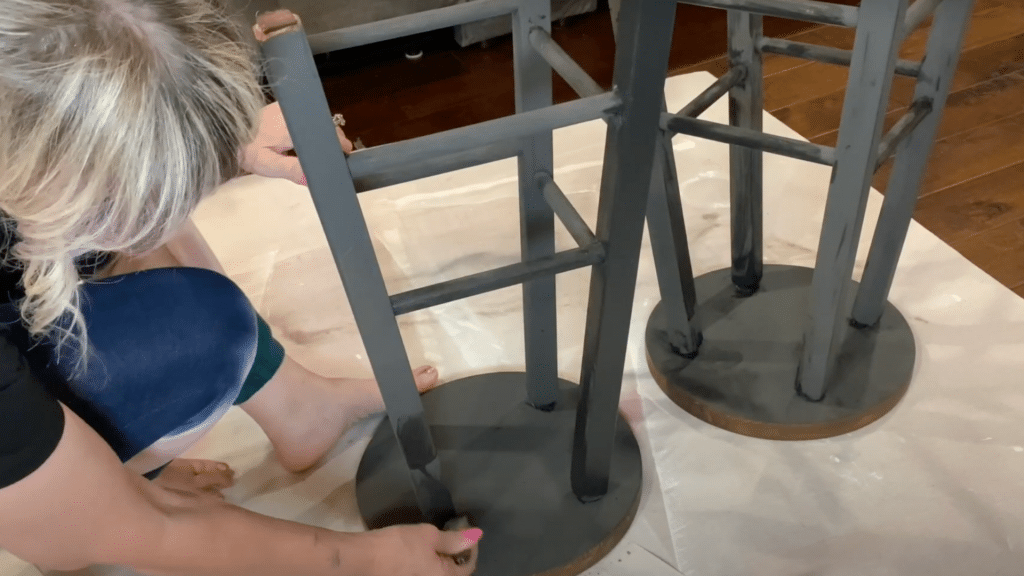
Paint the bar stool legs with DIY Paint in Black Velvet:
- Apply one coat and let it dry
- Add a second coat for full coverage
- Finish with clear wax for protection
Paint the keepsake stool with FolkArt Rich Black:
- Lightly sand the whole stool
- Apply one even coat
- Let it dry fully before moving on
You can use your own paint or design to customize your bar stool.
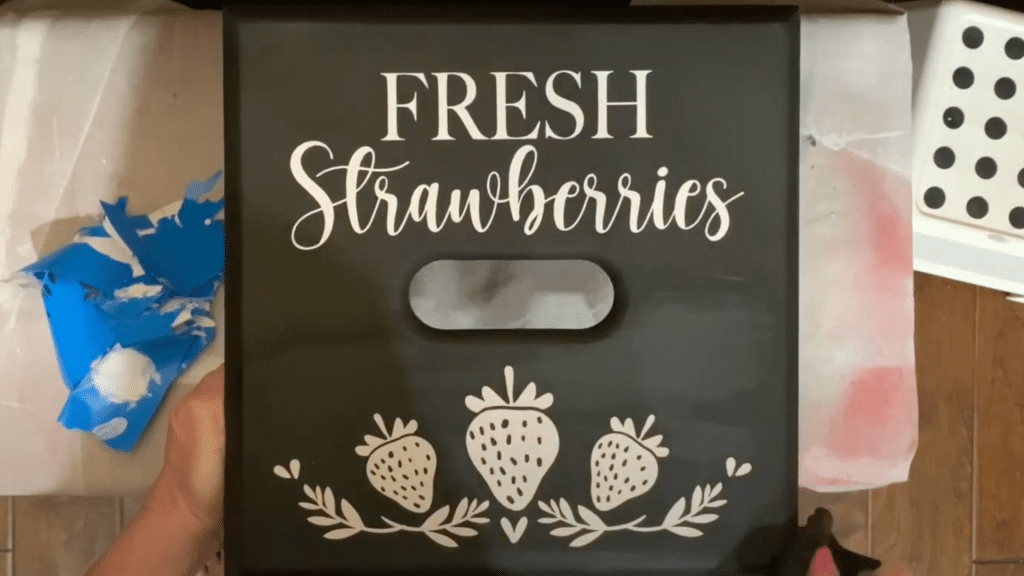
Step 4: Add the Stencil Design
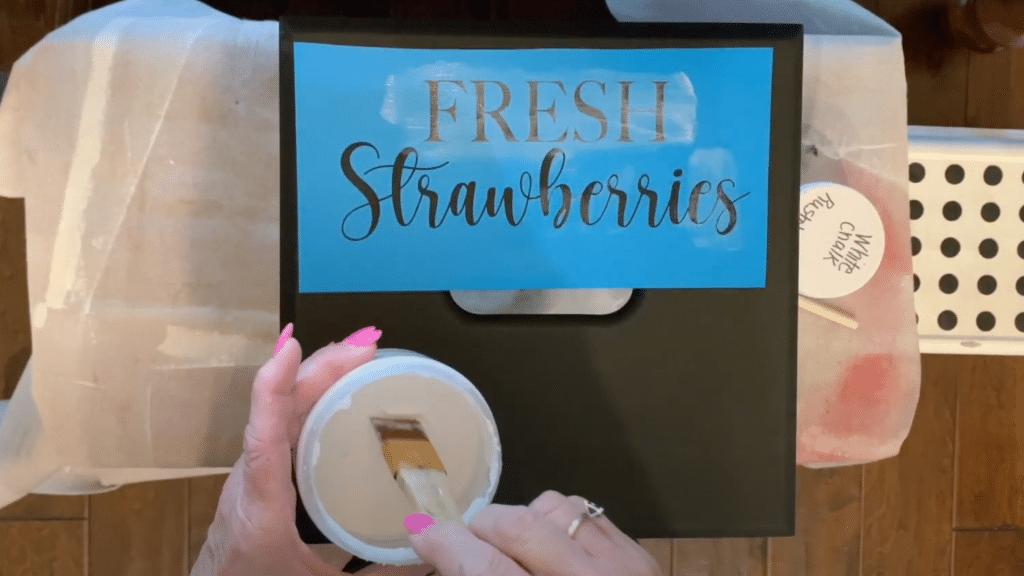
For the keepsake stool, use a Cricut or pre-made stencil to add custom text or images:
- Brush on a thin coat of Mod Podge to prevent bleeding. Let it dry
- Use a stencil sponge to apply white chalk paint
- Remove the stencil carefully while the paint is still wet
- Use tweezers for small pieces
- Touch it up if needed
This will add a touch of personalization to your bar stool.
Step 5: Seal and Finish
Apply a clear wax coat to all painted surfaces:
- Let it sit for a few minutes
- Buff with a cloth until smooth
- Allow everything to cure and dry fully before using
And you are done with renovating your bar stool.
Watch the Full Makeover Here
If you’d like to see the full process in action, you can watch the original video here by Late Knight Creations.
How to Get a Professional Finish on Painted Bar Stools
If you want your painted stools to look clean and polished, a few extra steps can make all the difference.
With the right tools and a little patience, you can achieve a professional finish that lasts and looks beautiful in your space.
Here’s how to do it the right way. Start by sanding thoroughly using multiple grits, moving from coarse to fine for a smooth and clean surface.
- Apply stain or paint in thin and even coats, allowing each layer to dry fully before adding another.
- Avoid rushing the process, as drying time makes a big difference.
- Use quality brushes or sponge applicators to reduce streaks and brush marks.
- Once the paint or stain is dry, seal your work with a good finishing wax or topcoat.
- Buff well for a smooth and long-lasting finish that looks clean and polished.
And just like that, you will be able to DIY your bar stool professionally.
Tips for Beginners
Proper maintenance can keep your stools looking great for years, ensuring they remain a functional and stylish part of your home.
With just a few simple steps, you can protect the finish, prevent wear, and keep them sturdy and comfortable.
Here are some essential tips to maintain the beauty and durability of your stools.
- To keep your stools looking fresh and lasting longer, regular maintenance is key.
- Clean them with a soft cloth to remove dust and spills, avoiding harsh chemicals that can damage the finish.
- Apply a protective sealant or wax every few months to keep the surface smooth and resistant to wear.
- For wooden stools, check for cracks or loose joints and repair them promptly to prevent further damage.
- Avoid placing heavy items on them or subjecting them to moisture, which can warp the material.
- Finally, rotate stools occasionally to ensure even wear and maintain their overall appearance
A little care while painting your bar stool ensures it stays functional and stylish for years.
Final Thoughts on Painting Old Bar Stools
Refreshing old stools is easier than you think.
With a bit of sanding, staining, and painting, even worn or mismatched stools can look brand new without losing their charm.
If you’re on a budget or working with a sentimental piece, this process is simple and rewarding.
Be mindful of drying times, use high-quality materials, and take your time to achieve a smooth finish.
If it’s updating an old kitchen stool or restoring a beloved seat, a little care goes a long way in making your stools look great and feel like they belong in your home.
Ready to refresh your stools?
Leave a comment and let us know how it goes!