
Hey friends! Today is week three of the One Room Challenge! Well…It is for the designer participants, I’m a guest participant, but I’m posting a day early. I have another post scheduled for tomorrow. We made progress in our downstairs bathroom makeover by making and installing these DIY weathered wood shelves.
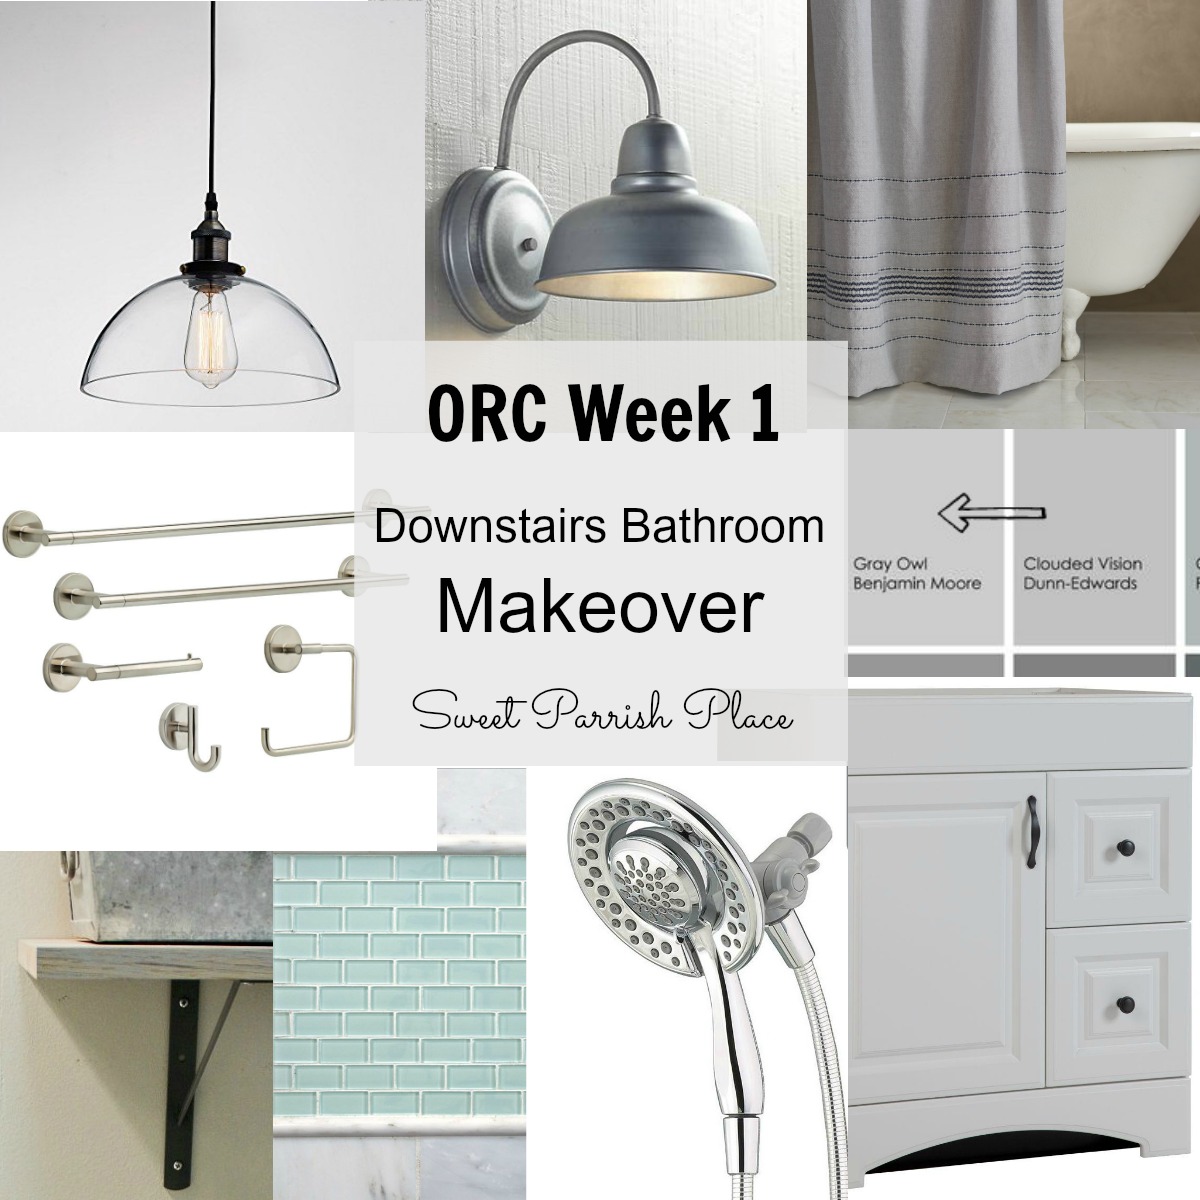
If you would like to see the before pictures of this space,and my inspiration board for the room, click here. You can also read my week 2 post all about our new bathroom vanity and sink. You can also check out my first time participating in this challenge in the fall with our guest/kids bathroom makeover.
If you don’t know what the ORC is, The One Room Challenge™, currently in its eleventh season, is a widely anticipated biannual event every April and October. Each round, twenty design bloggers take the challenge and transform a space. It is hosted by Calling It Home and House Beautiful. Wednesdays is the day for the design bloggers to go live with their progress, and Thursdays is the day for all the guest participants to go live.
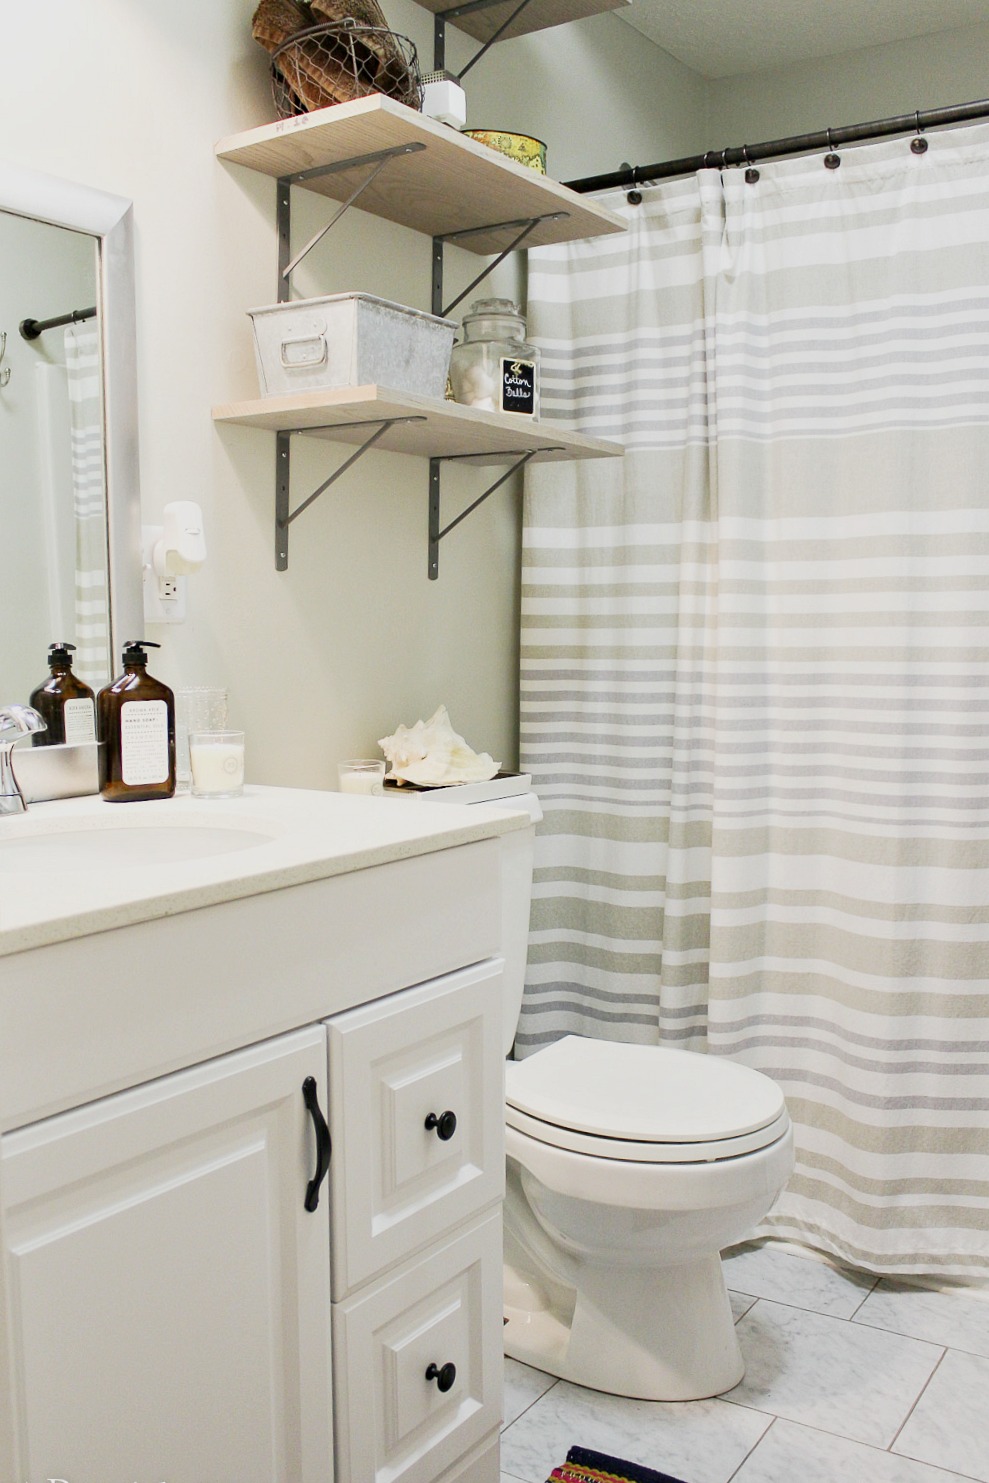
Let me start by saying that these shelves are not officially styled yet. I kind of stuck everything that was already in this room, and a few new items I have gathered for the new space so far, and gave them all a place to live so they weren’t scattered elsewhere in my home and so my son could use this room and find the things he needs to get ready.
In any event, this space looks so much more like home now that the shelves are up, check out the same spot before shelves!

For your convenience, this post has affiliate links. If you click on them and buy an item, I will receive a small percentage of commission. By clicking the link, you are NOT paying any more than you ordinarily would, and you are helping support me in keeping this blog up and running, so thank you for that!
DIY Weathered Wood Shelves
These shelves are so easy to make that it is almost cheating to call them DIY, ha! Sooooo simple you guys! I have made similar ones before, and I will do it again, I am sure! All you have to do is pick out some wood you like the size and look of, and have them cut to the length you want right in the store! I bought mine at Home Depot, and they cut them for us right there on the spot.
The wood I chose was oak. But you should choose whatever type of wood you feel attracted to.

After you get them home, you need to sand them down until they are smooth. To achieve the weathered look of my shelves, I just painted them with one coat of WOCA exterior oil. Why exterior oil, you ask? Well, simply because I already had a bit of this left over from my wooden spool table makeover.
I stopped at one coat because I loved they way they looked just like that, but if you want to see what two coats would look like, take a look at my spool table, linked above. Still a gorgeous finish, but more full coverage.
I bought very inexpensive slate grey brackets to attach the DIY weathered wood shelves to the wall. I liked them because I thought they had an industrial look. Simple and no fuss at all.

Guess what else? We got our farmhouse light installed over the sink! And I love it with all of my heart. Well, I am holding out on you this week, and will share it maybe next time. But you can see in the picture below what a difference this light makes in this bathroom. It is like night and day, and my son keeps raving about what a great difference it is when he gets ready in the morning!
Very soon, this wall behind the sink will be covered with sea glass subway tiles. That is why the mirror is currently leaning against the wall.

With brackets like this, when I attach the shelves to the wall, I first use a drill to attach the brackets to the shelves. And then attach them to the wall. It works better if you can use two people. One to hold the shelf and one mark the spots where you should drill the brackets into the wall.
Here, you can see a glimpse of the rug that I am going to be using on the floor. The macrame wall weave that I am having made will also bring in some of the same colors that are in this rug. You might be wondering about my color scheme in this space, with the sea glass tiles and then the navy rug with a touch of Pink Yarrow. I think it is all going to work together.
The sink and vanity, the walls, the floor, and the shelves are all very neutral, so I feel like I can go a little crazy with the colors I am bringing into this space. I am also bringing in some pretty navy blue bath towels, which you can see a glimpse of in the mirror below. I like the navy with the sea glass, and the Pink yarrow is just a tiny accent that I think is a lot of fun! Hopefully in the end, the room will look awesome!
If you like it, then you wanna put a pin on it!

Before I go, let’s review my list for the downstairs bathroom makeover.
TO DO LIST
Replace sink and vanityInstall light over sinkDIY wall shelvesReplace shower curtain- Replace shower head
- Replace accessories and hardware
- Have a Wall Weave made for the space
Replace bathroom rug- Replace ceiling light
- Paint bamboo shelves for space
- Install glass subway tile backsplash
Paint walls
Source List
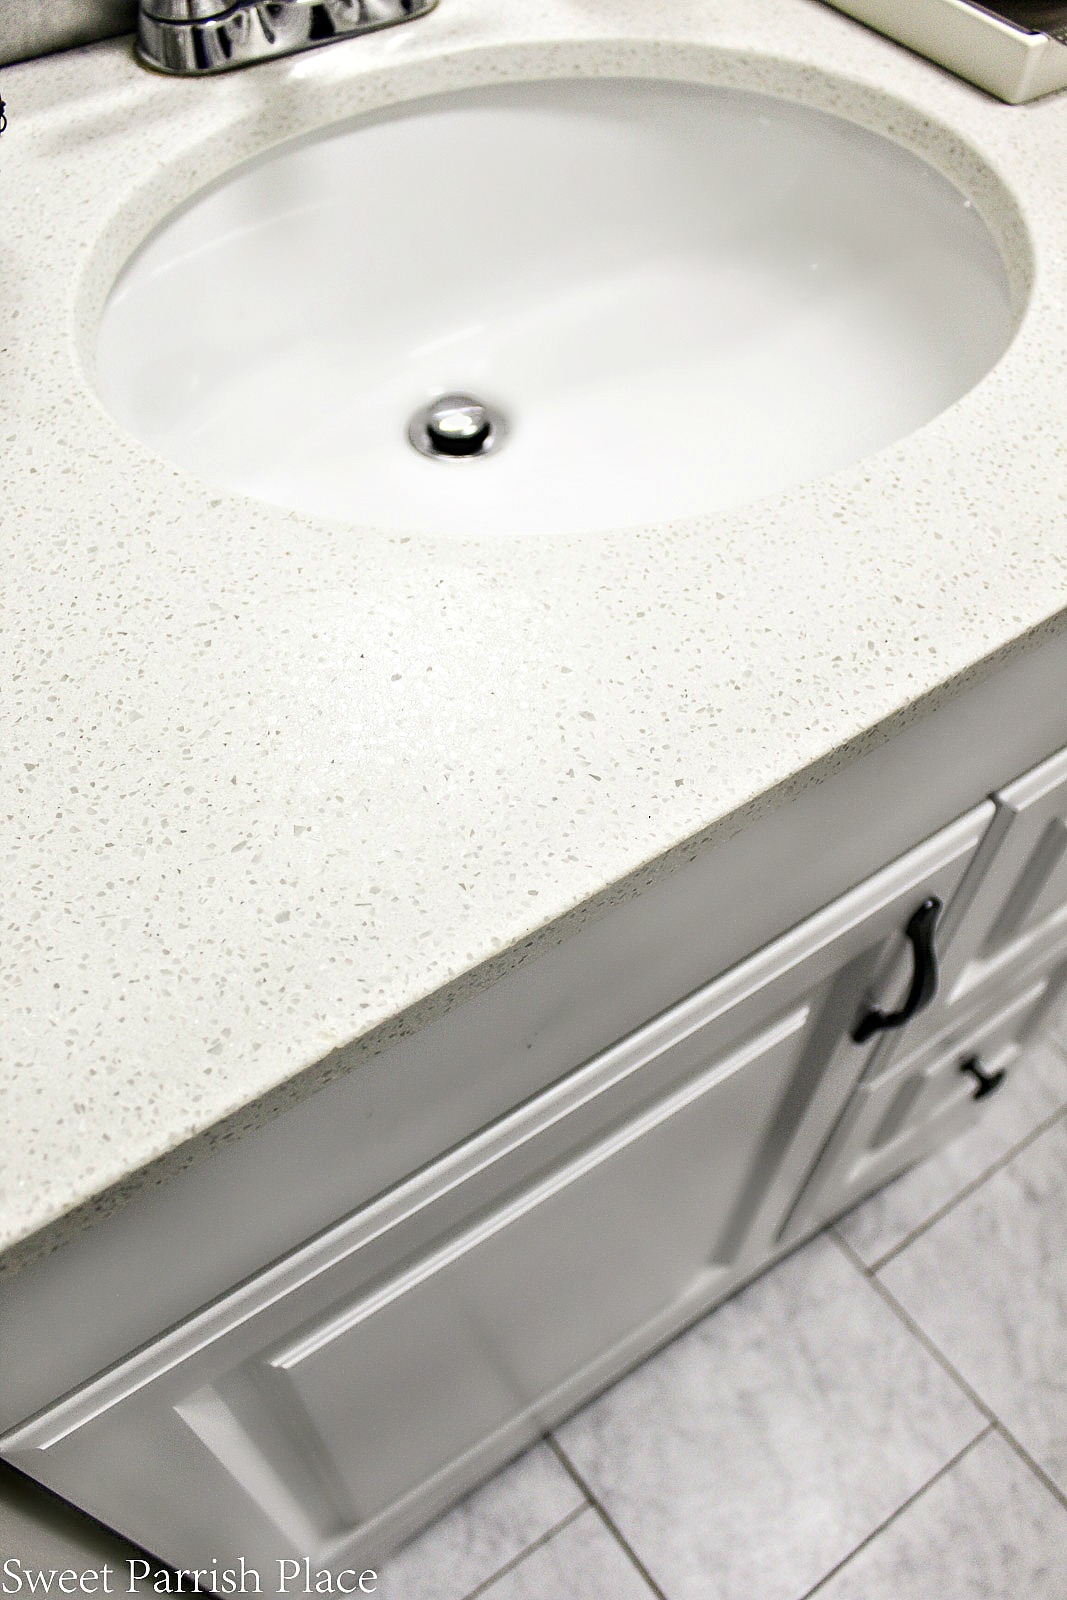
Quartz vanity top- Craigslist
I sure hope you will stick around to see how this bathroom makeover turns out! Next week, I hope to show you our farmhouse light over the sink, and our progress with our subway tile installation. What do you think of our progress so far in this space?
I will tell you, my 16 year old son who uses this room is super happy with the changes. And since he is the one who uses this bathroom, I’m glad he is enjoying it. Now his friends can stop making fun of him for his pink bathroom. I love the way the DIY weathered wood shelves look in the space, and they are going to be so functional for my son to add some much needed storage in this small bathroom.
As for the reason why I posted this a day early, it is because I am joining together tomorrow with 5 other bloggers to bring you a fun style blog hop! 6 of us will be showing you our ideas on ways to style white pants. so if you love white pants, or style, or both, be sure to check back tomorrow to see how each of us style a pair of white pants. It should be fun!
Do you have champagne taste and a tiny budget too?
Love fashion, DIY, crafting, all things vintage and thrifty?Stick with me, I’ve got you covered!
Sign up to get my posts delivered to your inbox here
Follow me here:
![]()
You may also like
Downstairs Bathroom Makeover | Before and Plans
One Room Challenge Week 2 | Downstairs Bathroom Makeover
I’m sure you are loving having extra shelves in the bathroom. Those look great and seem like a fairly simple DIY project anyone can do on their own. Thanks for linking up with us at the #HomeMattersParty this week!
Thanks so much for hosting Nicole! Fun party!