I hope you were able to enjoy your Holiday weekend! I am off today and enjoying a lazy Monday morning. LC never has Memorial Day off, which sucks, so I usually spend the day doing housework. I don’t mind because I haven’t done a stitch of laundry all weekend. The ironic thing about being a blogger is that I don’t get nearly as much housework done as I used to. I am busy working on projects, and then blogging about them, and my general housework goes to crap! The projects I would be probably be doing anyway, but it takes a lot of time to actually blog about them! Before blogging, my house was a lot cleaner, but that’s OK, because I am enjoying what I am doing.
Update: Come see the Deck Summer 2015
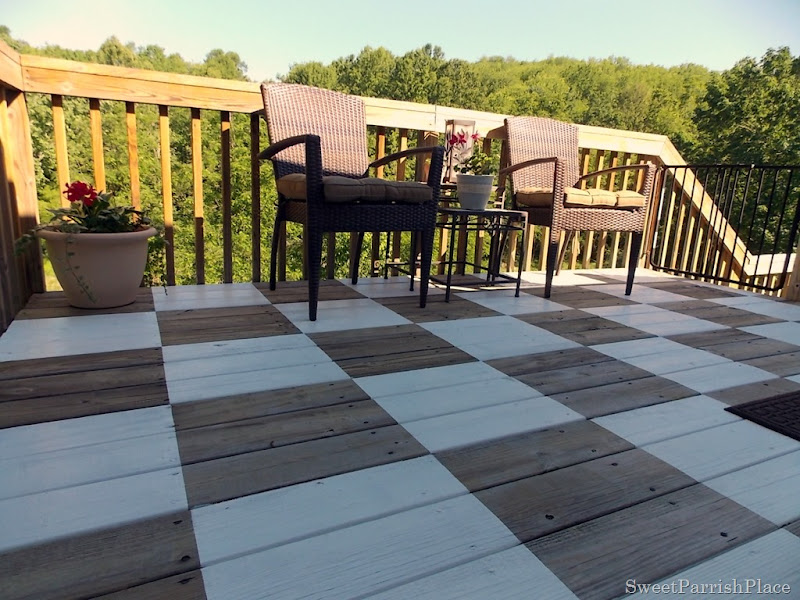
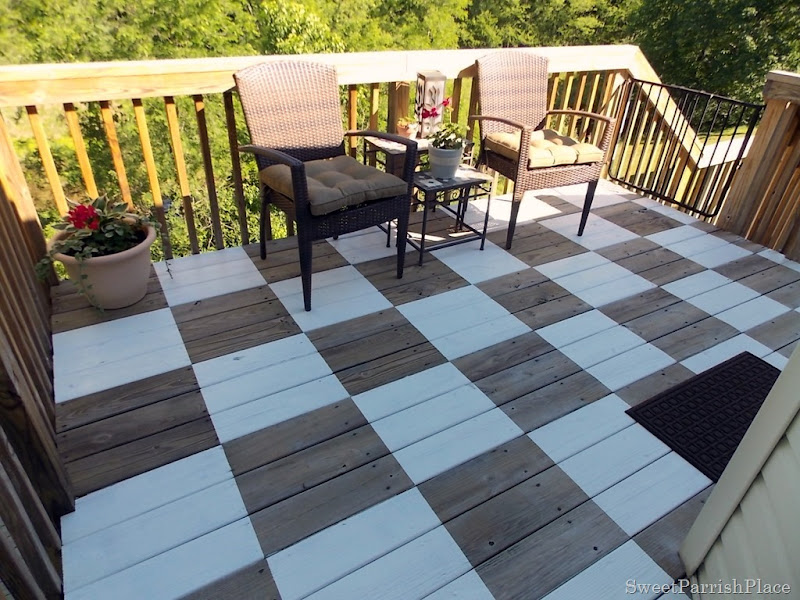
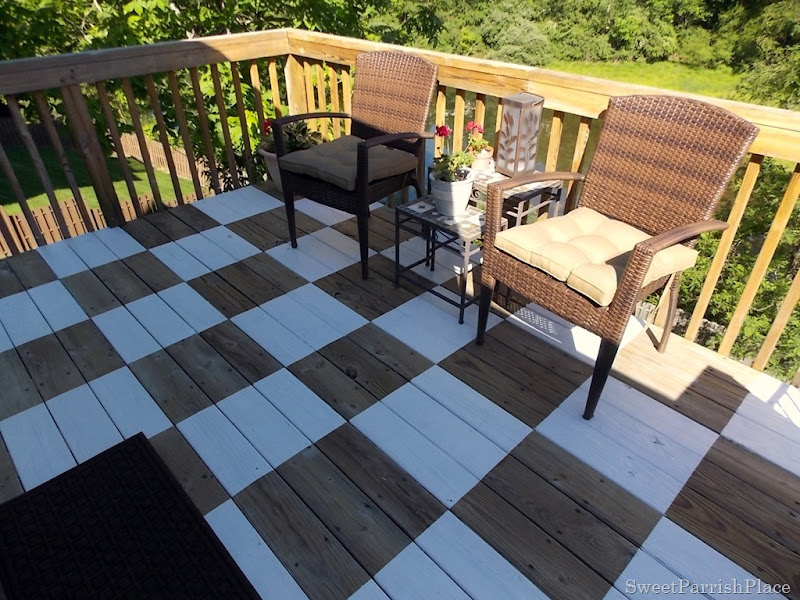
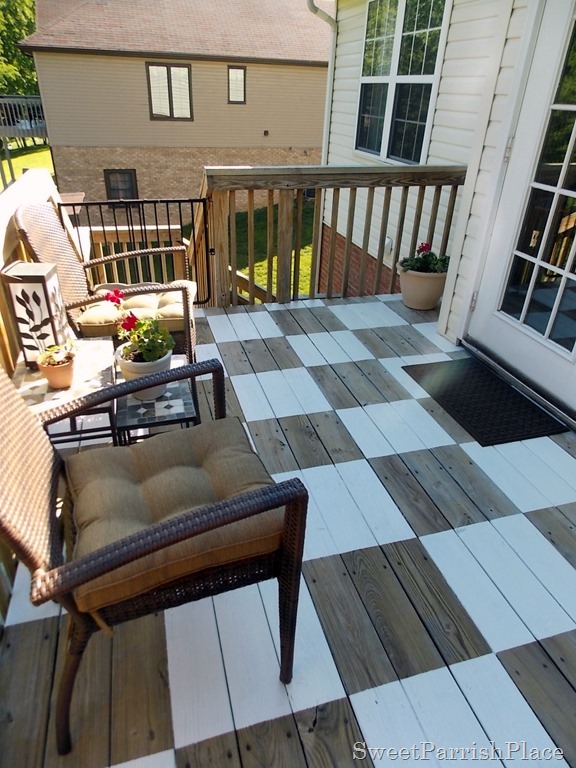
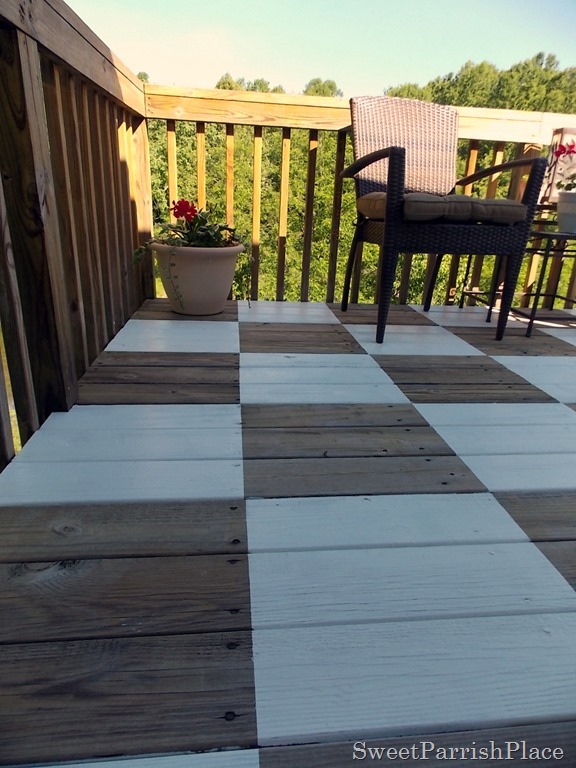
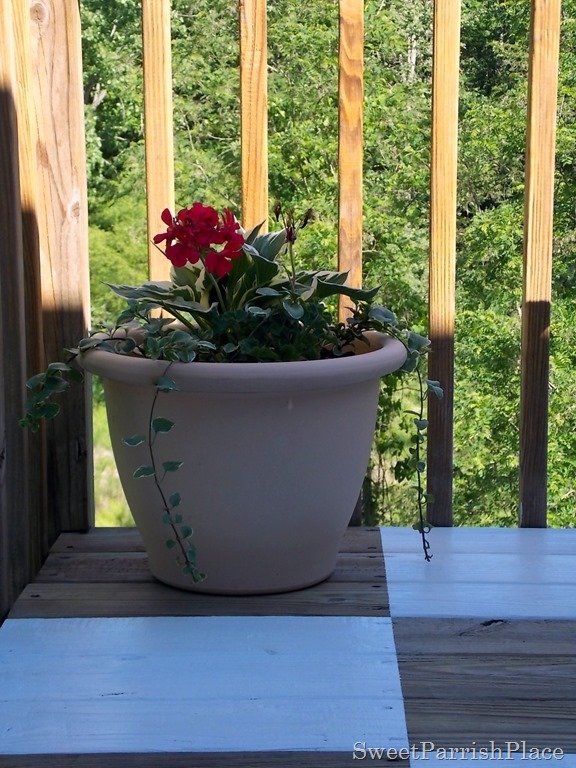
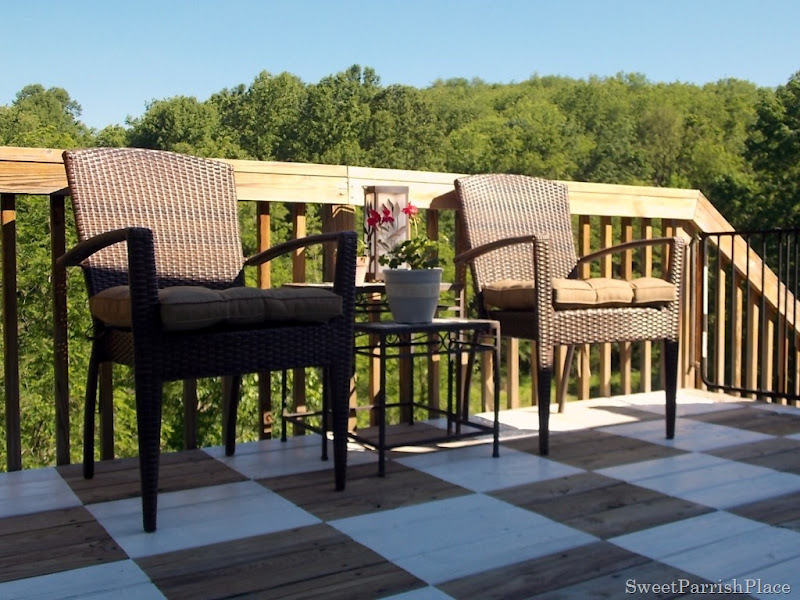
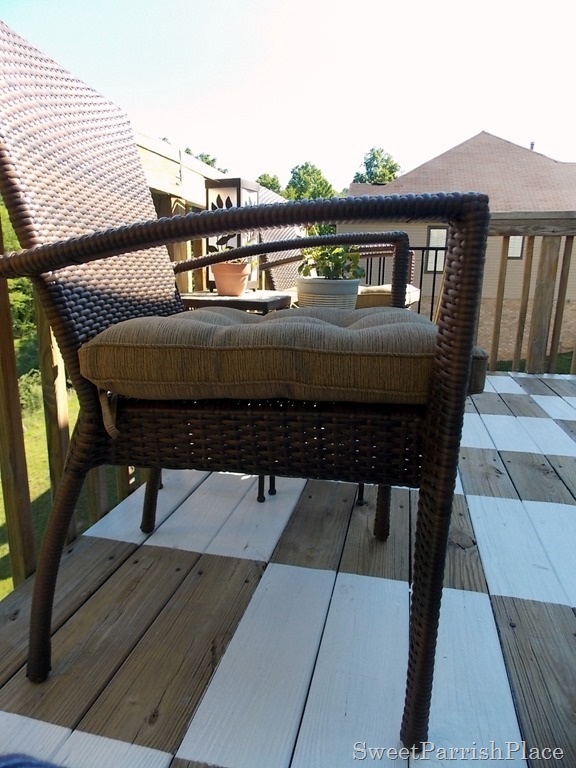
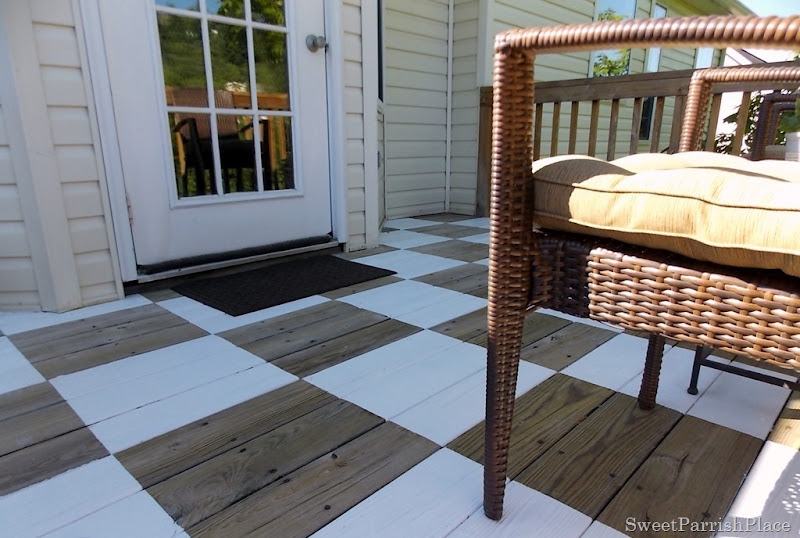
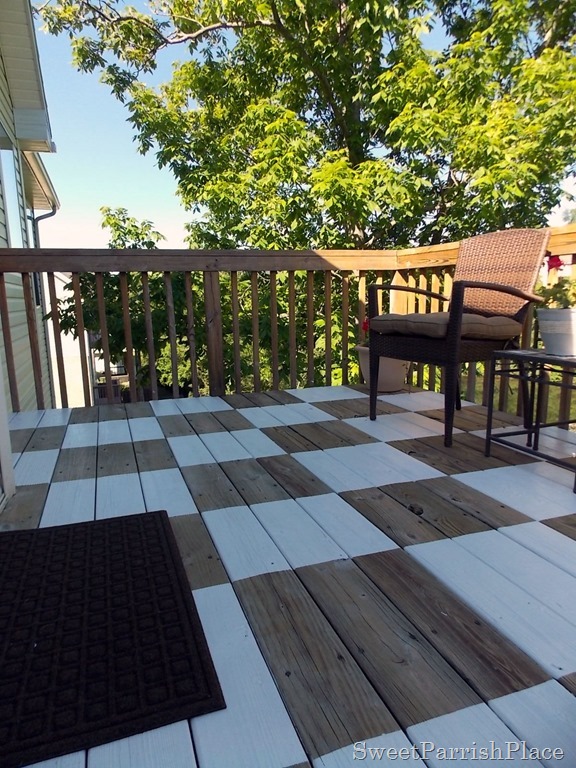
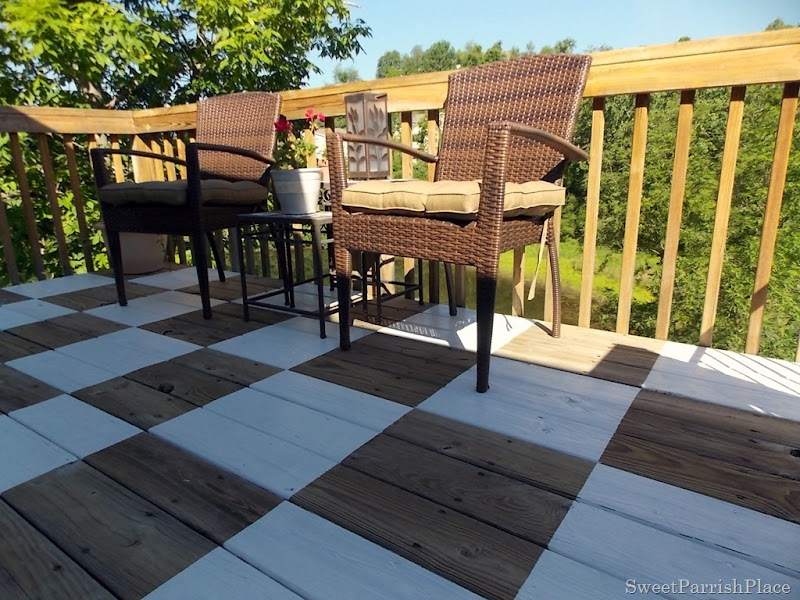
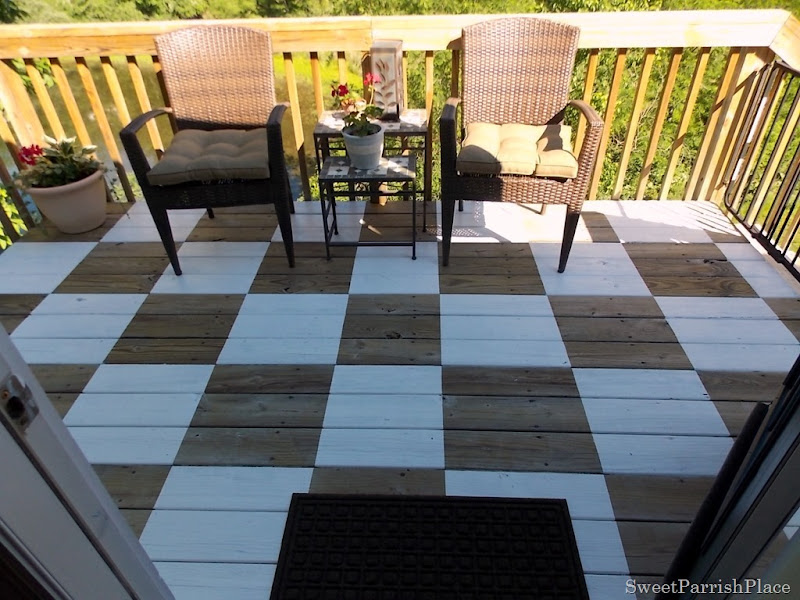
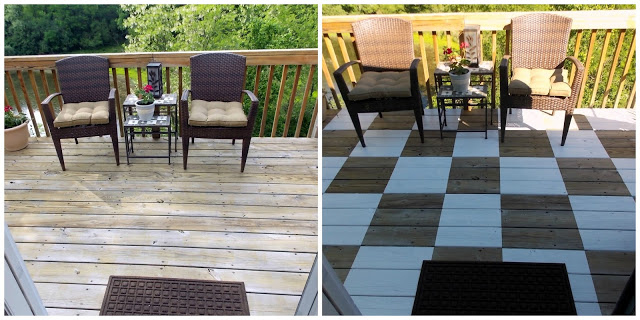
I have an amazing project to show you today that I did on Saturday. This is my new favorite! I am still madly in love with my painted backsplash, but my checkerboard deck is dreamy! I have shown you my back deck recently here and here. I have been planning this project for several weeks, and I was finally able to actually do it. Here it is, completed. This is the top level of our deck.


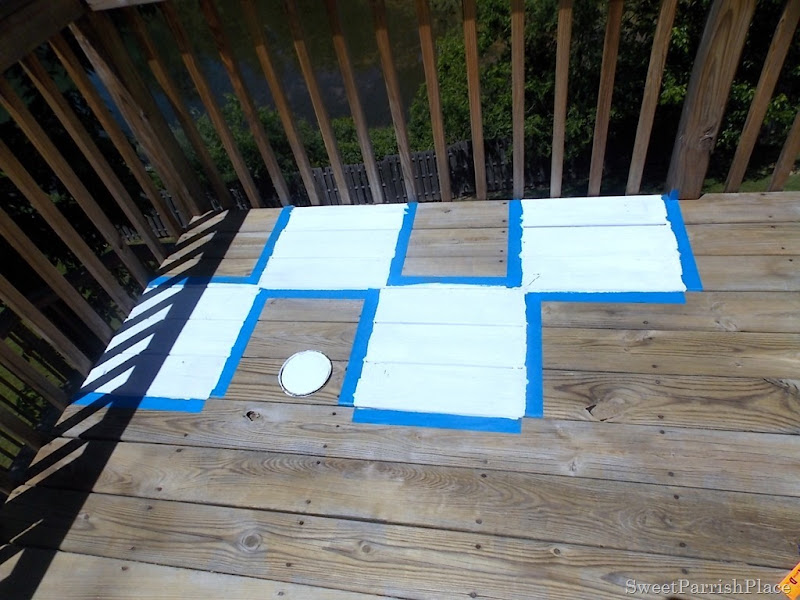
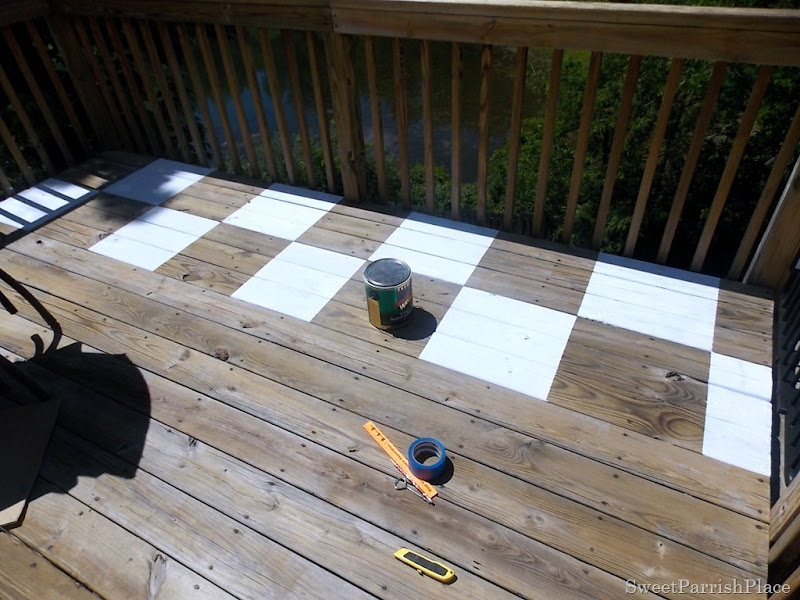
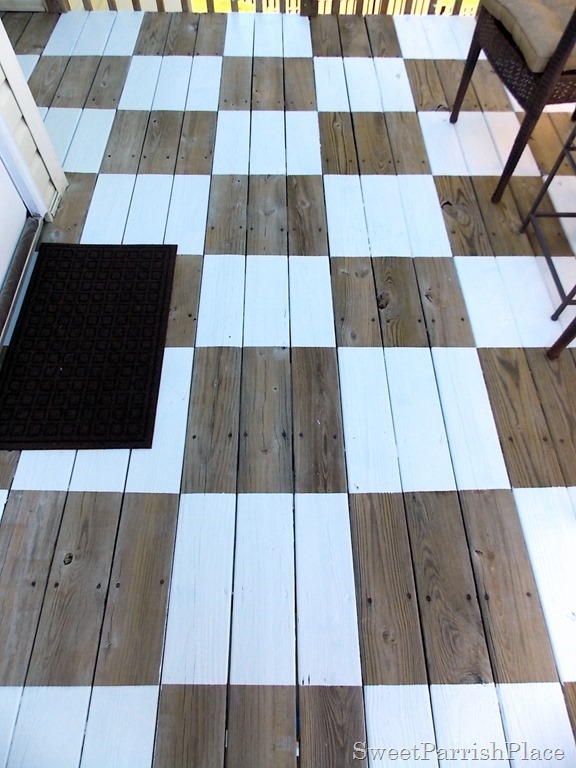
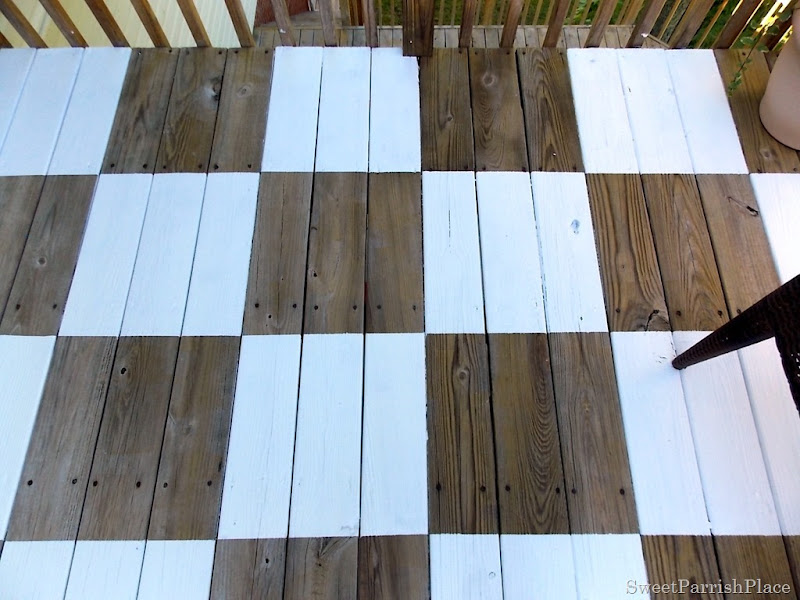
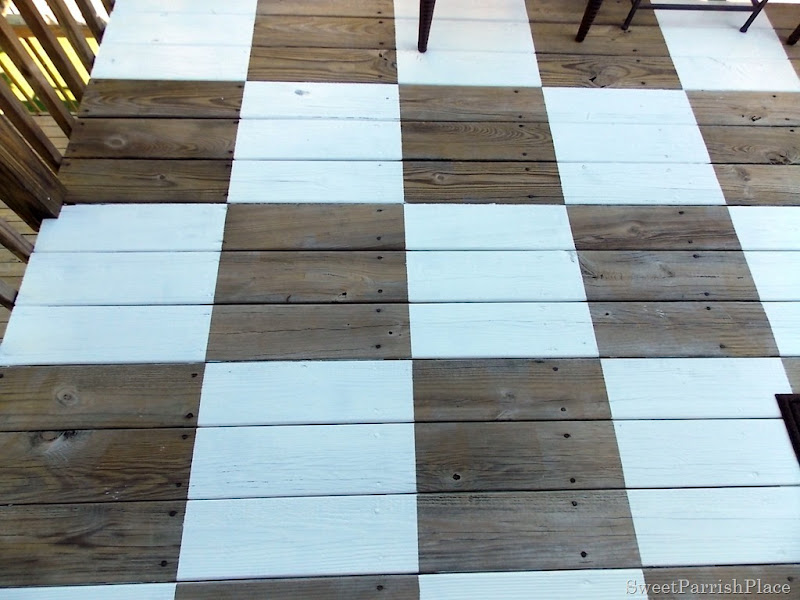
I used a pencil to draw my lines, then I took painters tape and taped off each square. I actually taped off and then painted one square at a time. that helped me to make sure that I was painting it correctly. I DID NOT want to mess up, that would have been tragic, because the paint would not have come off easily. If I would have taped of the whole thing before painting, I would have become confused and ended up making a mistake, because of the pattern. I tore of the tape after I finished each two rows.
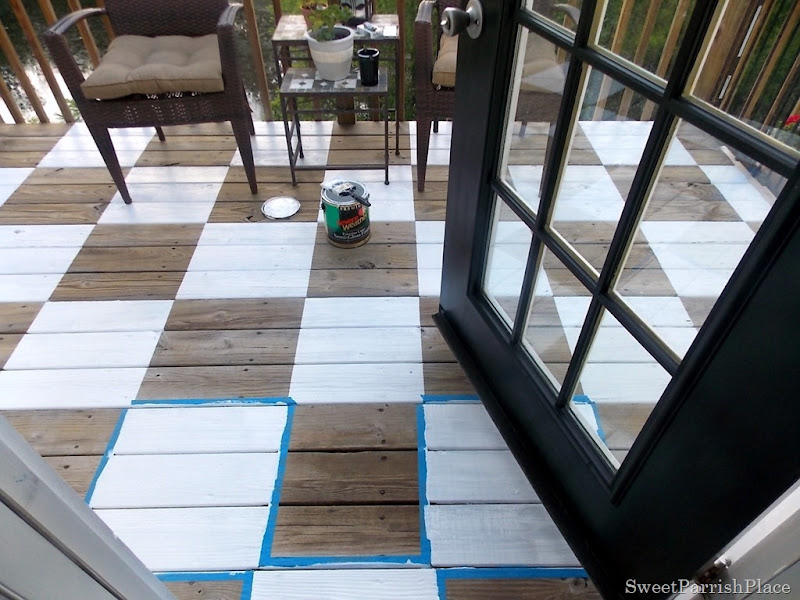
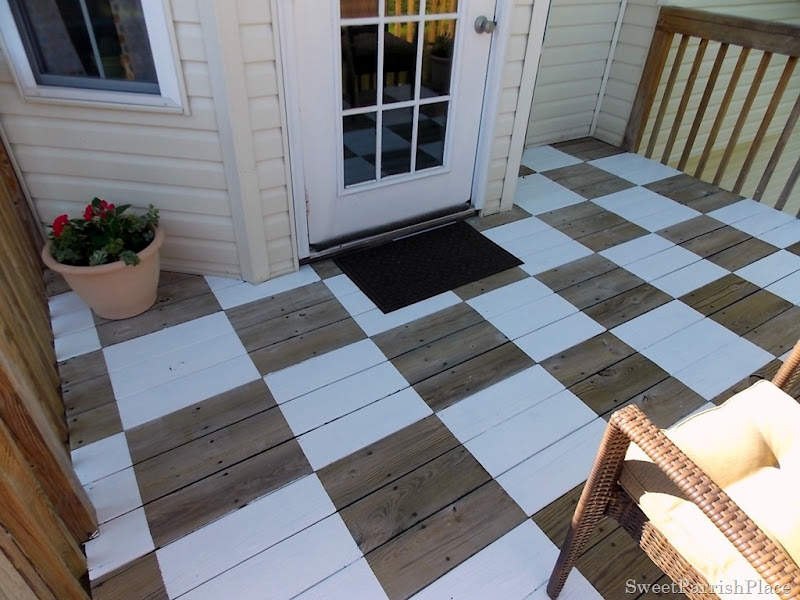
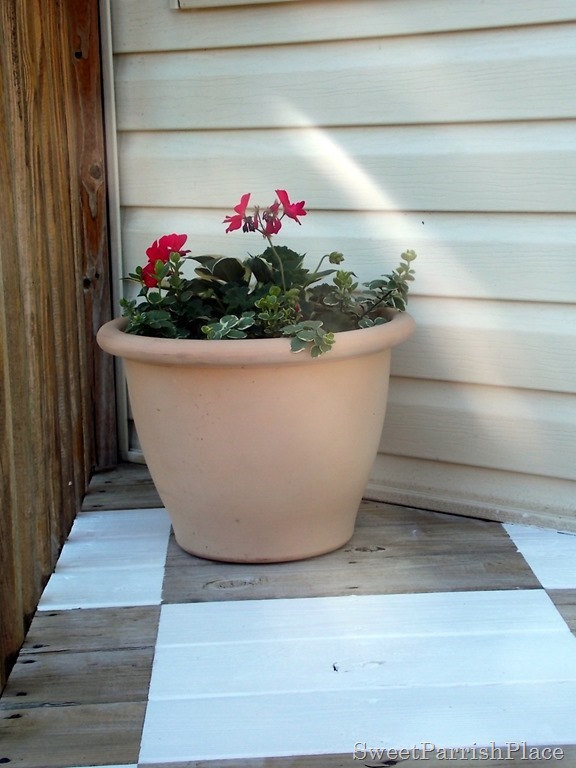
As you can see, there are two awkward little corners to the right and left of the door. After doing the first three rows or so, I worked my way down into these corners, because I needed to leave the area right in front of the door unpainted until the end. I painted my way right back inside of the door.
Update: I recently painted this door. See the results here.
I am not going to lie. This project was very physically exerting for me. For one thing, it was a cool day. when I started on it, it was cool, then it warmed up to where it was comfortable in the afternoon, but when evening came, the temperature dropped and it was windy. I was really cold, and I was bent over all day, crouched down, on my knees, or sitting. By the time I was finished I was actually shaky. I went straight in and LC made me a nice cup of hot tea and I had a nice hot bath. I was exhausted! I do have to give LC some credit, he pulled up a lot of the tape for me, and he cleaned up for me after I was finished. It is Monday morning as I am writing this, and my entire body is still sore from the project. Don’t tell me a DIYer gets no exercise! I beg to differ!
And here is a little side by side of the before and after for you. I know how we all love a good before and after! And this one does not disappoint!
The paint I used is called Valspar Severe Weather exterior paint in semi gloss white. It is supposed to be durable in all types of extreme weather conditions. This paint was actually left here by the previous owner’s, and it was almost the entire gallon. I still have enough left to repaint the banister’s out front. We think that is what they had used it on in the first place. We looked it up online and it looks like an excellent paint to use for outdoor use, and especially for a project like this. After I painted on Saturday, LC sprayed the entire deck down with Thompson’s water sealer. Warning: it did not absorb into the painted areas, and he had to go out and wipe it off of each square. But it was no big deal. Now both levels of the deck have been power washed and sealed. They should be good for another two years. Today we are getting out the furniture that belongs on the lower deck. And I have some chairs to make over for down there as well. You can see the chairs I rescued from the roadside here.Even my kids think the deck looks awesome! It is very pleasant to sit out there and just admire it. I would still love to find a cafe table to put out here. I would also love to paint a rug on the bottom deck, but I may hold off on that until next summer. I only have 6 weeks off this year, and I think I already have myself booked with enough projects to last me!
The best part about this project was that it was FREE! That is right people, this amazing project did not cost us a dime! The paint was left here by the previous owner, the box I used for the stencil I picked up at work, and I had plenty of painter’s tape left over from other projects. We completely transformed the look of our worn and weathered deck for no money! Isn’t that awesome? Enjoy your Memorial day! I am going to be spending it doing laundry and coloring my hair. If you have any questions about this project, feel free to ask me in the comment section and I would be glad to answer you. I love comments!
I am linking up here:

http://thriftydecorchick.blogspot.com/2013/06/june-before-and-after-party.html

http://myuncommonsliceofsuburbia.com/

http://linda-coastalcharm.blogspot.com/2013/06/nifty-thrifty-tuesday-no166.html
http://www.domestically-speaking.com/2013/06/181st-power-of-paint-party-popp.html
http://www.theshabbycreekcottage.com/2013/06/transformation-thursday-no-208.html

http://startathome.blogspot.com/2013/06/paint-party-and-giveaway.html

http://iheartorganizing.blogspot.com/2013/07/the-great-outdoors-lets-get-this-party.html








This is stunning, Nicki! Pinning it!! 🙂
Thanks Rachel! I love your nursery reveal and pinned one of those pics too!
This is just what I'm looking for to 'revive' my deck. Thanks for the detailed information and what kind of paint you used as well as all of your 'tips'!
Gorgeous! I would never have thought to put to put a checker pattern on a deck. I love this idea! Hope you got a massage with that tea and bath. 🙂
NO massage Melissa. Come to think of it I should have asked for one!
Looks great!
Cheryl @ The Creative Me and My McG
Oh my gosh, that looks awesome!
All I can say is – GENIUS!!!! Looks terrific Nicki! Love it!!!!!
Hey Nicki, your deck looks great. That is a beautiful way to transform your deck.
Thanks Rachel!
It does look awesome! I love how fresh and fun it is, you totally don't need a rug on that deck:)
Krista
Your deck looks fabulous and I love how you did it with things on hand. I have to say what a great job you did, the lines are perfect. I would have ended up with squares that weren't square. Great job really, it looks fabulous.
Traci
OK Nicki that is way cool!!!
Shelly
minettesmaze.blogspot.com
A big thank you to everyone who has made a comment about my deck reveal! I am so thrilled that so many of you liked it!
Adore this so much. I'd love to do something like this, but we have a two-tiered deck that staggers over making it a little more complicated.
Shauna, Thanks! I am not sure exactly what you mean, but just wanted to let you know that our deck is also a two tiered deck. The top story is older though, the bottom ties was built years later. I decided to paint the floor of the top story because it was showing it's age. this totally revived it! I won't do this on the bottom tier because I don't think I physically could, well, I guess I could if I did it over several days, but I am not going to!
what a fun makeover! good for you, and enjoy!
You must have a lot of patience to tape up all those squares but wow what an impact it makes! You've turned a plain old wooden deck into a real feature you should be very proud 🙂
Wow, I LOVE it! Turned out amazing!
LOVE THIS!!! SO CREATIVE!!! Amazing way to make this deck an even more special place! Thanks so much for sharing at Give Me the Goods Link Party!
Amy @ http://www.commona-myhouse.blogspot.com
Thank you to everyone of you who have taken the time to comment about my deck transformation! I read every single one!
I featured on my fb page and you're one of my top 3 personal favorites this week! Hope you'll join us again on Tuesday night. Great job!
Marty@Marty's Musings
Thank you so much! That is awesome!
Oh my goodness… what a fabulous floor! I can't believe what a drastic change a little paint made! And I feel your fatigue.. I KNOW what you mean! But looking at your efforts now is the most magical reward ever. 🙂
I've featured you on I Love That Junk and a few other places. Thanks for linking up to Party Junk 189!
That is fabulous! I love it! Thanks!
Sweet Lord! This is fantastic!! You are one of the features today at the Make it Pretty Monday party at The Dedicated House. Pop on in and grab a feature button. Hope to see your prettiness again at the bash! Toodles, Kathryn @TheDedicatedHouse
So awesome to be featured on your favorites today! Thanks a million!
Looks like a lot of work but this is a great idea I have to try something like this on our deck
Fantastic look – love love love. Love isn't a strong enough word to say what I think about this makeover. 🙂
So sweet of you! Thanks!
What you did with your deck is amazing. You succeeded in creating the effect you wanted, and you've done it with proper care to make sure that your deck wouldn't be damaged through the process. It's great that you power washed it first before painting it. That way, you are assured that the paint will last, and your deck will stay beautiful as it should.
Renew Crew
Love the painted deck Nicki!! Thanks so much for sharing it on Project Inspire{d}! 🙂
Nancy
Thanks so much!
Your deck is AMAZING! Thanks so much for sharing it at my Twirl & Take a Bow party. Stop by House on the Way tomorrow to see it featured! Feel free to grab a "featured" button too.
Leslie
Your checkerboard deck is fabulous … I featured it tonight at the Project Inspire{d} link party!
What a great transformation! The squares look great! 🙂 Thanks so much for sharing at last week's All My Bloggy Friends! I can't wait to see what you share this week 🙂
Now that's and eye catching upgrade. Thanks for the brainstorm you started. enJOYed your post.
This looks amazing! I always love what paint can do and I am sure you are really enjoying your new deck floor!
This looks amazing! I always love what paint can do and I am sure you are really enjoying your new deck floor!
Thanks Jordan! I can't sew or build things, but paint I can do!
Wow! Stunning! What a difference adding pattern makes! I hope you'll consider submitting this project for a feature at Stylish Feature Fridays!
Have a stylish day!
Karen
http://www.astylishinterior.com/2013/06/announcing-stylish-feature-friday.html
I've seen this featured in a couple of places, and it's just fab, love it. I'd love to do this in my hall, but I'm not sure my back or knees could take it – I'm impressed with your perseverance !!
I know how much work went into your painted deck, and it's wonderful! My hat's off to you!
Hi Nicki,
You project was one of the featured project at
Top 10 Pin It Monday Hop#10.
Cheers,
Judy
Awesome! Thanks so much for the feature!!
Nicki,
LOVE your deck…so much that I featured it today at my party. Please feel free to grab my starfish featured button for your blog.
Blessings,
Linda
Awesome! Thank you so much Linda!
I love it! It's so fun looking! I hope you really enjoy it this summer!
Thanks Kathryn! I am having a party soon and can't wait to show it off!
I just found this and I LOVE IT!!! I would love if you came over to link up ….
http://startathome.blogspot.com/2013/06/paint-party-and-giveaway.html
Hope to see you soon
Brooke
Start at Home
And I will follow on my way out!!!
Your deck is AWESOME! I never get bored of seeing what paint can do. I'm featuring your deck in the PoPP Spotlight this week. Thanks for linking up.
That is great! Thank you so much!
Sweet deck idea! Pinned and shared on face book:) Stop by http://www.sewsweetvintage.com/2013/07/bicycle-basket-up-cycle.html
This is interesting! I enjoyed reading your great post.Thanks for the valuable information and insights you have shared here. Absinthe Drinker
Good read …Artwork Only is a worldwide business specializing in the production of oil paintings and prints on canvas.
Paintings
I just finished the top part of my deck. Its slate grey with white spindles. So now I have a lower section which I am going to checkerboard. Yours looks great I hope.mine will too.
That sounds like a great idea! I miss my checkerboard deck. It is important to tape everything off so that you have clean lines. Good luck!