Sweet Parrish Place

I'm the girl with champagne taste and a tight budget

  • Home
  • About
    • About Nicki
    • Shop My Amazon
    • Contact Us
    • Blog Love
    • Link Parties
    • Advertise | Disclosure | Privacy Policy
  • Home Tour
    • Yellow Prairie House Tour
    • West Virginia Home Tour
    • Seasonal
  • Projects
    • Trashtastic Treasures
    • Holiday
    • Decorating
    • DIY
    • Crafting
    • Paint Projects
    • Cleaning/Organization
  • Style
    • Fall/Winter
    • Spring/Summer
    • Sweet Parrish Place Style
    • Tips/Tricks
    • Shop My Looks
    • Shop My Amazon
  • Travel
  • Lifestyle
    • Family
    • Decor
    • My Favorites
    • I’m Loving It
    • Personal
    • Shop My Amazon
  • Yellow Prairie House Tour

Faux Painted Kitchen Backsplash- Progress

April 11, 2013 By Nicki 18 Comments

It’s Thursday!  That means one more day until Friday, right?  Can you give me a woot woot?  We have a BIG weekend coming up.  It is Miss 17 Year Old’s Junior Prom!  So get prepared for some picture overload of that next week.  Her gown is TO DIE FOR!  So gorgeous!  I can’t wait to show it off to you!  So you will be seeing that next week.  In case you did not know, last week, I was off for the week of spring break.  And I got busy around here.  I have been working on this faux subway tile painted backsplash in my kitchen for what seems like forevah!  I broke it down into sections.  Before spring break, I had two sections already completed.  I showed you a sneak peek here.  It was even featured one week over at Savvy Southern Style on Wow Us Wednesday!  I was so thrilled about that!  I felt like a very big deal, for about 2 seconds anyway.

So, over spring break, I was able to complete the two largest sections, which were behind the sink and the rest of the way down the wall.  There is only one section left, and it is a very small section behind the microwave, that I can easily complete on the next free day I have.  This will be the last post about my progress with this technique, and the next post will be the big reveal.  I promise, I am going to clean and make it pretty for pictures, and everything.  In these pictures it is a disaster.  Work zone!  I cleaned it up just a tad for a couple of these shots, but other than that, it is bad.

This is the section I cleaned up a little.


DSCN1990
You can see here that everything is taped off and ready for paint.  You have to do the taping off in two phases.  First the horizontal lines, then the vertical.  In this photo, I have the vertical taped off to the left and the horizontal to the right.  And look, It was a battle of the painter’s tape!  Frog tape versus Blue painter’s tape with edge lock.  Who do you think won?  I promise to let you know when I do the full tutorial, someday.  BTW, I painted our kitchen cabinets back in the fall.


DSCN1985
If you look closely, you can see on that far right cabinet, right near the handle, there is a place that the paint got scraped off.  I need to touch that up.
DSCN1986
This is the largest area, above the sink.  It took the longest.
DSCN1987
I started clear at the far left with this project.  We joked on Sunday that it looked like someone had dies around our kitchen.  It had been my daughter’s birthday, and her BFF made her a bunch of cupcakes.  My son brought home brownies that he made with his ma maw, and a friend brought over pepperoni rolls and cookies.  Hence, the food you see sitting on the counter and stove.  YUM!
DSCN1988
You cannot see that cord in the below picture when you are actually standing in the kitchen.  Only the part that plugs in.
DSCN1991
This is a better view of what you actually can see of the cord.
DSCN1992
This is the entire backsplash on this side of the kitchen.  Well, as close as I could get to it, it was dinner time and LC was making spaghetti.  I was taking pictures around him.
DSCN1993
DSCN1994
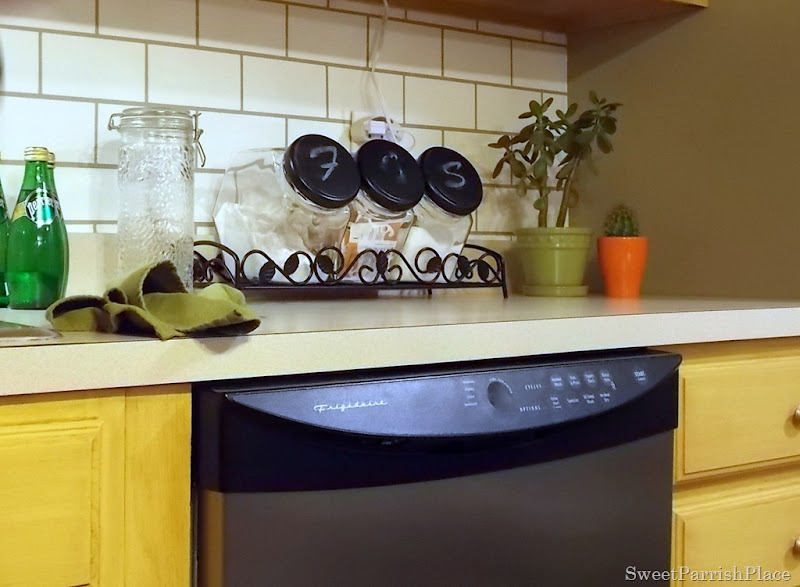
These are the last shots for today.  I wanted to show you a close up of where the backsplash  meets the wall.  You can see that the paint I used for the grout lines is the exact same paint I used on that wall.  You can also see that there are a few touch ups needed.  I will touch it all up when it is complete.
DSCN1995
DSCN1996

Overall, I am extremely happy with the results!  It looks awesome!  Everyone who comes to the house raves about it.  We even had a professional painter here to give us an estimate (to paint out living room and stairwell), and he said I should be a professional!  After this project is completed, the only other things I need to do in the kitchen are paint the door, and paint the island.  I have to say, this kitchen is finally starting to come together, and it feels like “my home”, instead of just a house we moved into.  And that, is a very good thing!I am linking up here:
Liz Marie Blog
Inspire Me Please

The Shabby Nest
frugal-friday


Shabby Creek Cottage

It's Overflowing
It’s Overflowing

that diy link party
DIY Showoff

The Dedicated House
The Dedicated House

Featured on Monday Funday
Finding Home


settingforfour

Suburbsmama
Suburbs Mama


Savvy Southern Style

Pretty Things Link Party

Filed Under: Uncategorized

Comments

  1. Aimee Lane says

    April 13, 2013 at 12:43 pm

    Turned out GREAT! I'd absolutely love for you to stop by and share your Kitchen Update at my party — it just opened!!! http://www.itsoverflowing.com/2013/04/share-your-creativity-73/ Enjoy your weekend LOTS! XO, Aimee

    Reply
  2. Nicki Parrish says

    April 13, 2013 at 12:47 pm

    Aimee,
    Thank you so much for inviting me to the party. Iran straight over there and linked up!

    Reply
  3. My name is Rita says

    April 16, 2013 at 3:35 am

    I can't believe that is not real tile!!! It looks so real. Great idea! If you get a chance, please link this to my linky party: http://suburbsmama.blogspot.com/2013/04/sunday-linky-party-3.html

    Reply
  4. Janet says

    April 17, 2013 at 3:47 am

    WOW, this looks AMAZING!!!! I have actual subway tile that my husband installed, but I'm sure if I showed him this he'd be kicking himself wishing he did this and saved time instead! LOL!

    http://www.iheartmygluegun.com

    Reply
    • Nicki Parrish says

      April 17, 2013 at 4:01 am

      Thanks Janet, this was much cheaper than actual subway tile, but it probably took me even longer. It was quite the time consuming task. But so worth it!

      Reply
  5. Tanya Runkle says

    April 17, 2013 at 4:16 am

    Nicki your diy faux backsplash is gorgeous!! Now following and I would love for you to join the Pretty Things Link Party every week at twelveOeight (live now) hope to see you there 🙂

    xo, Tanya
    http://twelveoeight.blogspot.com/2013/04/pretty-things-16-link-party-and.html

    Reply
    • Nicki Parrish says

      April 17, 2013 at 1:03 pm

      Tanya, I ran straight over and linked up! Thanks for the invite!

      Reply
  6. Angela Conley says

    April 17, 2013 at 5:16 am

    Wow, what a project you've taken on! I bet you'll feel so great once it's all done. It looks great. The pattern adds so much to the kitchen, yet it's simple. Love it!

    Reply
    • Nicki Parrish says

      April 17, 2013 at 1:02 pm

      Thanks Angela, I will be so glad when it is finally finished! Tedious, but worth it!

      Reply
  7. Lindsey Domer says

    April 19, 2013 at 12:39 pm

    This is SO clever! I am TOTALLY doing this if we ever move and I get a new kitchen. 🙂

    Also in love with the yellow cabinets!

    toddlindsey.com

    Reply
    • Nicki Parrish says

      April 19, 2013 at 2:32 pm

      Lindsey,
      Thank you! This took me several hours, but was so worth it! I really love my yellow cabinets too! It reminds me of the cabinets on Modern Family- the ones who have the three kids.

      Reply
  8. Rebekah of Schenewark Farm says

    April 19, 2013 at 6:22 pm

    love it! might have to steal this idea. 🙂

    Reply
    • Nicki Parrish says

      April 20, 2013 at 2:25 am

      Awesome! I still have one small part to finsih, and after that I will have a final reveal and a tutorial, so stay tuned!

      Reply
  9. Anne says

    May 1, 2013 at 4:46 pm

    Fabulous! Looks like a another copycat job is going to follow very soon.

    Found you at DIY Showoff & now following 🙂

    Cheers!

    Reply
    • Nicki Parrish says

      May 2, 2013 at 2:54 am

      Awesome! I find it so amazing that someone would copy something I did! I feel like I copy other bloggers all of the time! LOL!

      Reply
  10. Carol says

    March 30, 2018 at 12:49 am

    What type/kind of paint did you use for the ‘white tile’? Gloss? Semi? Latex? Enamel?

    Reply
    • Nicki says

      March 30, 2018 at 10:43 am

      Hi Carol! I am sending the link to the full tutorial on this post so you can see it, and also the type of paint I used is in there. It was a high gloss latex. https://sweetparrishplace.com/faux-painted-subway-tile-tutorial/

      Reply

Leave a Reply Cancel reply

Your email address will not be published. Required fields are marked *

CommentLuv badgeShow more posts

This site uses Akismet to reduce spam. Learn how your comment data is processed.

Hi, I'm Nicki I'M THE GIRL WITH CHAMPAGNE TASTE AND A TIGHT BUDGET. I'M SO GLAD YOU'RE HERE!
  • Bloglovin
  • Facebook
  • Google+
  • Instagram
  • Pinterest
  • Twitter

VIP Real Estate

NO PLACE LIKE HOME

No Place Like Home

ORC Bathroom Makeover

Kids/Guest Bathroom Makeover

One Room Challenge Week 6 Kids-Guest Bathroom Reveal

It's week 6 of the One Room Challenge and this is … [Read More...]

ARCHIVE

ORC

Shop My Faves!

Spring Trends
PicMonkey Photo editing made of win
Get Sponsored by Big Brands

SheKnows

Linquia Influencer

FYI

Find Your Influence

INSTAGRAM

Recent Posts

  • Cozy and Casual Christmas Tour | Part 2
  • Casual and Cozy Christmas Tour | Part I
  • Farmhouse Bathroom Makeover Progress | $100 Room Challenge

Archives

Find It Here

Copyright © 2022 · Sweet Parrish Place