
Subway Tile Backsplash and Farmhouse Light
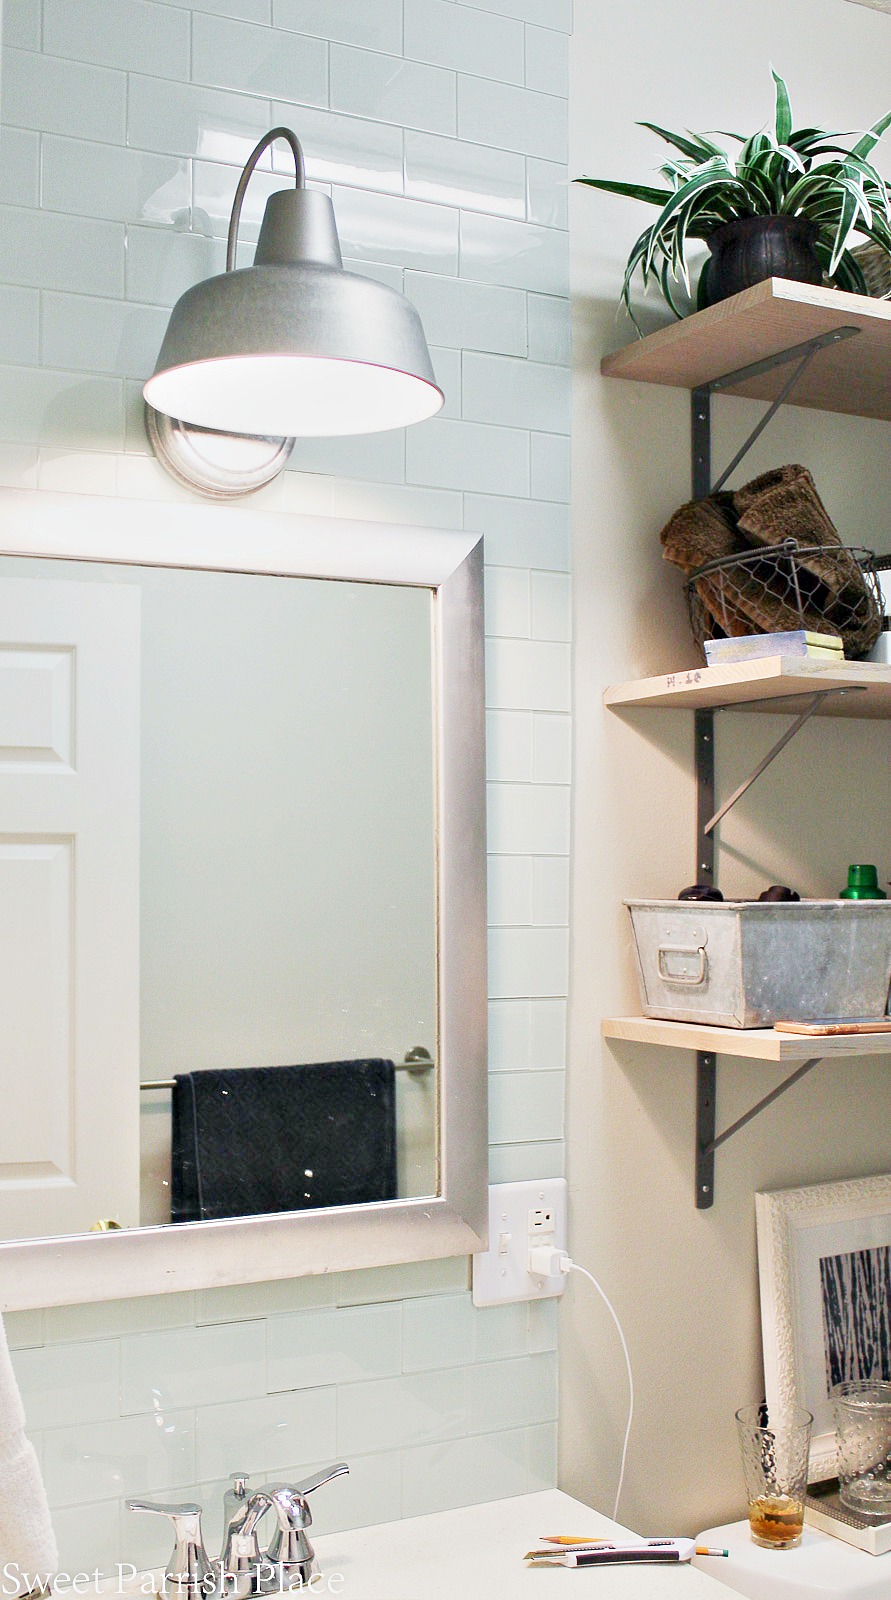
Hey friends! Today is week 4 of the One Room Challenge for guest participants, and I am very close to being finished in this room! I have my Subway tile backsplash and farmhouse light both installed! And these two things are the star of the show in this bathroom, so I am very happy. I took these photos on the day I was working on the subway tile installation, so nothing is styled, but I think they look great!
If you don’t know what the ORC is, The One Room Challenge™, currently in its eleventh season, is a widely anticipated biannual event every April and October. Each round, twenty design bloggers take the challenge and transform a space. It is hosted by Calling It Home and House Beautiful. Wednesdays is the day for the design bloggers to go live with their progress, and Thursdays is the day for all the guest participants to go live.

Since we are on week 4 of this challenge, you might want to catch up with my progress on this downstairs bathroom makeover from the beginning. You can click the links provided to take you back to each of the first three weeks: Week 1, Week 2, Week 3. We actually hired a contractor to install the farmhouse light over this sink. And you guys have no idea how long I have wanted a light over this sink! Try since the day we moved in!
I actually bought this light almost three years ago in anticipation of having it installed, but it kept getting pushed to the back burner because we had to hire it out. It was beyond our ability to install a light where there once was none. So the day I came home from work to find this sweet baby installed was a happy day for me!
Here is what it looked like after the light, but before the subway tile. Already a huge improvement to have a light up, am I right? You can see that at this point, the mirror was just leaning against the wall because I didn’t want to hang it until the tiles were installed.

For your convenience, this post has affiliate links. If you click on them and buy an item, I will receive a small percentage of commission. By clicking the link, you are NOT paying any more than you ordinarily would, and you are helping support me in keeping this blog up and running, so thank you for that!
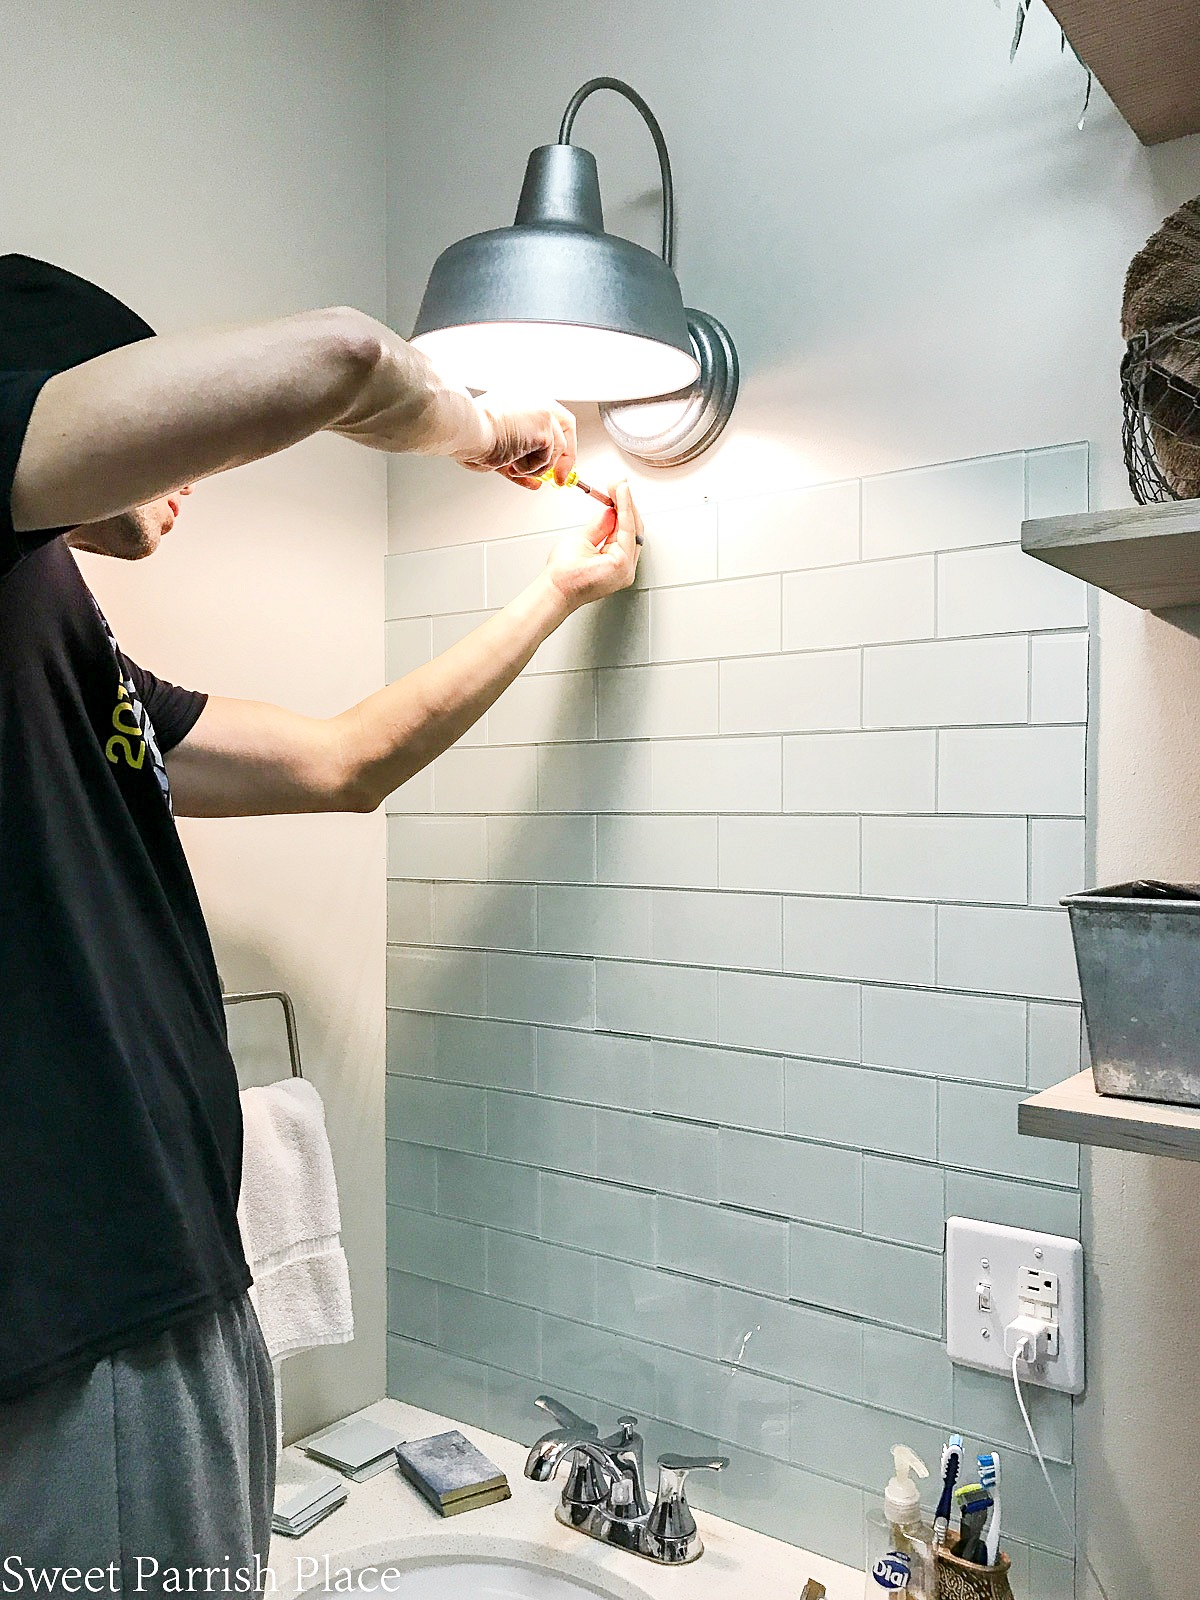
I received these tiles free of charge from Aspect Tiles. They are glass peel and stick tiles, and they were very easy to work with. the color I chose is called Glacier. I installed them myself using a manual tile cutter. I didn’t have any type of fancy tile cutter, and I am only able to cut straight lines with this cutter, so that does pose some limitations, but I managed to get the job done with it.
I wanted my tiles to go clear to the ceiling to make a statement. The ceilings in this bathroom are very tall, so I knew this would add some drama and excitement to the space. When I got to the ceiling, I couldn’t quite fit another tile , it was just slightly too narrow. So I haven’t decided if I want to leave it as is or cut a few more tiles to the proper width to finish it off. I think it still looks great even though there is a small gap up top. What do you think?

When I told our contractor (who installed the light) that I would be installing the subway tile, He advised me to go ahead and attach the mirror to the wall and tile around it. He didn’t think we should try to attach it to the subway tile. So, I planned to just leave a blank space there to hang the mirror, and then I almost forgot, oops! So I had to call in my muscle and have him pry one of the tiles off of the wall. And so now I can testify about the strength of the adhesive that holds these tiles on the wall. We had a very hard time getting it off. But in the end we able to remove it.
As you can see below, we also loosened the light to be able to fit the subway tile beneath it. So for a bit, it was just hanging there by the wires. And you can also see below the tile that we removed to hang the mirror. We installed this mirror using a french cleat. French cleats are excellent to hang heavy items, and this mirror is very heavy. I like a french cleat, because you can slide the item back and forth to make sure it is centered properly.
While we are on the subject of the mirror, I do want to point out that I will be painting the mirror in a glossy white. I got this mirror for $5 at a consignment shop. I actually bought three of them, and you can see each of them being used in different ways in my home, both here and here.
After the mirror was hung, I had the difficult job of trying to tile around the french cleat and the light. This was a sticky situation for me. I am not good at figuring out how to do these types of things. I probably spent more time fretting about it than anything, and for a little while I was completely clueless about how to proceed. It took me quite a bit to think on it and stare at it before I could go ahead.

Remember, I was using a manual tile cutter, and it only cuts straight lines. So I was limited in that aspect. But you can see below what I cam up with. I honestly can’t tell you how I figured this out, I just did. Ha! I started with the tiles right around the french cleat and above the mirror and worked my way up and around the light opening. And as you can see, I just kind of rigged it as good as I possibly could so that the light could be reinstalled, and everything would be covered with the tiles.
It’s no secret that a professional who had an electric tile cutter could probably have done a better job. But I am happy with the way it looks, and that is really what matters, right? And once the light was reinstalled, you really can’t even notice any of this at all.

I really am super happy with the way this tile job turned out! When I think back at where this sad bathroom started when we moved into this home,and where it is now, I am thrilled! It is a huge upgrade, and I think it will help us a lot when it comes time to put this house on the market. This is the bathroom my son uses,and he is very happy with the changes too.


I bought this piece of quartz that I used on the sink off Craigslist for $50, and as you can see in the picture below, it has a chip on the back, right where the subway tile meets up with it. Hopefully this is nothing that a little caulk can’t fix. And on the left of the sink where it meets the wall, there is a bigger gap than I would like, so I am still trying to decide what to do about it.
I feel like it is too wide to just caulk it. That is how it was before, and I thought it looked bad. So I am considering adding a small piece of wooden trim and painting it white, then caulking around it. If any of you have any thoughts or ideas on how to make this look good I sure would love it if you would comment and tell me what they are!

This weekend, I will be trying to learn how to macrame a caged light fixture that will become the ceiling light in this bathroom, so hopefully I will be able to figure it out! I think I can do it! If you look in the picture below, there is a blank wall above the towel rack that will soon have a handmade macrame wall weave that I am having specially made for this room. So I should receive it soon. And I am super excited to see it!
Having the subway tile backsplash and farmhouse light that I have been picturing in my mind finally installed makes me a very happy girl!
I really love the subtle color these subway tiles bring to the neutral room. And I think they are so subtle that they can still almost count as a neutral. I am really excited to get this room finished up and styled for pictures! Two more weeks to go! Next week, I will be sharing our new shower head we installed, and I painted some bamboo shelves for this space that I will sharing as well. I will also share where I am with the macrame light, and maybe, I will have the wall hanging by then, but I think I am going to save it for the big reveal!
Before I go, let’s review my list for the downstairs bathroom makeover.
TO DO LIST
Replace sink and vanityInstall light over sinkDIY wall shelvesReplace shower curtainReplace shower headReplace accessories and hardware- Have a Wall Weave made for the space
Replace bathroom rug- Replace ceiling light
- Paint bamboo shelves for space
Install glass subway tile backsplashPaint walls
SOURCE LIST
Quartz vanity top- Craigslist
Do you have champagne taste and a tiny budget too?
Love fashion, DIY, crafting, all things vintage and thrifty?Stick with me, I’ve got you covered!
Sign up to get my posts delivered to your inbox here
Follow me here:
I can’t believe those are adhesive tiles, they look great! Way to go on figuring out the tile/light dilemma, I struggle with spatial type things like that as well. gah! I’m excited to see it with the mirror painted, it will look so fresh and crisp.
Karen, thanks so much! I think my issue stems back to my school years and I was terrible at math! I am now a school counselor with a masters degree in counseling, and that is partially because I didn’t have to take much math for a major in Psychology!
This looks amazing! I’ve pinned it to save for inspiration for our bathroom re-do. Thanks for sharing!
Sarena @ Teal Inspiration recently posted…Books That Changed My Life
That is so awesome,and much appreciated! Good luck with your bathroom!
The bathroom is turning really nice. Love the soft color of the tiles and the lamp!
Thanks Natalie! The color is my favorite thing about the room!