Why wait for a plumber when you can fix it yourself in minutes?
These quick plumbing hints are easier than you think.
Learning basic plumbing skills saves you hundreds of dollars every year.
Most common plumbing problems need simple tools and basic knowledge.
DIY plumbing gives you control over your home repairs.
You don’t need years of training to handle small fixes.
Plumbing tips for homeowners focus on simple solutions that work fast.
Basic plumbing skills help you avoid expensive emergency calls.
Save money on plumbing repairs by learning these proven methods.
These plumbing hints will boost your confidence around the house.
Here are some essential tips every homeowner should know about DIY plumbing.
Why Smart Plumbing Hints Matter for Homeowners?
Smart homeowners know that basic plumbing knowledge pays off quickly.
Plumbing hints are simple ideas that help you handle common water problems at home.
These beginner-friendly plumbing guidance tips turn scary repairs into easy tasks.
DIY plumbing tips save you time when small problems pop up.
Fix plumbing issues at home without waiting for professional help.
Most plumbing emergencies happen at the worst times.
Learning these skills means you stay in control of your home.
Small leaks become big problems when ignored for too long.
Quick action using proven plumbing hints stops damage before it spreads.
Your wallet will thank you when you avoid costly repair bills.
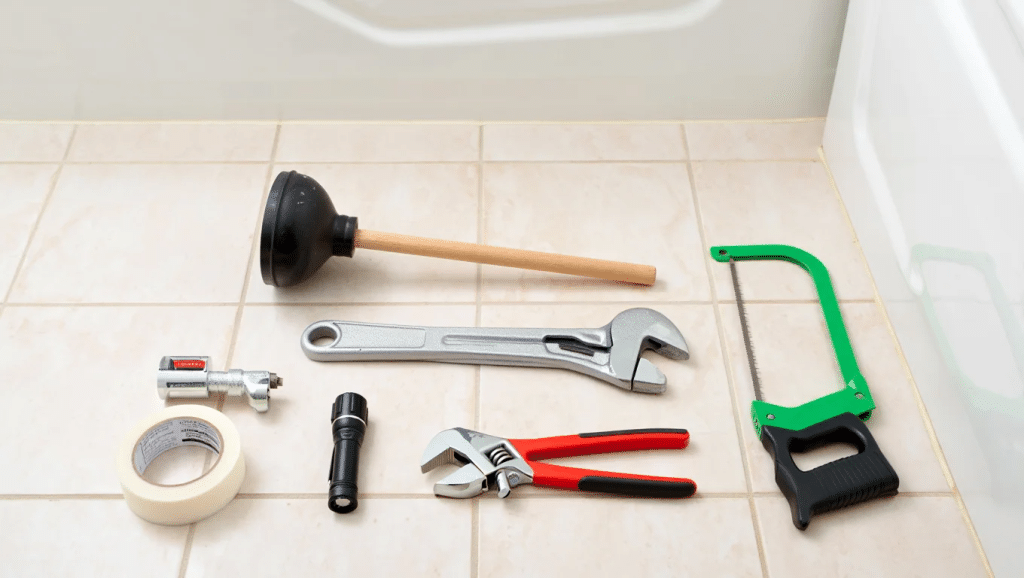
Before we start on DIY plumbing, make sure you have these essential tools ready.
Tools Every DIY Plumber Should Own
Having the right tools makes plumbing hints work like magic for homeowners.
Professional plumbers rely on quality equipment to get jobs done fast.
Your toolkit should include these must-have items for the most common repairs:
- Adjustable Wrench: Grips pipes and fittings of different sizes perfectly
- Plunger: Clears toilet and drain clogs without harsh chemicals
- Pipe Wrench: Provides a strong grip on threaded pipes and fittings
- Teflon Tape: Seals threaded connections to prevent leaks completely
- Drain Snake: Removes deep clogs that plungers cannot reach
- Basin Wrench: Reaches tight spaces under sinks and faucets easily
- Hacksaw: Cuts through old pipes when replacement becomes necessary
- Level: Ensures new installations sit straight and function properly
- Flashlight: Lights up dark spaces where most plumbing problems hide
These tools effectively handle 90% of common household plumbing problems.
Here are some beginner-friendly DIY plumbing tips to get you started.
Plumbing Tips No Plumber Will Tell You
Professional plumbers know secret tricks that make repairs faster and more reliable for homeowners.
However, we have found some helpful tips to help you take control of your own home repairs.
Even though they seem simple, they can help you save a lot of money and prevent disasters.
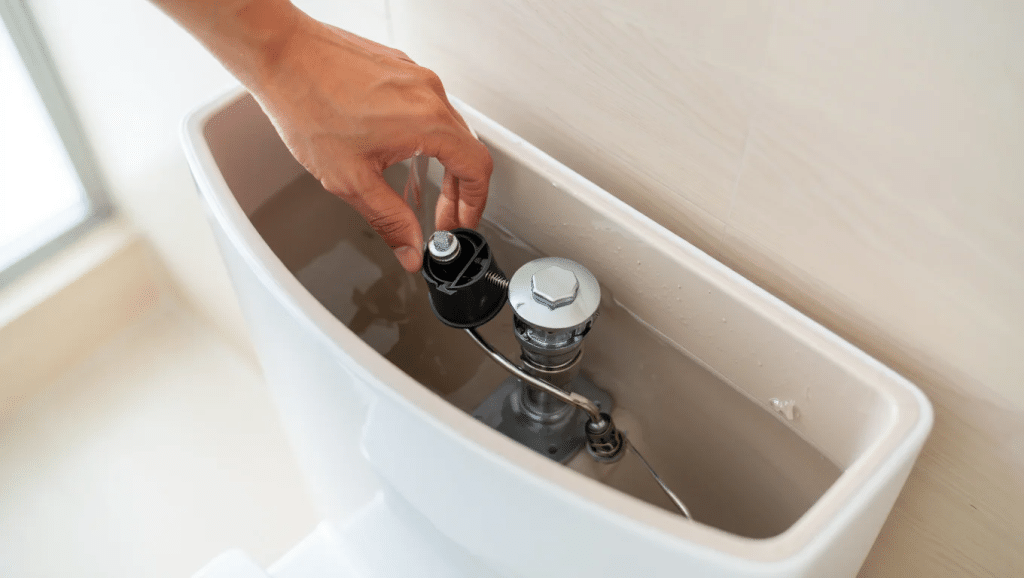
1. Replace a Toilet Flapper
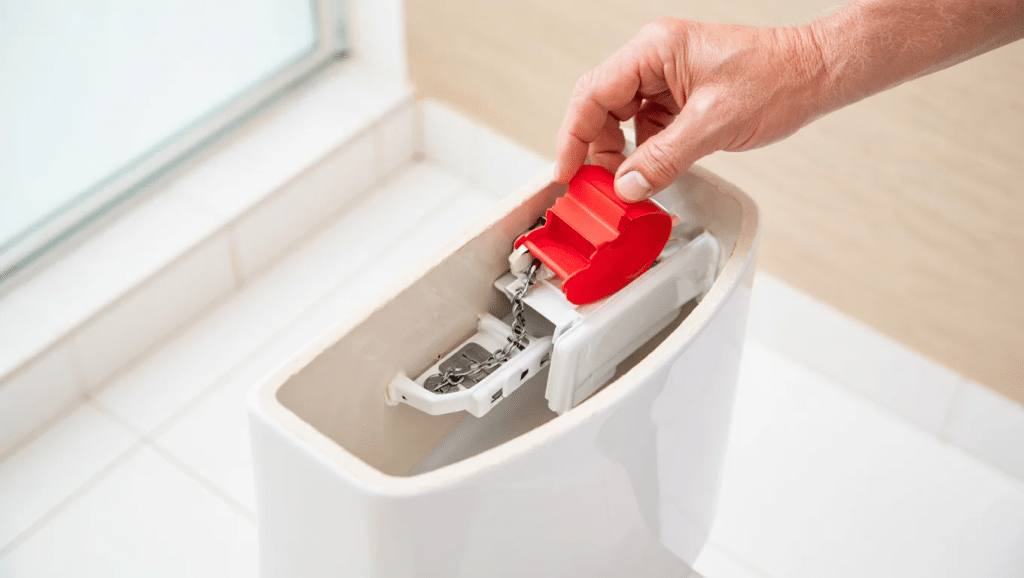
If your toilet keeps running, the flapper might be worn out.
This small rubber part seals water inside the tank.
Turn off the water, flush the tank, remove the old flapper, and clip on a new one.
It only takes ten minutes and costs very little.
This fix can stop waste and save gallons of water each day easily.
2. Clean Your Shower Head with Vinegar
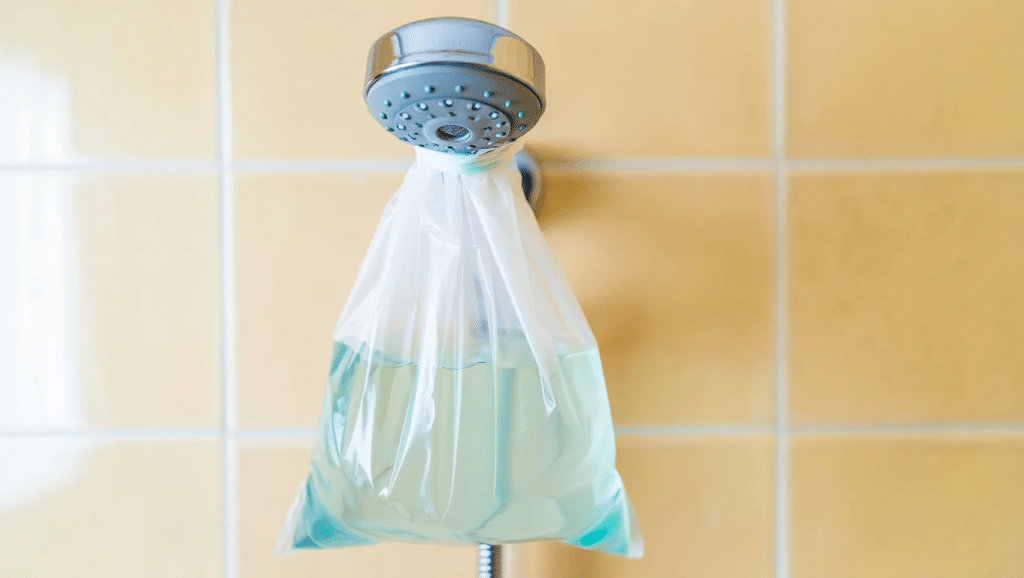
Mineral buildup can clog the showerhead, reducing water pressure.
Fill a plastic bag with vinegar and tie it around the shower head overnight.
In the morning, remove the bag and rinse the head.
This removes the buildup safely.
You don’t need to remove any parts or use tools, making this an easy and smart fix.
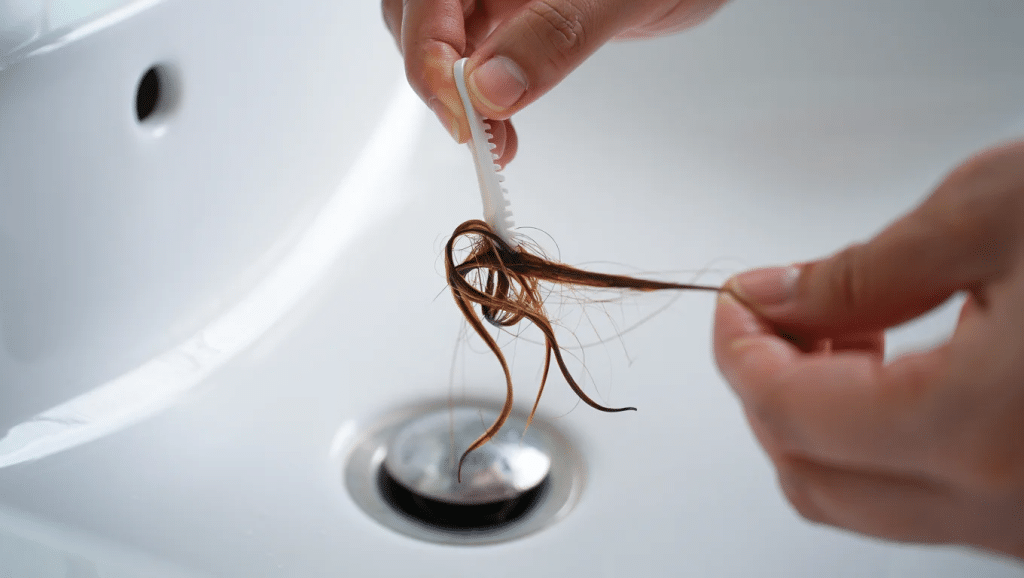
3. Use a Drain Strainer to Stop Hair Clogs
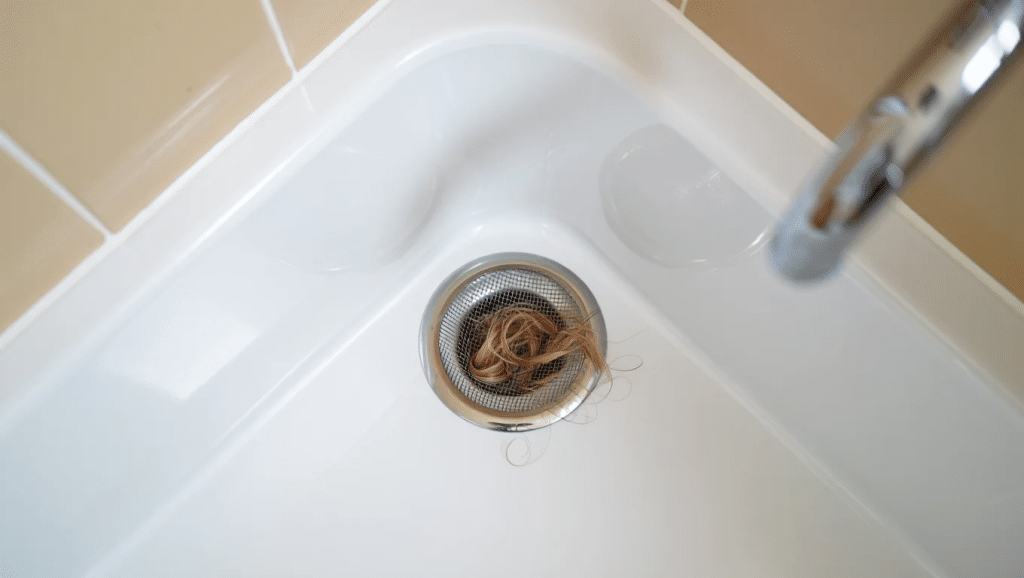
Hair and soap easily clog drains in the tub or sink.
A small mesh strainer placed over the drain stops this from happening.
It catches debris before it enters the pipe.
Clean it regularly to keep water flowing.
This method is simple and can help prevent larger plumbing issues before they begin.
4. Turn Off the Main Water Valve
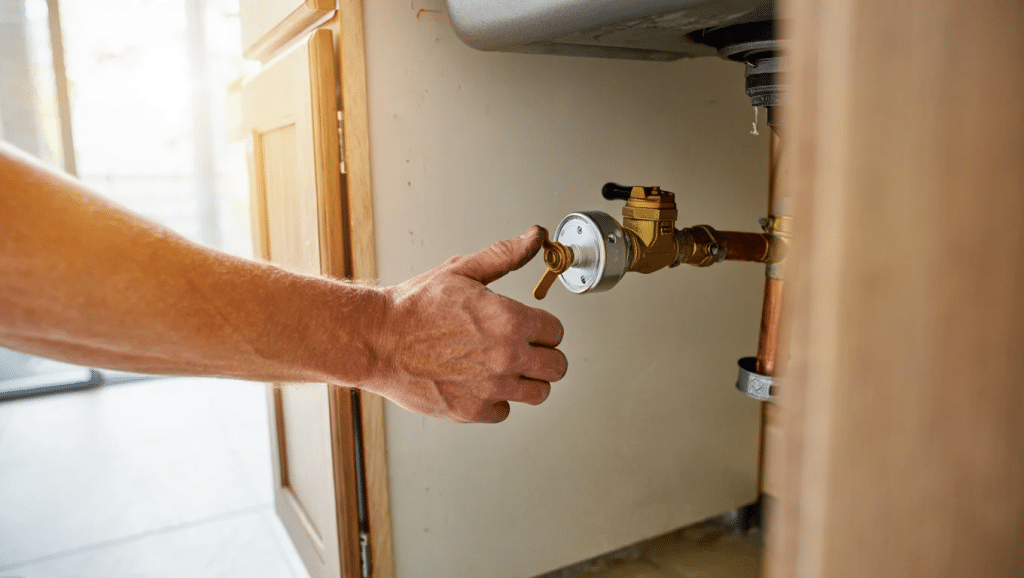
In case of a leak or flood, knowing how to turn off the main water valve is essential.
Find the valve near the water meter and turn it clockwise to shut off.
Practice this once so you know what to do during an emergency.
It’s a basic step that helps stop damage quickly and easily.
5. Flush Drains with Baking Soda and Vinegar
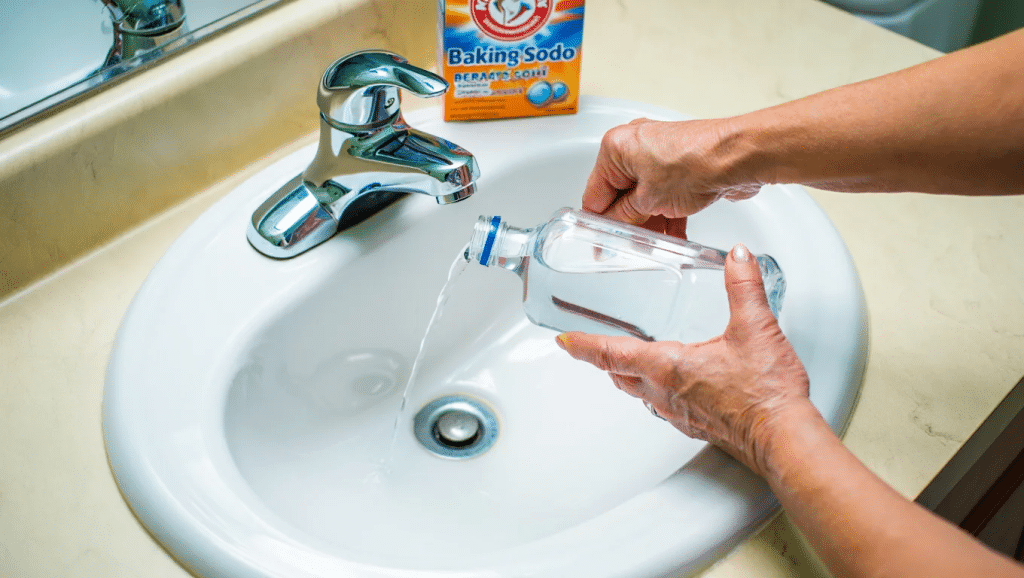
Instead of using strong chemicals, pour half a cup of baking soda down the drain and add one cup of vinegar.
Let it bubble for ten minutes.
Pour hot water afterward.
This clears small clogs and removes bad smells.
It’s safe, affordable, and keeps pipes clean without the need for harsh store-bought cleaners.
6. Insulate Pipes in Cold Areas
Pipes in basements or outside walls can freeze in cold weather.
Use foam pipe sleeves or insulation tape to wrap them.
This helps prevent bursting and leaks.
It’s easy to do and saves money on repairs.
You can find insulation materials in any hardware store, and no special tools are needed.
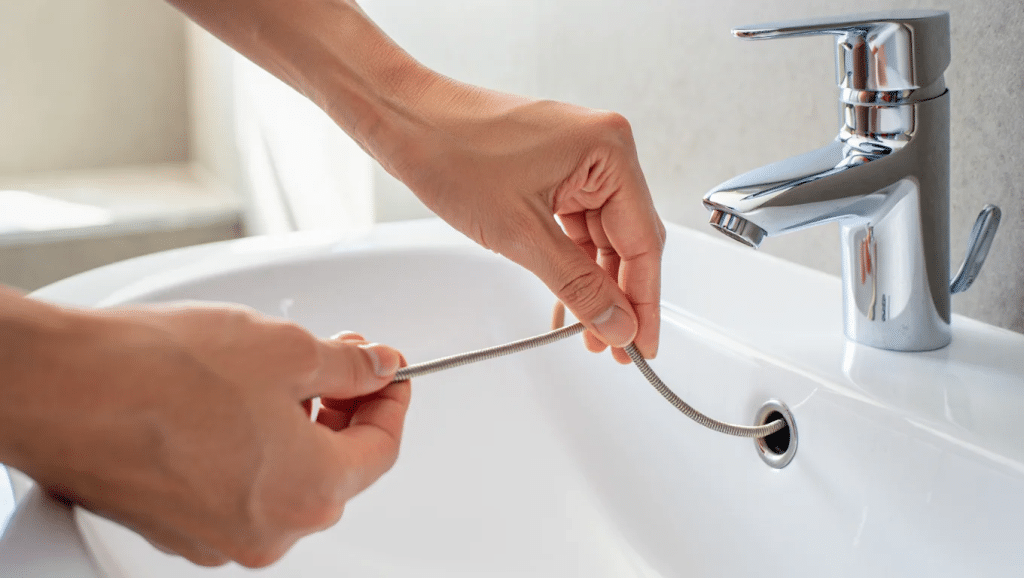
7. Clean the P-Trap to Clear Stubborn Clogs
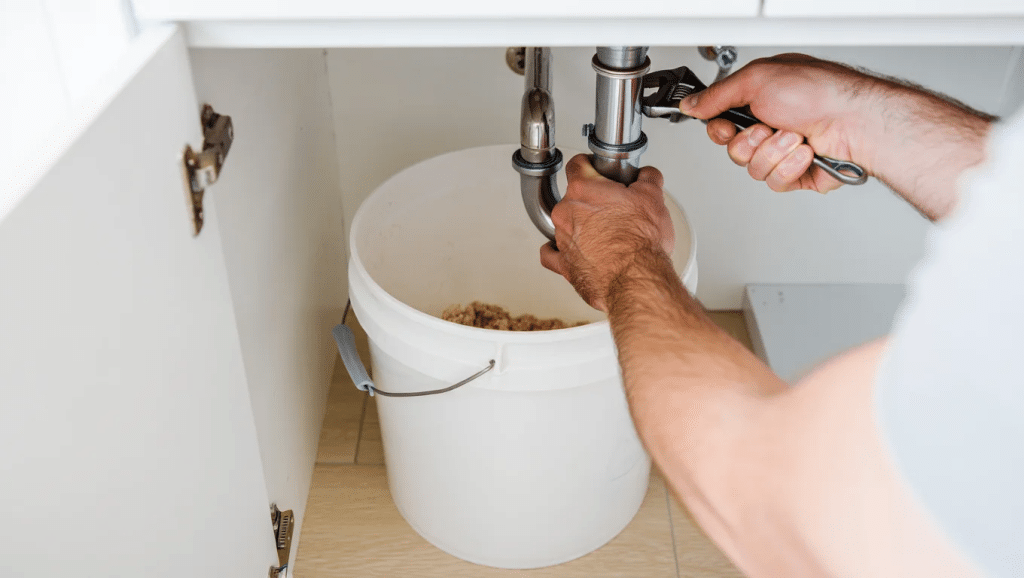
If water drains slowly even after using a plunger, your P-trap may be clogged.
Place a bucket under the sink, unscrew the curved pipe (P-trap), and remove any debris that may be trapped.
Rinse the pipe and reattach it firmly.
This deep clean clears buildup that strainers and cleaners often miss, and it takes less than 15 minutes.
8. Check for Silent Toilet Leaks with Food Coloring

Want to find sneaky water waste?
Add a few drops of food coloring to the toilet tank and wait 20 minutes.
If colored water appears in the bowl without flushing, you have a slow leak.
A worn valve seal usually causes it.
Spotting this early helps conserve water and cut down monthly bills, without needing to open your toolbox.
9. Fix Leaky Faucets with a Simple Seal
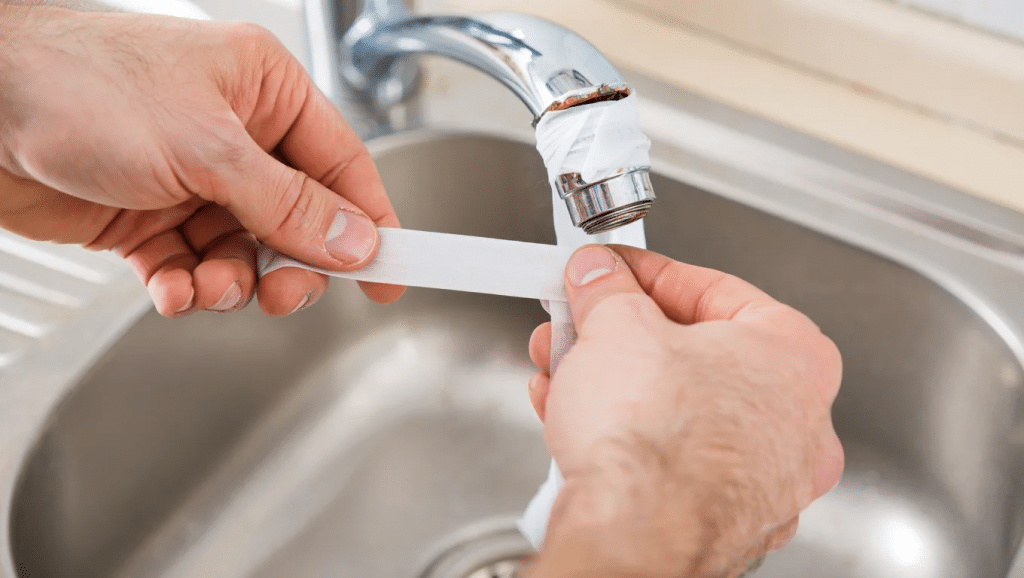
If your faucet drips or leaks at the base, you can often fix it using plumber’s tape.
Remove the fixture, wrap the threads tightly with the white tape, and screw it back.
The tape seals gaps and stops leaks.
This is a straightforward solution that can be implemented in minutes and doesn’t require any special tools.
10. Unclog a Drain with a Plunger
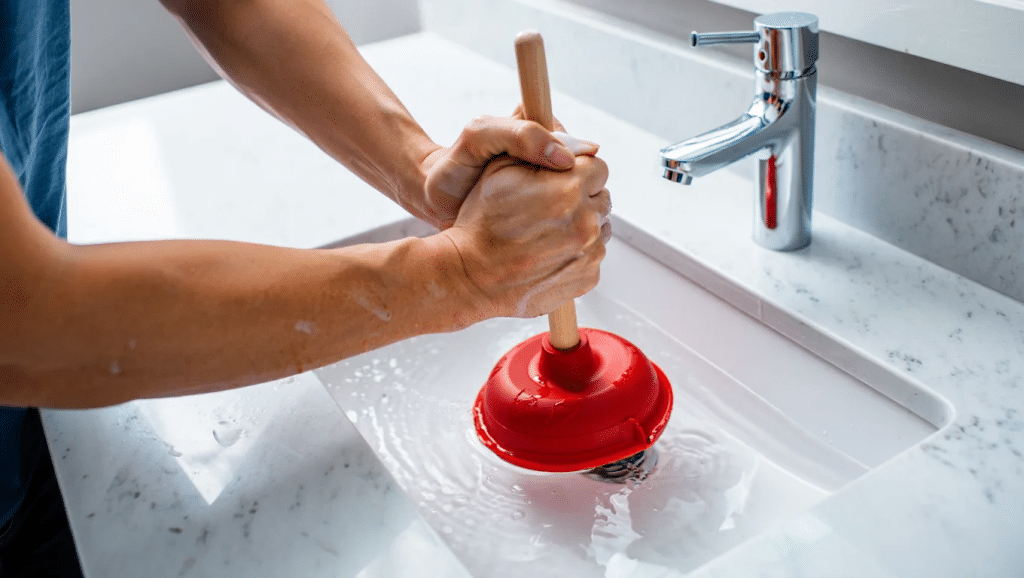
A plunger is great for clearing blocked sinks or tubs.
Ensure there is enough water to cover the rubber cup.
Press down firmly and pull up quickly.
Repeat several times.
This creates suction to loosen clogs.
It’s fast, easy, and much safer than using strong chemicals on your pipes.
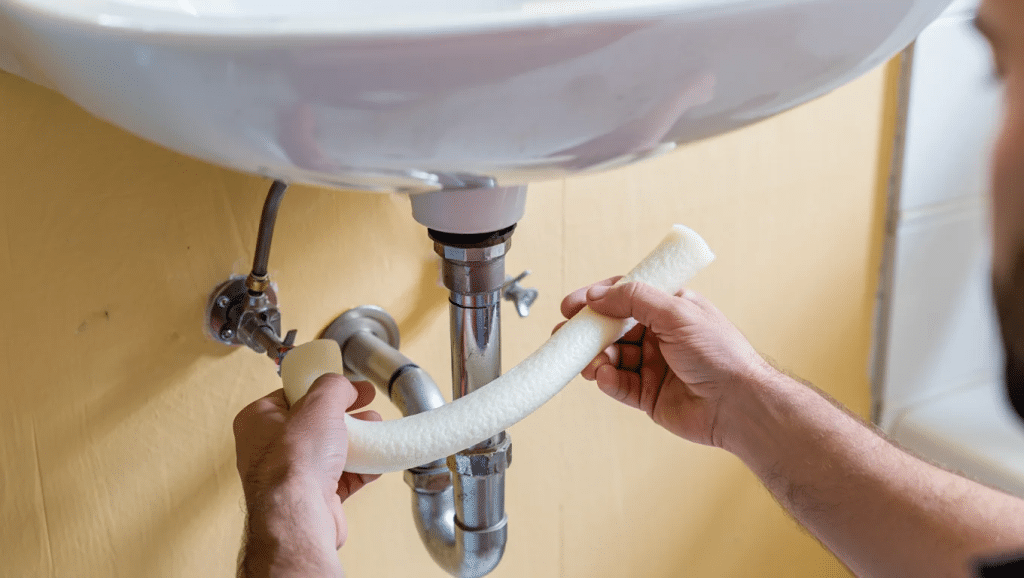
11. Swap Your Showerhead for Better Flow and Savings

Low water pressure or leaks?
Unscrew your old showerhead and replace it with a new water-efficient model.
For a snug fit and leak prevention, apply a strip of plumber’s tape around the pipe threads, just one simple wrap.
Hand-tighten the new head, and you’re done.
This fast fix improves comfort and conserves water daily.
12. Clear Sink Overflow Drain
The small hole near the top of your sink is an overflow drain.
It stops spills but can collect dirt and hair.
Use a small brush or pipe cleaner to remove debris.
This prevents blockages and allows water to flow more efficiently.
It’s a quick job and improves your bathroom’s cleanliness and safety.
13. Install a Faucet Aerator
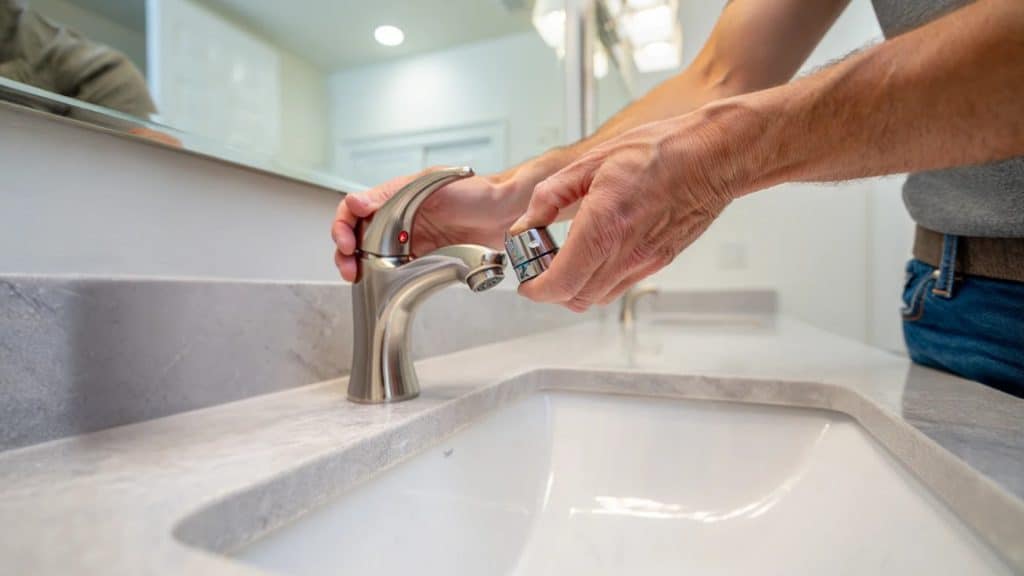
Aerators screw onto the end of faucets and reduce water flow without lowering pressure.
Remove the old one, clean the threads, and screw on a new aerator.
This saves water, cuts bills, and feels better when washing hands.
It’s an easy fix that anyone can do in just a few minutes.
14. Use a Wet-Dry Vacuum to Pull Out Clogs

If a plunger fails, try using a wet-dry vacuum.
Set it to liquids, seal it over the drain, and turn it on.
The suction pulls out tough clogs that plungers can’t reach.
Be sure to create a good seal.
It works well and keeps your pipes clean, requiring no chemicals.
15. Shut Off Water to Individual Fixtures

Many sinks and toilets have small shut-off valves underneath.
Turning these off helps you fix leaks without having to shut off water to the entire house.
Turn the valve clockwise.
This makes repairs easier and allows you to fix small problems quickly without needing to call a professional or causing major disruptions.
16. Replace a Leaky Hose Washer

Garden hoses often leak at the faucet or spray nozzle.
Unscrew the fitting and remove the rubber washer.
Replace it with a new one and tighten.
This fix takes two minutes, reduces waste, and extends the hose’s lifespan.
It’s a great starter task for anyone wanting to learn DIY plumbing.
17. Use Enzyme Drain Cleaner Monthly
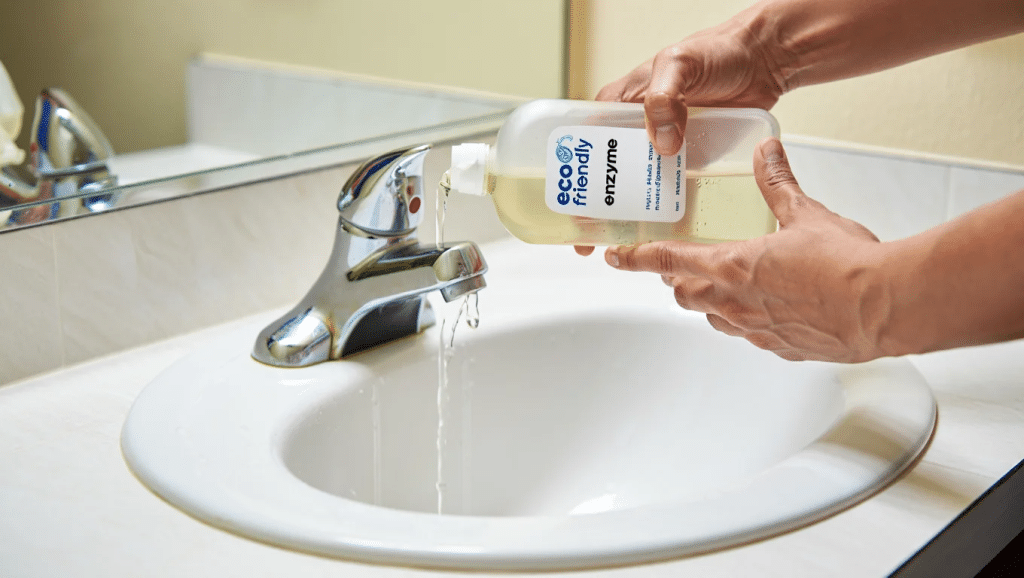
Enzyme-based cleaners help break down buildup in pipes without harming them.
Pour the product into each drain monthly before bed.
Let it sit overnight and rinse with warm water.
This helps keep clogs away and reduces bad smells without damaging your plumbing or harming the environment.
18. Secure Loose Pipes with Pipe Straps
If you hear pipes banging inside walls or under sinks, they may be loose.
Use pipe straps or clips to secure them.
Screw them to a nearby wall or stud to stop movement.
It takes just a few minutes and helps protect pipes from future damage caused by vibration or noise.
19. Stop a Running Toilet by Adjusting the Float
If your toilet runs nonstop, open the tank and check the float.
If it’s too high, water will overflow into the overflow tube.
Adjust it by turning the screw or sliding it down.
This helps prevent water waste and can be fixed in just five minutes with no tools or plumber’s help.
20. Check Water Meter for Leaks
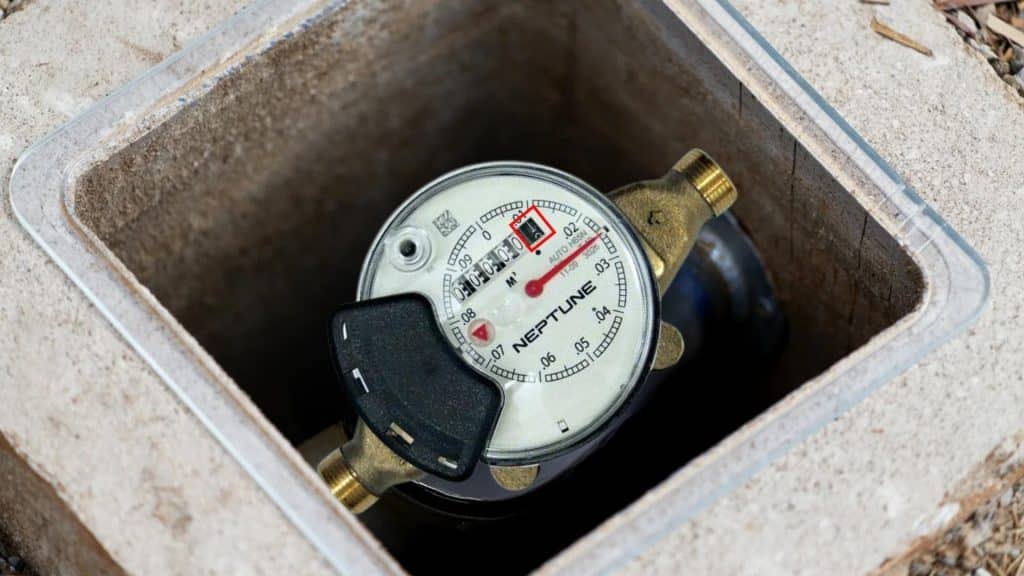
To find hidden leaks, turn off all faucets and appliances using water.
Check the water meter outside.
If it moves, you may have a leak.
This test takes five minutes and helps catch problems early.
If the dial moves fast, call a pro.
If it moves slowly, check faucets and toilets.
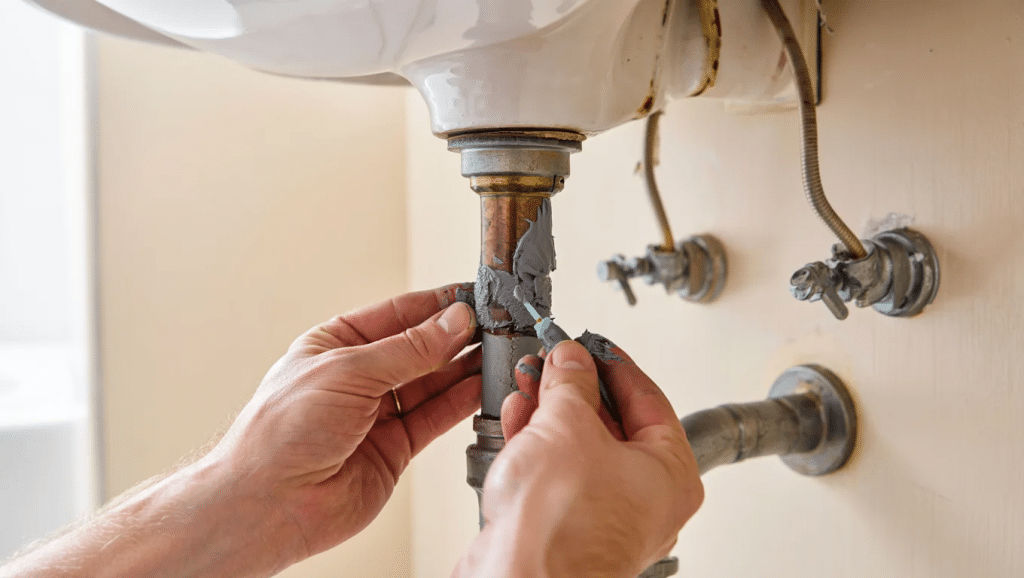
21. Check Under-Sink Pipes for Signs of Wear
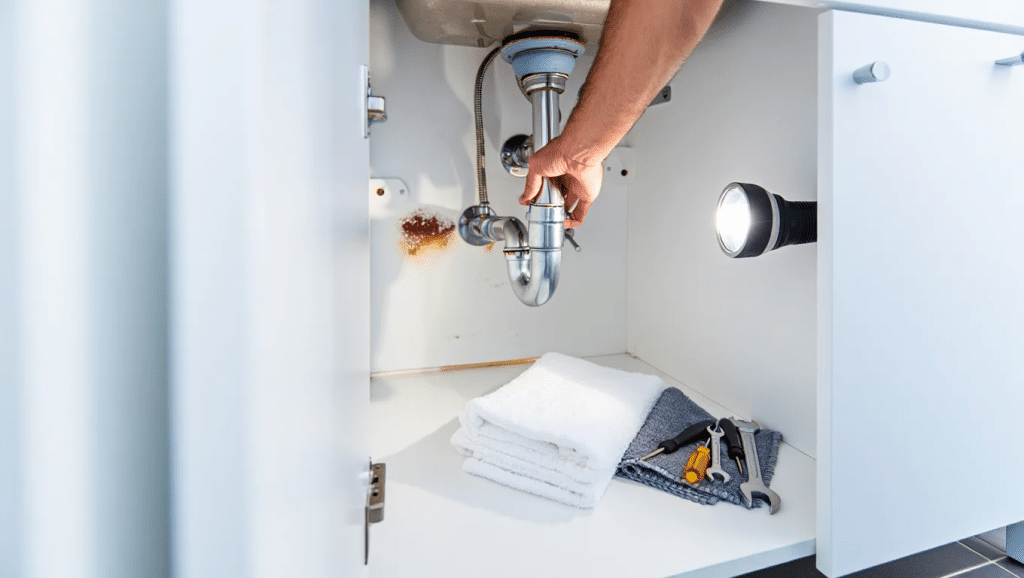
Leaks often begin where you least expect, like under the bathroom or kitchen sink.
Open the cabinet and check the pipes for signs of corrosion, moisture, rust, or loose joints.
Gently wiggle the connections to spot instability.
Catching wear early helps you replace parts before a leak starts and prevents water damage to cabinets and floors.
22. Clean Garbage Disposal with Ice Cubes and Salt
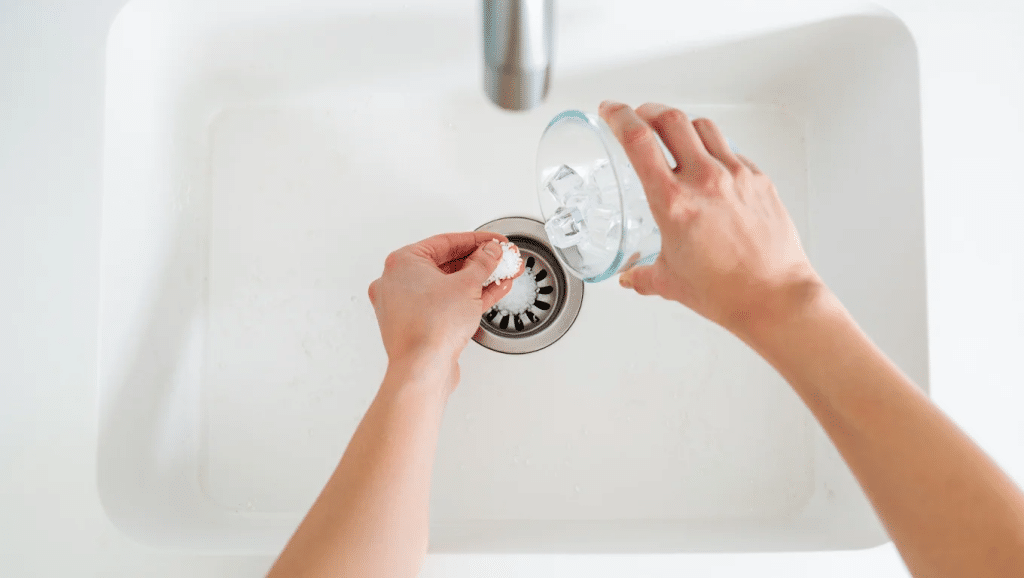
To sharpen and clean your garbage disposal, pour in a handful of ice cubes and a pinch of salt.
Turn it on and let it run for a minute.
The ice scrapes off the buildup, and the salt scours the blades.
Do this monthly to keep it fresh and working well without chemicals or scrubbing.
23. Tighten a Loose Toilet Seat
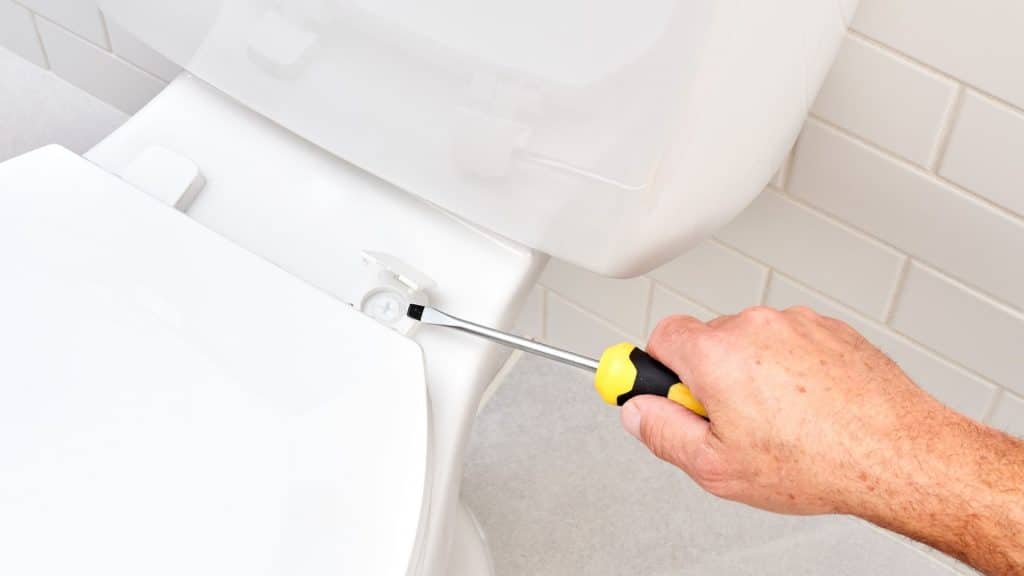
If your toilet seat wiggles, check the bolts under the seat.
Use a screwdriver to tighten them or replace them if broken.
Many toilet seats also have quick-release buttons for easy removal.
This job is simple, clean, and helps make your bathroom more comfortable and safe to use daily.
24. Prevent Mold by Checking for Drips
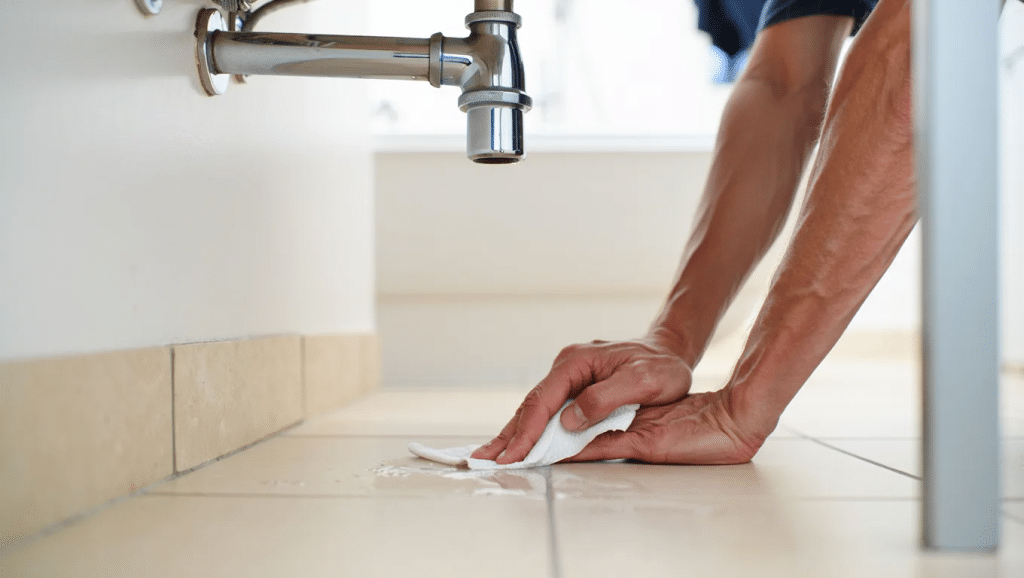
Dripping faucets or pipes under sinks cause damp spots.
Wipe with paper towels to check for leaks.
Fixing the source of moisture helps stop mold growth.
Even small leaks waste water.
Keep the area dry with a towel or a fan until the issue is fixed.
Early checks make long-term problems much smaller.
25. Avoid Cross-Threading When Connecting Fittings
When joining metal or plastic plumbing pieces, screw them on by hand first.
If it feels too tight too soon, it may be crooked.
Remove and try again.
Cross-threading damages threads and can cause leaks.
Taking the time to connect parts correctly saves money and avoids more significant issues later on.
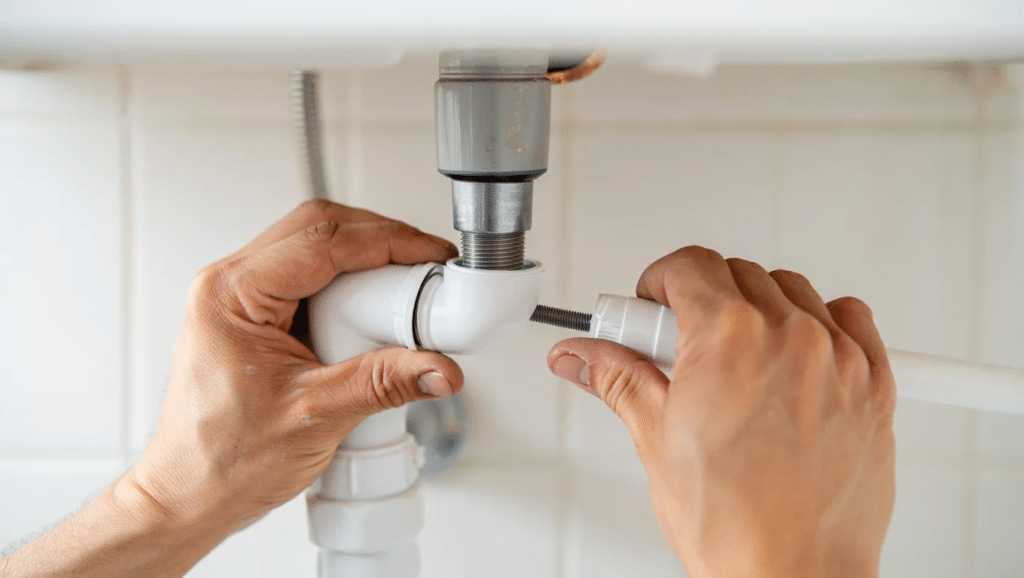
26. Use a Bucket When Working Under the Sink

Before removing a trap or pipe under the sink, place a small bucket or container underneath.
This catches water and stops messes.
It’s a simple trick, but it keeps you dry and makes cleanup easier.
Always keep a bucket and a towel nearby before starting any plumbing work at home.
27. Grease O-Rings Before Reinstalling Fixtures
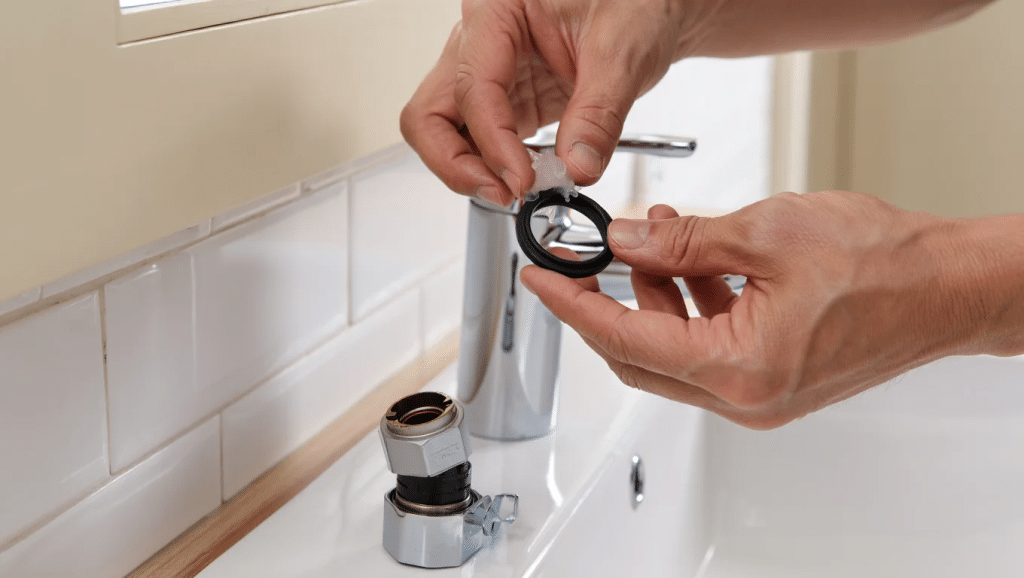
When putting back showerheads or faucet parts, add a bit of plumber’s grease or petroleum jelly to the rubber O-rings.
This helps create a good seal and makes it easier to take apart later.
It reduces wear and tear, prevents leaks, and helps fixtures last longer without needing replacement.
28. Drill Slowly to Avoid Hitting Pipes
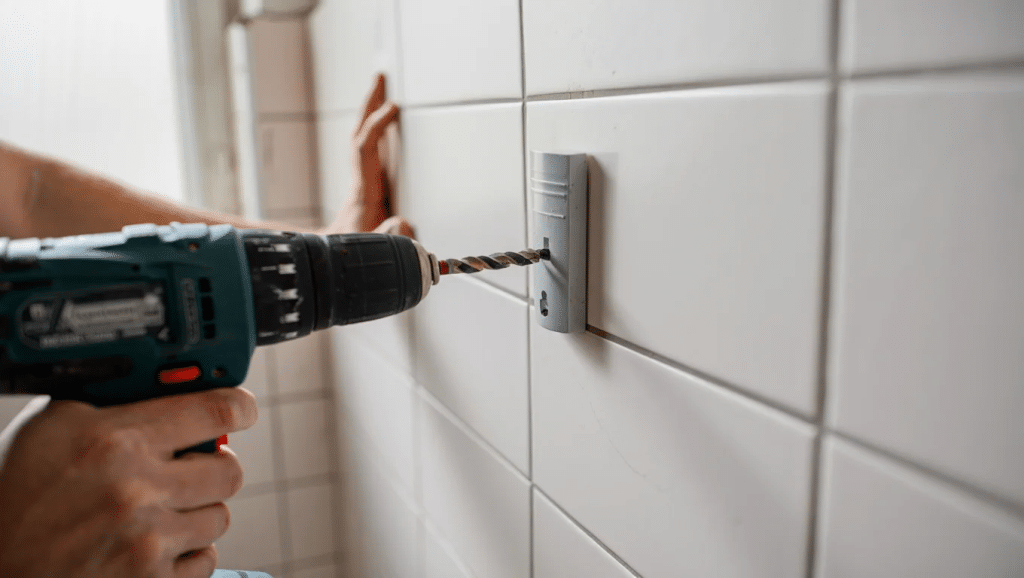
When hanging something in a bathroom or kitchen, be careful where you drill.
Pipes behind walls are easy to hit.
Use a stud finder with wire-sensing features or check drawings if available.
Go slowly and stop if you feel resistance.
It prevents disasters like broken pipes or water damage.
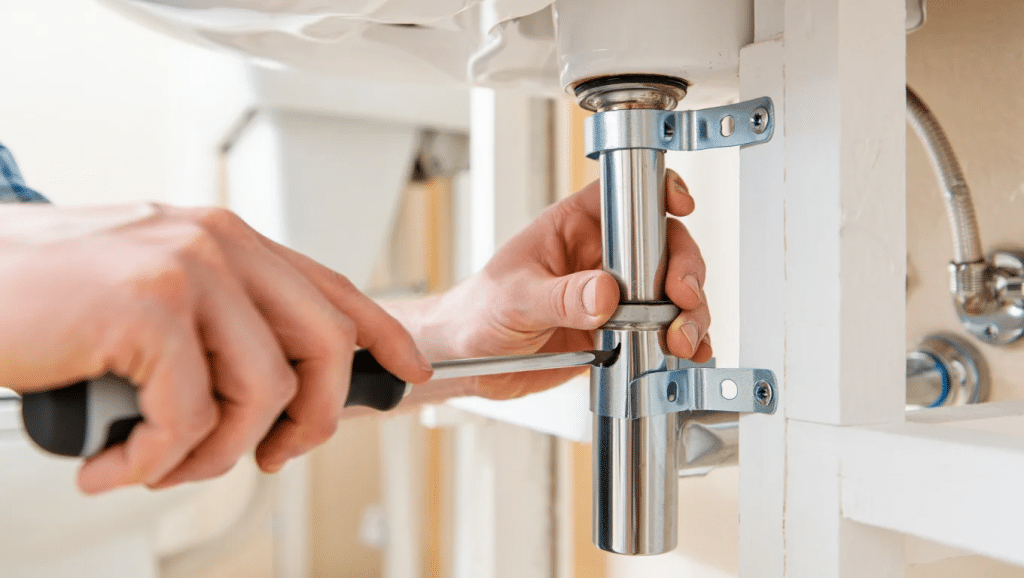
29. Replace Old Toilet Supply Line
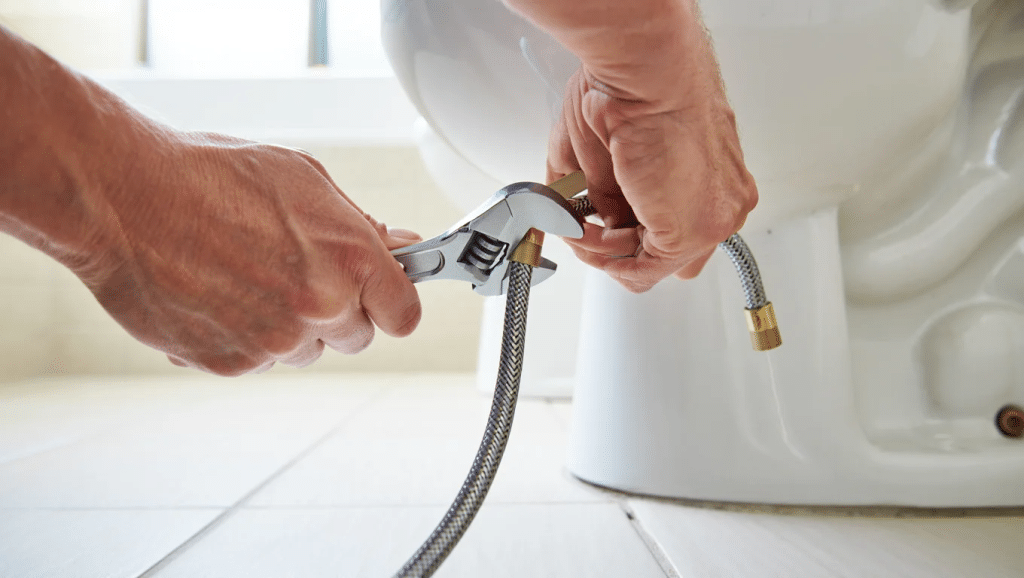
If the water line going to your toilet looks rusty or cracked, it’s time to replace it.
Turn off the shut-off valve, remove the old hose, and attach a braided steel one.
Tighten by hand and then slightly with a wrench.
It’s quick and adds strong protection from leaks or bursts.
30. Hang Hoses Loosely to Prevent Kinks
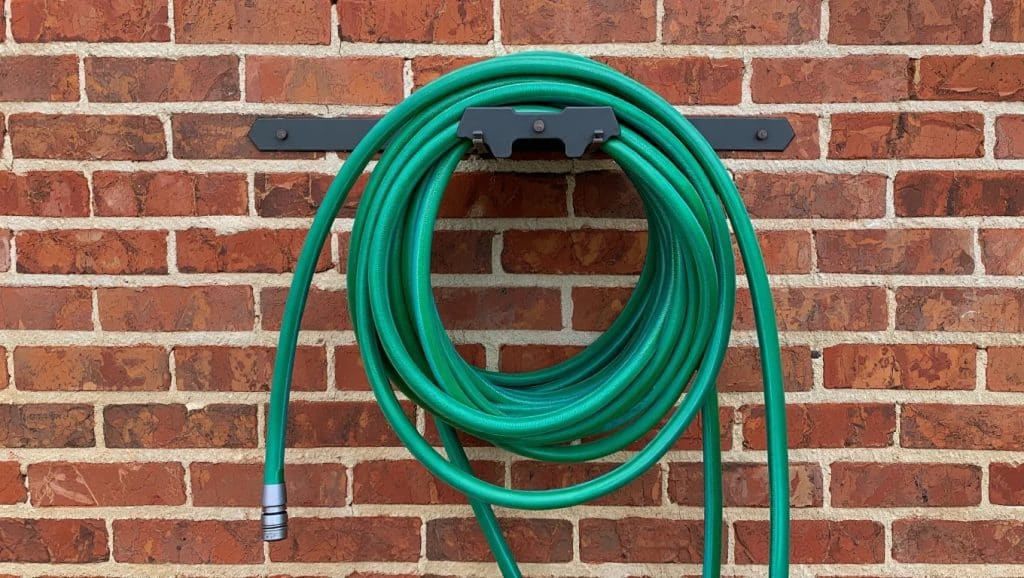
When putting away a garden hose, hang it on a wide hose holder.
Don’t wrap it too tightly, or it may kink.
Kinks cause weak spots that can leak or burst.
Coil it gently and avoid sharp bends.
This keeps the hose strong and ready for use each season.
31. Check for Toilet Rocking and Fix with Shims
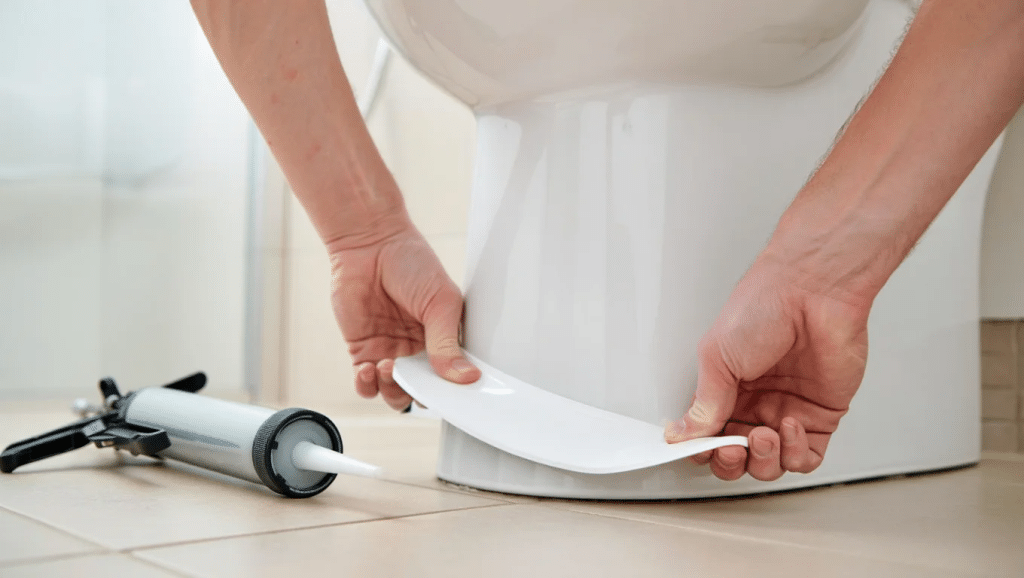
If your toilet rocks side to side, it might not be seated evenly.
Use plastic toilet shims to level it.
Slide them under the base, trim the extras, and caulk the edge.
This keeps the toilet stable and avoids seal damage.
It’s easy to fix and helps avoid leaks from the base.
32. Use a Water Pressure Gauge to Detect Issues Early
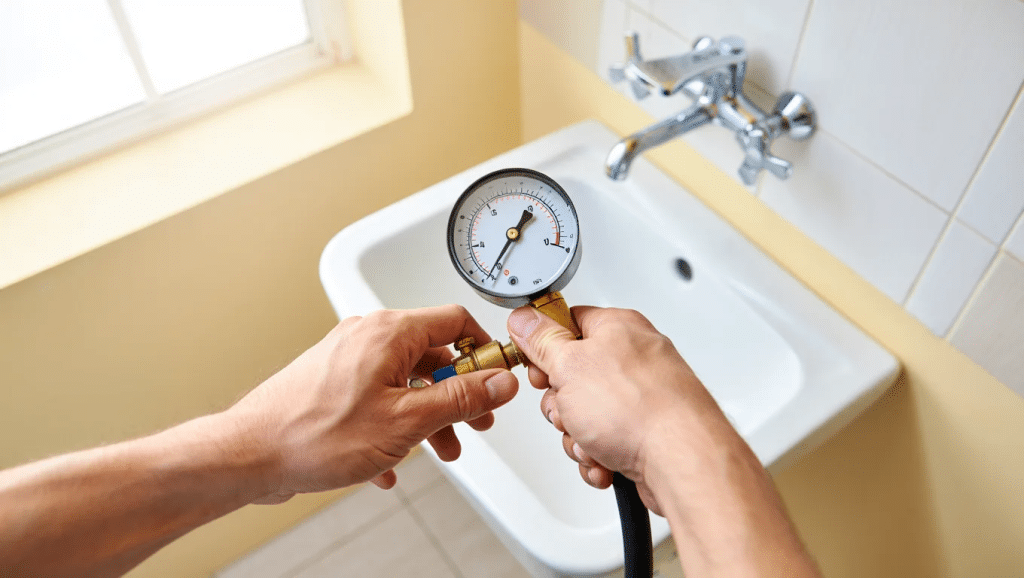
Attach a water pressure gauge to an outdoor spigot or laundry faucet to check household pressure.
Ideal pressure ranges between 40 and 60 psi.
Too high?
You may need a pressure regulator to prevent stress on pipes and fixtures.
Catching this early can extend the life of your plumbing and prevent hidden leaks.
33. Restore Faucet Pressure by Cleaning the Aerator
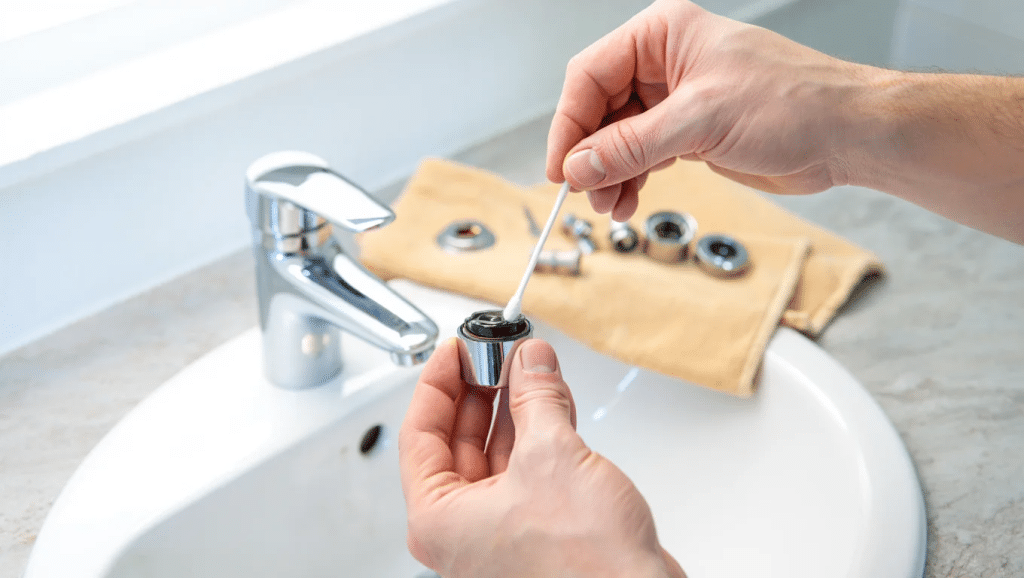
If your sink feels sluggish, the aerator may be clogged with mineral deposits.
Unscrew it from the faucet, soak it in vinegar for a few hours, rinse, and reattach.
This clears the buildup and restores strong, even water flow, no chemicals or replacements needed.
34. Remove Garden Hoses Before Winter Hits
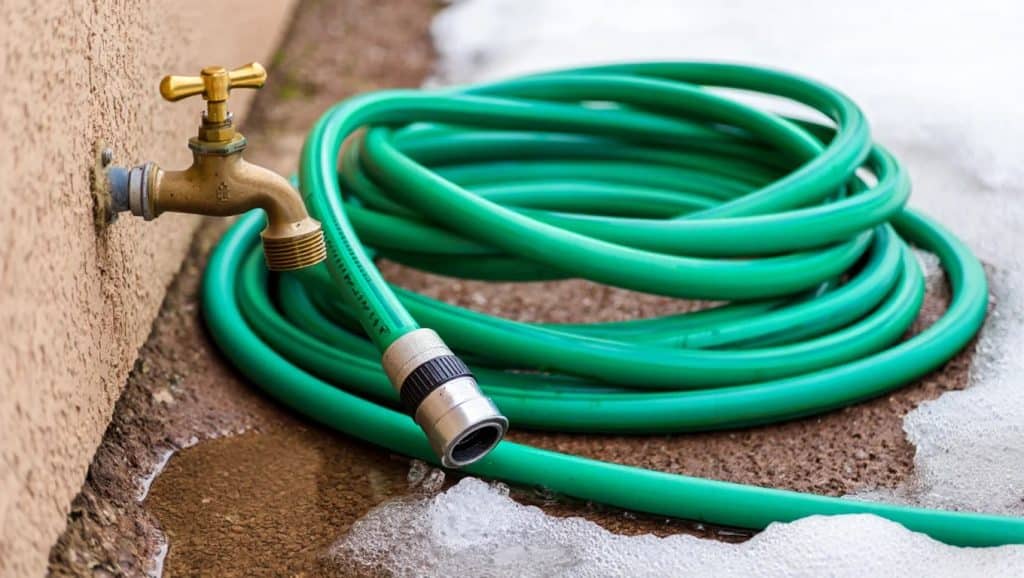
Before temperatures drop, disconnect outdoor hoses from faucets and drain them fully.
Leaving hoses attached traps water that can freeze and crack pipes.
This simple disconnect step protects your plumbing, especially when combined with outdoor faucet covers for maximum freeze prevention.
35. Patch Small Pipe Cracks with Epoxy Putty
For small cracks or leaks in metal pipes, epoxy putty works well.
Turn off the water, dry the pipe, and knead the putty.
Press it on the crack and let it cure.
It hardens quickly and stops leaks.
This is a temporary solution until a full repair can be made.
36. Stop Faucet Squeaks with Petroleum Jelly
If your faucet handle squeaks or sticks, it might just need a little lubrication.
Turn off the water, remove the handle, and apply a dab of petroleum jelly to the stem.
Reassemble and turn it a few times.
This quick fix makes everyday use smoother and extends the life of faucet parts.
37. Clear Hair from Drains Using a DIY Zip Tool
Hair buildup in bathroom drains slows water and causes bad odors.
Cut small notches into a plastic zip tie and use it like a mini hook to pull out trapped hair.
This quick monthly task keeps your drains clear and water moving.
It’s perfect for ongoing upkeep, not just emergency clogs.
Safety Precautions Before You Start Any Plumbing Work

Your safety comes first when working with water, pipes, and electrical connections around the house.
Smart plumbing hints always start with proper safety measures that protect you and your family.
Follow these essential safety rules before touching any plumbing system:
- Turn Off Water Supply: Locate and shut off the main water valve before starting work
- Check for Electrical Wires: Look for electrical connections near pipes to avoid dangerous shocks
- Wear Safety Glasses: Protect your eyes from splashing water and flying debris.
- Use Proper Gloves: Rubber gloves keep your hands safe from chemicals and sharp edges
- Ventilate Work Area: Open windows when using chemical drain cleaners or solvents
- Have Towels Ready: Keep plenty of towels nearby to clean up water spills quickly
- Know Your Limits: Call professionals for gas lines, major pipe replacements, and electrical issues
- Test Water Temperature: Hot water pipes can burn skin in seconds without warning
These safety steps prevent accidents that turn simple repairs into emergency room visits.
How to Know When It’s Time to Call a Professional?
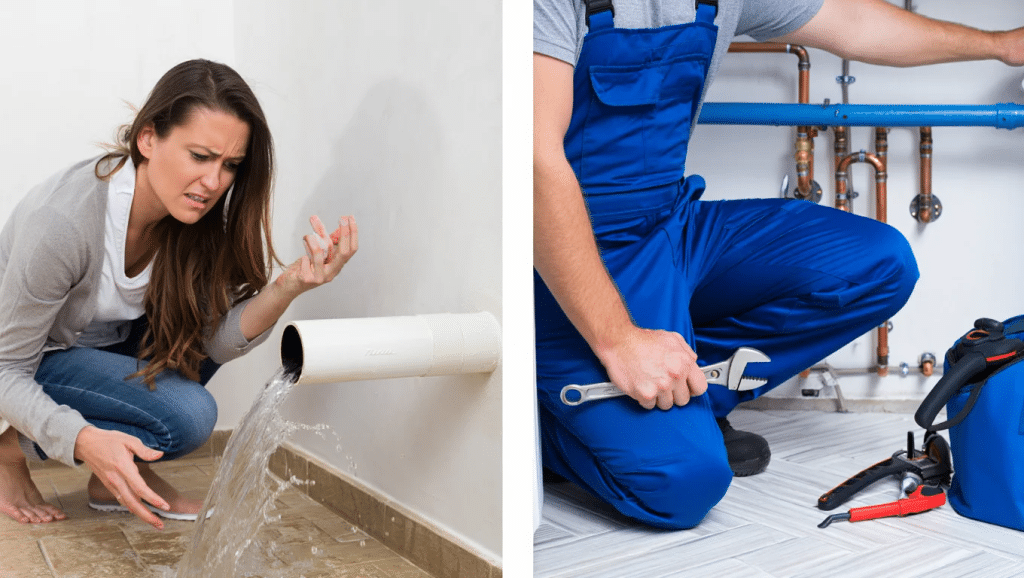
Sometimes, normal plumbing problems grow beyond what homeowners can handle safely with DIY methods.
Professional plumbers have specialized tools and training for complex repairs that go beyond basic plumbing hints.
Recognize these warning signs that indicate you need expert help:
- Gas Line Leaks: Any smell of gas requires immediate professional attention and evacuation
- Sewer Line Backups: Raw sewage in your home needs professional equipment and health precautions
- Major Pipe Replacements: Whole-house repiping jobs require permits and professional installation expertise
- Water Heater Installation: Gas connections and electrical work need licensed professional handling
- Frozen Burst Pipes: Extensive water damage and pipe replacement often exceed DIY capabilities
- No Water Throughout House: Mainline problems usually require professional diagnosis and repair
- Repeated Same Problems: When DIY fixes fail repeatedly, underlying issues need professional assessment
- Permit Required Work: Major renovations and additions require professional work and inspections
These plumbing emergencies exceed the limits of DIY plumbing and require immediate professional intervention.
Knowing when to hire a plumber protects your home from costly damage and ensures your family’s safety.
Common Mistakes to Avoid
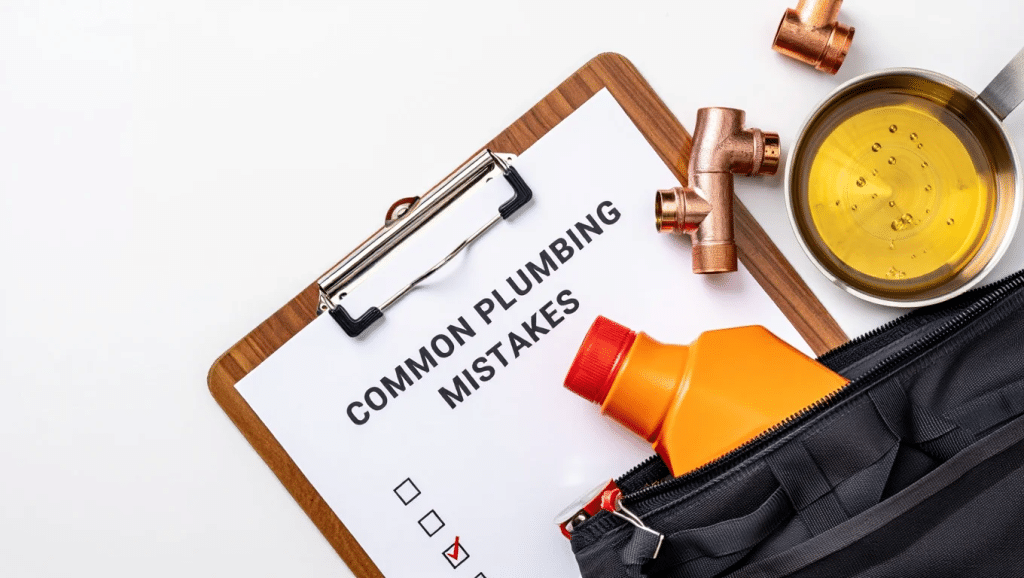
Even simple plumbing tasks can go wrong if you miss a few basics.
Avoid these common mistakes to keep your DIY fixes safe and stress-free:
- Overtightening fittings: This can crack threads or break parts, causing leaks instead of fixing them.
- Skipping the shut-off valve: Forgetting to turn off the water first can lead to sudden flooding.
- Using the wrong tools: Mismatched tools damage fixtures and slow you down.
- Pouring grease down drains: Grease solidifies and causes stubborn clogs over time.
- Relying on chemical drain cleaners: Frequent use can eat through your pipes and harm the environment.
A little care goes a long way.
Avoid these traps to keep your repairs smooth and your home damage-free.
Wrapping It Up
These plumbing hints give you the confidence to handle small repairs without calling expensive professionals.
Simple plumbing tips can prevent future disasters while saving both time and money for your household.
DIY plumbing solutions work best when you have the right tools and follow proper safety procedures.
Quick plumbing fixes become second nature once you practice these basic techniques on minor problems.
Remember that you can solve minor problems yourself with patience and the right approach.
However, always contact professional plumbers when dealing with complex issues beyond your skill level.
Smart homeowners know their limits and aren’t afraid to call for help when safety is at risk.
Keep this home plumbing guide handy for future reference when water problems pop up unexpectedly.